Black & Decker had a section in the very first Workmate manual called "Simple fixtures for your Black & Decker Workmate" showing plans for two different variations of this idea. As far as I know it has been in every manual since then.Fishwatcher — I can see adaping your idea: getting a sheet of 3/4" plywood, cutting a 2 x 3 (or 4) foot section of it, screwing a 3 foot length of 2x4 down the plywood's long dimension, and clamping that in the WM's jaws. With smoothing and chamfering of the plywood sheet, and maybe a coat or two of shellac -- and that's a great portable work surface.


You are using an out of date browser. It may not display this or other websites correctly.
You should upgrade or use an alternative browser.
You should upgrade or use an alternative browser.
Black & Decker Workmate
- Thread starter abstamaria
- Start date
Made a plywood 2x4 foot work surface this afternoon with a full length 2x4 (inch) spine, glued and screwed in place. I notice that the wood jaws — doubled at the closure edge — are just a weee bit thinner than a 2x4 (inch) board is thick. So given that tiny bit of clearance, I'll be easy to attach a "retainer" plank (1x6 for example) on the other side of the 2x4 (inch). Neat design.
Outlawmws
Well-known member
Arebee, I put "keepers" like that on all my cleats. For the average power tool (bench grinders) I don't bother with full width, jsut 6-8" and the the keeper cleat - your keepers could be 1/4" ply adn not needed full length, just at the ends maybe.

Some examples:

This Miter box was the first thing I ever ddi mounted for the WM - the plate is solid oak, routed corners just for fun, and uses recessed T nuts for the tool mounting holes.

Some examples:
This Miter box was the first thing I ever ddi mounted for the WM - the plate is solid oak, routed corners just for fun, and uses recessed T nuts for the tool mounting holes.
Here's the 2x4 foot plywood work surface on the WM. Color's a bit strong, to say the least. I intended a warm color, but 8 square feet of this particular stain got a bit overwhelming, so I toned it down a little with dark walnut stain. Does bring out the wood grain! Anyway, it'll get beaten up as time goes on, and that's life in a shop.
Canadians reading this should know that in tribute to its Brockville (Ont.) birthplace, I used Robertson screws (and glue) to attach the 2x4 spine.
Canadians reading this should know that in tribute to its Brockville (Ont.) birthplace, I used Robertson screws (and glue) to attach the 2x4 spine.
Attachments

MrDayne
Well-known member


Returning to an old subject—what paint best matches the gray of a 79-001? I have finally done my first touch-up painting on a Workmate and my answer is Rust-oleum Painter's Touch 2X UltraCover Paint+Primer Charcoal Gray Satin. I bought and tried six other spray cans from auto parts stores, but none matched as well as plain old Rust-oleum.

Over the last few weeks I've been slowly working on a 79-001 Type 9 that I bought a couple of years ago unassembled, never used, in the original box. Unfortunately, the box had sat in a damp/wet location for a long time. As a result the rear portion of the lower frame that it normally rests on when folded had rusted quite badly, with significant pitting. Here's a small sample:
The rust was actually much worse than it looks because it continued underneath the paint in large areas. So it was a big rust removal job, but I had no reason to want to paint the rest of the almost pristine Workmate. I limited my painting to the lower rear frame, masking off all the rest.
Here are some photos showing how good the color match is. I've drawn a box on each one showing where the touchup paint is. First, from the rear, it's almost impossible to notice anything unusual.

Even close up it's hard to tell that the lower fram is any different from the leg, the side stay, os the H-frame:

On the side I had to continue the touchup paint around the corner so I masked it off vertically in line with the corner foot. Here you can just see where the paint changes.

The photos above were taken in fairly bright shade. The next one is in full sun, where the line is more visible, but still quite acceptable. Even in this situation, when you're standing and looking down at that area, the difference doesn't jump out at you.

Over the last few weeks I've been slowly working on a 79-001 Type 9 that I bought a couple of years ago unassembled, never used, in the original box. Unfortunately, the box had sat in a damp/wet location for a long time. As a result the rear portion of the lower frame that it normally rests on when folded had rusted quite badly, with significant pitting. Here's a small sample:
The rust was actually much worse than it looks because it continued underneath the paint in large areas. So it was a big rust removal job, but I had no reason to want to paint the rest of the almost pristine Workmate. I limited my painting to the lower rear frame, masking off all the rest.
Here are some photos showing how good the color match is. I've drawn a box on each one showing where the touchup paint is. First, from the rear, it's almost impossible to notice anything unusual.
Even close up it's hard to tell that the lower fram is any different from the leg, the side stay, os the H-frame:
On the side I had to continue the touchup paint around the corner so I masked it off vertically in line with the corner foot. Here you can just see where the paint changes.
The photos above were taken in fairly bright shade. The next one is in full sun, where the line is more visible, but still quite acceptable. Even in this situation, when you're standing and looking down at that area, the difference doesn't jump out at you.
4xdog
Well-known member
Good job!Returning to an old subject—what paint best matches the gray of a 79-001? I have finally done my first touch-up painting on a Workmate and my answer is Rust-oleum Painter's Touch 2X UltraCover Paint+Primer Charcoal Gray Satin. I bought and tried six other spray cans from auto parts stores, but none matched as well as plain old Rust-oleum.
Over the last few weeks I've been slowly working on a 79-001 Type 9 that I bought a couple of years ago unassembled, never used, in the original box. Unfortunately, the box had sat in a damp/wet location for a long time. As a result the rear portion of the lower frame that it normally rests on when folded had rusted quite badly, with significant pitting. Here's a small sample:
The rust was actually much worse than it looks because it continued underneath the paint in large areas. So it was a big rust removal job, but I had no reason to want to paint the rest of the almost pristine Workmate. I limited my painting to the lower rear frame, masking off all the rest.
Here are some photos showing how good the color match is. I've drawn a box on each one showing where the touchup paint is. First, from the rear, it's almost impossible to notice anything unusual.
Even close up it's hard to tell that the lower fram is any different from the leg, the side stay, os the H-frame:
On the side I had to continue the touchup paint around the corner so I masked it off vertically in line with the corner foot. Here you can just see where the paint changes.
The photos above were taken in fairly bright shade. The next one is in full sun, where the line is more visible, but still quite acceptable. Even in this situation, when you're standing and looking down at that area, the difference doesn't jump out at you.
For taping off
Curling up the edge of the tape before painting, will allow the paint to feather-out/fade/blend rather than creating a step/ hard line.
Try it on some scrap to refine the technique.
.
gleman
Well-known member
I should mention that in my experience, the color varies somewhat even within the 79-001 model depending on the environment they have been in. As I mentioned, this particular Type 9 has what is essentially brand new paint. Before too long, I will be doing the same rehab on the same area of my own original 79-001 Type 4, which has been treated quite well but definitely doesn't look new. I expect the color match will be different, but it will be interesting to see. And I will be doing this a third time on a 79-001 Type 3, trying for a good match to its blue paint.
You can see my unboxing of the Type 9 in a YouTube video I made to promote my website. I won't claim it's very entertaining or informative, but this is where you can view it:
You can see my unboxing of the Type 9 in a YouTube video I made to promote my website. I won't claim it's very entertaining or informative, but this is where you can view it:
fishwatcher
Well-known member
- Joined
- Jan 26, 2023
- Messages
- 759
The top on my WM300 is still solid, but could use some reconditioning. The plywood is dried out, chipped in some places and I’d like to restore and refinish it. For now, I’d rather restore the existing planks vs making something all new.
This is what it started looking light this afternoon.


After disassembly I sanded a few of the rough spots and cleaned it with mineral spirits. Seems like it darkened up the wood and I like it.

I’ll keep it like this for now, but I have a couple of options in my garage for a future finish. I have a water based semi-gloss poly and an oil-based stain and sealer called Preserva Wood. It looks like it’s mostly for decks and fencing. If a really compelling alternative is worth buying, I’ll do it.. but I wonder if I can use either of what I already have.
Any reason not to go with the preserva wood? Would the poly be better?
Any tips on the best cleaning process, proper restore, and a nice finish on this are appreciated.
This is what it started looking light this afternoon.
After disassembly I sanded a few of the rough spots and cleaned it with mineral spirits. Seems like it darkened up the wood and I like it.
I’ll keep it like this for now, but I have a couple of options in my garage for a future finish. I have a water based semi-gloss poly and an oil-based stain and sealer called Preserva Wood. It looks like it’s mostly for decks and fencing. If a really compelling alternative is worth buying, I’ll do it.. but I wonder if I can use either of what I already have.
Any reason not to go with the preserva wood? Would the poly be better?
Any tips on the best cleaning process, proper restore, and a nice finish on this are appreciated.
Attachments


For cleaning, I use stronger solvents than mineral spirits. I have used a variety, but they typically contain xylene, acetone, denatured alcohol, and/or toluene. You can find these "straight" or in combinations. Some examples are lacquer thinners of various formulations, Goof Off, 3M Adhesive Remover, and Oops. I have found the original finish on my Workmate jaws to be highly resistant to solvents, so these have been great for removing stuff on the surface (including paint spills and overspray) with no effect on the original finish. However, be cautious and test on a small area. Be cautious around any decals or stickers that you don't want to remove. And, at all costs, don't spill any of these solvents on the painted frame! They will remove that paint almost instantly! I can't tell from the photos exactly what is on the surface of the jaws that makes them appear dirty, but I think there's a good chance it can be removed this way.The top on my WM300 is still solid, but could use some reconditioning. The plywood is dried out, chipped in some places and I’d like to restore and refinish it. For now, I’d rather restore the existing planks vs making something all new.
For my recent restoration of a 79-001 Type 5, I actually resorted to paint remover on the jaws and was amazed by the results! The typical solvents I mention above weren't working on some paint spills, so I suspected they were probably oil-based paint. I did a small test using Citristrip and it removed the paint while leaving the original finish. I think that indicates that the original finish is perhaps an epoxy. I was thrilled with the result because the only other remedy would have been sanding off the entire finish.
If you find that cleans the jaws and makes them look newer, I doubt there is any benefit to applying another finish because the original finish should still be protecting the wood.
You didn't say exactly what Preserva Wood product you have, but that seems entirely wrong to me. Outdoor stains normally must be applied to bare wood; they won't work at all over a film finish such as that on your Workmate jaws. For that to work, you would have to sand the jaws down to bare wood. Check the preparation and application instructions for the stain.
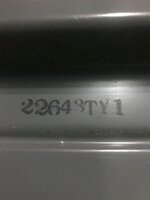
And, by the way, could you turn your Workmate over and check the bottom surface of the front metal footrest for a code number like the one in this photo, and tell me what it is? Thanks.The top on my WM300 is still solid, but could use some reconditioning. The plywood is dried out, chipped in some places and I’d like to restore and refinish it. For now, I’d rather restore the existing planks vs making something all new.
Attachments
Outlawmws
Well-known member
I thought by the time the 300's were out they had migrated to particle board? 
Clearly factory though.
Clearly factory though.
All of the Workmate 300 Type 1's that I have documented (which admittedly amounts to fewer than ten) have these plywood jaws. They have the same gray paint, black vise knobs, and black dogs as the 79-001. The switch to particle board on the 300 may have coincided with the switch to black-painted frames, orange handles and orange dogs. I haven't tried to determine when that happened.
Outlawmws
Well-known member
That makes sense - I had 200's and a 400, and those were orange dog era, and particle board.
I'll add that the 300 Type 1 is nearly identical to the 79-001 Type 9 that it replaced, from what I have observed in photos of the early 300's. The two visible changes are the switch back to plywood jaws on the 300, and the addition of slots and holes for tools in the footrest. And of course, some changes in the markings on the jaws and crossbar.
The 300 stayed on the market for 13 years, so there was lots of opportunity for changes.
The 300 stayed on the market for 13 years, so there was lots of opportunity for changes.
My continued quest for documentation of the early Black & Decker Workmate turned up some delightful rarities in the last few weeks. Of course I will be adding these to my web site.
First up is from late 1974 or early 1975, a four-page color brochure promoting the first U.S.-market Workmate (the 79-001 Type 1). Looking at the first three pages you would think this is an advertisement to buyers. When you get to the last page you see that it is actually aimed at retailers, telling them how B&D will be marketing the Workmate. The clear highlight is the five verses of lyrics from the first television ad, which they tell us features a "manly outdoor scene"!
You can find the brochure on my Documents page, but here's the direct link to the PDF:
https://h-frame.weebly.com/uploads/...kmate_79-001_type_1_dealer_flyer_form0401.pdf
I sure wish I could find a copy of the TV spot as well.
Oregon rock crusher
Well-known member
I remember that commercial spot with the catchy jingle. I thought the lyrics were plane a door on it instead of place a board on it but it's been a long time since that commercial played last. I looked once on you tube and was surprised they didn't have that spot.
Last edited:
Here's another rare gem, this from Ron Hickman's own company, Mate Tools, a four-page flyer used to promote the original Workmate. It also includes the Team-Mate full height add-on bench, plus a couple of accessories I never knew existed—the Wallmate hangers and the Tidymate floor cloth for keeping a neat work area! This was generously provided by an owner who inherited his Workmate from his father complete with paperwork.
You can find the brochure on my overcrowded Documents page, but here's the direct link to the PDF:
https://h-frame.weebly.com/uploads/1/3/0/4/130458025/mate_tools_workmate_flyer_crop.pdf
You can find the brochure on my overcrowded Documents page, but here's the direct link to the PDF:
https://h-frame.weebly.com/uploads/1/3/0/4/130458025/mate_tools_workmate_flyer_crop.pdf
fishwatcher
Well-known member
- Joined
- Jan 26, 2023
- Messages
- 759
I put on a coat of Boiled Linseed oil, let it sit in the sun for 15 minutes, wiped it off, and let it dry for almost a week, and then repeated the process (only been a day so far). I didn’t go for removing all of the old stains other than my use of mineral spirits a few weeks ago.For cleaning, I use stronger solvents than mineral spirits. I have used a variety, but they typically contain xylene, acetone, denatured alcohol, and/or toluene. You can find these "straight" or in combinations. Some examples are lacquer thinners of various formulations, Goof Off, 3M Adhesive Remover, and Oops. I have found the original finish on my Workmate jaws to be highly resistant to solvents, so these have been great for removing stuff on the surface (including paint spills and overspray) with no effect on the original finish. However, be cautious and test on a small area. Be cautious around any decals or stickers that you don't want to remove. And, at all costs, don't spill any of these solvents on the painted frame! They will remove that paint almost instantly! I can't tell from the photos exactly what is on the surface of the jaws that makes them appear dirty, but I think there's a good chance it can be removed this way.
For my recent restoration of a 79-001 Type 5, I actually resorted to paint remover on the jaws and was amazed by the results! The typical solvents I mention above weren't working on some paint spills, so I suspected they were probably oil-based paint. I did a small test using Citristrip and it removed the paint while leaving the original finish. I think that indicates that the original finish is perhaps an epoxy. I was thrilled with the result because the only other remedy would have been sanding off the entire finish.
If you find that cleans the jaws and makes them look newer, I doubt there is any benefit to applying another finish because the original finish should still be protecting the wood.
You didn't say exactly what Preserva Wood product you have, but that seems entirely wrong to me. Outdoor stains normally must be applied to bare wood; they won't work at all over a film finish such as that on your Workmate jaws. For that to work, you would have to sand the jaws down to bare wood. Check the preparation and application instructions for the stain.
My goal was to rehydrate the wood and hopefully the BLO soaked in enough to do the trick. It’s darkened up compared to the pre-treatment stage. In a few places where the wood was cracked.. I used Gorilla super glue or epoxy that I had lying around.

I've developed a love affair with these things. They can clamp/hold just about anything for sanding/routing/drilling/etc. If I'm making a mess and don't want the trash my garage/shop with sawdust I can setup the Workmate outside on my driveway for easy cleanup. They fold up really easy if needed. The oldies with aluminum frames and marine plywood jaws are my favorite. (very well built and solid as a rock.)
I just finished restored the one in the middle. It was mechanically prefect but cosmetically pretty rough. The previous owner didn't believe in cleaning up paint stains/overspray or glue drippage. The one on the far right is an oddball. It looks like it's galvanized steel vs. painted.

I just finished restored the one in the middle. It was mechanically prefect but cosmetically pretty rough. The previous owner didn't believe in cleaning up paint stains/overspray or glue drippage. The one on the far right is an oddball. It looks like it's galvanized steel vs. painted.
What you have is three 79-001 Type 2's. The two on the left were made between February and June 1976. The one on the right is older, made between May and early September 1975.I just finished restored the one in the middle. It was mechanically prefect but cosmetically pretty rough. The previous owner didn't believe in cleaning up paint stains/overspray or glue drippage. The one on the far right is an oddball. It looks like it's galvanized steel vs. painted.
If you look carefully at the upper left and right frame assemblies on all three, you will see that they are all made of the same unpainted plated steel. It was in late September 1975 that they started painting the lower frame pieces, like the two on the left. In February 1977 they started painting the upper frame pieces as well.
If possible, I'd like to know the 5-digit production codes stamped in ink on the bottom side of the wooden jaws. It looks similar to the "619 21" in this photo. Thanks.
Attachments

Thanks! The one of the far left is #62251, the one on the far right is #5203. No legible markings on the one in the middle.If possible, I'd like to know the 5-digit production codes stamped in ink on the bottom side of the wooden jaws. It looks similar to the "619 21" in this photo. Thanks.
Very cool! The one marked 5203 is the second earliest Type 2 out of over 300 Type 2's I have documented dates for. The earliest is one week older.Thanks! The one of the far left is #62251, the one on the far right is #5203. No legible markings on the one in the middle.


Oregon rock crusher
Well-known member
Pretty rough conditions for a workmate base to survive in for long. Fab table with a closed bottom cutting section on the outboard side. Wouldn't want to put too heavy a piece on the "grill" or she'd tip over. A lot of weight already on that 200 even before you add a project.
Outlawmws
Well-known member
Yep, cutting/welding table. As for tip-over, just add a third leg and you are good to go for most things.
I'm curious how much bounce back you would get with that depth of tub. I like the concept quite well overall.
Are the pics from an auction?
I'm curious how much bounce back you would get with that depth of tub. I like the concept quite well overall.
Are the pics from an auction?
Yes, this is the auction:
https://www.proxibid.com//asp/LotDetail.asp?lid=81794770
https://www.proxibid.com//asp/LotDetail.asp?lid=81794770
There are some ridiculous prices for a couple of Workmates on eBay right now.
At the low end, there's a 79-003 with lots of wear and a missing foot for $225 (was $250) plus $75 shipping:
https://www.ebay.com/itm/386674013501
and at the high end a 79-001 Type 2 that appears unused, probably one of the nicest in existence, for (cough, choke) $1,000 plus $100 shipping:
https://www.ebay.com/itm/176165817688
Both listings allow Best Offers...
Outlawmws
Well-known member
People can dream.
paulsomlo
Well-known member
It's good that they're that proud of them, because they're going to have them for a very long time. On my local FB Mktplace, I can buy 79-001's all day for $50 or less.
nadogail
Well-known member
Harbor Freight sold a “Knock Off” for $10, I destroyed mine when I tried to use it as a Welding Table.
I would buy another if they were available.
I would buy another if they were available.
I have a new posting in the blog section of my web site with info that the world has long been awaiting
After years of collecting data, I decided that I'm confident enough to report my estimates of the relative prevalence of each of the 10 Types of the original Workmate 79-001. I'm pretty sure I have reported here previously that the Type 2 is the most common one, and that the Type 5 is the most rare, but now I've compiled the entire list, complete with my estimated (admittedly rough) percentages for each of them.
You can see it at:
https://h-frame.weebly.com/blog/whats-the-most-common-workmate-79-001
I have a "most rare" type five, does this mean that I could sell it for $10k? Maybe I should contact Mecum and Barrett-Jackson.
As usual wolfcj has done an excellent job of collecting historical Workmate data, well done sir.
As usual wolfcj has done an excellent job of collecting historical Workmate data, well done sir.
Yours is one I wasn't aware of. Could I please get some photos? What I would most love to find is a 79-001 Type 5 with the paper label on top of the jaws still intact and readable. Of course, I'd like photos of yours even without a label!I have a "most rare" type five, does this mean that I could sell it for $10k? Maybe I should contact Mecum and Barrett-Jackson.
As usual wolfcj has done an excellent job of collecting historical Workmate data, well done sir.
Last edited:
The wood on my type 5 is in poor shape, it seems often used as a backing board when cutting wood with a circular saw. The rest of the parts are in a little better shape but suffers from sitting in a leaky shed in the seller's back yard. I got it from a widow cleaning out her property, probably paid more than it's worth but Workmates seem to be hard to find around here without spending time crawling through garage sales. What is available on CL or FM is usually priced at "tool collector" levels. While writing this I looked on those sources, none listed locally in a metro region of over 2 million. It's at my rural property 25 miles away, the next time I am there I'll check for any ID on the underside of the wood.Yours is one I wasn't aware of. Could I please get some photos? What I would most love to find is a 79-001 Type 5 with the paper label on top of the jaws still intact and readable. Of course, I'd like photos of yours even without a label!
This thread is what inspired me to get a Woodmate not long after it started 13 years ago. I remember a friend got one back in the 70's when they were the latest thing to have. He used it while building a 40' sailboat in his backyard, it worked great and could he easily transported up and into the boat where a typical work bench couldn't go.
When you do go there, please take some photos showing various views of it if you don't mind, so I can see the components used, even if there are no identifying marks.The wood on my type 5 is in poor shape, it seems often used as a backing board when cutting wood with a circular saw. The rest of the parts are in a little better shape but suffers from sitting in a leaky shed in the seller's back yard. I got it from a widow cleaning out her property, probably paid more than it's worth but Workmates seem to be hard to find around here without spending time crawling through garage sales. What is available on CL or FM is usually priced at "tool collector" levels. While writing this I looked on those sources, none listed locally in a metro region of over 2 million. It's at my rural property 25 miles away, the next time I am there I'll check for any ID on the underside of the wood.
This thread is what inspired me to get a Woodmate not long after it started 13 years ago. I remember a friend got one back in the 70's when they were the latest thing to have. He used it while building a 40' sailboat in his backyard, it worked great and could he easily transported up and into the boat where a typical work bench couldn't go.
No Workmates "listed locally in a metro region of over 2 million"? That doesn't seem possible. In mid-Michigan, with no single really large city, there are dozens to choose from.