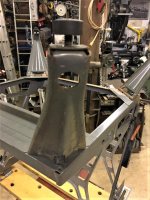
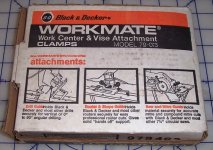
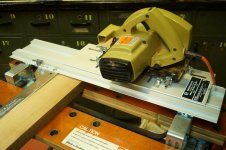
I recently came across a Mitremate 79-012 Mitre & Saw Guide at an estate sale and thought some here might like a brief look at how to set it up. Unfortunately, the one at the sale did not come with a manual. However, I owned a Mitremate with my original Workmate in 1977, and still remember the basics. See the attached photos, with a genuine period-correct B&D circular saw for demonstration purposes.
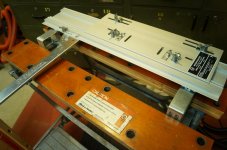
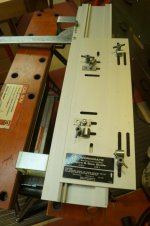
There are two main pieces - a sled that holds your circular saw, and the track that is clamped into the Workmate and which the sled runs in. There are also six small pieces of hardware used to mount the saw to the sled - two saw-alignment tabs and four saw-clamping clips. (Those are my names for them; B&D probably calls them something else.) There are multiple slots in the sled so you can position the hardware where needed for your saw.
The clips are shaped sort of like a "P" and have a type of wingnut. The tabs are flatter with just a small lip and use a standard nut. The reason for the difference is that for a given saw you only attach the tabs once and then never need to move them. The wingnuts on the clips let you remove the saw easily for other uses. When you reinstall it on the sled, the alignment tabs make sure you get it back in the right position.
One clip attaches to one of the lengthwise slots at the front of the sled and one at the back. The other two clips and the two tabs go in the crosswise slots along the left side of the sled.
The initial saw installation is a little tricky, and I don't remember if the manual gave a specific technique that makes it easier.
You start with the tabs. Place the saw on the sled with the blade safely overhanging and parallel to the right side of the sled. Slide the tabs against the left side of the saw baseplate and tighten them down to establish the sideways position of the saw. At this point, the saw is not actually attached to the sled.
Then you attach the four clips in whichever slots work best and slide them into position, tightening them to clamp the saw baseplate. The position of the saw along the length of the sled isn't particularly critical; it has much more leeway than the sideways position.
Now it is mounted, but you have to check the alignment of the blade with the edge of the sled again. I always find it out of alignment. So I have to loosen the clips, loosen at least one of the tabs, move it as needed, and tighten everything up again. Check the alignment again and repeat until it's right. If you don't get the blade parallel to the direction of travel, the cut will be rough and could even kick back.
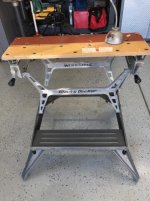
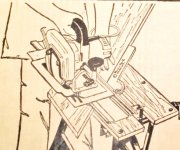
To use it, set the mitre arm on the track to the angle you need. Open the jaws of the Workmate about 4" to fit the brackets on the track, place the track between them as shown, but don't clamp it yet. Take the board you want to cut, lift the track up and slide the board underneath it, so the track balances on it. Now tighten the jaws firmly to clamp the track. (It actually works best if there is an additional 1/32" or so clearance for the track above the workpiece, which you can achieve by using a piece of cardboard or something similar as a spacer.)
As long as you're working with the same thickness of stock, you don't have to change anything. If you switch thickness, you should reset the track in the jaws to just clear the new thickness