
You are using an out of date browser. It may not display this or other websites correctly.
You should upgrade or use an alternative browser.
You should upgrade or use an alternative browser.
Black Hat Shop Works
- Thread starter aggierailroad
- Start date
TimeWarpF100
Well-known member
Got an addition and thus another project in the shop.
If anyone knows of a way to clean this up without ruining the finish, let me know. Please don't suggest sandpaper, emery cloth, scotch brite pads, or the like. Brasso will rub these marks off, they are very delicate!
More shots of the damage

And.... lastly..... a preview of the stack of drawers I acquired from my parent's new (old) garage. Vintage turn of the last century (1900) Warren hardware drawers.
Thanks for looking.


Try PPG DX 501 to clean that up. Just use a ;micro fibre cloth to wipe with..
Amazing results . . .
OP
aggierailroad
Well-known member
Well, the Ridgid arbor shaft works. Sort of.
If anyone else attempts this, you will need to replace the woodruff key with a 3/16" bar stock key, and a "normal" E-ring (retaining ring) as the original Craftsman retaining ring is too thick. I found both parts at the local old-timey hardware store.
Now, onto the jewelled panel.
From what I read, my technique was to use a wire end brush because it follows curves better. Preferably I would have waited to find a stainless steel wire brush as it won't deposit metal in the aluminum and rust; a finer wire size to make smoother swirls; and a smaller diameter brush because that's what was original. I found a 1" carbon steel brush at the hardware store for 7 bucks. Guess what I went with.
The other thing I read was the polish the panel first. I took some 220 grit paper to it, should have moved to 400 first, then polished it on the HF machine.

Notice the scratch marks. Oh well, about to scratch it some more.
Another trick is to put O-rings and heat shrink around the bristles to keep them from flaring out. I used zip-ties and hard copper wire. Worked OK. This is the best tip out there, btw. You'll notice right away.
Next, I laid out a grid, .75" on centers, for my 1" brush.

Used my trusty Incra T-Square rulers, thanks Mr. Aerodrome.
Get to swirling.

I found that a short burst of pressure worked better than trying to ease into it. Just jam it down hard for about half a second. These are rough due to the thick wire size (my speculation). I also used a dab of chrome polish on each row because I also read that some lube helped. Most guys use valve lapping compound but we're not that fancy around here.
The flat panels are really easy to do, I just eye-balled center and went to town. I got a little loose where the panel rolled but it looks OK from 5' away.
Here's the take away: the wire brush is fantastic but use a smaller wire diameter for a finer swirl. Don't be scared of this, it's easy. Thanks Robert and Kevin and Jonathon and everyone else for the encouragement to just dig in.
Test setup with the link belt passes the washer test - thinner than a nickel!!!!
I'll try to post a vid of start up and shut down.
Here's where we started, for reference.

Thanks for reading.
Still need to paint a few things, re-do the stand. Finish the wings. Wire up the safety switch. Finish the fence and miter blocks... The list goes on..
So far, into this about $175.
JonBoehman
Well-known member
Looks great
works4me
Well-known member
Very very nice result! I definitely think you took the right approach!
It's another example to me about how the care taken in finishing makes a *huge* difference.
It's another example to me about how the care taken in finishing makes a *huge* difference.
longlivepunk
Well-known member
Nice!! Glad you went with this over the vinyl. Authentic is always worth the bit of extra work! Bet you'll be way happier with it and want to show it off more!
Radio Ron w4ron
Well-known member
Looks GREAT, I love engine turning.
I've used it a lot on equipment I've built that had alum. panels.
I've used it a lot on equipment I've built that had alum. panels.
DoghouseForge
Well-known member
Beginners luck...

Looks pretty sweet...
JP
Looks pretty sweet...
JP
Looks really good. Maybe its just the size of the pic but the swirls look larger then original. I'm guessing these were probably done while the stock was flat from the factory before the metal was shaped. Those curves look like they're gonna be a challenge.
OP
aggierailroad
Well-known member
Y'all are making me blush.
Yes, they are larger than stock because I got tired of delaying completion waiting on tooling. Famous last words. The curves sucked, but here's what I did (sorry no pic yet):
I turned my drill press table 90 degrees and clamped a 1"x1" piece of plywood about two feet long so that it stood straight up and was aligned right under the brush. That allowed me a surface to press against while also being able to hold the piece on the curve.
Worked pretty well.
OP
aggierailroad
Well-known member
Weather went from ice and freezing to super nice and sunny in one weekend. Didn't get much done other than rigging up this mobile stand base for my table saw.
Temporary fix until I get the mobile saw station built.


Temporary fix until I get the mobile saw station built.


Southernbuild
Well-known member
Cool projects, I'll be following your thread
OP
aggierailroad
Well-known member
OK, got some toys in to "finish" off the table saw. Unfortunately the phenolic plate for the zero clearance insert is too short... Should have measured first.

The indicator, among other things, is used to set the blade parallel with the miter slots. From what I've been reading, the Freud glue-line rip blades are up there with the Wood Forrest blades at about half the price. I'll let you know how it fares.
Got this bad boy wired up. It's not as hard as what the "reviews" say. I had plenty of room in the box to make the connections. As a nice surprise, Quincy also included crimp spade terminals for you to use. I used 12' of 10/3 power cord wire and a 30/50 amp power terminal from Lowe's. You can't get that style of terminal (which fits the Miller line of welders as well) from Home Depot anymore. Don't waste your time looking, I had half the store digging through shelves. Found it within two minutes at the blue store.

Runs like a champ. ~90 dB right next to it with a freebie iPhone SPL app.

It's still considerably quieter than most compressors I've been around.
Also finally mounted up my power strip, charger and made a music player stand.
Detailed writeup coming to the blog, but here's the highlights. A shear, brake and ironworker could have had this 2 hr project done in 20 minutes. Oh well!

In hindsight, a few more "lightening holes" and a nice set of dimple dies would have been nice!
Already had the 18ga. at 10.5" wide from another project. Cut to length (27") or 26 if you can't do math like myself.

Drill and bend over the edge of the table.
Clamp and weld. .023" wire, Millermatic 211 on 4.5 and nearly 65ipm.

Crude keyholes in the back. 3/16" and 5/16" holes. Use a rat-tail file to connect them. In hindsight, use a 3/8" hole for the big size. I didn't have any button head screws that could fit!

Snake the power wires through it all and crank up the jams!


The indicator, among other things, is used to set the blade parallel with the miter slots. From what I've been reading, the Freud glue-line rip blades are up there with the Wood Forrest blades at about half the price. I'll let you know how it fares.
Got this bad boy wired up. It's not as hard as what the "reviews" say. I had plenty of room in the box to make the connections. As a nice surprise, Quincy also included crimp spade terminals for you to use. I used 12' of 10/3 power cord wire and a 30/50 amp power terminal from Lowe's. You can't get that style of terminal (which fits the Miller line of welders as well) from Home Depot anymore. Don't waste your time looking, I had half the store digging through shelves. Found it within two minutes at the blue store.

Runs like a champ. ~90 dB right next to it with a freebie iPhone SPL app.

It's still considerably quieter than most compressors I've been around.
Also finally mounted up my power strip, charger and made a music player stand.
Detailed writeup coming to the blog, but here's the highlights. A shear, brake and ironworker could have had this 2 hr project done in 20 minutes. Oh well!

In hindsight, a few more "lightening holes" and a nice set of dimple dies would have been nice!
Already had the 18ga. at 10.5" wide from another project. Cut to length (27") or 26 if you can't do math like myself.

Drill and bend over the edge of the table.

Clamp and weld. .023" wire, Millermatic 211 on 4.5 and nearly 65ipm.

Crude keyholes in the back. 3/16" and 5/16" holes. Use a rat-tail file to connect them. In hindsight, use a 3/8" hole for the big size. I didn't have any button head screws that could fit!

Snake the power wires through it all and crank up the jams!

Last edited:
works4me
Well-known member
Very cool! Too bad you don't know someone with a break you could use for stuff like that ;-)
DoghouseForge
Well-known member
Hell man , you could have been here by now ... like you said, that would take you about 20 minutes to do, and you'd be headed home already...
whatever, dont use the resources availible to you...

JP
whatever, dont use the resources availible to you...
JP
OP
aggierailroad
Well-known member
Throw a dog a bone, and this is what you get...
Can't catch a "brake" around here.
Can't catch a "brake" around here.
DoghouseForge
Well-known member
There's a press and break right across the street from your house...
just get the schedule and change your position in between trains.
JP
just get the schedule and change your position in between trains.
JP
OP
aggierailroad
Well-known member
What do isolation pads and trunnion adjustment have in common?
 Who knows?
Got the table saw fully running this weekend. Had to adjust the trunnions, build a zero clearance insert and adjust the fence. Here's my low-buck approach to adjusting a table saw for accurate cuts.
If this process is new to you, you should adjust a table saw when it's new, new to you, been dropped, been rebuilt or anytime the saw sees a large shock.
Most saws have the blade assembly hanging from the top. Cabinet saws will be independently mounted, and you will adjust the table rather than the blade. The saw swivels from two cast half circles on each end that have been machined to act as guides. Three bolts hold the trunnions to the top.

Typically you want to align the blade with the miter slots that are machined into the tabletop. This is independent of the fence/blade alignment, which is a whole other topic. They do make some tools to help you adjust the trunnions and hold them in place while you tighten the bolts, but.... not worth it to me.
You can get away with just a go/no-go gauge, feeler gauges, anything really, but I like to use the dial indicator because it's great for this kind of application.
First step is to unplug the saw followed by raising the blade as far as you can.
Mark one tooth with a marker.

Go ahead and make the little jig to hold your indicator. I used 1/8" steel because the mighty-mag is, well, magnetic. You want a tight fit in the slot, use shims to shore it up if need be.
Put the indicator on the side of a carbide tooth. I don't use the blade because the coating can throw off your measurements, where the blades are precision ground. Zero the indicator. I like to start with the front trunnion bolts fairly snug.

Rotate the saw back and slide the jig back until you can reference the same tooth.

I found that I had to apply a bit of pressure on the trunnion while I tightened the bolts to ensure it stayed true. One bolt will walk the trunnion one way, the other bolt the other. Go back and forth to stay on the mark.
Go back to the front, rotating the saw back around, and ensure the front hasn't moved and that you are still perfect. Took about 10 minutes and I was within 0.0005 per the indicator. Pretty accurate for a 60 year old table saw.
Next thing to do, for which I regretfully don't have pics, is to set up the positive 90 degree stops. I used a digital angle gauge. Got that to 89.9 degrees, close enough for me. I set the pointer arrows to use a a quick reference, but you can't beat the magnetic angle gauges for about 10 bucks.
Last, but not least, use the same jig to set your fence to the miter slot. Some people prefer a 1 degree kickout at the rear to presumably help with kickback, but I'm not sure there is an advantage. A well prepared saw with a good blade and good technique will yield great (and safe) results.
Side note: can't say enough about the Freud glue line rip blade. Get the real one, made in Italy. Man it cuts well, even for my 1 hp saw.
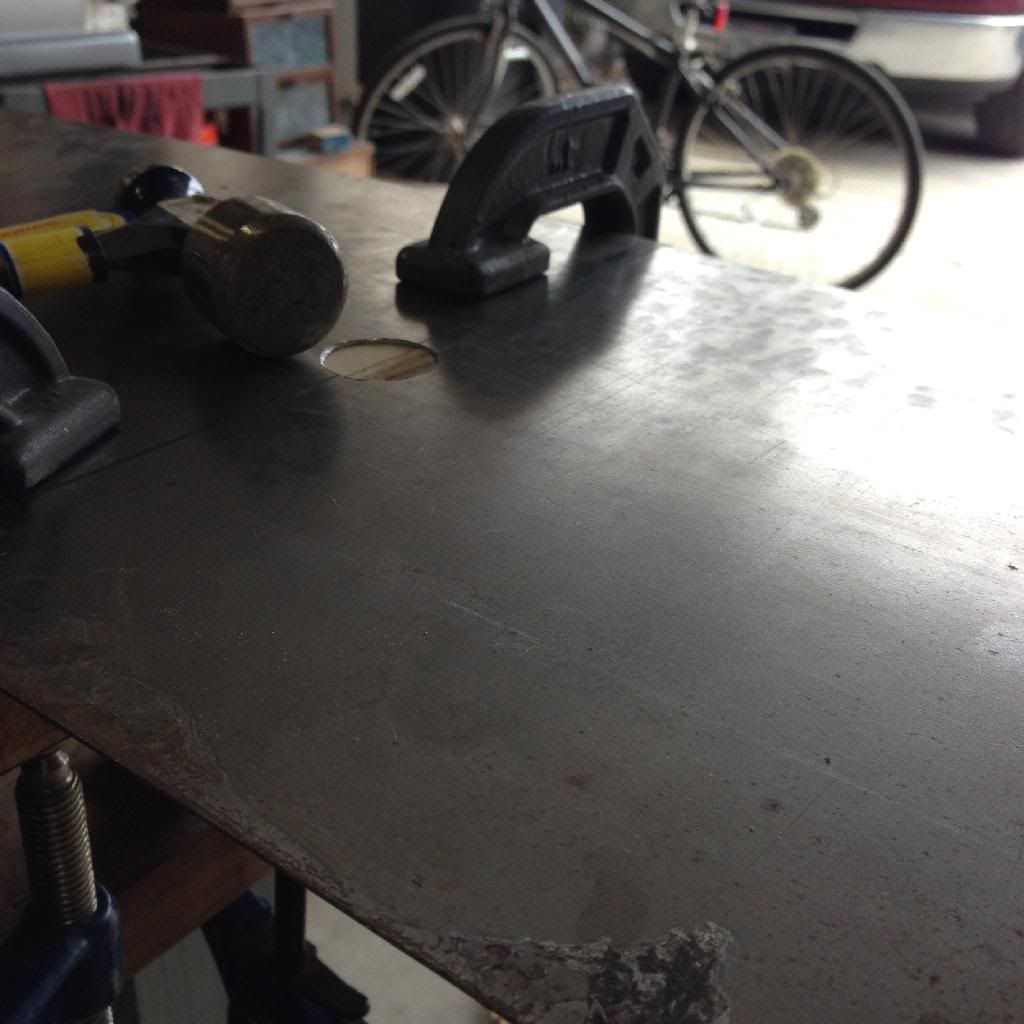
On to the isolation pads, aka, hockey puck feet. Being a native Texan, this is the first time I've seen a hockey puck in person, quite dense, and at a buck, not a bad pad for a compressor.
Get some bolts and washers and nuts, 1/2" for this application.

Find and mark the centers.
Finding centers, the easy way.
If you've got a lathe, well, you ****. Skip this step!
1 3/8" forstner bit for the washers. I set the depth stop so that the washer/bolt head would be recessed about 1/8".

Rubber cuts like butter. Didn't freeze it, just room temperature. Used 350 RPM, I believe.
Don't ask me how that one got off....
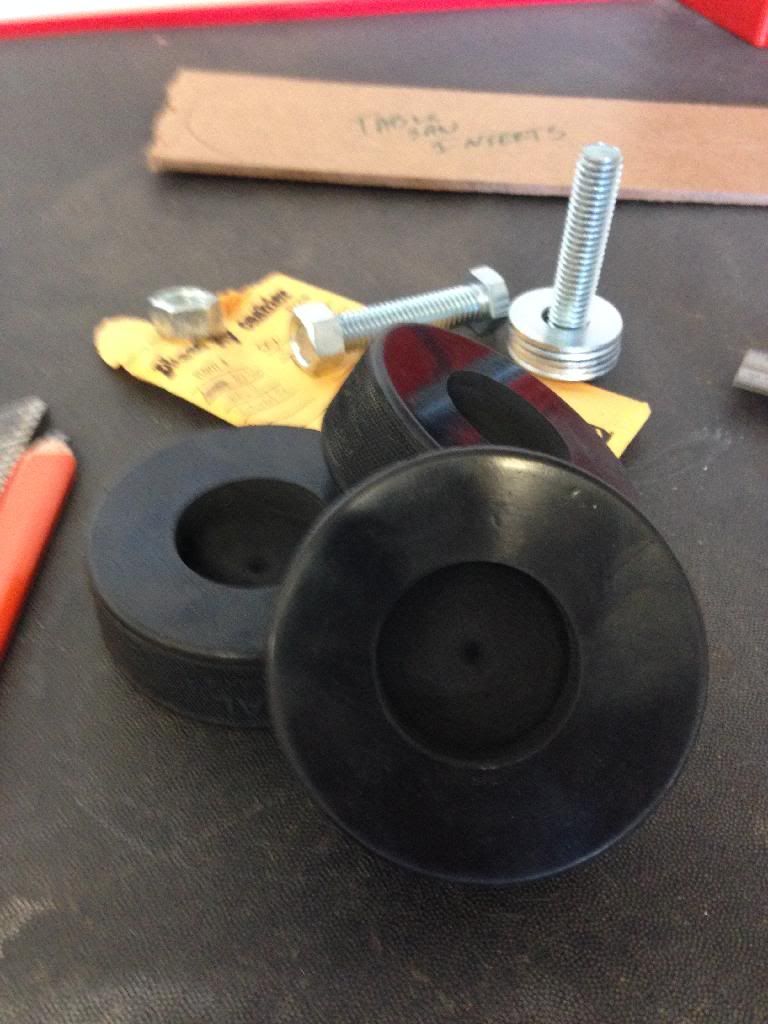
Follow that with a 1/2" hole and voila:

Use the wife to place the feet while you tilt the beast and...

Cheap and easy. For those that are curious, it did not help with noise reduction, but I did maybe feel less vibrations in the floor next to it. I won't be mounting this to the floor, and yes, I accept the risk. Didn't have any problems getting the bolts snug with the head slipping, didn't see any need to get it super tight either. This was a cheap, 20 minute project. I might consider a steel pad on top of the puck to prevent the foot from cutting into it. At a buck apiece... it will be hard to want to add to them.
Thanks for reading!
Who knows?Got the table saw fully running this weekend. Had to adjust the trunnions, build a zero clearance insert and adjust the fence. Here's my low-buck approach to adjusting a table saw for accurate cuts.
If this process is new to you, you should adjust a table saw when it's new, new to you, been dropped, been rebuilt or anytime the saw sees a large shock.
Most saws have the blade assembly hanging from the top. Cabinet saws will be independently mounted, and you will adjust the table rather than the blade. The saw swivels from two cast half circles on each end that have been machined to act as guides. Three bolts hold the trunnions to the top.

Typically you want to align the blade with the miter slots that are machined into the tabletop. This is independent of the fence/blade alignment, which is a whole other topic. They do make some tools to help you adjust the trunnions and hold them in place while you tighten the bolts, but.... not worth it to me.
You can get away with just a go/no-go gauge, feeler gauges, anything really, but I like to use the dial indicator because it's great for this kind of application.
First step is to unplug the saw followed by raising the blade as far as you can.
Mark one tooth with a marker.

Go ahead and make the little jig to hold your indicator. I used 1/8" steel because the mighty-mag is, well, magnetic. You want a tight fit in the slot, use shims to shore it up if need be.
Put the indicator on the side of a carbide tooth. I don't use the blade because the coating can throw off your measurements, where the blades are precision ground. Zero the indicator. I like to start with the front trunnion bolts fairly snug.

Rotate the saw back and slide the jig back until you can reference the same tooth.

I found that I had to apply a bit of pressure on the trunnion while I tightened the bolts to ensure it stayed true. One bolt will walk the trunnion one way, the other bolt the other. Go back and forth to stay on the mark.
Go back to the front, rotating the saw back around, and ensure the front hasn't moved and that you are still perfect. Took about 10 minutes and I was within 0.0005 per the indicator. Pretty accurate for a 60 year old table saw.
Next thing to do, for which I regretfully don't have pics, is to set up the positive 90 degree stops. I used a digital angle gauge. Got that to 89.9 degrees, close enough for me. I set the pointer arrows to use a a quick reference, but you can't beat the magnetic angle gauges for about 10 bucks.
Last, but not least, use the same jig to set your fence to the miter slot. Some people prefer a 1 degree kickout at the rear to presumably help with kickback, but I'm not sure there is an advantage. A well prepared saw with a good blade and good technique will yield great (and safe) results.
Side note: can't say enough about the Freud glue line rip blade. Get the real one, made in Italy. Man it cuts well, even for my 1 hp saw.
On to the isolation pads, aka, hockey puck feet. Being a native Texan, this is the first time I've seen a hockey puck in person, quite dense, and at a buck, not a bad pad for a compressor.
Get some bolts and washers and nuts, 1/2" for this application.

Find and mark the centers.
Finding centers, the easy way.
If you've got a lathe, well, you ****. Skip this step!
1 3/8" forstner bit for the washers. I set the depth stop so that the washer/bolt head would be recessed about 1/8".

Rubber cuts like butter. Didn't freeze it, just room temperature. Used 350 RPM, I believe.
Don't ask me how that one got off....

Follow that with a 1/2" hole and voila:

Use the wife to place the feet while you tilt the beast and...

Cheap and easy. For those that are curious, it did not help with noise reduction, but I did maybe feel less vibrations in the floor next to it. I won't be mounting this to the floor, and yes, I accept the risk. Didn't have any problems getting the bolts snug with the head slipping, didn't see any need to get it super tight either. This was a cheap, 20 minute project. I might consider a steel pad on top of the puck to prevent the foot from cutting into it. At a buck apiece... it will be hard to want to add to them.
Thanks for reading!
Nursepeter1973
Well-known member
Love the idea of the hockey puck feet... might steal the idea as feet for my bench
DoghouseForge
Well-known member
Ive never adjusted my trunnions!!! explains evey shortcoming I have! 
So question: when you check the distance from the stationary jig to the blade at front and rear locations are you looking for wobble or a non perpendicular alignment in relation to the table insert? this would affect every thing that follows a track or predetermined line on the top of the table?
or
Non perpendicular alignment would mean that you cant cut straight without your fence being the same amount of un square? so as long as the front and rear distane are equal the cut is straight?
Or does that mean your always cutting a slight diagonal?

JP
So question: when you check the distance from the stationary jig to the blade at front and rear locations are you looking for wobble or a non perpendicular alignment in relation to the table insert? this would affect every thing that follows a track or predetermined line on the top of the table?
or
Non perpendicular alignment would mean that you cant cut straight without your fence being the same amount of un square? so as long as the front and rear distane are equal the cut is straight?
Or does that mean your always cutting a slight diagonal?
JP
OP
aggierailroad
Well-known member
Ive never adjusted my trunnions!!! explains evey shortcoming I have!
So question: when you check the distance from the stationary jig to the blade at front and rear locations are you looking for wobble or a non perpendicular alignment in relation to the table insert? this would affect every thing that follows a track or predetermined line on the top of the table?
or
Non perpendicular alignment would mean that you cant cut straight without your fence being the same amount of un square? so as long as the front and rear distane are equal the cut is straight?
Or does that mean your always cutting a slight diagonal?
JP
Doesn't explain every shortcoming.
You are looking for non parallel alignment with the blade and the miter slot. The rationale is that anything you use to push wood through the blade needs to be in parallel with the blade to A) ensure a straight cut and B) mitigate kickback. I guess that if you never use a miter fence, crosscut sled or any kind of sliding jig it won't matter too much, but I still think it's good practice as the miter slot can be used as a reference plane from which to build other measurements.
Wobble, or arbor runout, is checked by taking out the blade and putting in a known flat disc, such as a blade stiffener, and setting up the dial indicator just like I showed. Unplug the saw, spin the disc by hand and watch the indicator - just like checking for runout in a drill press. A bent arbor, maybe a piece of slag on the arbor or bad bearings could be culprits of runout.
The second part of your response is true. If the fence is parallel to the blade you will be cutting straight, but maybe not when the blade is tilted.... Remember that the blades tilt pivot point is not in the middle of the trunnions, so any skew at the far ends results in a wild offset - the errors compound -.
If you are having problems with straight cuts, my first check would be the fence alignment, then arbor runout (if the cuts are wobbly), then trunnion alignment (especially on crosscuts). Inbetween all of that I would try a different blade coupled with the use of feather boards to apply even pressure against the fence while cutting. Oh, and, your fence can get out of parallel just from the action of engaging the clamp. Best to measure (which you don't have to do that often if you've taken the trouble to set everything up) front and back after you've clamped it down - especially with a rear locking fence setup. Using the cam lock style, rear gripping fences can put a slight twist in the fence, causing a few thousandths, or greater, misalignment.
So many variables, so little time.

OP
aggierailroad
Well-known member
Just got the storage drawer knocked out for this never ending gun box build. Boxed finger joints cut on the router. Material is about 3/8", joints are 1/2".

Close up of the joints. Here's the trick to the setup: the table was setup for half inch material but the drawers are about 7/16". So, cut your sides + the difference x2. They overhang now but are trimmed later. Or don't be lazy and adjust your router height that is dead nuts on and tied to the jig...
Moving on. Make the bottom from the resawn scrap from the sides. Use this tape, which stretches, as your clamps. Tape one side, fold it, glue the joint, unfold it and tape the other.

Rough fitted with an ebony pull. Use a low angle plane to get final fit.

In its new home.

Just have to finish the gun mounts...
OP
aggierailroad
Well-known member
Small head board project. This was covered in black latex paint and had some weird quilted inserts. The wife wanted it taller, so here's how I made that happen.
Starting point from the back. The frame is MDF and the legs are poplar, just screwed on, thankfully without glue, which made them easy to get off.

Rip down some 2x6. Wet, bowed crappy yellow pine. If it wasn't getting painted...

To make the half lap joint to join the legs to the board, and without having a dado blade, make several cross cuts with a circular saw. Do more than you see here, the more the merrier.

Take your hammer, tap out the pieces and clean up with a sharp chisel. These 8"x3" joints should take about 5 minutes apiece. The result looks like so:

Cut your joints using the same technique for the cross brace. I first ripped down the 2x6 to 5 inches. Lay in your brace, mark it and then cut the opposite side of the mark out. Boom, a full half lap joint.
Cut your corner braces out of the leftover ripped 5 inch piece. Didn't get a pic, but these were doweled in using 0.5" dowels on all mating pieces. Liberal use of wood glue - Titebond II. Use an angle block to allow for easy clamping. You have to tighten both clamps at the same time to keep the block from slipping.

Here we are all done. No mechanical fasteners. Your personal viking headboard. Would have been neat, but overkill, to half lap the cross braces. I think the dowels will be more than adequate.

Just need to run the plane over some of the inconsistencies of the rough lumber, prime, fill any cracks, paint and install.
OP
aggierailroad
Well-known member
Got some goodies in the mail this weekend:
For the record, the usaweld.com website isn't so great, but their customer service is awesome and the unit comes with brackets, a valve, a gauge, plugs, a reducing bushing, too much desiccant, safety pressure lock and probably something else.

Everything made in the good 'ol US of A. The Goodyear hoses have a surprising 10 year guarantee!
Needed a way to mount the regulator so I counter bored some holes into a 1x6:

1/4" carriage bolts counter bored just enough to recess the heads. Had just a little bit of blowout, no worries as this is probably a temporary solution.

Screw it to the wall.....

And bob's your uncle:

The shorty hose is a 300psi rated half incher from Goodyear. Same warranty as their long hoses and made in the USA.

I used pipe dope on all the joints except for the big hose, which got PTFE tape because I forgot I had the liquid kind...
I turned down the tank to 150 psi and the output to 93 psi. So far no leaks, just need to determine a manifold location because I don't like the hose bib to be off the regulator to avoid over stressing the regulator. Dry, dry air even at full open. I think I'm going to like this...
MP&C
Well-known member
Some awesome woodworking! Keep the projects coming!
NASTYZEN
Well-known member
I am a terminal wood splitter. I have a hard time with wood, so you wood guys impress me with your skills. I am enjoying all your projects. Oh yeah, and you **** for having gotten an air drier before me.
I have a hard time with wood, so you wood guys impress me with your skills. I am enjoying all your projects. Oh yeah, and you **** for having gotten an air drier before me.
OP
aggierailroad
Well-known member
Thanks guys, I've finally learned don't be afraid to make scraps... And only post the good stuff!
If anyone is familiar with the Pachmyer style gun enclosures, I'm all ears on a new twist to lock the guns in place. I'd like to do a cam-lock style closure, but not sure I can get the travel out of it in the event that there was only, say one gun, instead of all three. I think springs might can be used to compensate, but am struggling with this one.
It sucked to buy the drier, and it's so weird to feel the air come out and not feel like a sand blaster. That and it's drier than our humid Houston air and feels like a micro desert.
OP
aggierailroad
Well-known member
Finally get to play with these...
My 23ga pins didn't come in yet, so no news on that gun, but the 18ga nailer shot a 2 inch brad into solid white oak 10 times without bird nesting the brads or jamming. It didn't jam on the 11th, I just got bored trying to make it fail.

Highly recommend these Sencos.
My 23ga pins didn't come in yet, so no news on that gun, but the 18ga nailer shot a 2 inch brad into solid white oak 10 times without bird nesting the brads or jamming. It didn't jam on the 11th, I just got bored trying to make it fail.

Highly recommend these Sencos.
OP
aggierailroad
Well-known member
A little progress is better than no progress...
Got the few (hand) planing marks sanded out and some filler spread on. Wouldn't dry in the humidity to get sanded off... grrr...
I use the filler in the knots (it is big box store lumber after all) and the end grain tearout from the half lap joint, just to give a smoother finish - sprayed latex. Filler is just Sherwin Williams brand spackling. It's very smooth and has proven to work great so far.

Also got a few scales cut out from some scrap burl (the main piece is being sold for $2,800) for a certain knife maker that lurks around this forum. It proved interesting to cut, requiring a taper jig to be made.
Before:

Sliced and diced ~1/4" thickness.

And a coat of 1.5lb cut amber shellac off the saw (no sanding) just to see what it will look like. Talk about some swirly grain.

Got the few (hand
) planing marks sanded out and some filler spread on. Wouldn't dry in the humidity to get sanded off... grrr...I use the filler in the knots (it is big box store lumber after all) and the end grain tearout from the half lap joint, just to give a smoother finish - sprayed latex. Filler is just Sherwin Williams brand spackling. It's very smooth and has proven to work great so far.

Also got a few scales cut out from some scrap burl (the main piece is being sold for $2,800) for a certain knife maker that lurks around this forum. It proved interesting to cut, requiring a taper jig to be made.
Before:

Sliced and diced ~1/4" thickness.

And a coat of 1.5lb cut amber shellac off the saw (no sanding) just to see what it will look like. Talk about some swirly grain.

Last edited:
DoghouseForge
Well-known member
BURL!!!! FEED THE ADDICTION!!!
tapper jig? Is that just a wedge to even its lay on the fence?
sorry about the humidity, maybe you can just move your shop inside the air dryer?
You **** by the way,
Jp
tapper jig? Is that just a wedge to even its lay on the fence?
sorry about the humidity, maybe you can just move your shop inside the air dryer?
You **** by the way,
Jp
OP
aggierailroad
Well-known member
Got some time for a few things on the to-do list. First of all, needed a place to hang the air hose and straighten out the rest of the hanging stuff, so I got another of those Kobalt wall cleats.

Stepped up to the big leagues and got the infamous purple HVLP from our favorite tool store.

Used it to spray some Sherwin Williams latex primer on the headboard leg extension. Still a few kinks to work out with the gun setup for latex. Even so, that premium primer finishes really well. Just need to block it out one more time and shoot the finish.

Finally get to get started on the second end table, a take on the first cube styled one.
First I used the plywood top template to layout where the legs would sit. Corner to corner and then add 12/32" to each side with the infamous Incra rulers.

Cut the steel to fit, just like on the first table.

Last piece buttoned up. You may notice that the intersecting angles are not exactly ninety degrees. I think CAD said they were about 87 or so. I shot the difference and decided to not change the saw around and just cheat one side, it was about a 1/16" gap anyways.

Chamfer the ends..

And damn, due to the steel being seconds, and from a long drop, someone decided to bend it at some point along the way... There's not any more material, so I had to make this piece work.

The inclined plane to the rescue! With the help of some various clamps and a 1/8" spacer, she straightened back out.

Then I used the die grinder with a Roloc disk to just clean up the weld area a bit where the verticals meet the horizontals.

Can you tell which one was bent?

Welded up the long runner, checking for square, welding alternating sides to minimize warping.

Keep going around the circle... The last two legs are just tacked in case they need to be moved around later.

Lastly, I used the pull saw to cut the slots for the template. A chisel was used for the corners. Had to tweak on one leg a bit, but the template will be used to weld in the 3/8" square bar stringers that will both support the top and keep the legs pull tight.

The plan is to cut, joint and plane the walnut and rough cut it to shape with a bandsaw. Then the template will be used with a pattern tracing router bit to get the final shape. In theory it'll be really easy.....
OP
aggierailroad
Well-known member
BURL!!!! FEED THE ADDICTION!!!
tapper jig? Is that just a wedge to even its lay on the fence?
sorry about the humidity, maybe you can just move your shop inside the air dryer?
You **** by the way,
Jp
Sorry, I missed this earlier.
Yeah, just an adjustable angled fence. Most often used to cut tapered legs for tables.

OP
aggierailroad
Well-known member
More progress on table #2 and the gun box.
First off, got the table pieces cross cut, jointed and ripped for glue up. Was able to store this piece perfectly flat for about 8 months - with a side effect of not needing to plane it flat! Sometimes you get lucky.
About 22 inches square for reference. The marks are to keep them in order from where they were laid out to where they were glued up. Use chalk - it won't absorb into the wood and affect your finish of choice.

Then, got the dovetails cut for the barrel lock that will be used in the gun case. Beer bottle for reference. The whole contraption is 5 inches tall.

Use a table saw and a paring chisel to clean up the bottom. That's all for now, with hopefully a spread on using grain filler and possibly the french polish finishing technique.
DoghouseForge
Well-known member
Your pink table cloth, purple spray gun, and home decor look just beautiful...
Your use of fake fruit in the glass bowl makes me smile...Im not alone!
JP
Oh yah, I guess your works pretty sweet.
Your use of fake fruit in the glass bowl makes me smile...Im not alone!
JP
Oh yah, I guess your works pretty sweet.
OP
aggierailroad
Well-known member
You know you want a purple gun too...
Finished the headboard. Glued the legs to the top and used 6 countersunk screws per side. Thinned the latex about 40% and finally got good results with the HVLP gun. Two coats followed by this glaze:

Rub it into the corners and use a damp rag to burnish it off. Keep turning to a clean side to keep from smearing it around. Keep the rag dry enough that you can't squeeze any more water out. Here's the final result. Btw, a pint of glaze will last a lifetime...

Time to put the ash panels in. They are book matched in both directions.

I ripped some ash strips and pinned the panels in place with 23 gauge half inch pins. Hot glue would work in a pinch, you don't want them glued in or permanent for both expansion reasons and for when your wife changes her mind.

Used carriage bolts to secure it to the frame.

All she wrote. Hope you enjoyed it.

OP
aggierailroad
Well-known member
Small update on the range box, but first, a shot of a sweet score I got at the "resale" antique shop.
They are hand wheels from ancient sewing machines that were used to make hats from a local plant that is being torn down. They should work fairly well on both my table saw and the future bead roller mod I have planned.

There's still a little bit of felt fuzz on the underside.
Back to everyone's favorite topic: sanding and finishing...
This box will get a more or less traditional French polish - which is generically shellac diluted with alcohol (in this case Everclear) and lubed with mineral oil. You apply about two weeks worth of coats - day in and day out...
Gather your ingredients..

But, first I needed to prep the box - step one was to use the chisel and pare off the dowels used in the santu box joints. Don't try this unless you have a very sharp chisel with a back that's dead flat, or you risk gouging the surrounding wood. Slice the dowel side to side, just like filleting a fish - or, use coarse sandpaper on a narrow block.
The offending dowels (birch):

Sliced off like a hot knife through butter.

Take note of the deep grain/pores you get in walnut in the above pic. They won't do for the glass finish we are after.
Blam-o! Perfect slice. But wait! What is that? A dent from a guy that can't use a mallet... Of course it's on the top. No problem, easy fix. Just add a few drips of water....

Let it dry (aka absorb into the wood) and when it swells out....
Barely noticeable dent. Another hit with steam from an iron will take out the rest.

Next, scrape on the Wunderfil walnut putty and pore filler. I used it full strength to fill in the gaps. Gaps were created by a 0.003" misalignment in the router bit and follower bearing. Check your pattern bearings when you get them new! I use an old gift card, scraping 45 degrees to the grain direction to work the filler into the cracks and pores.

Hand sand with 220. Any coarser and you'll tear out the filler. The stuff does tend to clog paper, so having compressed air on hand is a benefit if you've got it.
Even in out 86% humidity, it dried in about an hour. Then... I thinned the Wunderfil down and coated the rest of the box. Again, scraping 45 degrees against the grain.
Horrible pic, I apologize. The stuff was setting up and I was hurrying.

That's it, I'll let this dry overnight, sand with 220 then 320 before starting with the shellac. Thanks for looking.
OP
aggierailroad
Well-known member
Sneak peek on current projects and an oldie but a goodie:
Wrapped up two magnetic knife holders. One is ebony, the other lacewood, both with hard maple ends and bits. Finish is oil and beeswax.


And I got the supports welded in the the second end table. 1/2" square tubing.

Best thing I got out of the weekend was finding out the hard way that my miter saw is out of square and it needs a new blade and I found a new way to ruin some expensive hardwood. It's really fast, just ask me if you'd like to know how!
Capt Chrysler
Well-known member
Metal, GOOD! Wood, BAD!!!
I got my A$$ handed to me today building a wooded rack to set some transmissions on! Then I come on here and see this stuff!!!!!!!!!!!!AGR..................
Your wood skills are killing me!
Capt. Chrysler
I got my A$$ handed to me today building a wooded rack to set some transmissions on! Then I come on here and see this stuff!!!!!!!!!!!!AGR..................
Your wood skills are killing me!
Capt. Chrysler
OP
aggierailroad
Well-known member
The deeper I get into this stuff the more I start to agree... But it never fails, sharpen a blade up, take some swipes with the hand plane and make a 4 foot long 0.002" shaving that curls up and it all makes sense again.
That happens once every 6 months... On the plus side I never have to sharpen my grinder...
That happens once every 6 months... On the plus side I never have to sharpen my grinder...