To avoid these ads, REGISTER NOW!

Above 1200 Sq/FT Blackbyrds Basement

Wokspaces above 1200 squarefeet.
OP
B

Blackbyrd

Well-known member
Joined
Nov 28, 2020
Messages
1,170
Location
TN
Well..... that happened faster than planned haha.

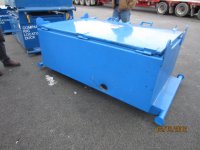
We were are at Big R (knock off Rural King) picking up paint supplies cause its closer than Lowes. They had this service cabinet as a floor model for 130 and its perfect! We took down the bar shelves upstairs so I needed a place to put stuff.

On a side note I wondered into harbor freight and thought how cool are these tiny tool boxes?!?! So I keep some drill keys and Allen wrenches for swapping out cutoff wheels so its just the right size for that kind of stuff.
 

Attachments

  • 20251124_233252.jpg
    20251124_233252.jpg
    789.9 KB · Views: 100
  • 20251124_233310.jpg
    20251124_233310.jpg
    937.2 KB · Views: 77
  • 20251124_233346.jpg
    20251124_233346.jpg
    1,017.3 KB · Views: 92
To avoid these ads, REGISTER NOW!

Xti04

Well-known member
Joined
Nov 11, 2016
Messages
2,347
Snap on has a tool box cabinet that open s into a full bar setup. It was a promo item awhile back. I tried to get my tool guy to order one and it was a no go but I wanted to do that exact same thing for my shop, especially after I buit the bar top out there. That looks perfect for the job and much more affordable than the Snap on one I found on ebay.
 

Cdubu52

Well-known member
Joined
Sep 4, 2014
Messages
636
Location
Pittsboro, NC
Well..... that happened faster than planned haha.

We were are at Big R (knock off Rural King) picking up paint supplies cause its closer than Lowes. They had this service cabinet as a floor model for 130 and its perfect! We took down the bar shelves upstairs so I needed a place to put stuff.

On a side note I wondered into harbor freight and thought how cool are these tiny tool boxes?!?! So I keep some drill keys and Allen wrenches for swapping out cutoff wheels so its just the right size for that kind of stuff.
That is a sweet set up. Keep it all up and out of the way, but ready when needed!
 

madison069

Well-known member
Joined
Nov 5, 2010
Messages
4,202
Location
Monroeville, PA
Well..... that happened faster than planned haha.

We were are at Big R (knock off Rural King) picking up paint supplies cause its closer than Lowes. They had this service cabinet as a floor model for 130 and its perfect! We took down the bar shelves upstairs so I needed a place to put stuff.

On a side note I wondered into harbor freight and thought how cool are these tiny tool boxes?!?! So I keep some drill keys and Allen wrenches for swapping out cutoff wheels so its just the right size for that kind of stuff.
Pretty slick cabinet!
 
OP
B

Blackbyrd

Well-known member
Joined
Nov 28, 2020
Messages
1,170
Location
TN
20251215_114317.jpg

Well today is the first day of my extended vacation. Shop is in chaos, while I wanted to dig into the last ofnthe sheet metal stuff I found myself unmotivated. Probably cause the high today was 20 so the shop while some what warm was still a bit too chilly for me.

I got big plans since im off till the 2nd let's see what kind of magic I can pull off.
 

madison069

Well-known member
Joined
Nov 5, 2010
Messages
4,202
Location
Monroeville, PA
20251215_114317.jpg

Well today is the first day of my extended vacation. Shop is in chaos, while I wanted to dig into the last ofnthe sheet metal stuff I found myself unmotivated. Probably cause the high today was 20 so the shop while some what warm was still a bit too chilly for me.

I got big plans since im off till the 2nd let's see what kind of magic I can pull off.
If I took weeks at a time off, my boss would have found someone else to take my spot. Lol


I hear ya on the temperature, it’s “warm” but still chilly in my garage too. If it wasn’t for the move, I’d probably be in the house right now.
 
OP
B

Blackbyrd

Well-known member
Joined
Nov 28, 2020
Messages
1,170
Location
TN
@madison069 its not all vacation, though I am fortunate to have 4 weeks. We shut down during the holidays depending on how Christmas falls some where around the 21st or 2nd and dont return until the new years.

Whatever is left of my vacation doesnt roll over so I burn it all to make a long break for myself. My job has me investigating product failures, usually that cost us a bunch in warranty but source isnt always obvious, so rapid pace lots of visibility. So its nice to have a mental shutoff to get my feet back under me. Ive already gotten phone calls haha.
 

madison069

Well-known member
Joined
Nov 5, 2010
Messages
4,202
Location
Monroeville, PA
@madison069 its not all vacation, though I am fortunate to have 4 weeks. We shut down during the holidays depending on how Christmas falls some where around the 21st or 2nd and dont return until the new years.

Whatever is left of my vacation doesnt roll over so I burn it all to make a long break for myself. My job has me investigating product failures, usually that cost us a bunch in warranty but source isnt always obvious, so rapid pace lots of visibility. So its nice to have a mental shutoff to get my feet back under me. Ive already gotten phone calls haha.

My previous job was Reliability Engineer for a Directional Drilling company in the oil field, I really enjoyed the job but the politics was too much. Finding root causes and providing corrective actions was fun! I didn’t mind the midnight failure investigations as it was challenging to take tools apart and ensure the cause of failure isn’t lost. Some failures were electrical, some hydraulic, some just physical, and others was operator error. Reviewing the recorded data in the tools and also what was recorded on surface could be a daunting task due to the amount of information they recorded! That was 10 years ago now, so I’m sure my skills are rusty.

Yea, I can’t rollover my time either. So I usually burn my days via one or two days at a time spread out over the year. 6 weeks of total time off via vacation, personal, and sick days can allow me to take a lot of Mondays off. Nonetheless, I’m only working 6 days between now and January 2nd. So I’m not too far off from having the same amount of time out of the office as you.
 
Last edited:
OP
B

Blackbyrd

Well-known member
Joined
Nov 28, 2020
Messages
1,170
Location
TN
Oh you are speaking my language!!! My speciality is test development to replicate root cause within the boundaries of application. I was part of a rapid problem solving team within our quality function.

I love the challenge of being handed "the black box" that cant be solved. I was a test engineer prior to becoming part of that team. Building data acquisition systems and having broad understanding of all our test capabilities in our corporate lab. I merged all that with the investigative side of problem solving which is awesome cause I get to participate in some crazy projects, fast paced, high pressure, but so rewarding when I solve /replicate failure. Its also incredibly draining hahahaha.

I can see in my future being coached to not burn 8 vacation days at the end of the year though.
 

loganb

ALLIANCE MEMBER
Joined
Dec 29, 2011
Messages
5,613
Location
Omaha, NE
So you're saying that you get paid to take the piece that product design said couldn't be broken as it was perfect...customer is reporting it's broken and costing them ungodly but uncalculated dollars while it's down....then you figure out how they did it, replicate it and put a nice bow on the new test procedure for corporate quality and product? Nice!

Reminds me a bit of the job in college....minus the high stakes and pressure. Worked in a civil engineering research lab on campus. Primarily grad students and above would bring us research projects, typically involving concrete beams but sometimes asphalt and want us to create some sort of test fixture to cycle and or break it in an unconventional way. Scope was never clear and budget was often non-existent but the fun ones were actual sponsored projects with defined scopes so we knew what we needed to do. Lots of hydraulic cylinders, load cells, strain gauges etc but very little if any pressure to get it done on a timeline!
 
Last edited:
OP
B

Blackbyrd

Well-known member
Joined
Nov 28, 2020
Messages
1,170
Location
TN
@loganb thats pretty much my job in a nutshell. Except they know how much its costing us, once it crossed a certain threshold is when my former team would get involved. Never fun to be the assigned expert onna team in motion, but part of the gig. I get to play mad scientist often hahaha. Then pass learnings back to design so we dont repeat past issues. The scope is only solve the problem and fast hahaha, usually starts with getting returns back and dissecting them. Which usually leads to some non standard tests that are investigative in nature.

I've actually moved into what was gonna be a slower gig, but I keep being asked to participate in the big projects cause we re organized and my team was disassembled. Which *****, but In a way is pretty validating to keep being asked back.
 
Last edited:

loganb

ALLIANCE MEMBER
Joined
Dec 29, 2011
Messages
5,613
Location
Omaha, NE
@loganb thats pretty much my job in a nutshell. Except they know how much its costing us, once it crossed a certain threshold is when my former team would get involved. Never fun to be the assigned expert onna team in motion, but part of the gig. I get to play mad scientist often hahaha. Then pass learnings back to design so we dont repeat past issues. The scope is only solve the problem and fast hahaha, usually starts with getting returns back and dissecting them. Which usually leads to some non standard tests that are investigative in nature.

I've actually moved into what was gonna be a slower gig, but I keep being asked to participate in the big projects cause we re organized and my team was disassembled. Which *****, but In a way is pretty validating to keep being asked back.

Sounds like a fun gig!
 

madison069

Well-known member
Joined
Nov 5, 2010
Messages
4,202
Location
Monroeville, PA
So you're saying that you get paid to take the piece that product design said couldn't be broken as it was perfect...customer is reporting it's broken and costing them ungodly but uncalculated dollars while it's down....then you figure out how they did it, replicate it and put a nice bow on the new test procedure for corporate quality and product? Nice!

Reminds me a bit of the job in college....minus the high stakes and pressure. Worked in a civil engineering research lab on campus. Primarily grad students and above would bring us research projects, typically involving concrete beams but sometimes asphalt and want us to create some sort of test fixture to cycle and or break it in an unconventional way. Scope was never clear and budget was often non-existent but the fun ones were actual sponsored projects with defined scopes so we knew what we needed to do. Lots of hydraulic cylinders, load cells, strain gauges etc but very little if any pressure to get it done on a timeline!
Last time I talk to the guys, they were still using my test boxes I created and implemented throughout the company to prevent premature failures when sending certain electrical boards back in the field.

I don’t miss the lithium batteries failures as I was one of the dissassembly personnel when they come back to the shop. Those thing were basically sitting missles that has shown its ability of going through 3 plates of 1/4” thick and still shoot off into the woods 3/4 of a mile away.
 

madison069

Well-known member
Joined
Nov 5, 2010
Messages
4,202
Location
Monroeville, PA
Last time I talk to the guys, they were still using my test boxes I created and implemented throughout the company to prevent premature failures when sending certain electrical boards back in the field.

I don’t miss the lithium batteries failures as I was one of the dissassembly personnel when they come back to the shop. Those thing were basically sitting missles that has shown its ability of going through 3 plates of 1/4” thick and still shoot off into the woods 3/4 of a mile away.
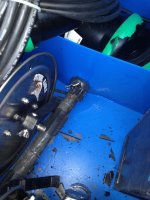
I had to fire up the old hard drive, but here is the box. See that hole on the bottom? it wasn't there the night before.

yard battery explosion 002.jpg

The tool casing acted as a barrel, and this was the discharge at the rear.
photo1.JPG
Part of it got stuck inside the box. A lifting strap is what jammed it and kept part of the string from going to the woods.

photo2.JPG

I remember getting out of the shower that morning and seeing my phone was blowing up< pun intended> and once I got my hearing aids in, I was able to call them back. They said I need to come see this pronto. It was a fun day.


In the end we wrote up the process of properly securing the tool in the yard and setting them in a corner where the hills acted as a bunker to prevent anymore possible damage from discharge in the future. One thing that they never could figure out was how do we handle the tools in the field? Lets be real here, that was basically a loaded barrel riding down the highway when it returned to the yard. It could of went off and shoot toward someone's car or into the cab of the truck driver.


In the end that tool was discontinued due to the high failure rates, but there were other tools that used those same lithium batteries, and they failed just as easily. Only difference was the design of the other tool created what I called a stop gate at both ends of the tool and so there wasn't a chance that the probes could shoot out of the internal like this one did. But none the less, I don't drive behind truckers who is hauling drilling tools on the road, because I don't want to be the one that gets shot by a probe discharge!
 
To avoid these ads, REGISTER NOW!
OP
B

Blackbyrd

Well-known member
Joined
Nov 28, 2020
Messages
1,170
Location
TN
Ive been busy.... not quite as productive as I hoped but progress is progress!

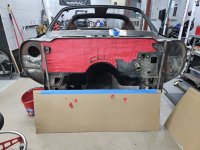
I had a laundry list of items left on the rear half, which ive widdled down! I made my template for the flat firewall. I wanted to get the firewall done, the minitub going and the finish the t top latch..... which is gonna take way more time than I wanted to spend.


I had to skin down 3 layers to get to something with more structure than tin foil
20251218_093947.jpg

3rd layer only needed a small repair though
20251218_103517.jpg
20251218_113618.jpg
Made my templates outta painters tape (new trick I learned)
20251218_085520.jpg
2nd layer used part of the old inner support fornthe outer skin and a new flat section
20251218_160819.jpg
And last the outer skin is tacked in just need to stitch it in.
684ce616-7aa2-4523-901a-2c5c1c694cd4.jpg


Now just to do the 3 other corners 😭 hoping to move faster tomorrow.
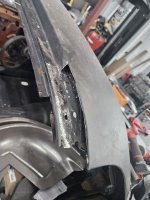
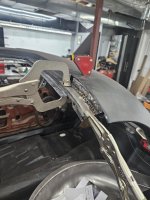
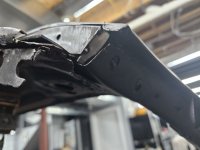
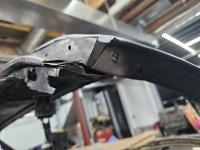
Last but not least a marketplace find! A denali paint matched bumper for my silverado..... too bad we had to cut it off.... in the rain.
 

Attachments

  • 20251218_135402.jpg
    20251218_135402.jpg
    1.1 MB · Views: 36
  • 20251216_112506.jpg
    20251216_112506.jpg
    577.4 KB · Views: 25
  • 20251210_001640.jpg
    20251210_001640.jpg
    984.7 KB · Views: 34

zmotorsports

ALLIANCE MEMBER
Joined
Oct 20, 2009
Messages
21,441
Location
Northern Utah
Rust repair is turning out good. That is exactly how I used to do them as well, until I invested in a shrinker/stretcher which reduced the amount of welded seams. Just took a bit of playing with to get a feel for it and how much radius to attack at a time.
 
OP
B

Blackbyrd

Well-known member
Joined
Nov 28, 2020
Messages
1,170
Location
TN
Rust repair is turning out good. That is exactly how I used to do them as well, until I invested in a shrinker/stretcher which reduced the amount of welded seams. Just took a bit of playing with to get a feel for it and how much radius to attack at a time.

The amount of work would have been cut in half it id chose to buy one. I looked at them early on, but somehow I convinced myself I wouldn't get much use out of it? If I do another one "if" id invest in more sheet metal tools. Shears, brakes, shrinker stretchers... and probably a bead roller. Though I was extremely happy with the m12 nibbler for making the patch panels.

@madison069 because its bad *** thats why! Jokes aside this is a small view into the level of compulsive behavior I exhibit....
 

zmotorsports

ALLIANCE MEMBER
Joined
Oct 20, 2009
Messages
21,441
Location
Northern Utah
The amount of work would have been cut in half it id chose to buy one. I looked at them early on, but somehow I convinced myself I wouldn't get much use out of it? If I do another one "if" id invest in more sheet metal tools. Shears, brakes, shrinker stretchers... and probably a bead roller. Though I was extremely happy with the m12 nibbler for making the patch panels.

@madison069 because its bad *** thats why! Jokes aside this is a small view into the level of compulsive behavior I exhibit....

I completely understand, the associated equipment can add up very quickly. Back when I first got started doing restoration work in the 80's and 90's I did it exactly like you. I only more recently added the shrinker/stretcher and Diacro pan brake within the last 5 or 6 years. I purchased a Mitler Bros. bead roller back in the 2000's because I was doing a lot of tin work on race cars and aluminum work on sand rails and it paid for itself over and over, but the necessary equipment was spread over a couple of decades as funds were available as well as the needs arose. I don't do much paint & body these days, but it's nice to have them when needed. I wish I could have afforded them back when I was more heavily involved in paint & body, but that's how things go I guess. :dunno:
 
OP
B

Blackbyrd

Well-known member
Joined
Nov 28, 2020
Messages
1,170
Location
TN
Ive really enjoyed learning metal working, ive considered investing in it a bit more and just doing basic stuff and selling them. Like duplicating the closeout panels I made for my firebird. There's so few resto shops left anymore

Doing custom 1 off stuff is something ive always enjoyed, but duplicating after ive done the challenging part not so much?
 

zmotorsports

ALLIANCE MEMBER
Joined
Oct 20, 2009
Messages
21,441
Location
Northern Utah
Ive really enjoyed learning metal working, ive considered investing in it a bit more and just doing basic stuff and selling them. Like duplicating the closeout panels I made for my firebird. There's so few resto shops left anymore

Doing custom 1 off stuff is something ive always enjoyed, but duplicating after ive done the challenging part not so much?

Same here, I have always enjoyed the custom and restoration work much more than the general repairs, but I can attest that after having my business it is harder to make money at the custom work. The clientele that can and will spend the money is not as vast as what they try to portray on television shows.
 
OP
B

Blackbyrd

Well-known member
Joined
Nov 28, 2020
Messages
1,170
Location
TN
Oh absolutely! I dont think a single shop that did that kind of work in my area is still running. I take that back, there's one but they quit doing resto and only do insurance work
 
OP
B

Blackbyrd

Well-known member
Joined
Nov 28, 2020
Messages
1,170
Location
TN
Since the full write up went over well ill keep that format going forward for future updates.


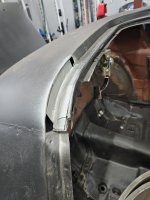
Rear passenger side done, so from the factory its actually open near the bottom of the curve to the b pillar.... not a fan so I closed it in, stillna small gap in the inner corner. Still deciding on what to do there. Im afraid of altering how the weather strip fits.
20251220_153419.jpg


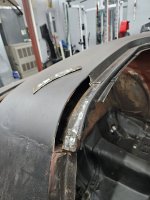
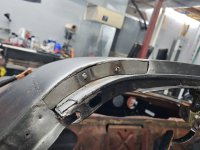
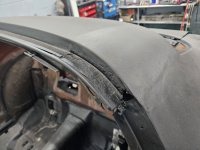
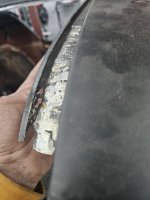
This small lip where the headliner clips had several pockets that looked rough so I stripped it down... may have to wire wheel and Drexel what's left before I prime it to make sure I get all the rust out..... im wondering at this point should I have just re skinned the roof.... it may have been less work.
20251220_140650.jpg


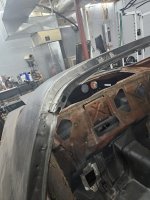
Onto the front passenger corner it was in about the same shape as the rear corner. Down to the 3rd layer
20251220_130638.jpg
20251220_140731.jpg

Filling in the holes in the channel was not a fun task...... copper spoon on a magnet was required... but now this section is clear of rust and weld through primered.
20251220_153427.jpg

Now, I got a little smarter this time, the second layer is an L shaped bracket the vertical part has been fine in both repairs minus a little surface rust. Last repair though I welded the bottom part in first then welded the wall back. This time I clamped thr lower in place and tacked the back wall on. This helped me nail the shape/curve of the roof channel way easier and making finishing the bucket much easier as well since I could grind my welds down on the table.
20251220_140637.jpg
20251220_153447.jpg

Coated the backside in an encapsulater, then just drill some holes roset weld and I can finish the 3rd layer repair.

Similarly they leave open corners here again, I want to box it in, but also have concerns again about altering the fit of the weather seals. The door/window/ ttop is all one piece so I have to retain OE shapes here...

Thankfully the drivers sides look way better, looks like only the outer skin needs any real work.

Looks like I may be lucky to get the roof finished haha let alone knock out my firewall project hahah.
 
OP
B

Blackbyrd

Well-known member
Joined
Nov 28, 2020
Messages
1,170
Location
TN
Had to set this for tomorrow cause im a good Santa's helper hahaha.

Did a quick print to test things man im really happy with the quality of prints! Im gonna be in trouble once I figure out how to model things I want.

20251224_200033.jpg
20251224_211605.jpg

Hope everyone has a Merry Christmas!!
 
OP
B

Blackbyrd

Well-known member
Joined
Nov 28, 2020
Messages
1,170
Location
TN
Id love to say I got everything on my list done before I went back to work, but life sure gets in the way hahaha.

More progress on the ttop repair, and after a chat with autobody buddy, im gonna close in the sections that are left open, it will add more time and work to the job, but ill feel better knowing there's no way water can creep in.
20251229_205133.jpg
20251229_205144.jpg
20251229_205151.jpg

I washed the denali bumper .... seems its been painted and not well... hahah it will match the rest of the truck hahaha. I wanted to put it on, but since we had to cut the brackets off id have to use mine and they are actually bent. Looks like the previous owner backed into something pretty hard... to ebay I go.....
20251229_205216.jpg

This transmission line leak has been a huge bummer... it appears I inherited someone's i can do that cheaper fix..... unfortunately im in a bind and need the truck drivable tomorrow while im outta town and my wife's car is in the shop.... that life in the way thing hit me with a mean hook. So for now had to remove some of thr weaker hose and double clamp it. No more drip but I definitely want to replace the lines
20251229_205330.jpg

Tomorrow is a wash, but ill have Wednesday and Thursday to hopefully wrap up the t top work onnthe passenger side. Marathon notna sprint
 
OP
B

Blackbyrd

Well-known member
Joined
Nov 28, 2020
Messages
1,170
Location
TN
20251231_143815.jpg
Decided on boxing in the open corners, figured making it part of the skin layer is still needed to put on was the best way to get it closed in

20251231_144018.jpg
Fitting like a glove getting pretty good at this haha

20251231_145738.jpg
Stitched in just need to clean up

20251231_165155.jpg
This is the final product hours of work no one will ever see once the car is painted and finished haha

20251231_165211.jpg
20251231_165216.jpg
Driver side is in similar shape, ive got my metal layed out and templates made just decided to spend my last day off being a bum before work kicks my ****.

e370f884-87ef-4f0a-b0fc-2d18ef085e1f.jpg
Wife decided she wanted a puppy so this little lady has found herself being my snuggle buddy haha. Thats 3 dogs now.....
 
OP
B

Blackbyrd

Well-known member
Joined
Nov 28, 2020
Messages
1,170
Location
TN
Rust repair is looking good. Are you using any type of weld thru coating or epoxy primer on the backside to prevent future corrosion issues?

Great question Mike! Yes the stuff thats not being welded together has an etching primer on the back side, the layers welded together have a silver weld through primer front and back. Its present in some of the pics, but the outer layers will get epoxy primered again once I finish all the welding.
 
To avoid these ads, REGISTER NOW!
Top Bottom