To avoid these ads, REGISTER NOW!

Blacksmithing Projects Journal

OP
D

DoghouseForge

Well-known member
Joined
May 11, 2013
Messages
374
Location
Lakeland, Fl
Despite my metalurgical set backs. (i think i just made that word up :thumbup: ) I mananged to finish the final christmas order and remake the chefs knife I am giving my uncle for christmas.

This post has the butcher block process documented as well, since alot of folks seem to be interested in that process also.

The blade work is basicly the same with the exception of the Differential Hardening/quenching technique that I have begun using on my Kitchen style knives.


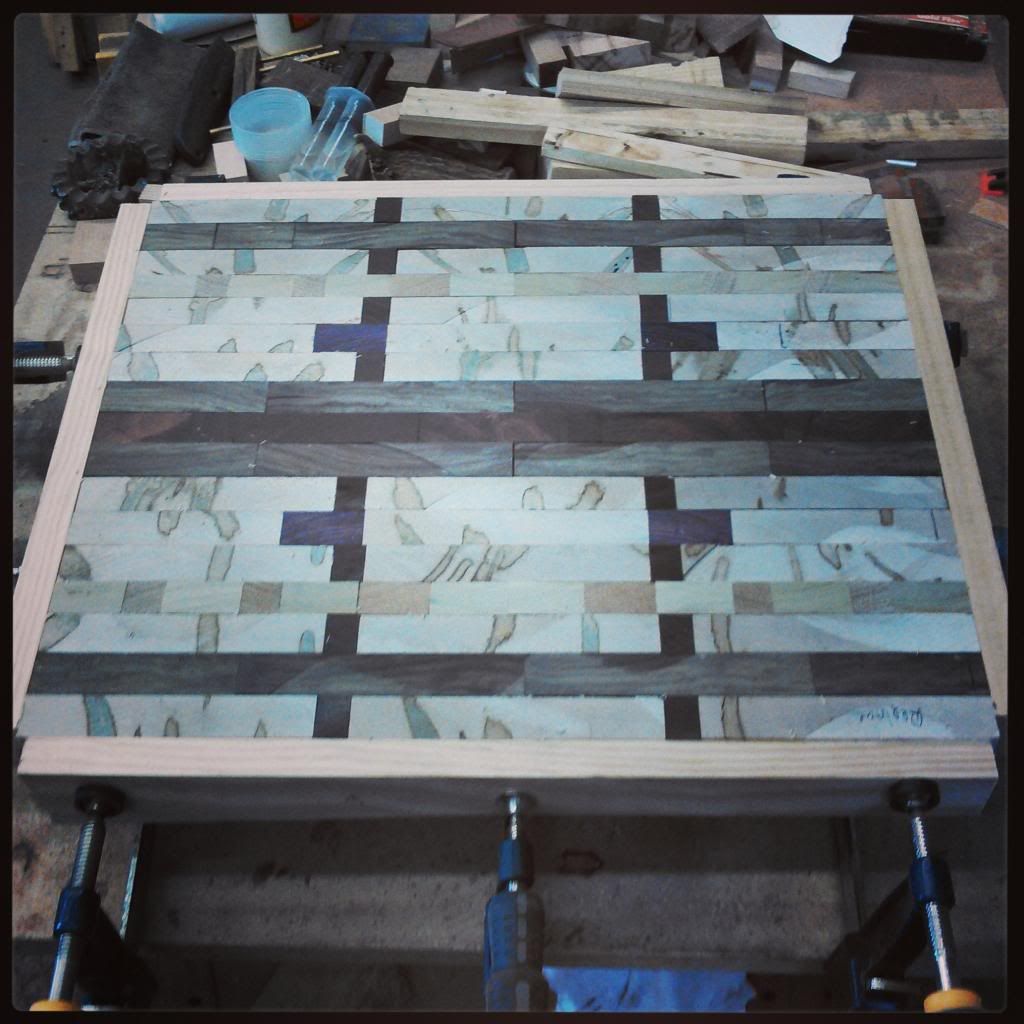
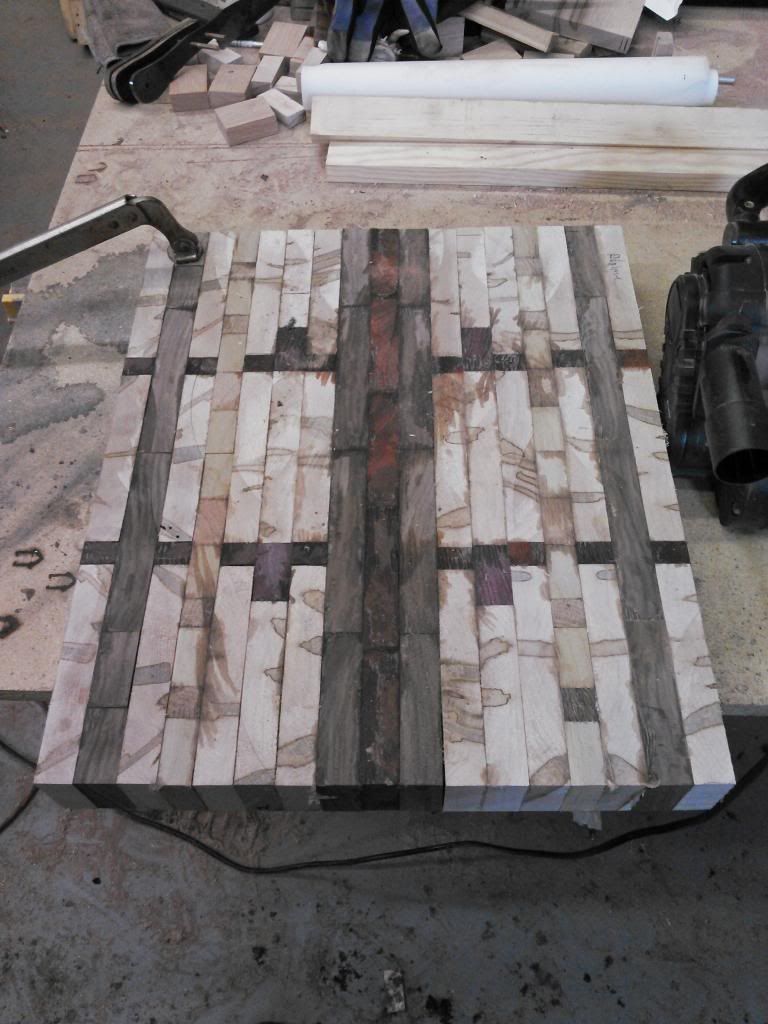
So to start we have a massive Butcher Block cutting board that was ordered as a christmas gift from a gal in Georiga.

I wasnt super happy with this boards looks upon completion but she designed it, and approved the layout before hand. This is a definite case of "the customer is ordering for there taste, not yours".

Its a Cool concept and with the exception of the oak and poplar stripes it is one of the nicest boards so far. I just would have switched the oak and poplar for another row of walnut, but ...thats just me.


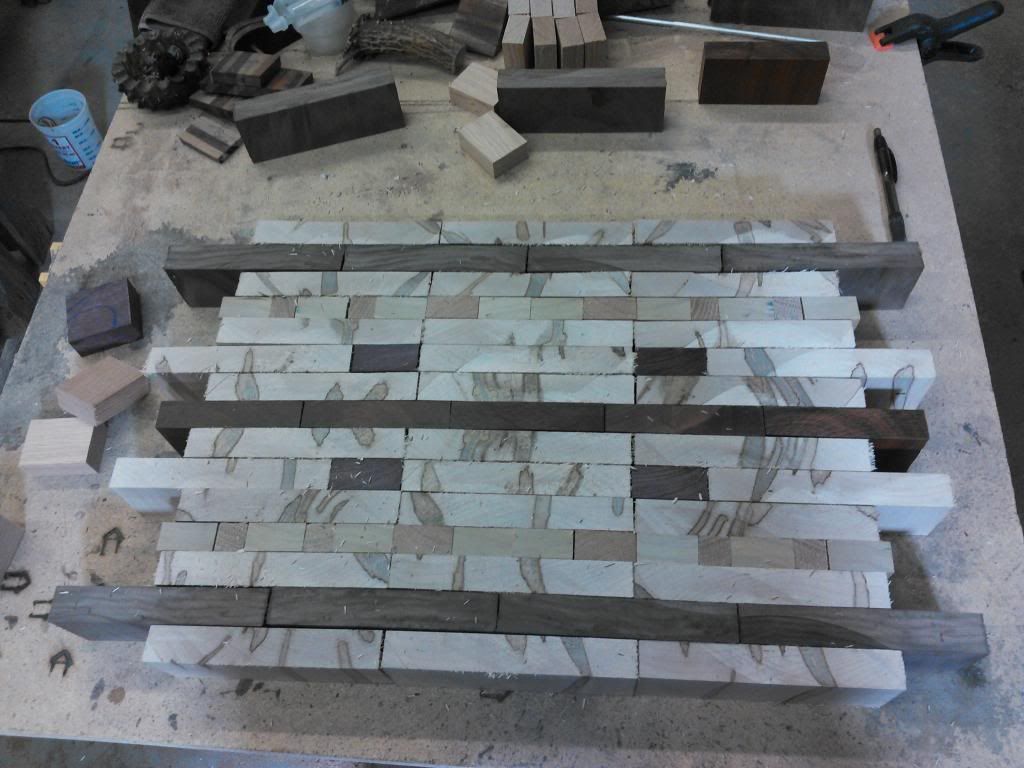
The main wood in this build was Ambrosia Maple with Walnut and Bloodwood accents and spacers. There is some purple heart added for color and the oak and poplar i mentioned before.

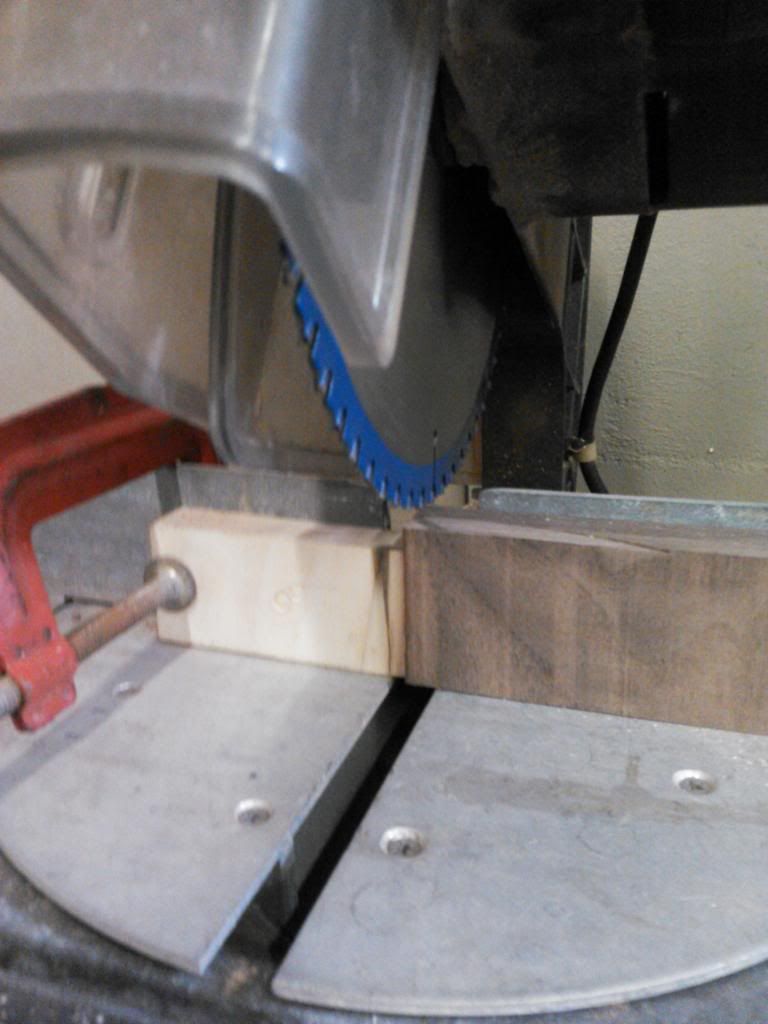
To start I made a jig/stopper on the miter saw so I could cut each board to 2" without having to measure each one. Once these were all cut I played with the pattern until I was happy.


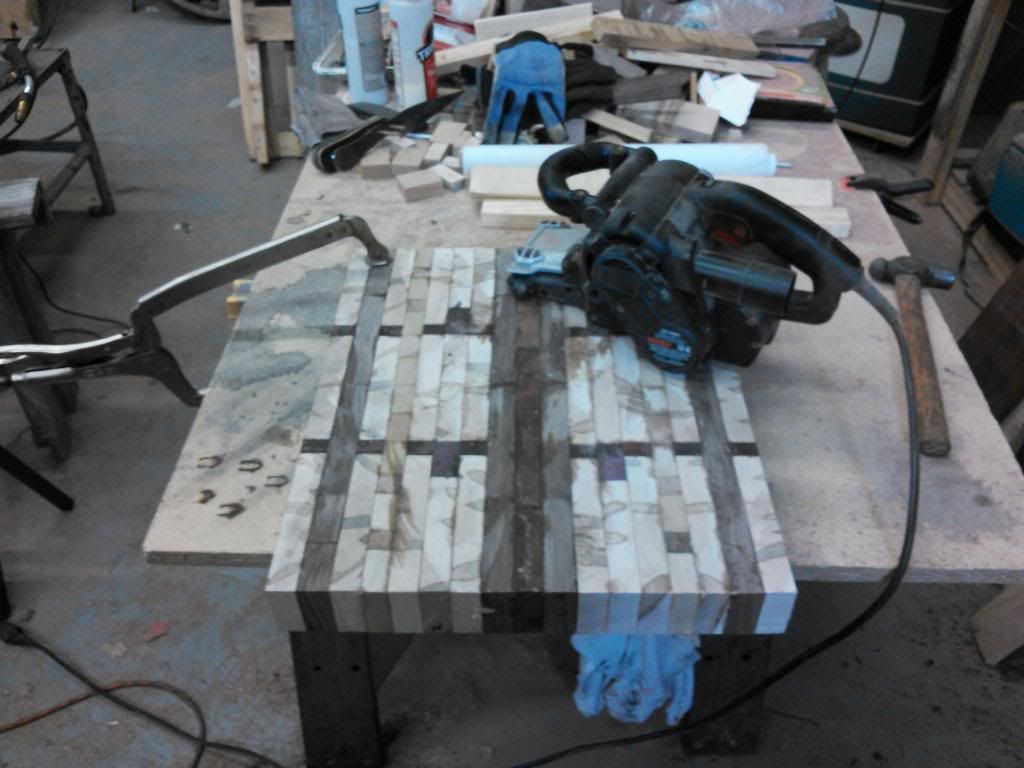
The next part involves moving the little jig/stop up to the blades edge so i can trim each boards edges evenly. In theory( at least in my mind) if i set the trimming to 1/8" then my overall spacing wont change and the symetry stays the way it was before trimming.


Here it is cleaned up


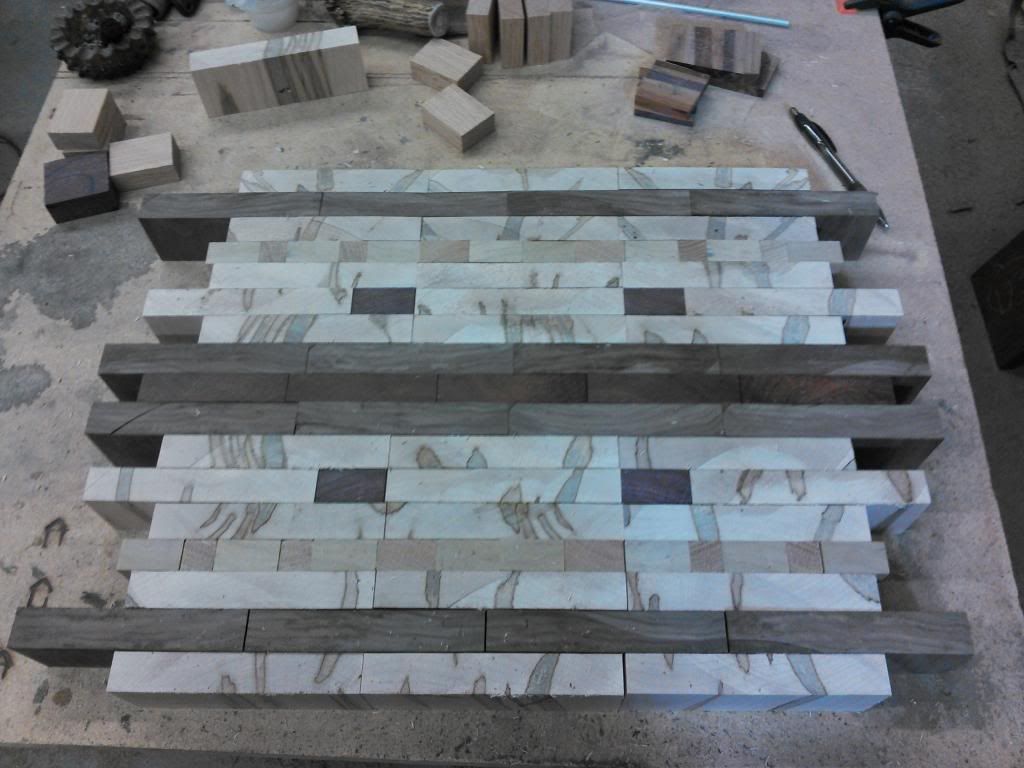
Since the edges of the board are not uniform I need to trim it down so that my clamps can pressure each row evenly. I use a square and basiclly trim the outer boards to the marked line


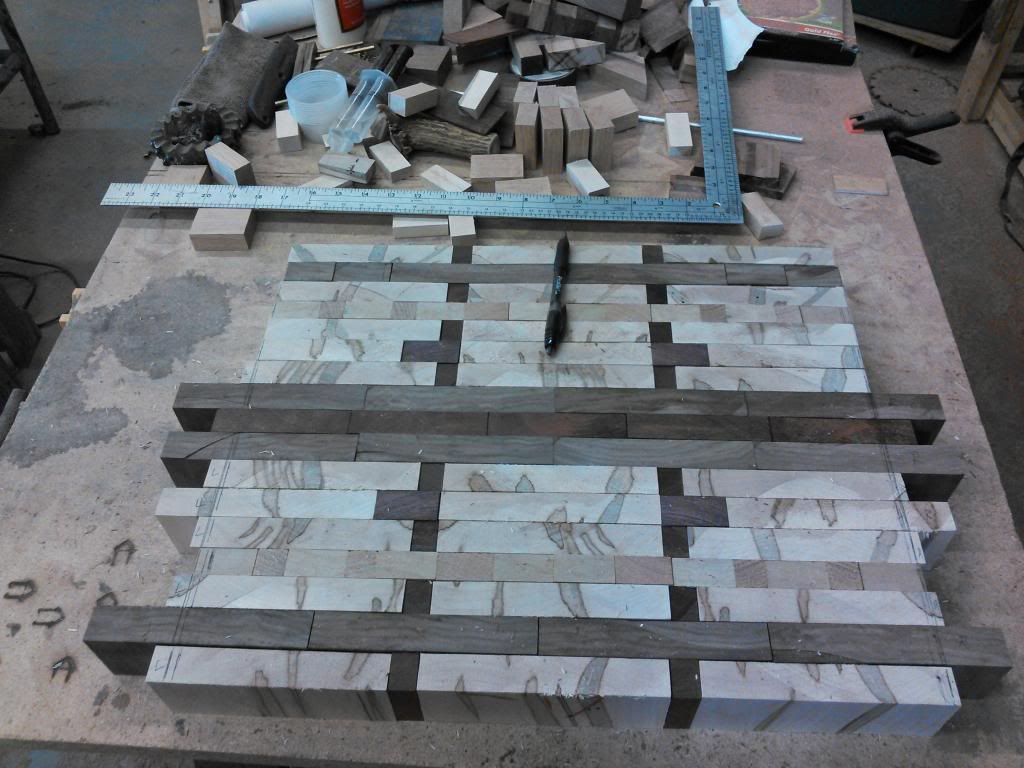
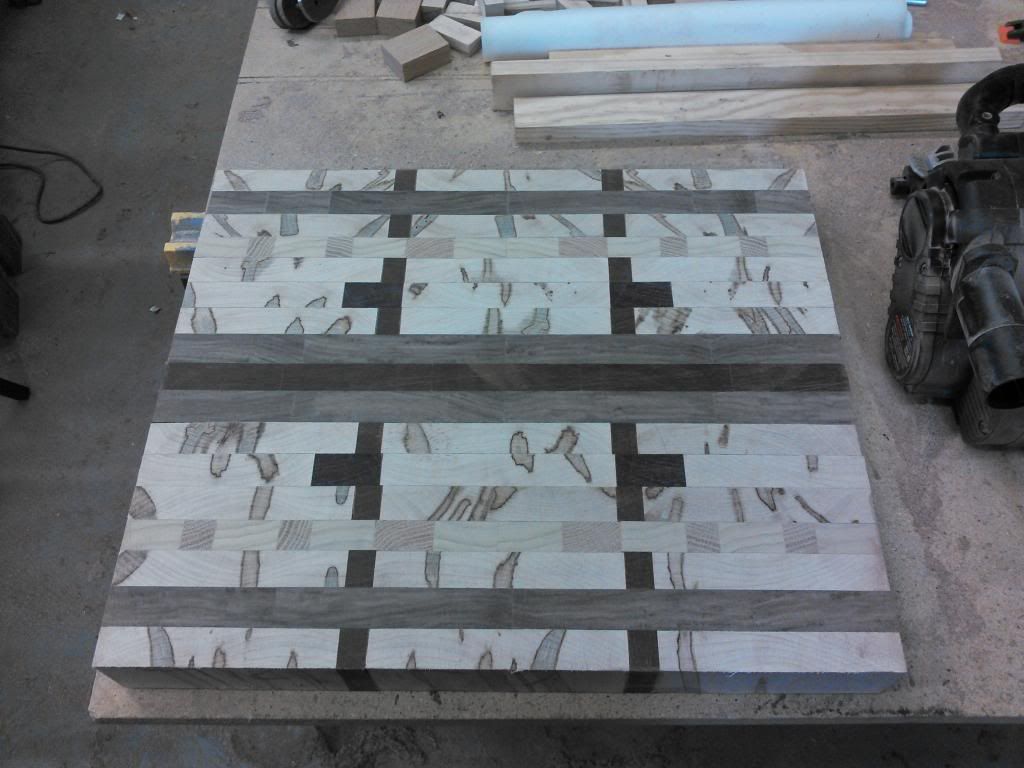
With everything evened up I can compress it to see if there are any obvious issues. As long as the seams are close the clamps will do the rest. This is a good time to cut your side boards. I use soft pine for these so that any slight uneveness can be pushed into the soft side boards and not mess up my uniform contact.


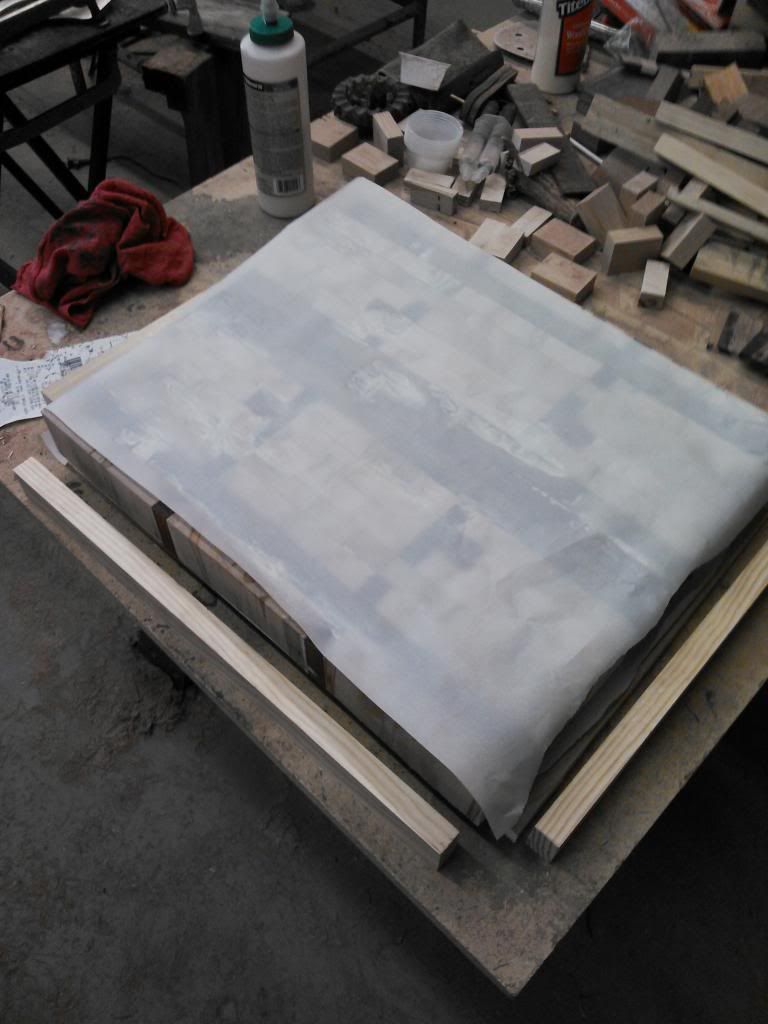
I use cut out 3/4" plywood as the top and bottom pressure plates. These keep the board from curling up or down (pringleing)

In order to keep them from becoming permanent additions wax paper sheets are layed under them. No matter how much over spill comes from the glue I have never had the wax paper stick once the boards were removed.


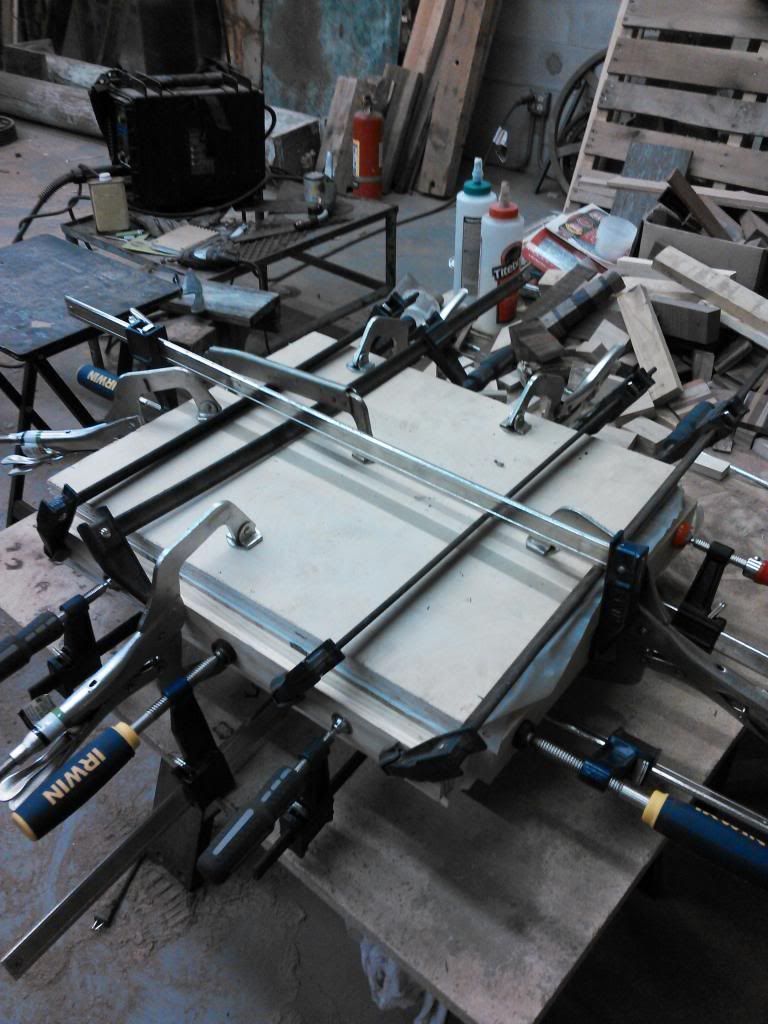
On a board of this size the gluing takes a little while so save time where you can in the process of compression by allready having your clamps together and roughly set.


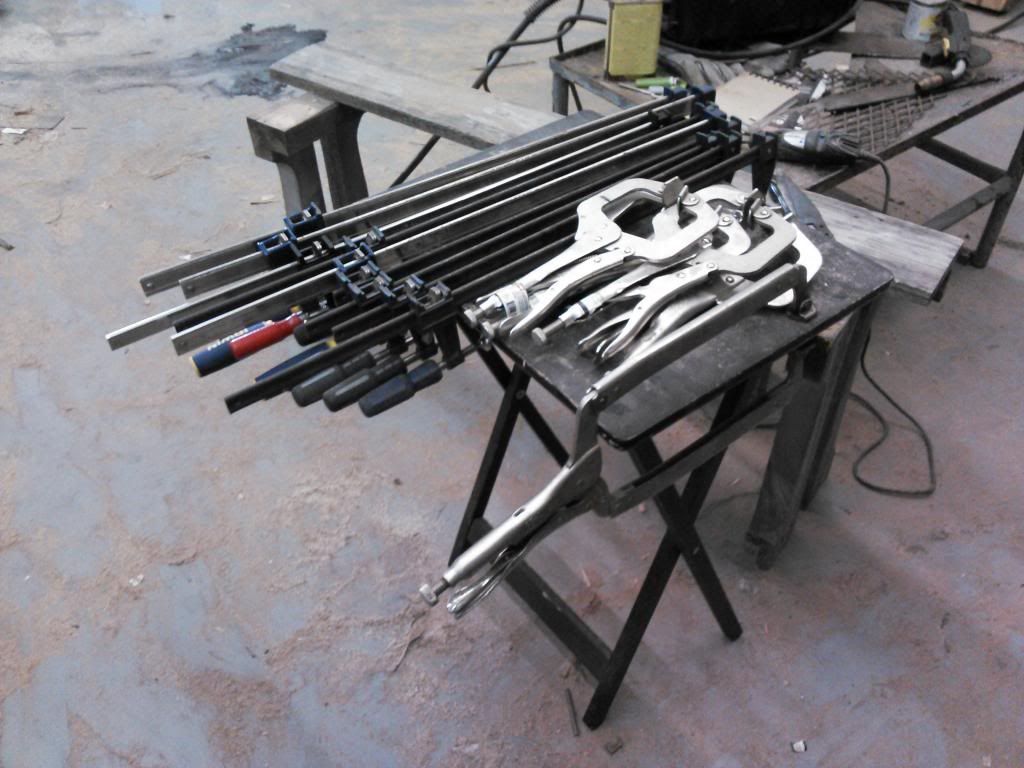
As Aggie has pointed out numerous times its best to stagger your clamps. Once they are all on I tighten them in the same staggered manor.

Remember to go back after your done tightening the sides and put a little extra twist into the top and bottom clamps to relly enusre this thing stays flat.


I let my boards sit overnight and usually its the next evening before i can work on them again. So as a general rule 20-24 hours curing time in the clamps. It may be overkill but I like to let it sit unclamped for a few hours as well. Sometimes the over spill isnt totally set and letting it finish curing keeps from clogging the sander

Unclamped and down right ungly...but...Its flat!


The 3x21 craftsman sander with 36grit belt is the tool for the next job. Clamp it and start working it until any high spots, glue, and lowspots are removed.
Generally it takes me about 30-45 min to finish both sides. I didnt photo it but I run a level across the top and it will show you where you need to keep sanding and where to aviod. If you follow its lead you will end up pretty darn flat for a "by hand" job.


Last edited:
To avoid these ads, REGISTER NOW!
OP
D

DoghouseForge

Well-known member
Joined
May 11, 2013
Messages
374
Location
Lakeland, Fl
Now, these butcher blocks need to be seamless. Especially if they have been paid for and people are expecting a clean finished product.

This one was fairly neat in the seams, but it had one corner that was really bad. Im always amazed at how an entire board can push together perfectly but one seam manages to illude the clamps.


Never fear! I have a fix.
Gather up some of the saw dust from the sander, and some good quality, clear finish, super glue (this is a case where a little longer set time actually works in your favor)


Pack! the crack with saw dust. Im talking grind it in! you want it solid.


Then take the super glue and run a bead over the entire crack. Move slowly so that it can soak in.


Go do something else for an hour or two and then complete the sanding process. The glue bonds to the sides of the wood and also hardens the dust into a solid making a permanent fix to the issue.


To finish the sanding I use a 60 grit belt on the 3x21 and then move to a 6" DA air sander. The DA runs 80, 120, 220 grit to complete the power tool portion of the process. The final sanding is done with 400 grit and a hand block. I dont go crazy with the 400 just enough to help smooth out the end grains.

Its at the 80 grit point that I do any edge work if needed. rolling them slightly keeps them from chipping and it helps hide any un-squareness you might have.

1st coat:

Once home and away from the dust in the shop I apply the sealer


The last step is to lightly sand the first coat with 600grit. This takes care of any uneven grain popping issues (especially the walnut). Then apply the second coat of sealer and let it cure for 24 hours

Here is what you should get.


bottom side:


Allright, thats an updated "how to" on the Doghouse Forge Butcher Block approach. I love the one I made a long while back and its what we use every day in our kitchen but I think the workmanship has imporved a little since then. :thumbup:

Gonna work on a post for the most recent knife builds this evening so that on it way...

Thanks!
JP
 
Last edited:
OP
D

DoghouseForge

Well-known member
Joined
May 11, 2013
Messages
374
Location
Lakeland, Fl
Dude, you opened a can of worms.... To answer these questions, we need more info, particularly about the steel type, quench material, temperatures, and on and on.

Here's a link to get you started down the road. Give us some more info and we'll narrow it down.

Quench Cracking

Im pretty sure the PDF you sent will have the info I need.

Thanks!!

just in case

Material - W-2 High carbon Steel
temp - 1450(non magnetic or really freaking close to that)
Quench medium - Water

Thickness varies from 1/64 at edge to 1/32 maybe 1/8th inch up. (i dont have a micrometer so Im roughing these totalls but they shoud be fairly close)
 

aggierailroad

Well-known member
Joined
Jan 8, 2012
Messages
581
Location
Houston, TX
Can I make a suggestion on the cutting board construction?

I'm going to anyways...


OK, the "slats" with the red arrows are all the same pattern, same with the blue, and the others don't matter because there is no pattern.

If you look, and no criticism, you have a little bit of wave in the pattern where stuff doesn't exactly line up.

Try edge gluing the boards together first. It will add a step, and you will definitely need the cauls to avoid curling, but hang with me here.

Then, cross cut (table saw with sled, miter saw with sled, etc.) the "slats" out to whatever height you want the cutting board to be. Turn them on edge, and now you have a uniform pattern that is dead nuts on. Do the same with the other pattern, and voila, no jagged edges, no worries about fitment, just trim the edges last to square it up. You can also run these through the tablesaw and/or a jointer to get them all to the same width.

It looks good, I was reminded of these monsters when I was in williams sonoma yesterday shopping with the wife.
 
OP
D

DoghouseForge

Well-known member
Joined
May 11, 2013
Messages
374
Location
Lakeland, Fl
If you look, and no criticism, you have a little bit of wave in the pattern where stuff doesn't exactly line up.

.

Aggie, its not the "post **** and be praised journal" its the garage journal. Ive never been in a garage where making something better or more efficiently wasnt the task at hand.

So criticism is expected.

I am fully aware of the line up issues. Its wierd because i usually dont have adjustments like this in the clamp stage. It was lined up correctly after being glued so i must have over tightened one section or something. This has been eating at me since i unclamped it. I almost didnt send it to the lady because I hate it so much. Its literally all I see when i look at it.

As far as the ambrosia patterns lining up, that was never intended. They were supossed to be random. Only the bloodwood spacers and purple heart sections were suposed to be symetrical.

My wife told me to quite being a *****...:sad: If the lady doesnt like it Im sure Ill hear about it and ill remake it if needed, but My wife says thats not going to happen...we shall see...

In reguards to this method you listed...Im just plain confused....are you saying glue entire boards together, end to end, say in 6 ' lengths. Caul and clamp like I do with my serving boards since there is only one joint direction to compress, and then cross cut 2" sections with the table saw or the big radial arm saw. then instead of needing to clamp it 4 ways I would just need to worry about 2???

If im going to repeat a pattern I would need a section of full boards for each different row, and then mix and match each style?


Thanks Man!

JP
 
OP
D

DoghouseForge

Well-known member
Joined
May 11, 2013
Messages
374
Location
Lakeland, Fl
So the other part of this order was a 8" chef knife. She wanted it rough forged with the Hunter Drop to the blade and a copy of the laminate handle I made for a knife a while back. Since this was to be a proper cooking knife I didnt contour the bottiom of the blade like I have done in the past. It has a slight rocker to it but its basicly a flat bottomed chef knife with a different top line.

I also needed to build a traditional chefs knife for my uncle's christmas presesnt. He is a special guy, and has been a great role model for me. He taught me to ride a bike, shoot guns, what to do with the ladies :thumbup:, and most importantly to duck hunt.

He is a professional Chef so this knife needed to be correct! and functional.

I really forged alot of these knives blades design. the general shape was cut and ground but the taper was almost completly forged. Since my uncle and I enjoyed our duck hunting I made the handle of his knife to mimic the shape of a shotgun stock. I think it turned out pretty cool.

for anyone who's missd this part (recap)


heres the general shapes coming together.


blades are almost completly forged into the finished taper


Handles ground but still no need to grind on the blades since the thickness isnt an issue after forging.


after some work on the belt sander.. Im not positive but its probably up to 80grit at this point


I was really liking the profile of this "shotgun Chef"


At this point they are ground pretty close to the thickness I wanted and ready to be hardend.


Now, Im gonna change things up a little bit with the quenching. Instead of dunk quenching the entire blade I want to only harden the cutting edge and at the same time soften the spine even more. This is ideal for a kitchen knives because of the flexibility you achieve while still maintaining a super sharp and maintainable cutting edge.

To do this I take an aluminium roasting pan and fill it evenly to the level at which I want the blades to be hardend to.


Then I use the torch to selectivly heat the blade from about half way down to the tip of the cutting edge
You achieve this by passing the entire blade back and forth through the heat. Leaving the knife in one position scalds the steel and if its to close to the fine side it will cut through it. (been there, F'd that one up bad, cussed alot, threw it against the wall)

Check for non magnetic and set it evenly into the water, oil, or brine.

(differentially tempering/hardening air hardend steel requires other thechniques, like the use of clay to insulate sections of the blade while the other are exposed to the air and harden faster. )


when you pull it back out, let the rest of the knife cool slowly to get as much softness from the residual soaked heat the rest of the blade pulled in while the edge was hardend.
It will developes a hardening line or point. Its very clear to see and can be seen after all the finish is done if you know its there
 
Last edited:
OP
D

DoghouseForge

Well-known member
Joined
May 11, 2013
Messages
374
Location
Lakeland, Fl
So with the hardening done I do the standard tempering at 500deg for 1.5hours x 2

after the final grinding I decided on the special laminate burl I had from a few months back for the "Shotgun Chef" and the order got the last of the exotic laminate. The Burl is comprised of Blue redwood burl, purpleheartwood, and walnut.


from here its the standard dry fit and pin
if you look at the burl laminate you will see i snapped it at the top when i was pushing a pin through. It popped right at a walnut junction so in the next photo you can see how I fixed it.


clamps and let it sit overnight. Rushing this will cause your handles to seperate during the shapping process due to the heat transfer.


out of the clamps and roughly ground


here are the handles about 120 grit in the process


and finished but not sealed


got some sealer on the exotic laminate


and both handles finished and polished


here are the final knives. Im really happy with them. The rough look isnt my ideal, but it seems to be what people want so Ive been leaning to that direction for a while.

The 8"chef


The "Shotgun Chef"


Got the balance right on the money!


I had fun making these and luckily didnt have any of my "Quench Crack" with them either....wheww...the knife I posted a week or so back that is pictured in the differential quench example photo got the cracks and I had to grind almost half of it away...

So this is the final christmas order


and with that the Doghouse is closed for a while so I can work on my jeep!

Thanks for checking it out

JP
 
Last edited:

aggierailroad

Well-known member
Joined
Jan 8, 2012
Messages
581
Location
Houston, TX
Thanks Thomas! Appriciate it!

Dont mind Aggie and I , we are **** retentive sons of ******* so untill the board is correct, to the micron, I dont think either of us would be happy.

JP

I had a sneaking suspicion it was bothering you, which is the only reason I said anything...

This is why I'm never getting a forge and hammer, you'll be nit-picking me to death!
 

aggierailroad

Well-known member
Joined
Jan 8, 2012
Messages
581
Location
Houston, TX
Thanks Thomas! Appriciate it!

Dont mind Aggie and I , we are **** retentive sons of ******* so untill the board is correct, to the micron, I dont think either of us would be happy.

JP

I was going to go down and do some mockups... but... this guy explains it fairly well. Just do what he does in the first few steps for those patterned pieces. The rest can run wild and be cleaned up with the table saw. Now you're only clamping in one direction at a time. Will slow you down, but ease your OCD mind.

I saw a clamping jig the other day for these that sets up your bar clamps. Take a 2x4 and rip it lengthwise (2x2x8') then, cut them to length to about your biggest board size. Crosscut grooves as wide as the bars on your clamps for a tight fit - as many as you want. Lay the two boards out, set your clamps in and now they are facing the right way and ready for you to glue up, eliminating one step in the "panic" glue up process.
 

KMinAF

Well-known member
Joined
Mar 5, 2011
Messages
698
Location
Fairview Utah
A true craftsman makes the job look easy and it isn't until I have tried it myself that I gain a true appreciation for the talent involved. My hats off to you! I tried it, I liked it and I will do it again. Here is my first go at making a flower. Thank you for sharing and instructing.

DSCF6267_zps7f2be546.jpg
 
OP
D

DoghouseForge

Well-known member
Joined
May 11, 2013
Messages
374
Location
Lakeland, Fl
A true craftsman makes the job look easy and it isn't until I have tried it myself that I gain a true appreciation for the talent involved. My hats off to you! I tried it, I liked it and I will do it again. Here is my first go at making a flower. Thank you for sharing and instructing.

DSCF6267_zps7f2be546.jpg


Awesome work! That looks great, your texture and brasswork really look the part. :thumbup:

You just made my week posting this!

Thankyou and dont be shy, keep it coming!

JP
 
OP
D

DoghouseForge

Well-known member
Joined
May 11, 2013
Messages
374
Location
Lakeland, Fl
I just love this thread.:thumbup:

True master craftsmen at work.

Thanks 1/2 cup! At the risk of offending the actuall Master Craftsmen in the world, I would say "moderatly adept" craftsmen. But thanks:thumbup:


Here's something I bashed out many years ago, using Oxy-Ace for heat.


Nastyzen, that's alot more work than people probably realize. Did you start with square and forge it round or with round and forge in the edges?
I have to admit its refreshing to see someone make a toilet paper holder that isnt just plain cheesy or a horseshoe with a rod welded to it.

I keep going back to look at it...I think you may have jump started my next idea!. :thumbup:

Thanks

JP
 

NASTYZEN

Well-known member
Joined
Jun 11, 2010
Messages
2,823
Location
St-Colomban,Que. Canada
I have an Austrian friend who is a master blacksmith. Over the years I've picked up on some of his techniques.
I am strictly an amateur black smith myself.:)
For the toilet paper holder, I used 1/2'' dia. hot rolled round rod. Textured the entire length of rod first then tapered the ends down.
Just free handed the bends using a Oxy-ace torch.
For the finish, I wire brush all the scale off with a bench grinder mounted wire brush. I use plain old floor wax applied to the part with a brush after I've warmed it up with the torch. Once cooled down, rub down with a rag.
 

78RS_to112SS

Well-known member
Joined
Oct 19, 2013
Messages
100
Location
Northern Ontario, Canada
Some time ago I tried to make knives from rail road spikes. It frustrated me that I could not keep the handle straight when twisting it so I modified my adjustable wrench and MUCH better.
su9u3uge.jpg


uzenuhun.jpg


This is another I kind of free handed. Not practical but more like you would see in a pirate cartoon lol.
a8y5ahe7.jpg


Sent from my iPhone using Tapatalk
 
OP
D

DoghouseForge

Well-known member
Joined
May 11, 2013
Messages
374
Location
Lakeland, Fl
Some time ago I tried to make knives from rail road spikes. It frustrated me that I could not keep the handle straight when twisting it so I modified my adjustable wrench and MUCH better.
This is another I kind of free handed. Not practical but more like you would see in a pirate cartoon lol.

Sent from my iPhone using Tapatalk


Those look great. Nice spacing on the twist work.

Im gonna make a wrench like you posted. Thats an ingenious solution. Ive ruined a pair of tongs with the torque twisting generates so this might just be a good solution.

by the way , The pirate Knife is awesome! . :) My nephew would love something like that to go with the chest I made him a while back. Thanks, brains spinning...

JP
 
OP
D

DoghouseForge

Well-known member
Joined
May 11, 2013
Messages
374
Location
Lakeland, Fl
I have an Austrian friend who is a master blacksmith. Over the years I've picked up on some of his techniques.
I am strictly an amateur black smith myself.:)
For the toilet paper holder, I used 1/2'' dia. hot rolled round rod. Textured the entire length of rod first then tapered the ends down.
Just free handed the bends using a Oxy-ace torch.
For the finish, I wire brush all the scale off with a bench grinder mounted wire brush. I use plain old floor wax applied to the part with a brush after I've warmed it up with the torch. Once cooled down, rub down with a rag.

Thanks!

JP
 
To avoid these ads, REGISTER NOW!
OP
D

DoghouseForge

Well-known member
Joined
May 11, 2013
Messages
374
Location
Lakeland, Fl
Happy New Year everyone,

Thanks for welcoming me to the Garage Journal this year and being so supportive of the thread and its projects.

Ive learned so much from you guys in a short period and even made a few friends in the process. 2014 should be a good year for the Doghouse...Lots on the to do list and I look forward to sharing it with everyone.

Thanks again for the comments, advice, and motivation. You have truly made this a worth while endeavor! :thumbup:

JP
 
OP
D

DoghouseForge

Well-known member
Joined
May 11, 2013
Messages
374
Location
Lakeland, Fl
Thanks Donmillerx,

I appreciate the link... Im planning to start building my own tongs soon but the tong blanks they sell are pretty tempting!

JP


So hope everyone had a happy holiday,

Its been a wild january so far around the Doghouse. A local store in downtown lakeland asked to carrry my serving boards and cutlery. I agreed to the serving boards, but not to the knife stock they requested. Instead I agreed to building a knife set for display in their store front that could be special ordered by clients. The labor involved in creating enough inventory for a store display that can be refilled immediatly just isnt an option for me at this time.

So aside from Farriery the saws have been humming and the sanders have been running in order to get the Brooke Pottery Order completed.

Heres a link to their web site. It will give you a feel for the type of store. The previous cutting/serving board maker retired so the time was right for me I guess. Judging by the fact that everything cuttiing boards related is sold out, thier eagerness is understood.

http://brookepottery.com/

Serving board factory aka Doghouse Forge...


this is taking the "Aggie method" to a whole new level!


It's kinda sad...I got a bunch of gift cards at christmas to use on my jeep restoration, and spent all of it at HF on clamps...Bitter sweet...bad side is I dont have any "free" money left, but the up side is I can clamp 4 boards at a time now. Before I could only do one per day basicly, so this helps alot!


So the knife set is going to be traditional but very "doghouse" at the same time. Im using so amazing wood (no pics untill later , sorry...cant spoil it..:) )

Going with a nice mix as far as styles:

Santoku, Mini Cleaver Chopper, 7.5" traditional Chef, Pairing, mini fillet, and two different hidden tang slicers.


Since the last posting I have learned how to do hidden tang handles correctly and I cant wait to show you guys! So freaking slick how it works...

and...
I found this baby for $100 on the big CL monday, new in the box...couldnt get there fast enough. 2x42 with the 1/2HP motor..This is gonna change the knife making from night to day. Its no "Bader" but compared to the 1x30 I have been using....no comparrison...plus, if i dont find the power good enough I can just put the sander arm on my extra baldor and that motor spins with so much torque/rpm it creates a time vortex! :scared:


A quick note for Valentines Day...its coming soon so don't space out and forget...
Here's a variation on the Horseshoe Heart... from the very first post...:eek:

This is for a friend of mine. He ordered the word love forged in the handmade horseshoe style and a large heart as well..


Ok so thats the news...

I saw a couple differnt guys on instagram making an axe from rasp and since rasp are kinda my thing...i decided I needed to make one as well.

Its stupid simple...


Break it just like the horseshoe toe bend from the very first post


Once you have it started use the horn and fold it on around itself into a "u"


pick the point you want your handle drift to begin and drive the hammer into the bend you created. flip if over and drive into the other side. the secret is to use the edge of the anvil to set the crease...just like when we made handles a while back...


keep working it tighter and tighter untill your close to the size you want


Once your close use a pipe to even out the distances around the drift...unless you happen to have a 1.5" solid bar lying around you will need to be gentle so you dont crush the pipe.


Next we are gonna forge weld the two sides into one solid section...I use "iron mountain flux" ...borax works as well, but I find the formula in Dr. Millers blend to give an edge in the process.


Get the steel to an almost white heat and then brush the seem clean...apply a bead... bead/layer/line etc... of flux to all the seems in your weld. If your steel is the right temp it will melt into the seems as you are pooring it on..if it completly falls off as you move it around to do the other side it needs to be hotter. Some of the surface flux will fall off, but you will know what im mean when you see it melt into the cracks.


For the sake of the photographic process I got this one really close to the right temp...If you look at the steel about half of it is noticably whiter than the other...this is what you are looking for as for as color..


Unfortunatly I cant take pictures and forge weld at the same time...but its not about how hard you can hit it...Instead you want to work your seems with good even , overlapping blows. think of it as hemming the metal instead of pounding it together. the next series of pics shows the temp/color of the steel when Im welding it...

Work your edges and dont be shy about reheating when needed. if you only get one side done before your color changes thats fine, put it back in and start again with it hot. eventually you will belnd all the edges together. Re-flux each time and get it superheated. With the edges allready welded you can wail on the center and weld it. If you try to weld the center first there will be no sides to contain the mass, and it will just flatten out and push to the sides. With the sides as dams the center forges through to the other side instead of outward...
 
Last edited:
OP
D

DoghouseForge

Well-known member
Joined
May 11, 2013
Messages
374
Location
Lakeland, Fl


and sometimes you run out of propane in the middle of a very important process...:headscrat :thumbup:

Here's how far i got... I will finish the welding tomorrow and continue on with the shaping of the axe head...

Notice the seems... some areas have blended better than others...this is why is important to work evenly and in smaller sections...I knew the propane was almost out so I was trying to hurry... Ill tidy this up tomorrow and post an after pic...this is actually a good learning momnet so I guess the propane running out is was a good thing.


Ok, i will get the second section to this project posted soon. Untill then everyone be safe and have a great weekend!

Its crazy around here!

Anvil Surfing! late night... :lol:


JP
 
Last edited:
OP
D

DoghouseForge

Well-known member
Joined
May 11, 2013
Messages
374
Location
Lakeland, Fl
This is a continuation of the Battle Axe build fom the previous post. If you missed it jump back a bit to see how this got to where it is...


Aggie and Nastyzen I appreciate it.

The power/air hammer is on the list but its a ways down at this point. My mentor has one buried in a storge unit. He hasnt used it in years but power hammers are kinda like kids, you dont really want someone taking them out of your sight...Even if they are dirty and forgotten. :)

I went early this morning and finished the "Battle Axe"...changed its name...I like it... its amazing how much you can get done with a full tank of the pane.


So when I ran out of propane yesterday I had just started forge welding the two sections of rasp together. I was so focused on getting it done before it was empty that I made a careless error and left out a rather important piece of the equation...I was suppose to cut and place a third layer of rasp in between. This is needed to make mass and allows drawing of a large head...Oh well, I figured to late now so lets see what we can pull out of our bag of tricks....


Yesterday it ended up here:

I also grabed a nice thick oak dowell for a handle


while it is welded in places it needs to be consistantly blended to handle the forging of the blade that comes later... so I reheated, refluxed, and repeated the work to the edges...


If you remeber from yesterday, you need to weld the sides/edges first so that when you forge the center it has containment and doesnt blow out the sides instead of forginging down through its self. This couldnt be a better photo of what im taking about...Notice the literal bubble in the center of the blade? The sides are all forged so there is a pocket in the center where we havent worked yet. As the metal is superheated it builds pressure and forces the 1/8" steel upwards like a ballon...

Without the sides welded this wouldnt happen and it shows me that we are ready to weld the centers together


after working the center weld one pass I reheated and the bubble size decreased so I know im closing it up


So after finishing the center weld and checking the edges I am confident that my axe head has become one solid peice of metal instead of two

Here are the seems


Now on to forging the heads taper and shape

Here is what im going for


Now if I had rememberd the third layer this would be a breeze, but since im already playing with a short deck this is going to be a tall order for the steel I have to work and draw from...


So to start i want to let the steel know what im thinking...It sounds silly, but I need the steel to get the idea that its going to move in a certain direction...once all the molecules are heading the right direction eveything flows better...

So i drive the edge of my hammer into and towards the corner im looking to create. I drew an arrow on the anvil for reference...


Then work the hammer flat and overlapping to smooth out the area. When you do this step the metal moves into the creases you created before and expands the shape


If you notice im getting some "buck" in the opposite corner...Even driving away from it the force in the mass moving transfers enough to upset its location. To correct this turn the piece around and drive flat blows away from you instead of toward you. Your still forging the same direction but your hammer is coming from a different angle. there is another arrow on the anvil for reference


That straightend it back out but im still really short for my long drop at the bottom...

 
Last edited:
OP
D

DoghouseForge

Well-known member
Joined
May 11, 2013
Messages
374
Location
Lakeland, Fl
Here is where you have to stop and figure it out...you draw your shape on the blank and look at where there is metal where there shouldnt be???
Here I have a decent amount in front of my cutting edge and on the upper edge as well. The steel in front of the cutting edge is to thin too pack into its self so that metal is pretty much wasted :headscrat

But...the steel above my line is 1/8" thick so if i can source the steel from there, and move it all the way across the blade I can use its mass to fill where im missing...


Here is the blade after i worked on that theory for a bit...Not enough to make it all the way but way better than before...


So at this point I have robbed peter to pay paul and im am out of steel...Instead of pushing it to failure I will just make the best with what i have (another 1/4" of steel would have been nice :( )


So i went to the grinder and cleaned up my edges...even after removing a bit my seems are solid so that was a really good weld.


Here is what I was able to salvage...I happy with it. It still looks mean and Im sure it would do its job...


So block brush untill all the slag and excess flux is off and then touch up the shape of the handle drift...I used the same pipe as before and just tapped it back into form


Then fit your handle....make sure you fit it upside down the first time like me :headscrat :)


Then knock it off and try it again....


Now to secure it to the handle you need to rivit it in some manor... I chose 1/4' copper rod since it was handy from my knife building and easy to rivit cold.


use the drill press and create your holes. then feed the rod through and leave about 1/4" on each side


They make specific tools for this next step, but I find the round side of my driving hammer and the anvil work just fine...

lay the head with the rivit on the anvil face and drive it into itself...


use some sand paper to polish up the copper and take off the anvil marks


i burned and sanded back the handle from 80 - 220 grit. Its a nice technique for your hammers as well. There is no smoother finish...especially after your hand oils work into for a couple weeks..


Well here it is...


It didnt look right on the bench so i moved it to a more natural element..:)


This was fun...and very easy...the forge welding is the hardest part but if you take you time its not bad to learn...Its also not nearly as difficult to shape the head if you start with enough steel in the first place.:eek:


Thanks for checking it out and have a great week!!!!

JP
 
Last edited:

aggierailroad

Well-known member
Joined
Jan 8, 2012
Messages
581
Location
Houston, TX
That is pretty sweet.

Couple of questions... Your anvil is beat to hell. Is that a "beater" anvil and do you have a smoother one for finish work?

Secondly.. how does it throw? :)
 

Farmall450

Well-known member
Joined
Dec 23, 2011
Messages
13,354
Location
Marengo, Illinois
Awesome!
I've got everything except the forge, so I stick to welding horseshoes into flowers & wiring them on the fence, or using my anvil to manipulate stuff needed for projects (not fun ones, ones that need parts fabricated/straightened out) with a torch.

I will keep my eye on this.
 
OP
D

DoghouseForge

Well-known member
Joined
May 11, 2013
Messages
374
Location
Lakeland, Fl
That is pretty sweet.

Couple of questions... Your anvil is beat to hell. Is that a "beater" anvil and do you have a smoother one for finish work?

Secondly.. how does it throw? :)

that's not beat to hell, its just dings up from me trying to draw that blade down and gets more noticeable when the face gets really hot , like when you forge weld for 15 min.... One good round of forging out one of those rasp into a knife blank will flatten it right back out. I usually use the front half of the anvil for stuff like what you see, and the back half stays perfectly flat for when I'm doing my finish work. that Peter Wright is basically only used for pounding on stuff anyway. The horn is so big and blunt its not really useful for scrolling or making horseshoes. The Emerson I have on the truck is better for fine tuning stuff. I just back it into the shop and run the forge in the truck so I can use either one. Having the 5.5" face over 275lbs is much nicer for drawing things out. My next one is gonna be a long skinny 200lb hay budden anvil. I will put them at different stations so I wont need the truck inside anymore.


You are a very astute man... I guess you noticed the extra marks in the cypress stump...

when I get it right it flys pretty good but the blade started to bend from being so thin so I fixed it and now just fight imaginary enemies around the shop. :thumbup: you cant pick it uo without doing some maneuvers...:)

next time I make one im gonna add a bunch of thinner layers and include cuttouts from the old molybendium saw blade steel. It will be a very basic damascus... but thivk enough to hurl at oak trees if I desire

JP
 
OP
D

DoghouseForge

Well-known member
Joined
May 11, 2013
Messages
374
Location
Lakeland, Fl
Awesome!
I've got everything except the forge, so I stick to welding horseshoes into flowers & wiring them on the fence, or using my anvil to manipulate stuff needed for projects (not fun ones, ones that need parts fabricated/straightened out) with a torch.

I will keep my eye on this.

Thanks man!

Dont be shy, post up pics of your projects when you do them

jp
 
OP
D

DoghouseForge

Well-known member
Joined
May 11, 2013
Messages
374
Location
Lakeland, Fl
Got an update that is almost totally Wood related tonight...

This is the largest single order so far ,and I have to admitt that the extra clamps and a rather !MASSIVE! change in the buthcherblock process made it possible in a little over a weeks time of evenings and a couple shop days.

The Serving boards have become pretty efficient in their process, but the next step is to use the money from this sale to buy a planner. Not having to rely on my own skills with the table saw and 3x21 sander to true everything up in thickness will be a definite step in the right direction. Plus as far as I understand as long as I sand the excess glue off I should be able to feed the assembled boards through after gluing if I need to even out a shift or low spot caused by human error...It would seem like a board sitting 1/16" lower than the others isnt alot, but when you have to bring down the entire board a 1/16" and keep it level with a 3x21 sander it adds up real quick.


Anyway, the knives are next on the list for the shop order, and I just got a big shipment of belts from "trugrit" tonight so this weekend at the horse show I will be manning the grinders...Since I had a rain out today with farrier work I went ahead and layed out some handle selections and pins. Im happy with whats on the table so there will be a nice range of styles to choose from at the stores display.


Heres the knife layouts:

There's a nice redwood burl with solid brass caps (this is my first addition of brass bar so im excited about the process)
Also included are Bacote, Bubinga, B/W Ebony with a purple heart centerline, some type of spalted wood (possible pecan?), Walnut and red heartwood with a yellow heartwood spacer, and a couple variations on my newest laminate creation. Rosewood with laminate caps for the chopper and full laminate for one of the pairing knives.

The hidden tang knives will also be a first, but I have been "learned" on the process so Im looking forward to it.

I guess last is the drop point hunter/skinner with brass bolster and deer antler handle. This one is gonna be fun!


The laminate was fun and easy to make for once...I just saved all the trimmings from the serving board strips and pressed them into one solid block. Then I used the bandsaw to slice off 3/16"sections...I have enough to play with it on a few different projects and so far its looking really promising.


Before I get into the btucher block changes here are the lates serving boards

Added bubinga to the roster this go round...


The walnut/yellowheartwood striped board was an experiment with grain direction..The walnut is almost diagonal and the yellowheartwood striping is completly square with the rest of the board but if you look at it dead on the walnuts grain pulls your eye away from center and makes the yellow appear bowed heavily...Its neat but not the best effect...I had to measure it repeatedly because I swore i made it curved...


Bubinga on the outer edges... purpleheartwood and red oak


This is my favorite this round... Ambrosia mapel with the yellow and purpleheart racing stripes... and a suprise purple heart sidewall


Ambrosia/Bubinga/yellowheartwood


This one was made as a remakef or another customer of the one from last November ...I love this layout and really played with the asemetry with the padauk lines and the sharp color variations in the walnuts grains.
 
Last edited:
OP
D

DoghouseForge

Well-known member
Joined
May 11, 2013
Messages
374
Location
Lakeland, Fl
Now the butcher blocks... Im not sure if you guys saw Aggierailroads post in the last woodworking update about making patterns seperatly, and then building the boards in one direction instead of trying to center it from four...

I had absolutly the wrong understanding of what that post meant... :eek: and Im kinda thinking I might have been the only one...:headscrat

Anyway, this is what he meant...

descide the various patterns in the layout and glue entire board lenghts together...caul them like the serving boards to keep them flat and then when its dry use the table saw and slice it into strips at the depth you want the board to be.


These boards had two main patterns and one Bloodwood row so I made three different glue up sections... then layed them out and lined them up. Since they only move in one direction getting the lines crisp was a breeze. I could have been a little more creative with the grain directions but due to a couple goofd cuts certain pieces had to be the outside or end units and it wasnt worth fighting the whole board for it.


here they are all finished up


Red oak/Poplar with padauk and purpleheartwood striping...I decided to feature the padauk as the end caps because its so vibrant its almost glowing !


Redoak/poplar with bloodwood accents


Red oak/poplar bloodwood accents...this ones a little larger than the others...

 
Last edited:
OP
D

DoghouseForge

Well-known member
Joined
May 11, 2013
Messages
374
Location
Lakeland, Fl
Now this last board became a person adventure...I found this crazy figured poplar at Lowes of all places...their poplar is usually plain jane and has zero color but these were nice! So i paid my $12 and had a vison...

I cut the two boards and glued them in what I thought would yeild me a replica of what the long grain looks like once i had flipped it over to endgrain...I was wrong...

The top pic in the photo below is what it looked liked simply presented with the endgrain up and in order as I cut it...
the second pic is where my mind started to get a little bit beyond my skill level or "pay grade" as my mentor would say...:) I fliped every other one over and made little matched pairs...


I was happy with this and was about to glue it up when I realized...
If I cut this down the center and flip one side around i can face the pairs at each other! So i commenced to cutting each section down the middle after i had worked so hard at gluing them all together...:headscrat


Now, at this point I had to call in reinforcements, so I sent Aggie a photo...He pointed out that if Im going to "bookmatch" something the grains in the center need to be alligned as well..otherwise your just pointing **** at each other... So i proceeded to trim all my connections and got the center aligned pretty close to perfect... Unfortunatly since the darker (rear) rows were still glued to the center I didnt realize i was going to be messing that alignment up and the end result is bitter sweet...


There is no question this thing is RAD! but the uneven rear row is killing me...The center and "ink splotch" section is perfect but im gonna have to try this again and get everything evened up before its glued...

Live and learn and cuss a lil bit!


The blues and greys are blowing my mind...as cheap as this stuff was I have a bunch of plans in my head for other alignments!


The sides are pretty rad as well


So thats the stats for the moment.

I am going to be working this weekend and over the next week at the stack of knives from earlier in the post. I look forward to sharing that with everyone.

I also need to update a small! (dont worry not a full on science class) part of the metallurgy...I dont know if very many people saw the post because it was the last post on a page, but i was having issues with my finished blades cracking during the hardening phase...This sucked! because you were basiclly up **** creek and no body cares... except you who just wasted 4-5 hours of build time on the blade... I am happy to announce that I have solved that issue thanks to a article Aggie linked about the subject, so I will explain further when I do the next knife update.


Have a great rest of the week and enjoy the weekend!

JP


Ive been nostalgic latley...and was making dinner yeaterday thinking about how much fun this has been over the last year. Its cool to look down at a pile of cut veggies and a rocking cutting board and know you made your tools... I should point out that I use that pairing knife minimum 3 times a week and aside from the hone...never needed to resharpen it!:D

This also shows a really godo example of what the patina on a year old non stainless knife looks like...
 
Last edited:

nine4gmc

Well-known member
Joined
Mar 24, 2012
Messages
14,357
Location
Dallas
Love it, great job!! In one post, can you briefly describe the materials used for food grade cutting boards? Like what kind of glue, stain(if used), sealer or final coating? Thanks for posting, you do great work!!
 

aggierailroad

Well-known member
Joined
Jan 8, 2012
Messages
581
Location
Houston, TX
I like it. What's for dinner?

I wasn't able to really see it until now about the mismatch. You can still fix that and save that board....

Rip that glue line with your table saw and glue it back together... Since it's just a rubbed oil finish, you can easily sand through any glue squeeze out. And, end grain joints aren't particularly strong, so... you're not changing the "strength" of the board.

Next up is to build a crosscut sled for your saw..

I'm digging the serving trays, they look great.
 
OP
D

DoghouseForge

Well-known member
Joined
May 11, 2013
Messages
374
Location
Lakeland, Fl
Great thread. You are incredibly talented.
Thanks man, I appreciate the compliment...Its not totally fair though...Working with these wood selections is kinda like a Photographer that only shoots the Sierra Nevadas...Just frame up the shot and mother nature does the rest...everytime...


Love it, great job!! In one post, can you briefly describe the materials used for food grade cutting boards? Like what kind of glue, stain(if used), sealer or final coating? Thanks for posting, you do great work!!

Yup,

Titebond III Ultimate Wood Glue

Titebond III is non-toxic, waterproof, solvent free, and cleans up with water - safer to use than traditional waterproof wood glues. It provides strong initial tack, sands easily without softening and is FDA approved for indirect food contact (cutting boards). The ultimate in wood glues - ideal for both interior and exterior applications.... info taken from titebonds wed site

heres the link:
http://www.titebond.com/product.aspx?id=e8d40b45-0ab3-49f7-8a9c-b53970f736af


Stains

I dont use any stains with any of the projects I have done so far. The coloring, grains, and texture are all the natural woods doing...


The sealer and gloss finish are provided with:

"Watco Butcher Block Oil and Sealer"

heres the link:
http://www.lowes.com/pd_43860-90-000000000000241758_0__?productId=3153369


This stuff is not to bad from my experience so far...My first board was sealed with it and gets used daily. I just followed the labels instructions...I re-applied it last month before the holidays just to gloss it back up. and the board looked brand new again.

Since I have used it many times at this point I have a few tricks I use to bring out the best in it. If you sand up to 220 grit you will need 3 coats, and if you sand up to 400 grit you only need two. I use 0000 steel wool or 600 grit paper in between coats, and a microfiber cloth(car waxing towel) to buff it when totally dried... Since the long grain stuff only gets sanded to 220 you need to account an extra day for the 3rd coat on all non- endgrain builds.

I havent found the exact ingrediants listed anywhere but im almost 100% that is mineral oil, paraffin wax, and bees wax...

I have plans to make my own with those same ingrediants so when I do I will post the results.

hope that helps!


I like it. What's for dinner?

I wasn't able to really see it until now about the mismatch. You can still fix that and save that board....

Next up is to build a crosscut sled for your saw..

I'm digging the serving trays, they look great.

Chicken fettuccine...from scratch

I think I will let this one live like it is and make another one sooner than later, but who knows..I havent mailed it off yet so I could get motivated...


Now, lets figure out this "sled" because trying to cut a 4'x2' board into 1.75" strips wasnt exactly a cake walk...

If I had replaced the blade before hand it would have helped but the binding doesnt seem to relate to sharpness...correct?

Beautiful work, JP. I agree, this board is bitchin' !

Thank you sir!
Glad you like it because its coming to your house! :thumbup::lol:


Thasnk again guys,

JP
 
To avoid these ads, REGISTER NOW!
Top Bottom