To avoid these ads, REGISTER NOW!

Above 1200 Sq/FT Blue Bomber's Garages

Wokspaces above 1200 squarefeet.

cweidert03

Well-known member
Joined
Oct 19, 2015
Messages
417
Location
New Castle, IN
Very nice work. I have just started toying with building a detached two car garage at the back of my property. I have to find out if I’m even allowed to by city and neighborhood codes. I have an attached 3 car but due to a stair case to the above bonus room it only has room for 2. My biggest issue is the the grade of my property doesn’t bode well for a drive so I’m going over options for that. I would love to build it myself but A. I have never built anything that would require that degree of accuracy. B. Finding the time to get it accomplished


Sent from my iPhone using Tapatalk
 
To avoid these ads, REGISTER NOW!
OP
B

BlueBomber

Well-known member
Joined
Sep 14, 2013
Messages
3,201
Location
Outside Boston, MA
Very nice work. I have just started toying with building a detached two car garage at the back of my property. I have to find out if I’m even allowed to by city and neighborhood codes. I have an attached 3 car but due to a stair case to the above bonus room it only has room for 2. My biggest issue is the the grade of my property doesn’t bode well for a drive so I’m going over options for that. I would love to build it myself but A. I have never built anything that would require that degree of accuracy. B. Finding the time to get it accomplished


Sent from my iPhone using Tapatalk
Thanks!

My local code required 30 ft of setback from my back property line. As to skills, my biggest prior project was a large farmer's porch on my house. Books and YouTube are a great way to build knowledge, as is practicing on smaller projects. I also have had great success with just scheduling a meeting with my town's building inspector and showing him what I wanted to do, complete with my initial drawings and site plan. He was appreciative that I wanted to do it right and to code, and that good will carried through my porch project.

Even if you decide to contract out the work, you'll be ahead of the game in talking to your local inspector and it may help build steam in you to get it underway.

Good luck!
Sent from my SM-G950U using Tapatalk
 
Last edited:
OP
B

BlueBomber

Well-known member
Joined
Sep 14, 2013
Messages
3,201
Location
Outside Boston, MA
I had big plans of writing up a detailed tutorial for the installation of my second garage door. Then the Super Bowl came on. So here are all the pictures--I'll come back and edit the post to add notes as the game progresses.

First, I transferred over the two door frame fillers. These boards act as braces and alignment surfaces for the garage door panels as they stack up.

0253802c2a57f61064601680033d71be.jpg8634486c87e2b7fcb26e465ab01061b9.jpg

The Clopay door kit is pretty well thought out. The hinges for each panel are numbered--you just have to make sure the number is on the corresponding panel.

04dbfdcc989701554fb5019a8bf1811e.jpg

Here's the first panel in place.

1e31a922c46012da067d33cf380f9ccd.jpg

You can see how the frame fillers support the panel. The instructions say to pound a nail in on each side and bend it over each edge to hold it in place. I was skeptical, but it works well.

3ee1599410c886d596949014bedbfc47.jpg

Because the stem walls are so tight, I have to install the rollers before I fix it in place.

13548780b4a9e0b8a3e9dc5530048564.jpgc88b9c0baaa01c14d7a67135d927617d.jpg

I check the first panel for level. This doorway is dead on.

412fd0929b0c4ba090c8bc2a29e1c6b7.jpg

The second panel hinge has the only flaw I found in the kit. The roller tube blocks access to the bolt hole. I had to put an open end wrench on it to get it started.

c90002f3e87f12a31ad28cbaf10a9c1b.jpgbb4ba167df849b7ea369ea89975f8a06.jpg

Second panel in place.

fb2b0189a2adc0f080e5881b734ac8b5.jpg

Garage door rails lean back a little so that the door panels pull away from the trim around the door. This allows the door to open smoothly without jamming. To keep the door perfectly vertical, each hinge moves the roller tub a little further away from the door. Here, hinge #3 moves things back right on track (pun intended :) ).

3f401d5814329bb8b10d43c6ad4452db.jpg

The fourth panel is the glass windows. It is well packaged and much heavier than the others.

ce9c8741e5e86e7e945464d59c7092e1.jpgd0640e4d513beb5411cb3124ca3a91a0.jpg

The top panel has a larger bracket in lieu of a hinge. Interestingly, it needs two bolts that have no starter holes. I have to drill them.

0cd7c02a2d35d8e28f6fb836fd6bb813.jpg

The v-notch between panels makes lining up each panel as no-brainer.

c24ea97f88202990c6f2bb3dc3e3274e.jpg

Here are all five panels, held in place only with bent over nails.

b7a61034ce116daf5995570c5963a237.jpg

The door tracks slip over the rollers but there's not enough room to make that maneuver for the bottom two rollers, so I fit the tracks over the top rollers first, then drop them down over the bottom ones.

95a2d8e84cf270e8bc3857790f342944.jpgf726390ce801f399f7bff37cfff12e42.jpgc11c385d2ffe61b9bd87a0acd201930e.jpgc5e2c27f8853c5c1fd9cef4ee27d4981.jpgbebd6083e8b42f596c2ce63cc3da23ef.jpgbf73d82b30a844f6a0bb45105ae78d78.jpg

The last step for the weekend was to cut 41" inches off of of the horizontal tracks. I ordered high rise kits to lift the open doors up to the ceiling, and I need the 41" of track to fill in the vertical. My big Hitachi grinder and a cut off wheel made short work of the cuts.

94d4788ef7a56be9f32288798b63e2cd.jpg

Sent from my SM-G950U using Tapatalk
 

Attachments

  • 0253802c2a57f61064601680033d71be.jpg
    0253802c2a57f61064601680033d71be.jpg
    123.1 KB · Views: 1
  • 8634486c87e2b7fcb26e465ab01061b9.jpg
    8634486c87e2b7fcb26e465ab01061b9.jpg
    111.6 KB · Views: 1
  • 04dbfdcc989701554fb5019a8bf1811e.jpg
    04dbfdcc989701554fb5019a8bf1811e.jpg
    72.1 KB · Views: 1
  • 94d4788ef7a56be9f32288798b63e2cd.jpg
    94d4788ef7a56be9f32288798b63e2cd.jpg
    91 KB · Views: 1
  • bf73d82b30a844f6a0bb45105ae78d78.jpg
    bf73d82b30a844f6a0bb45105ae78d78.jpg
    74.5 KB · Views: 1
  • bebd6083e8b42f596c2ce63cc3da23ef.jpg
    bebd6083e8b42f596c2ce63cc3da23ef.jpg
    89.3 KB · Views: 1
  • c5e2c27f8853c5c1fd9cef4ee27d4981.jpg
    c5e2c27f8853c5c1fd9cef4ee27d4981.jpg
    67.2 KB · Views: 1
  • c11c385d2ffe61b9bd87a0acd201930e.jpg
    c11c385d2ffe61b9bd87a0acd201930e.jpg
    61.7 KB · Views: 1
  • f726390ce801f399f7bff37cfff12e42.jpg
    f726390ce801f399f7bff37cfff12e42.jpg
    76.2 KB · Views: 1
  • c90002f3e87f12a31ad28cbaf10a9c1b.jpg
    c90002f3e87f12a31ad28cbaf10a9c1b.jpg
    62.3 KB · Views: 1
  • 412fd0929b0c4ba090c8bc2a29e1c6b7.jpg
    412fd0929b0c4ba090c8bc2a29e1c6b7.jpg
    111.3 KB · Views: 1
  • c88b9c0baaa01c14d7a67135d927617d.jpg
    c88b9c0baaa01c14d7a67135d927617d.jpg
    93.1 KB · Views: 1
  • 13548780b4a9e0b8a3e9dc5530048564.jpg
    13548780b4a9e0b8a3e9dc5530048564.jpg
    82.3 KB · Views: 1
  • 3ee1599410c886d596949014bedbfc47.jpg
    3ee1599410c886d596949014bedbfc47.jpg
    84.2 KB · Views: 1
  • bb4ba167df849b7ea369ea89975f8a06.jpg
    bb4ba167df849b7ea369ea89975f8a06.jpg
    82.1 KB · Views: 1
  • 95a2d8e84cf270e8bc3857790f342944.jpg
    95a2d8e84cf270e8bc3857790f342944.jpg
    67.8 KB · Views: 1
  • b7a61034ce116daf5995570c5963a237.jpg
    b7a61034ce116daf5995570c5963a237.jpg
    81.3 KB · Views: 1
  • c24ea97f88202990c6f2bb3dc3e3274e.jpg
    c24ea97f88202990c6f2bb3dc3e3274e.jpg
    50.3 KB · Views: 1
  • 0cd7c02a2d35d8e28f6fb836fd6bb813.jpg
    0cd7c02a2d35d8e28f6fb836fd6bb813.jpg
    66.1 KB · Views: 1
  • d0640e4d513beb5411cb3124ca3a91a0.jpg
    d0640e4d513beb5411cb3124ca3a91a0.jpg
    87 KB · Views: 1
  • ce9c8741e5e86e7e945464d59c7092e1.jpg
    ce9c8741e5e86e7e945464d59c7092e1.jpg
    70.3 KB · Views: 1
  • 3f401d5814329bb8b10d43c6ad4452db.jpg
    3f401d5814329bb8b10d43c6ad4452db.jpg
    58.1 KB · Views: 1
  • fb2b0189a2adc0f080e5881b734ac8b5.jpg
    fb2b0189a2adc0f080e5881b734ac8b5.jpg
    76.3 KB · Views: 1
  • 1e31a922c46012da067d33cf380f9ccd.jpg
    1e31a922c46012da067d33cf380f9ccd.jpg
    98.6 KB · Views: 1
Last edited:

BUGTHUG

Well-known member
Joined
Nov 12, 2010
Messages
2,960
Location
Kansas
Nice job. On the track, you see one has the wheel curve and the other side is 90*, if you put the roller wheels into the curve part of the track the top part will fit over the top of the wheels. So you don't need to slide the rail from the top section of the door down. I hope this makes sense, probably to late now that your finished.
 
OP
B

BlueBomber

Well-known member
Joined
Sep 14, 2013
Messages
3,201
Location
Outside Boston, MA
Nice job. On the track, you see one has the wheel curve and the other side is 90*, if you put the roller wheels into the curve part of the track the top part will fit over the top of the wheels. So you don't need to slide the rail from the top section of the door down. I hope this makes sense, probably to late now that your finished.
Bugthug,

Thanks, and I understand exactly what you mean and after re-reading my original post, I can see why you thought I did it that way. The picture immediately below the text describing my technique shows me applying that technique against the number two hinge.

The problem is that my bottom panels have less than an inch of clearance between the back of the rollers and the concrete stem wall. There wasn't enough room to slip the 90° part behind those wheels. Therefore, I used the technique you described, capturing rollers from the top four panels, and then only had to slide the rail down over the bottom panel's two rollers. Much better than starting at the top!

Sent from my SM-G950U using Tapatalk
 
Last edited:
OP
B

BlueBomber

Well-known member
Joined
Sep 14, 2013
Messages
3,201
Location
Outside Boston, MA
Last weekend I also got the man-door installed but it was a trial. First, the plans called for a 40" opening in the stem wall, and it was built that way. I assumed that I'd need to frame the opening with pressure treated 2x4s, and did so a few weeks ago. However, when I came out on Sunday to actually install the door, I casually checked measurements and found the door was wider than my framed opening. D'oh!
0c19441ed9a7d2c196e4867bd7a41d2c.jpgea16bdee5e7d93b8b1e2d80ecd13de1f.jpg227f9ea2a1e0fbe5827003f75ace4429.jpg

What to do? I pulled the 2x4s down and split one lengthwise the wide way to buy myself an inch and a half. Cutting that board wasn't too much for my 10" table saw, but it was all it wanted!

10087959d78a7668274ad7043cd20a5b.jpg

Next I test-fit the door into the opening and realized the aluminum sill needs to stick out into the paved area, which is just a bit taller than the slab. So back to the table saw to split another PT 2x4 to elevate the door sill enough to clear the asphalt.b112e1c9a0987655c05c13fe9edd9ca1.jpg57da3359cff016359f7c49c965602bbc.jpg

Finally, I decided to replace the wooden trim with vinyl since I am doing the garage doors in vinyl for minimal maintenance. The challenge across the top was the alignment of the door on the opening had the sheathing across the top interfering with the upper trim piece. So, another trip to the saw table cut a notch to allow the trim piece to lign up where it needed to be. The verticals also required some notching to fit. Once everything was cut, I nailed it on with galvanized finishing nails.599822fdee75424506a04636bdfca162.jpgd12514852658ab5bf18cb6bce37d6311.jpg

Here are some shots of the finished doors from the outside. Well, the garage doors aren't finished yet, but it looks good from the driveway!

bc7d3ea0f146a2b93934859e7698c95c.jpge24df831801afad60157b7565a11893e.jpg
 

Attachments

  • 0c19441ed9a7d2c196e4867bd7a41d2c.jpg
    0c19441ed9a7d2c196e4867bd7a41d2c.jpg
    96.2 KB · Views: 1
  • ea16bdee5e7d93b8b1e2d80ecd13de1f.jpg
    ea16bdee5e7d93b8b1e2d80ecd13de1f.jpg
    68.6 KB · Views: 1
  • 227f9ea2a1e0fbe5827003f75ace4429.jpg
    227f9ea2a1e0fbe5827003f75ace4429.jpg
    54.9 KB · Views: 1
  • 10087959d78a7668274ad7043cd20a5b.jpg
    10087959d78a7668274ad7043cd20a5b.jpg
    85 KB · Views: 1
  • b112e1c9a0987655c05c13fe9edd9ca1.jpg
    b112e1c9a0987655c05c13fe9edd9ca1.jpg
    102.9 KB · Views: 1
  • d12514852658ab5bf18cb6bce37d6311.jpg
    d12514852658ab5bf18cb6bce37d6311.jpg
    80 KB · Views: 1
  • e24df831801afad60157b7565a11893e.jpg
    e24df831801afad60157b7565a11893e.jpg
    101.7 KB · Views: 1
  • bc7d3ea0f146a2b93934859e7698c95c.jpg
    bc7d3ea0f146a2b93934859e7698c95c.jpg
    76.5 KB · Views: 1
  • 599822fdee75424506a04636bdfca162.jpg
    599822fdee75424506a04636bdfca162.jpg
    64.8 KB · Views: 1
  • 57da3359cff016359f7c49c965602bbc.jpg
    57da3359cff016359f7c49c965602bbc.jpg
    104.6 KB · Views: 1
Last edited:
OP
B

BlueBomber

Well-known member
Joined
Sep 14, 2013
Messages
3,201
Location
Outside Boston, MA
The electrician team was out on Friday and two guys made a lot of progress. Most of the wall wiring and outlets are done, as are the overhead outlets and the front outside light boxes. Still to be done: 60-amp power through underground conduit from existing garage, back outside lights and outlet, and remainder of interior wiring.

This wall is where my work bench will go. I spec'd four outlets along this wall, and then two each on the other two walls. All wall outlets are of the 20-amp variety. The back wall will also get a 240-volt outlet for a welder.

ff99bba56cf10f2682491e4c58d62e71.jpg

The three light switches are for the inside overheads, front outside and back outside. At the top of the picture is the outlet for one of the shaft-drive garage door opener.

579fb0da3d4df9017f20490cf30835ca.jpg

This corner behind the entry door is where the breaker box will go.

6198039d0b8cd2beda0dfee29d8d6b78.jpg

For lighting, I ordered a 10-pack of LED lights from Amazon. They are not high end, but claim 4000 lumens and 50,000 hours average life. At $28 each, they seem a bargain.

05b88ecd985ec3345eb9da8ecee83957.jpg

The pull chains won't do much good 13 feet in the air, so I pulled each light to "on" and then snipped the chain while it was still extended. Now each light will have a cleaner look.

e8add0daf8f03e7023f58d1cabcd93f4.jpg

To mount the lights, I chose the quasi-hackish approach of just driving two deck screws through the middle of the thin reflector metal directly into the truss bottom. Each light is just four pounds, so two screws are plenty. There are certainly more professional ways to do it, but this works for me. The light tubes are flexible plastic, so I just moved them to the side.

183b8300248c87830f19f9ad6ceabae0.jpg

Excess cord was tucked up on top of the lights and only enough to reach the plug stuck out.

ede4cbae39a63ceb0fcba0c205dd6d56.jpg

Here are nine lights installed. Hopefully the electricians complete their work and I'll see how well the lights fill the space later this week.

f4518ba1434c3cb1babe79d83f6224cf.jpg

Sent from my SM-G950U using Tapatalk
 

Attachments

  • ede4cbae39a63ceb0fcba0c205dd6d56.jpg
    ede4cbae39a63ceb0fcba0c205dd6d56.jpg
    62.4 KB · Views: 1
  • f4518ba1434c3cb1babe79d83f6224cf.jpg
    f4518ba1434c3cb1babe79d83f6224cf.jpg
    158.4 KB · Views: 1
  • 183b8300248c87830f19f9ad6ceabae0.jpg
    183b8300248c87830f19f9ad6ceabae0.jpg
    39.3 KB · Views: 1
  • e8add0daf8f03e7023f58d1cabcd93f4.jpg
    e8add0daf8f03e7023f58d1cabcd93f4.jpg
    49.8 KB · Views: 1
  • 05b88ecd985ec3345eb9da8ecee83957.jpg
    05b88ecd985ec3345eb9da8ecee83957.jpg
    43.1 KB · Views: 1
  • ff99bba56cf10f2682491e4c58d62e71.jpg
    ff99bba56cf10f2682491e4c58d62e71.jpg
    85.1 KB · Views: 1
  • 579fb0da3d4df9017f20490cf30835ca.jpg
    579fb0da3d4df9017f20490cf30835ca.jpg
    83.2 KB · Views: 1
  • 6198039d0b8cd2beda0dfee29d8d6b78.jpg
    6198039d0b8cd2beda0dfee29d8d6b78.jpg
    83.5 KB · Views: 1
Last edited:
OP
B

BlueBomber

Well-known member
Joined
Sep 14, 2013
Messages
3,201
Location
Outside Boston, MA
I returned from work today to find the electrical crew have finished their wiring and...

53b7e5a14bd8cda1c243ac0aa0d3f9d4.jpg

...the building is hot! I have power! Also, my lights are VERY bright. I couldn't be more pleased with the luminance. We'll see how longevity goes, but at $27 each, if I get a couple of years out of them, I'm ahead.

b80996ffba2324be57bbeb3d8b7e9552.jpg

This weekend I'll tackle getting the garage doors finished, but for now it feels so good to see the building ablaze with photons!

Sent from my SM-G950U using Tapatalk
 

Attachments

  • 53b7e5a14bd8cda1c243ac0aa0d3f9d4.jpg
    53b7e5a14bd8cda1c243ac0aa0d3f9d4.jpg
    131.7 KB · Views: 1
  • b80996ffba2324be57bbeb3d8b7e9552.jpg
    b80996ffba2324be57bbeb3d8b7e9552.jpg
    44.1 KB · Views: 1
Last edited:
OP
B

BlueBomber

Well-known member
Joined
Sep 14, 2013
Messages
3,201
Location
Outside Boston, MA
Working on garage doors this weekend. Here's what I got done yesterday:

I ordered a kit from DDM to lift the horizontal track for the Clopay doors up closer to the ceiling. Clopay sells such kits themselves, but my Home Depot specialist couldn't figure out how to do it. The kit consists of bracketry to move the horizontal track and to support the additional vertical track. The kit also included new springs and pulleys to lift the doors. I'll post pics of those after today's work.

ff43ee9dc05e7966a4d849459fcf4fcc.jpg

The bracketry changes the angle on the vertical extension so I trimmed the excess track I had cut off of the horizontal tracks to match up better. After mocking up the first one and checking fitment, I cut and drilled the remaining parts.

fe13405cc2fc3a3b2b646f4fb20647ed.jpgfe8e1ee585a826276bd3a635d9302aaa.jpg

The kit calls for removing the flag bracket that comes with the doors, but during fitment I realized I had just enough room due to the 42" lift to leave the original bracketry in place.

1d5dbc214e7c19b065e344b565390fd3.jpg

Here's the first new bracket on place.

846a5f23699da00cd1f63e821d30b54a.jpg
d7b88f80dfd5ab833783a3158d1c7fd3.jpg

Once both vertical extensions were installed on the first door, I moved on to the horizontals. I needed to fab the anchor brackets to hold the rails in place and support the weight of the open door. Rather than buy a bracket kit, I repurposed the angle brackets that I removed from the excess horizontal track. There was just enough, when combined with the brackets I removed from the lower part of the vertical tracks, to make four anchor kits.

eb5c79069153da923451ef40fd07a26c.jpg0f09a89ef190dd5db7fe4758b0aac493.jpg4427bf979ad803a377bb94c15256f8ba.jpg

Today, I'm working on mounting and winding the springs on this door. Don't worry: SWMBO will be out here with me when I'm winding to be an extra set of hands and eyes. More pics tomorrow morning.

Sent from my SM-G950U using Tapatalk
 

Attachments

  • 0f09a89ef190dd5db7fe4758b0aac493.jpg
    0f09a89ef190dd5db7fe4758b0aac493.jpg
    110 KB · Views: 1
  • 4427bf979ad803a377bb94c15256f8ba.jpg
    4427bf979ad803a377bb94c15256f8ba.jpg
    125.5 KB · Views: 1
  • eb5c79069153da923451ef40fd07a26c.jpg
    eb5c79069153da923451ef40fd07a26c.jpg
    117.9 KB · Views: 1
  • d7b88f80dfd5ab833783a3158d1c7fd3.jpg
    d7b88f80dfd5ab833783a3158d1c7fd3.jpg
    119.6 KB · Views: 1
  • 846a5f23699da00cd1f63e821d30b54a.jpg
    846a5f23699da00cd1f63e821d30b54a.jpg
    87.2 KB · Views: 1
  • ff43ee9dc05e7966a4d849459fcf4fcc.jpg
    ff43ee9dc05e7966a4d849459fcf4fcc.jpg
    142.3 KB · Views: 1
  • fe13405cc2fc3a3b2b646f4fb20647ed.jpg
    fe13405cc2fc3a3b2b646f4fb20647ed.jpg
    92 KB · Views: 1
  • fe8e1ee585a826276bd3a635d9302aaa.jpg
    fe8e1ee585a826276bd3a635d9302aaa.jpg
    113.5 KB · Views: 1
  • 1d5dbc214e7c19b065e344b565390fd3.jpg
    1d5dbc214e7c19b065e344b565390fd3.jpg
    84.1 KB · Views: 2
Last edited:
OP
B

BlueBomber

Well-known member
Joined
Sep 14, 2013
Messages
3,201
Location
Outside Boston, MA
Okay, a long delay in updating did not mean a tragedy during spring winding, just a very busy work schedule the past week.

I spent a bit time going over the instructions and watched a few YouTube videos on installing garage door springs before I began. Given the "death and dismemberment" warnings all through the paperwork and the lore about the dangers of garage door springs, I wanted to be prepared. Like most such, things, it wasn't that bad as long as you understood what you were doing and why.

I assembled the jackshafts on the workbench. My kit came with hollow 1" shafts. The cable pulley for highlift doors has a ramped, cone-shaped section that is designed to make up for the spring tension lost as the door is lifting straight up. Once the first panel turns the corner, the weight of the door stack pushing down on the cables starts to decrease and the cable begins to wind up on the straight part of the pulley. The bearing brackets that hold the jackshaft bolt to the flag bracket which in turn gets screwed to the wall with 3" lag screws.

b977ae5a2285f712cd143aba20b87c6a.jpg81a3094c4893a6c4622e1283797b97f7.jpg293c2b5f94988782ccfbaf3e34d1a8f9.jpg

Here's the shaft installed. I chose to mount it a little lower than normal. Usually the jackshaft is up above the horizontal track so as to get the maximum lift geometry. However, since the bottom of my door in the open position was going to be dangling four feet below the ceiling, I made it easier on myself. A consequence of the lower mounting position was my cables were too long, so I clamped them and later cut off the excess. Each spring needed 46 quarter turns to create enough tension to lift each door with one hand.

375a001a1207db35c7c39f0c04588ebd.jpg512b60bc5326a02c4777254a031880c0.jpg35165c14b7daffa009af80f79799c322.jpg

Here's done. I forgot to take any pictures of the door opener installation, but I used two Liftmaster 3900 openers that mount directly to the jackshafts. They work well and keep the ceiling uncluttered. I only had to move one light during track install, so hopefully the lack of symmetry won't bother my internal OCD...:)

70c2ce6e8f5b0dc4a5716dde4938150a.jpgf69d97d53b23f25bad58d89e92b02a28.jpg727cca1e9d376c53f60bc1b97c44aec8.jpg

Sent from my SM-G950U using Tapatalk
 

Attachments

  • 293c2b5f94988782ccfbaf3e34d1a8f9.jpg
    293c2b5f94988782ccfbaf3e34d1a8f9.jpg
    123.4 KB · Views: 2
  • 375a001a1207db35c7c39f0c04588ebd.jpg
    375a001a1207db35c7c39f0c04588ebd.jpg
    138.2 KB · Views: 1
  • 512b60bc5326a02c4777254a031880c0.jpg
    512b60bc5326a02c4777254a031880c0.jpg
    73.3 KB · Views: 1
  • 35165c14b7daffa009af80f79799c322.jpg
    35165c14b7daffa009af80f79799c322.jpg
    96.5 KB · Views: 1
  • 70c2ce6e8f5b0dc4a5716dde4938150a.jpg
    70c2ce6e8f5b0dc4a5716dde4938150a.jpg
    109.8 KB · Views: 1
  • f69d97d53b23f25bad58d89e92b02a28.jpg
    f69d97d53b23f25bad58d89e92b02a28.jpg
    65 KB · Views: 1
  • 727cca1e9d376c53f60bc1b97c44aec8.jpg
    727cca1e9d376c53f60bc1b97c44aec8.jpg
    80.3 KB · Views: 1
  • 81a3094c4893a6c4622e1283797b97f7.jpg
    81a3094c4893a6c4622e1283797b97f7.jpg
    101 KB · Views: 1
  • b977ae5a2285f712cd143aba20b87c6a.jpg
    b977ae5a2285f712cd143aba20b87c6a.jpg
    95.8 KB · Views: 2
Last edited:
OP
B

BlueBomber

Well-known member
Joined
Sep 14, 2013
Messages
3,201
Location
Outside Boston, MA
I spent today's good weather....going to an estate sale! I used up my morning but I finally got a Wilton vise at a steal price. Pics are posted on the Garage Sale and Vises threads.

When I finally got back to working on the garage, it was after 1pm. I decided to work on siding the southern wall now that the electricians have plumbed in the power line. But first I had to make my own perforation for my utility pipe from the other garage.

d4be4a33e4b6274eb743e9cfcef98f2f.jpg0a48f346d9c871901e8341810c86c4af.jpg6dbd9676e125db808c548af474bd8643.jpg

A Sawzsall quickly opened the hole, although it was bigger than I would have liked. Next up was trimming around the utilities with J-block. The big 4-inch utility pipe demanded some creativity. Ultimately I split a 12" x 6" J-block on the band saw and then carved out the pipe cross-section in the filler panel. For the smaller electrical pipe, I used an already split hose bib J-block.

d336c5f55f206503fbe9570b6423ab1d.jpg
2fa65676ec1c40a543ff8a42dd28290f.jpgfb5468bffc5fe6e1b5e8b81c1b5a24f7.jpg084ec7935fdb2ef3208fd3c7fbb9f0bb.jpg

Once the trim was done, it was on to siding. The utilities added some challenge to this task too, but I managed to get the vinyl panels trimmed correctly on the first try. Once I got past the windows, things went more quickly. Still, I dragged out the flood light after sundown and kept on until about 8 pm to "finish" this side up to the level of the soffit work I still need to do.

31ba5cf7e818314ab1d968bf2f8baf6c.jpg55bb5adc6b75ff372dd507fc74be13c7.jpg

Sunday will be a yucky weather day, so I'll be prepping for work stuff and tax return stuff, but I'll interrupt both for a return to yesterday's sale for half price day!

Sent from my SM-G950U using Tapatalk
 

Attachments

  • d336c5f55f206503fbe9570b6423ab1d.jpg
    d336c5f55f206503fbe9570b6423ab1d.jpg
    104.9 KB · Views: 2
  • 6dbd9676e125db808c548af474bd8643.jpg
    6dbd9676e125db808c548af474bd8643.jpg
    70.8 KB · Views: 2
  • 0a48f346d9c871901e8341810c86c4af.jpg
    0a48f346d9c871901e8341810c86c4af.jpg
    103.3 KB · Views: 2
  • d4be4a33e4b6274eb743e9cfcef98f2f.jpg
    d4be4a33e4b6274eb743e9cfcef98f2f.jpg
    152.3 KB · Views: 1
  • 31ba5cf7e818314ab1d968bf2f8baf6c.jpg
    31ba5cf7e818314ab1d968bf2f8baf6c.jpg
    96.8 KB · Views: 1
  • 2fa65676ec1c40a543ff8a42dd28290f.jpg
    2fa65676ec1c40a543ff8a42dd28290f.jpg
    71.1 KB · Views: 1
  • fb5468bffc5fe6e1b5e8b81c1b5a24f7.jpg
    fb5468bffc5fe6e1b5e8b81c1b5a24f7.jpg
    95 KB · Views: 1
  • 55bb5adc6b75ff372dd507fc74be13c7.jpg
    55bb5adc6b75ff372dd507fc74be13c7.jpg
    93.8 KB · Views: 1
  • 084ec7935fdb2ef3208fd3c7fbb9f0bb.jpg
    084ec7935fdb2ef3208fd3c7fbb9f0bb.jpg
    132.2 KB · Views: 1
Last edited:
To avoid these ads, REGISTER NOW!

C_F

ALLIANCE MEMBER
Joined
Jan 21, 2005
Messages
9,675
Location
Utah...SNOW BLOWS!
It's coming along nicely, it won't be long now until the exterior is all completed. I always enjoy your progress updates! :)
 
OP
B

BlueBomber

Well-known member
Joined
Sep 14, 2013
Messages
3,201
Location
Outside Boston, MA
Nice build and lots of detail. Appreciate all the time you have invested for this thread.

Thank you!

It's coming along nicely, it won't be long now until the exterior is all completed. I always enjoy your progress updates! :)

Thanks, gents. I've learned a lot through this site, and although this is one of many dozens of build threads, if someone learns something from mine, I'm glad to contribute. The encouragement and kudos from you all is nice too! :rocker:
 

Jayman17

Well-known member
Joined
Feb 6, 2017
Messages
3,797
Location
Seattle, Wa
I'm enjoying following along on your build, you're going to have a great space when you get it done. The lights look great in there, and that Zip system looks pretty slick. I'd like to repeat what others have said and thank you for doing such a great job posting updates and sharing info. I'll be seeing it through to the end...:D

-Jay
 
OP
B

BlueBomber

Well-known member
Joined
Sep 14, 2013
Messages
3,201
Location
Outside Boston, MA
I'm enjoying following along on your build, you're going to have a great space when you get it done. The lights look great in there, and that Zip system looks pretty slick. I'd like to repeat what others have said and thank you for doing such a great job posting updates and sharing info. I'll be seeing it through to the end...:D

-Jay
Thanks, Jayman17! I hope to keep the thread alive with other goings on in and around both garages. After this garage culminates, I'll start working on a resto-mod of the '60 Impala you can see in the pictures.

Sent from my SM-G950U using Tapatalk
 

C_F

ALLIANCE MEMBER
Joined
Jan 21, 2005
Messages
9,675
Location
Utah...SNOW BLOWS!
More driveway pictures. I'm really pleased with how it came out. The asphalt layers are nice and thick. I'll probably wait until the spring to backfill along the edges when I redo the rest of the yard.4f3a164b86dee1f29a19fdbc73f954b1.jpg3d9e93d6f34605f76602761be64ce045.jpg6f99978f5bbaa79c4487aa34bf0c912f.jpga7e3128311291a18859af5d06a69c13a.jpg
I just got thinking...this summer you should paint a broken yellow line down the center of the driveways, then white parking spots near the garages, maybe even add a turn lane in the mix somewhere. Add a couple road signs, and... :lol_hitti
 

Attachments

  • 3d9e93d6f34605f76602761be64ce045.jpg
    3d9e93d6f34605f76602761be64ce045.jpg
    113.7 KB · Views: 1
  • 6f99978f5bbaa79c4487aa34bf0c912f.jpg
    6f99978f5bbaa79c4487aa34bf0c912f.jpg
    139.7 KB · Views: 1
  • 4f3a164b86dee1f29a19fdbc73f954b1.jpg
    4f3a164b86dee1f29a19fdbc73f954b1.jpg
    107.2 KB · Views: 1
  • a7e3128311291a18859af5d06a69c13a.jpg
    a7e3128311291a18859af5d06a69c13a.jpg
    150.5 KB · Views: 1

bagged89s10

Well-known member
Joined
Mar 13, 2005
Messages
4,607
Location
CT
Just wanted to post a link to the particular lights I used in my garage:

Sunco Lighting 10 PACK - ENERGY STAR, ETL - 4ft 40W LED Utility Shop Light, 4000lm 120W Equivalent, Double Integrated LED Fixture, 5000K Daylight Ceiling Light, Garage, Workshop, Linkable, Frosted
https://www.amazon.com/dp/B0748YTDMK/?tag=atomicindus08-20

Sent from my SM-G950U using Tapatalk


Those look exactly like the led shop lights I got from Costco. They are awesome.
 
OP
B

BlueBomber

Well-known member
Joined
Sep 14, 2013
Messages
3,201
Location
Outside Boston, MA
I just got thinking...this summer you should paint a broken yellow line down the center of the driveways, then white parking spots near the garages, maybe even add a turn lane in the mix somewhere. Add a couple road signs, and... [emoji38]_hitti
Thanks for the suggestions...but maybe Railroad Crossing markings would keep the boneheads from using it as a turnaround!

Sent from my SM-G950U using Tapatalk
 

Bob Heine

ALLIANCE MEMBER
Joined
Oct 24, 2009
Messages
10,705
Location
Boca Raton, Florida
BB, one of these at the entrance should reduce traffic on the driveway.
attachment.php
 

Attachments

  • Toll Sign.jpg
    Toll Sign.jpg
    80.7 KB · Views: 1,366
OP
B

BlueBomber

Well-known member
Joined
Sep 14, 2013
Messages
3,201
Location
Outside Boston, MA
BB, one of these at the entrance should reduce traffic on the driveway.
attachment.php
:hitti. love it! The challenge is what will be welcoming to guests but ward of trespassers...oh, and be acceptable to SWMBO? Probably just tolerating the occasional trespassers....

Sent from my SM-G950U using Tapatalk
 

tab2

Well-known member
Joined
Apr 9, 2009
Messages
381
Location
Boston
Great build; I don’t know how I missed it until now. I need a new driveway once I spend the money on all the projects and am jealous of yours. I love how nice and bright yellow all of Lazaro’s trucks are. Interesting to see they were on the low side.

Keep going strong. We’ve had some warm weather so I hope you have been keeping productive.
 
OP
B

BlueBomber

Well-known member
Joined
Sep 14, 2013
Messages
3,201
Location
Outside Boston, MA
Great build; I don’t know how I missed it until now. I need a new driveway once I spend the money on all the projects and am jealous of yours. I love how nice and bright yellow all of Lazaro’s trucks are. Interesting to see they were on the low side.

Keep going strong. We’ve had some warm weather so I hope you have been keeping productive.
Thanks for the kind words and encouragement, tab2. The blacktop was awesome through the winter (amazing how quickly I forgot about living with gravel for seven winters!).

Sent from my SM-G950U using Tapatalk
 
OP
B

BlueBomber

Well-known member
Joined
Sep 14, 2013
Messages
3,201
Location
Outside Boston, MA
Last weekend was spent prepping for taxes, and we met with the accountant on Friday. Unfortunately, her internet was out due to the most recent Nor'easter that dropped a foot of wet, heavy snow on New England. So I won't know what the damage will be for another couple of days.

Speaking of the storm and damage, we lost a medium sized pine in the woods next to our house. I'm shocked we didn't hear this one come down as it is on the same side of the house as our bedroom. Once the snow melts, I'll chop it up and will also probably put some cable bracing on the remaining pines to keep them from falling toward the house.

Here are a few more shots around the property of all the snow and subsequent clearing operations last Thursday.

8634e609cdd791036ffaa23dc95c5719.jpg1b22e64831ee754372bcc47bb847e4ac.jpg5a2c1a15b9666c44caa0f8c1b825a4d7.jpgc0763dfbfa67283e911cbaf459f2a855.jpg65b1d89058efdd7928e59b55d3b3a840.jpg3833c6f12d8c4ed80d42ad37969a621c.jpg

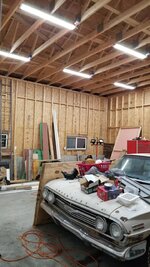
Today, I went out to the garage intent on putting up the outside trim around the garage doors, but it was just too darn cold. So, I decided to work in the other heated garage. First, I scrapped a Craftsman radial arm saw that I bought at an estate sale a few weeks ago. I got it for $50, and there's a $100 recall on them from the manufacturer. I felt a little bad about doing so, as this saw had been used for little over its lifetime. But, scrapping it will pay for everything else I got that day.

078711c17f64c95ec1fafa8d98983d98.jpg7e4acd41a5fb3f6100be22ab961e8b53.jpgd6477cce60cbc884222a81b75340d9ad.jpg343e62618637f8bac63b91be8568224d.jpg

I saved whatever I could off of it, and other than a few items EOCJason asked for, I'll put everything else up on Ebay for other users who don't scrap their saws.

961316daf2040aa4bf5d5f89dfb4c95d.jpg

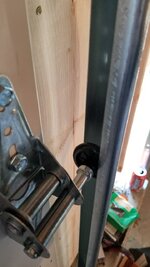
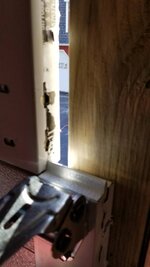
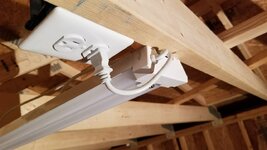
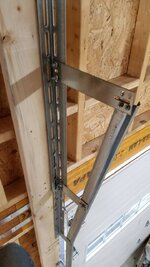
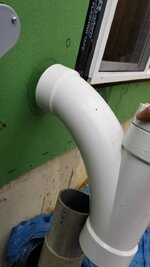
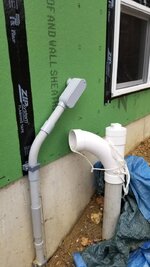
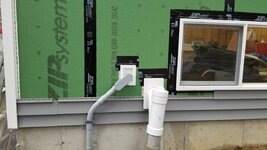
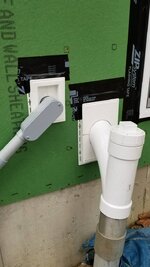
The next thing I did was finish routing the 4" PVC utility pipe into the old garage. I used a variety of tools (12"-long drill bit, variable hole saw, utility knife and Sawzall) to make the opening through the cedar siding, the plywood and the drywall. Fortunately, I missed the stud in the wall by a few hair-widths and the hole was much tighter than the one in the new garage. I still need to caulk it, but it is pretty air tight.

I realize now that I took zero pictures of the pipe installation. I'll take some tomorrow when I go back and caulk it.

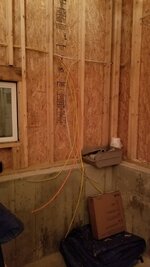
Last thing today was routing the compressed air line through the utility pipe. Months ago I bought a Rapidair Maxline kit that comes with 100' of flexible 3/4" vinyl-coated aluminum tubing, thinking it would be easy to snake it through my utility pipe. However, I had my doubts when I started to unroll the coiled tubing--it was very stiff! After second guessing myself and pricing jackhammer-sized 3/4" rubber lines on Amazon (twice as much as my kit for a hundred feet!), I decided to give the Rapidair tubing the ol' college try.

c2803419d264ad90bf6b99a5457e7223.jpg

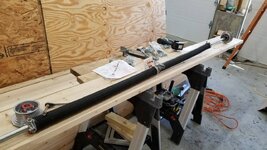
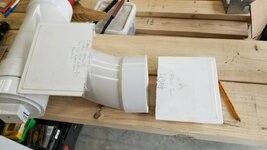
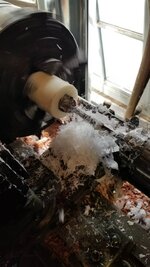
One thing I knew for certain I would need was some kind of nose piece for the leading end of the tubing. I expected the pipe to catch on some elbow lip halfway down the pipe and get stuck. I mulled it over a bit and decided to make what I needed on my lathe.

I scrounged through my collection of estate sale scraps and found 4-inch length of plastic rod of the right diameter. I rounded off one end into a bullet shape, and then drilled a 5/8" hole down the middle for the rope to come out. I then swapped the leader around in the chuck and drilled a larger hole in the bottom, the same size as the outside diameter of the tubing. This allowed the leader to sit down over the end of the tube and because the rope would be pulling from the middle of the bullet shape, there would be no sharp edges to catch. The last step was to drill radially through the leader and the tubing so that I could poke the rope out and tie it to the tubing below the leader, locking both firmly together.

Here are a few shots of the lathe work.

9cd3433b9357d1eaba517c6ee1d7ff22.jpg36f1b4e96645ef7ac6cfd7d6c06ed447.jpg9a90c506f9552ab52347090d3bc1b824.jpgf3521afb96965fd2765caab86f4a66eb.jpg

And here's the leader sticking out of the far end of the tubing.

d8bb858826149b8d1b8f05cf44dbf572.jpg50e4b0a6895fe4b779de84b7a21f23e6.jpg569ec3d60b81f2fcfa5cd034ee20fc76.jpg

Speaking of the ol' college try, I had to call on my son and his college friend (both home for Spring Break) to pull on the rope at the distant end and uncoil the tubing behind me as I pushed it into the near end. We only got stuck twice, but both times we were able to back up and hit it again, pushing past whatever had stopped us. I pulled all but 25 feet through the pipe and will hook up the near end tubing to my existing distro system tomorrow. I have a few other goodies to install in the air compressor system that I'll detail then.

Thanks for reading!
 

Attachments

  • 961316daf2040aa4bf5d5f89dfb4c95d.jpg
    961316daf2040aa4bf5d5f89dfb4c95d.jpg
    115.2 KB · Views: 1
  • 50e4b0a6895fe4b779de84b7a21f23e6.jpg
    50e4b0a6895fe4b779de84b7a21f23e6.jpg
    57.7 KB · Views: 1
  • d8bb858826149b8d1b8f05cf44dbf572.jpg
    d8bb858826149b8d1b8f05cf44dbf572.jpg
    88.3 KB · Views: 1
  • f3521afb96965fd2765caab86f4a66eb.jpg
    f3521afb96965fd2765caab86f4a66eb.jpg
    94.7 KB · Views: 1
  • 9a90c506f9552ab52347090d3bc1b824.jpg
    9a90c506f9552ab52347090d3bc1b824.jpg
    86.9 KB · Views: 1
  • 36f1b4e96645ef7ac6cfd7d6c06ed447.jpg
    36f1b4e96645ef7ac6cfd7d6c06ed447.jpg
    95.7 KB · Views: 1
  • 9cd3433b9357d1eaba517c6ee1d7ff22.jpg
    9cd3433b9357d1eaba517c6ee1d7ff22.jpg
    91.7 KB · Views: 1
  • c2803419d264ad90bf6b99a5457e7223.jpg
    c2803419d264ad90bf6b99a5457e7223.jpg
    122.4 KB · Views: 1
  • 343e62618637f8bac63b91be8568224d.jpg
    343e62618637f8bac63b91be8568224d.jpg
    111.5 KB · Views: 1
  • d6477cce60cbc884222a81b75340d9ad.jpg
    d6477cce60cbc884222a81b75340d9ad.jpg
    107.6 KB · Views: 1
  • 7e4acd41a5fb3f6100be22ab961e8b53.jpg
    7e4acd41a5fb3f6100be22ab961e8b53.jpg
    113.2 KB · Views: 1
  • 078711c17f64c95ec1fafa8d98983d98.jpg
    078711c17f64c95ec1fafa8d98983d98.jpg
    114.7 KB · Views: 1
  • 3833c6f12d8c4ed80d42ad37969a621c.jpg
    3833c6f12d8c4ed80d42ad37969a621c.jpg
    138.1 KB · Views: 1
  • 65b1d89058efdd7928e59b55d3b3a840.jpg
    65b1d89058efdd7928e59b55d3b3a840.jpg
    190.8 KB · Views: 1
  • c0763dfbfa67283e911cbaf459f2a855.jpg
    c0763dfbfa67283e911cbaf459f2a855.jpg
    31.3 KB · Views: 1
  • 5a2c1a15b9666c44caa0f8c1b825a4d7.jpg
    5a2c1a15b9666c44caa0f8c1b825a4d7.jpg
    112.8 KB · Views: 1
  • 1b22e64831ee754372bcc47bb847e4ac.jpg
    1b22e64831ee754372bcc47bb847e4ac.jpg
    97.9 KB · Views: 1
  • 8634e609cdd791036ffaa23dc95c5719.jpg
    8634e609cdd791036ffaa23dc95c5719.jpg
    203.6 KB · Views: 1
  • 569ec3d60b81f2fcfa5cd034ee20fc76.jpg
    569ec3d60b81f2fcfa5cd034ee20fc76.jpg
    117.9 KB · Views: 1
Last edited:
OP
B

BlueBomber

Well-known member
Joined
Sep 14, 2013
Messages
3,201
Location
Outside Boston, MA
Thanks. I have another write-up from Sunday's activities I hope to get to this evening as I wait for the snow to finish filling up my yard and driveway. [emoji2]

Sent from my SM-G950U using Tapatalk
 
To avoid these ads, REGISTER NOW!
Top Bottom