
You are using an out of date browser. It may not display this or other websites correctly.
You should upgrade or use an alternative browser.
You should upgrade or use an alternative browser.
BP&B Hobby Shop
- Thread starter HD FLHX
- Start date
bulletpruf
Well-known member
Ok, I love the truck, but the wrecker boom and stance are throwing me off. To be capable of hooking up to a car, certainly seems like it would need to ride a bit higher. If you're going to keep it fairly low, I think I would get rid of the boom.
Yes, I realize that it's not intended to be a functional wrecker, and yes, I certainly realize that you built it like you wanted to, but I still think it would look better without the boom.
My $.02.
Yes, I realize that it's not intended to be a functional wrecker, and yes, I certainly realize that you built it like you wanted to, but I still think it would look better without the boom.
My $.02.
Now we need a picture of the wrecker in action. Throw some tires on the Model A and pull it around the yard or something...
 ...with the springs that are in the back...or should I say lack there of, a Model A chassis is probably all it could handle
I do have something planned for the doors. I'm going to put a vinyl decal of my shop logo on the doors. I really thought hard about whether to hand letter it or use a decal. I agree hand lettering would look better, but with a decal whomever buys its later down the road can remove it easier & put whatever they want on it. On a side note the original Sanford & Son truck did sell on ebay a few months back. Brought pretty good money for a rusty old Ford F1The truck looks awesome!
But I just can't help being taken back to my childhood when I see a "dull" red Ford truck of that vintage.
How about lettering the doors like this?

Ok, I love the truck, but the wrecker boom and stance are throwing me off. To be capable of hooking up to a car, certainly seems like it would need to ride a bit higher. If you're going to keep it fairly low, I think I would get rid of the boom.
Yes, I realize that it's not intended to be a functional wrecker, and yes, I certainly realize that you built it like you wanted to, but I still think it would look better without the boom.
My $.02.

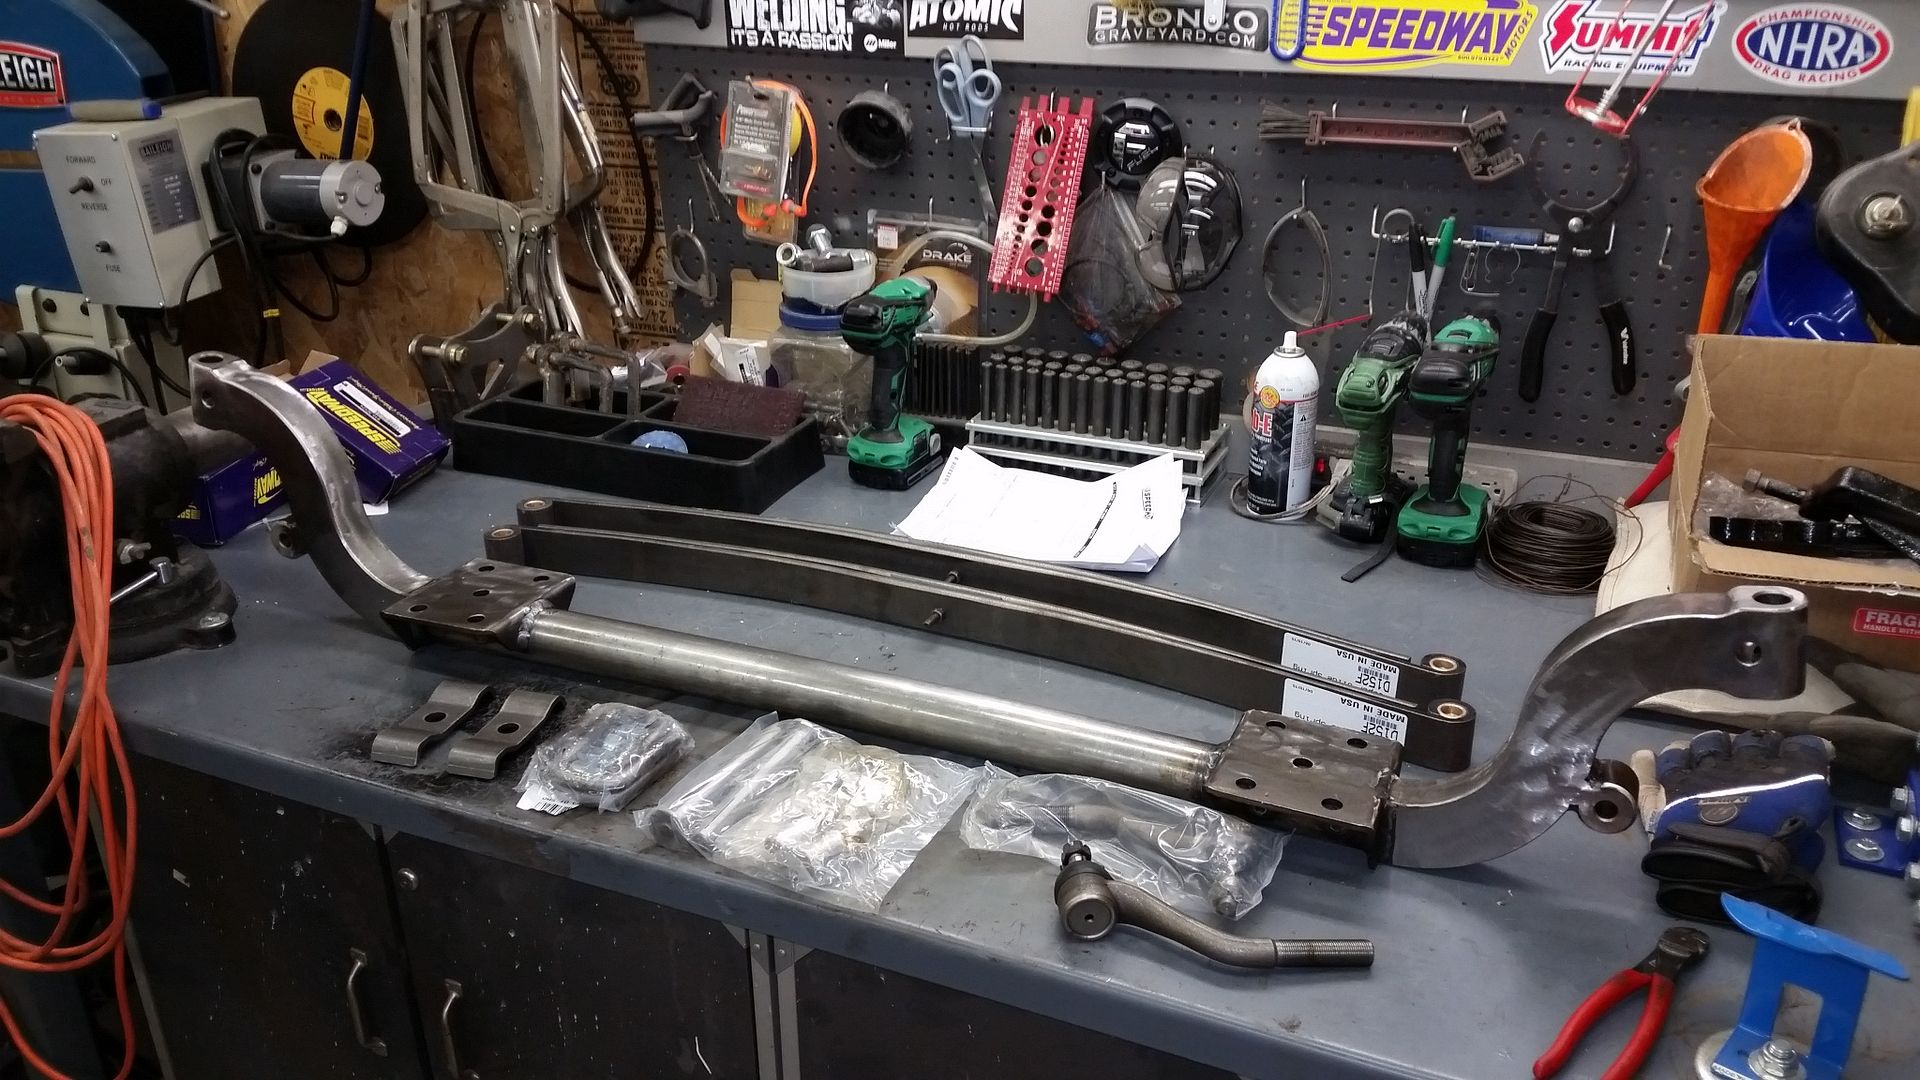
Doing some mock up work on the Model A chassis. The rear suspension is going to be a ladderbar setup with coilovers. It looks like I'll be able to incorporate the front ladderbar mounts in with the transmission crossmember.


Picked up these from Speedway Motors to help figure out the length of the coilovers and set the ride hieght.

Also went ahead and picked up an electric fan. I'm planning on running a stock hood so squeezing a small block into that space can be pretty challenging. Its a 2 speed 2500cfm and made in the good old USofA. I went with a black abs plastic shroud because I figured it would blend in better and not be as noticeable as a aluminum one would.


sqznby
Well-known member
Everything looks great, nice job.
Do you have a part number for the Speedway Motors coil-over height adjusters?
Thanks
Do you have a part number for the Speedway Motors coil-over height adjusters?
Thanks

sqznby
Well-known member
Thanks HD, I appreciate it
Build looks awesome
Build looks awesome
Love following your projects and this one doesn't disapoint either. Keep up the work on the model a it looks to be a nice build from your parts so far.
On a side note I notice you paper your floor during paint any reason you don't use plastic? I've pretty built my shop with the same size and design as yours and currently working on getting my paint room up and going.
On a side note I notice you paper your floor during paint any reason you don't use plastic? I've pretty built my shop with the same size and design as yours and currently working on getting my paint room up and going.
Love following your projects and this one doesn't disapoint either. Keep up the work on the model a it looks to be a nice build from your parts so far.
On a side note I notice you paper your floor during paint any reason you don't use plastic? I've pretty built my shop with the same size and design as yours and currently working on getting my paint room up and going.
Thanks for following along. Do you have any pics up of your place or a build thread?
I paper the floor for a couple of reasons. Unless you use a plastic designed for automotive paint use, paint will not stick to the plastic and could blow off once dried and that type of plastic is generally very thin as it is made for masking purposes. A lot of the time I paint many parts a day or two apart and I don't necessarily re-paper between days. For instance when I painted the F3 I painted all the front end sheetmetal one evening then painted the cab and bed the following afternoon. I just blow out the paint room again and move onto the next pieces. I would also be concerned about the plastic being slick. I paper the floor mainly for dust control purposes and it gives me a good surface to mask to.


Back to the Model A, worked on getting the motor and transmission mounts mocked up. Bought a motor mount kit from Speedway Motors. It looks like its going to work out pretty well. Definitely going to have to get a 90* adapter for the oil filter.


I bought two end caps for the transmission crossmember and made the rest. The crossmember is made out of 1 3/4" .120 wall tubing and the center mount is 3/16ths plate. The end caps are made for a bolt in application, but I think I'm going to weld everything in solid because I'm also planning on using this crossmember for the front ladderbar mounts.


I bought two end caps for the transmission crossmember and made the rest. The crossmember is made out of 1 3/4" .120 wall tubing and the center mount is 3/16ths plate. The end caps are made for a bolt in application, but I think I'm going to weld everything in solid because I'm also planning on using this crossmember for the front ladderbar mounts.


y'sguy
Well-known member
Not really project related, but car related. I've mentioned before that my grandfather was and my father is a Ford mechanic. A couple pics just recently were found of the dealership and my grandfather back in the 40's and 50's. He started working at Geyer Ford as a mechanic in 1948.

Geyer later sold the dealership to Jack Cross, in which it became Jack Cross Ford. That is who my father started working for along side my grandfather in 1975. The dealership transferred owners a few more times but stayed in that location till 1993 when a new building was built. Its hard to imagine in this day and age working in the same building out of the same 2 stalls for approximately 45 years. I grew up in this garage, it seems just like yesterday I was helping my dad after hours prepping new cars back in the mid to late 80's.
My grandfather is the 5th from the right.


Thanks for showing the 56 Bird and the other FORD dealership photos. I'm a 55 bird owner and grew up being around an a FORD dealership much like that.
If you find anymore photos like this to share please do. Love seeing them.
Thanks for following along. Do you have any pics up of your place or a build thread?
I paper the floor for a couple of reasons. Unless you use a plastic designed for automotive paint use, paint will not stick to the plastic and could blow off once dried and that type of plastic is generally very thin as it is made for masking purposes. A lot of the time I paint many parts a day or two apart and I don't necessarily re-paper between days. For instance when I painted the F3 I painted all the front end sheetmetal one evening then painted the cab and bed the following afternoon. I just blow out the paint room again and move onto the next pieces. I would also be concerned about the plastic being slick. I paper the floor mainly for dust control purposes and it gives me a good surface to mask to.
No pics or a build thread yet, I know Im slacking. I've always used plastic but was wandering if the paper worked better since I don't want the floor to get a thick overspray layer. I also paint the same with various days to do a project. Mainly due to space and I think it's easier having room to walk around stuff with no chance of bumping anything. Keep the pics coming
Pulled the Bronco out of its winter slumber, cleaned it up and took it out for a quick cruise Thursday while it was nice out.


Photo op with the '50


Its been a couple years since the Bronco has been done...time for a new look . Going to be breaking out the body saw to make room for a new wheel & tire package. I have a set of Fuel Offroad Anza 17x9 gunmetal grey rims wrapped in 35x12.50 BGF AT's on order from 4WheelParts. Just received a set of flares and rock slider yesterday from Wild Horses 4x4. The flares & sliders will be painted blue.


Also just finished installing a new 1 wire alternator and tach.


Photo op with the '50


Its been a couple years since the Bronco has been done...time for a new look
. Going to be breaking out the body saw to make room for a new wheel & tire package. I have a set of Fuel Offroad Anza 17x9 gunmetal grey rims wrapped in 35x12.50 BGF AT's on order from 4WheelParts. Just received a set of flares and rock slider yesterday from Wild Horses 4x4. The flares & sliders will be painted blue. 


Also just finished installing a new 1 wire alternator and tach.


KCarGuy
Well-known member
Beautiful Work.
Fantastic Transformation of Junk to Jewel!!!
Fantastic Transformation of Junk to Jewel!!!
1953mercury
Well-known member
Back to the Model A, worked on getting the motor and transmission mounts mocked up. Bought a motor mount kit from Speedway Motors. It looks like its going to work out pretty well. Definitely going to have to get a 90* adapter for the oil filter.
I bought two end caps for the transmission crossmember and made the rest. The crossmember is made out of 1 3/4" .120 wall tubing and the center mount is 3/16ths plate. The end caps are made for a bolt in application, but I think I'm going to weld everything in solid because I'm also planning on using this crossmember for the front ladderbar mounts.
How odd, a ford engine in a ford hot rod. Nicely done.
MikeTime to break out the body saw on the Bronco quarters


With rock sliders set in place, keep in mind the new tires on order are 35x12.50's on a wider rim so it'll fill out the wheel wells more than the 33x10.50s currently on it.


I had a little left over TruBlue base, but I went ahead and picked up another quart just in case. Hope to get all the parts painted over this weekend

Also bought a new set of inside door panels

Last edited:
SebringSilverZ
Well-known member
Can't believe you cut it! Should look good with the flares/sliders painted and new wheel/tire combo. Look forward to the pictures.
Ohmthis
Well-known member
I second the cutting part, but this is your truck not mine. It will look damn good when its finished. I also love the blue silver combination.
Just got back from a quick road trip to SW Ohio to pick up a 1964 E100 Army truck I just purchased. It started life as a Government Special Order built in December of 1963. Pretty much still stock unmolested. It has a 144ci straight 6 with a 3-speed column shift. According to the seller it spent its military time at Fort Rucker in southern Alabama.


MP&C
Well-known member
That's bad ***..
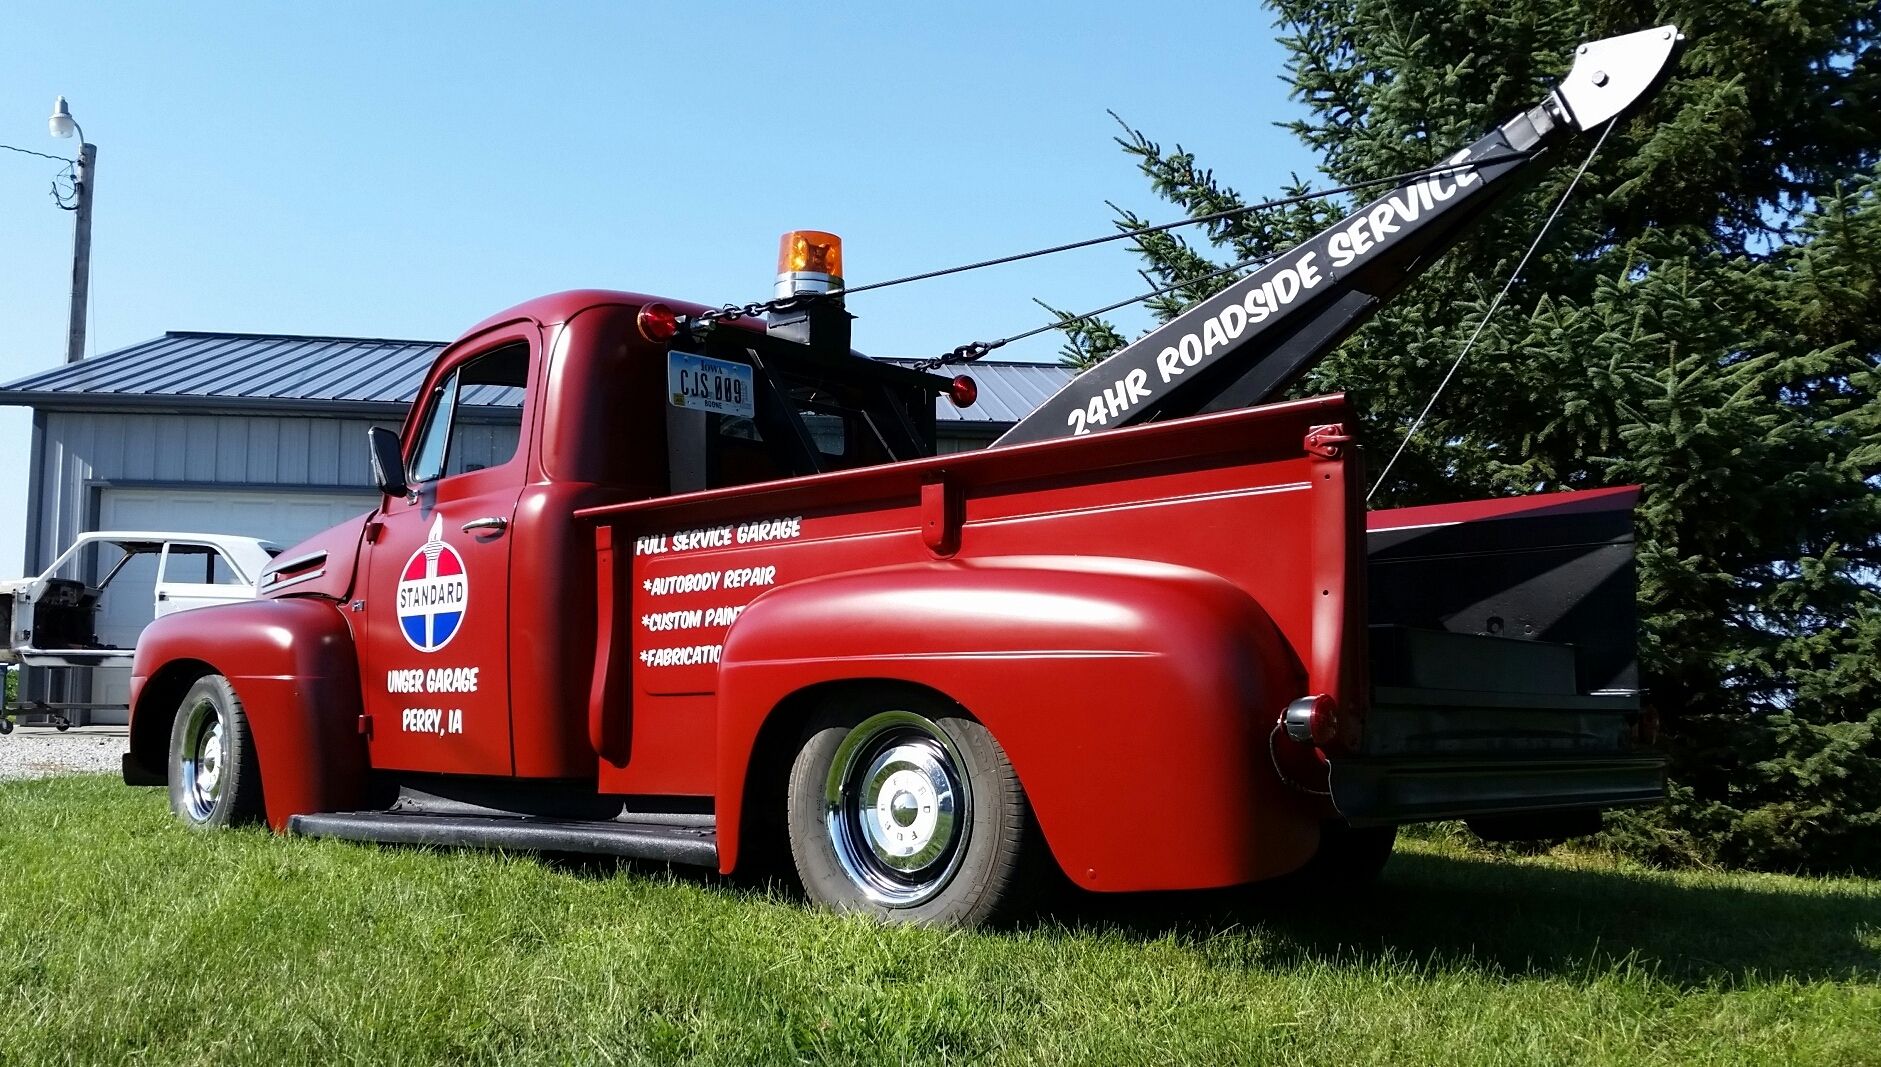
A few updates on some of my projects. First lettered the '50 tow truck


And onto the Bronco, the new Fuel Offroad 17x8.5 Anza's arrived mounted on a set of BFG 35x12.50 KO2's

Rock sliders and flares mocked up

Prepping parts for self etching primer and paint.

House of Kolor TruBlue with UFC35 clear


New door panels

And all back together


And onto the Bronco, the new Fuel Offroad 17x8.5 Anza's arrived mounted on a set of BFG 35x12.50 KO2's

Rock sliders and flares mocked up

Prepping parts for self etching primer and paint.

House of Kolor TruBlue with UFC35 clear


New door panels

And all back together


bulletpruf
Well-known member
Love the Bronco!
Truck does look better with the lettering.
Keep the updates coming.
Scott
Truck does look better with the lettering.
Keep the updates coming.
Scott
don long
Well-known member
I like the old Bronco but I'm partial to the tow truck for too many reasons
The lettering made it look killer
The lettering made it look killer
HD, where did you get the flairs? That's the best looking set that I've seen on a bronco.
From Wild Horses 4x4
http://www.wildhorses4x4.com/product/16959
zmotorsports
ALLIANCE MEMBER
Nice job on all the projects. I appreciate the high level of workmanship. I followed the Nova build and glad to see you started a shop project thread. Awesome looking box Bronco.
Subscribed.
Mike.
Subscribed.
Mike.
The only award that matters to a paint & body guy "Best Paint" Yesterday the Nova received its 2nd best paint award and placed 2nd overall.


Had a blow out on the Econoline, of course no jack so I ended up having it towed back to my place. I knew the tires weren't great, but I didn't think they that bad either Anyway picked up a set of 70K mile Hankooks for $230 shipped. Cheapest set of tires I've bought in years, gotta love good old 14" tires. With the wheels off it gave me a chance to look at the front brakes, it has pulled to the right under breaking since I've had it. PO said "just needs the shoes adjusted". What he meant to say was left wheel cylinder is puking fluid all the shoes, the adjusters are froze solid and the shoes are worn out.
 Went through the brakes completely, threw on a new set of shocks for good measure and now it stops nice and straight


Love how a nice satin paint job looks in the sun

Yesterday the Nova received its 2nd best paint award and placed 2nd overall. 


Had a blow out on the Econoline, of course no jack so I ended up having it towed back to my place. I knew the tires weren't great, but I didn't think they that bad either
Anyway picked up a set of 70K mile Hankooks for $230 shipped. Cheapest set of tires I've bought in years, gotta love good old 14" tires. With the wheels off it gave me a chance to look at the front brakes, it has pulled to the right under breaking since I've had it. PO said "just needs the shoes adjusted". What he meant to say was left wheel cylinder is puking fluid all the shoes, the adjusters are froze solid and the shoes are worn out. Went through the brakes completely, threw on a new set of shocks for good measure and now it stops nice and straight 


Love how a nice satin paint job looks in the sun

Last edited:
xtremek
Well-known member
The engine on that Nova is arguably the nicest looking I've ever seen. Very clean and simple.
Been busy replacing the windows and residing my house recently so I haven't
spent much time in the shop. I did just get done pulling the transmission out of the E100. The clutch lever either broke or never had its retaining clip and allowed it to disengage the throwout bearing, which meant I lost the clutch.


I was able to locate a box of NOS spring clips

Since it was apart went ahead a bought a clutch kit and had the flywheel resurfaced

Here's a little trick for removing a pilot bushing. Find a steel rod that fits tight in the bushing, fill the inside of the bushing with a slice of bread then drive the rod in. The bread will compact and push the bushing out. Its a lot easier to clean up afterword compared to the old grease trick.

Its back together now and works as it should, much better feeling clutch pedal.
Lastly a few pics of the Econoline and the '50 Wrecker at a couple old gas stations along the original Lincoln Highway old US 30 here in central Iowa


Last edited:
YJ4000
Well-known member
Very cool pictures at the gas stations.
Ryan.
Ryan.
Wanna Ride
Well-known member
- Joined
- Jul 28, 2010
- Messages
- 2,790
Some really nice looking projects!
Worsedog
Well-known member
Here's a little trick for removing a pilot bushing. Find a steel rod that fits tight in the bushing, fill the inside of the bushing with a slice of bread then drive the rod in. The bread will compact and push the bushing out. Its a lot easier to clean up afterword compared to the old grease trick.
I use the same method but with damp newspaper.
I use the same method but with damp newspaper.
A few of the going ons around my place. First the '50 tow truck got a new 3" drop axle and lowering springs from Speedway Motors.
Thankfully the old kingpins came out pretty easy. Sent the spindles out to a local machine shop and had new bushings pressed in and line honed to fit the new pins.

Quick coat of chassis black
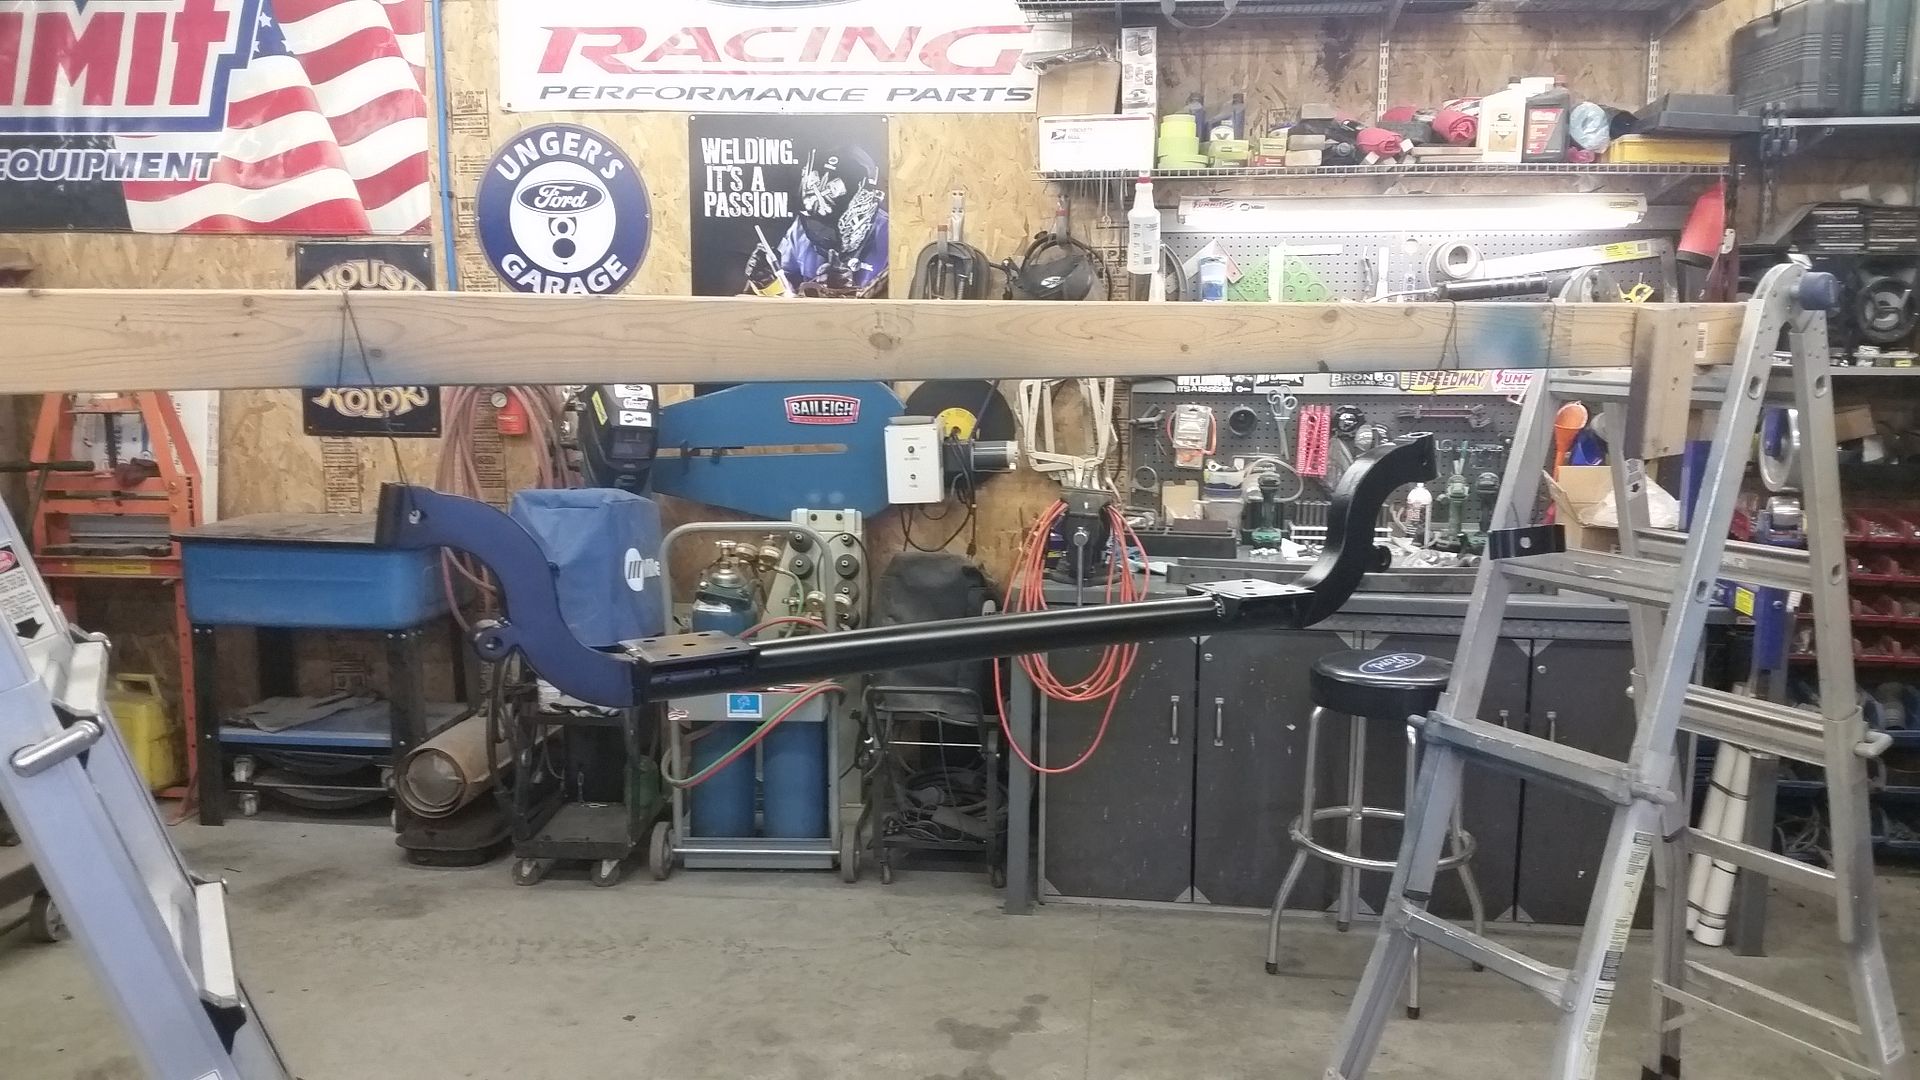
About as low as you can get one of these trucks on a static drop with an unmodified frame.


And secondly I pulled my '64 Fairlane out of storage and got it torn down. It was an unfinished project I bought cheap a few years ago and just stuffed it away.

Previous owner had made an attempt to fit a 460 into the car, actually got it in after cutting the **** out of the strut towers. then added a custom fab'd tower brace


Appears to be a pretty clean old 460 with a c6

A solid afternoons worth of work


Its handy having a wrecker boom around


Bare shell on a cart, plank canvas of sorts. I'm planning on doing a mustang II style IFS on coilovers up front and back halving the rear with a 4 link and coilovers holding a 9" in place. Undecided on the engine, maybe an old FE or a stroked small block
Kinda the look I have in mind

lethal-6
Well-known member
Did you make or purchase the body cart? Congratulations on the paint award the nova looks great. I may have missed it but what paint and clear did you use on it?
Did you make or purchase the body cart? Congratulations on the paint award the nova looks great. I may have missed it but what paint and clear did you use on it?
I bought that cart from Summit Racing, fully adjustable both length and width. It could easily be made for probably half of what they sell them for. I was super busy at the time and needed a cart so I just bought it.
The paint on the Nova is PPG, Deltron DBC base with DCU2002 Concept clear. There is a link to the Nova build thread in the first post of this thread if your interested in seeing it start to finish.
lethal-6
Well-known member
Thanks for the info I will look up the nova build.
YJ4000
Well-known member
Looking forward to watching the build.
Ryan.
Ryan.