To avoid these ads, REGISTER NOW!

Bridgewood 24" planer rebuild

jar944

Well-known member
Joined
Jul 26, 2010
Messages
5,958
Location
Northern VA
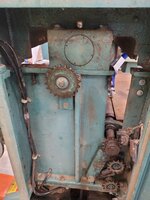
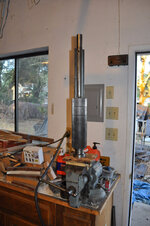
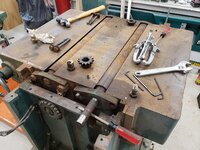
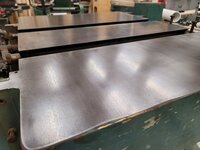
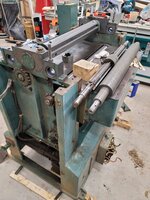
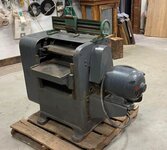
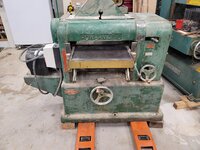
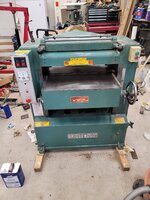
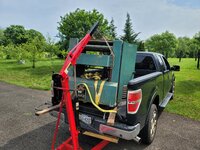
Picked this up last Saturday for $300. It's a 1988 bridgewood 612-PVG 24" (actual 630mm/ 24.8") capacity. Power wise it has a 15hp main motor, 1hp feed motor and 1hp table elevation motor.

20240527_115844.jpg20240527_105723.jpg20240527_113920.jpg20240527_114926.jpg20240527_114959.jpg

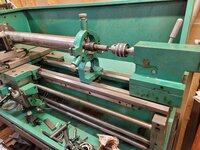
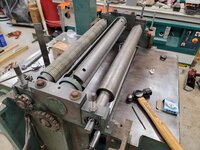
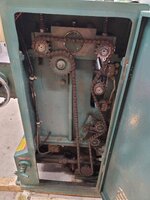
My intention was just to scrape the rust off and run it, but after powering it up (took a bit of head scratching to make that work) I noticed some squeaks in the feedworks where there shouldn't be.


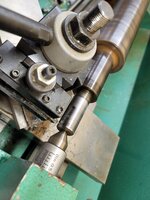
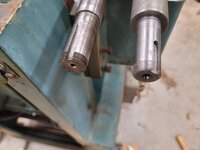
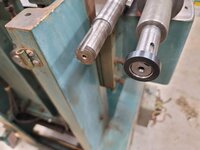
Beyond bearings I need to fix the previous "fix" on the outfeed roller.
20240531_175944.jpg

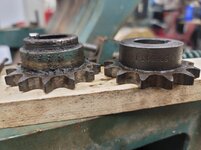
I believe it should match the infeed sprocket retaining method (threaded) and ideally not be undersized as well as round. 20240601_081536.jpg
20240531_181345.jpg

The feed roll sprockets are not the same but they are the same size. I think the replacement one should be fine to use with a correct spacer.
Screenshot_20240601_082238_Gallery.jpg
 

Attachments

  • 20240531_175924.jpg
    20240531_175924.jpg
    970.7 KB · Views: 10
Last edited:
To avoid these ads, REGISTER NOW!

PCustoms

Well-known member
Joined
Jul 23, 2011
Messages
23,491
Location
VT
$300?

I'm jealous. Even if you put $1k into it that's an amazing deal!
 
OP
J

jar944

Well-known member
Joined
Jul 26, 2010
Messages
5,958
Location
Northern VA
Looking at this bridgewood a bit more, and looking at a late model oliver 299 rebuild thread, they are very similar in design but different.

The nice thing is at least I have something to go off of.

Having never paid attention to the internals on a 299, searching for the correct amount of grease in a segmented infeed roller and seeing one from a 299 tipped me off.

Bridgewood
20240610_213543.jpg20240610_213406.jpg20240610_213351.jpg

Oliver
DSC_1123.JPGDSC_1122.JPG

The tables share a lot of similarities on the bed roller linkage and drive
20240611_074040.jpg20240611_074048.jpg
 
Last edited:
OP
J

jar944

Well-known member
Joined
Jul 26, 2010
Messages
5,958
Location
Northern VA
Looks like you're making good progress on that Bridgewood jar. You'll have her looking and working like new in no time...Ed.

Thanks
Hopefully ill be done sooner than later. I ordered a 5 gallon bucket of evaporust and picked up a couple sticks of 3 and 4" pvc to soak the feed rollers.and possibly the head. I'm still debating on pulling the table to get at the bed rollers.
 
OP
J

jar944

Well-known member
Joined
Jul 26, 2010
Messages
5,958
Location
Northern VA
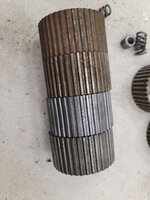
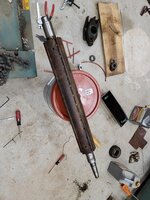
Pulled the rest of the segments off the infeed shaft, and started cleaning them in one of my ultrasonic cleaners with evaporust..
20240612_233023.jpg
20240612_233103.jpg

I found one cracked weld that needs some attention. Hopefully welding it doesn't warp the shaft.
20240612_233212.jpg20240612_233135.jpg
 
OP
J

jar944

Well-known member
Joined
Jul 26, 2010
Messages
5,958
Location
Northern VA
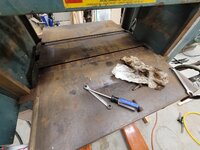
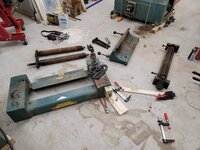
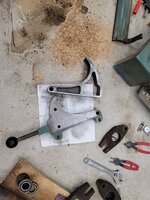
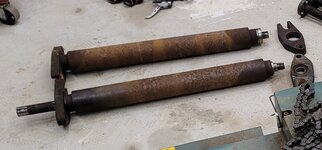
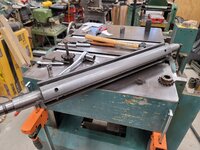
Started working on the planer this weekend after a bit of a hiatus. I ended up pulling the yoke, cutterhead/blocks and table rollers. A couple of the table roller bearings were bad so I ordered new bearings for all four rollers, and some new snap rings since I seem to be missing five of them from the factory.

20240803_090845.jpg20240803_165658.jpg20240803_170243.jpg20240803_214835.jpg20240804_123448.jpg20240804_122940.jpg

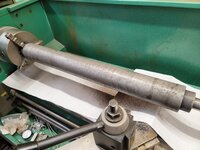
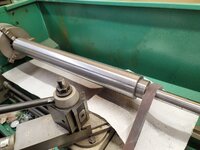
This was definitely welded and new keyway machined. Oddly it wasn't turned it seems to have been hacked with a angle grinder. The shaft should have been 25mm 6205 bearing (bearing seat was 75% intact so i left it) beyond the seat was ground off center. It cleaned up at .962" and finished at .950" for a .025" sleeve for a 1" bore sprocket. Hopefully it works how I envisioned

20240804_170835.jpg20240804_183940.jpg
 
Last edited:
OP
J

jar944

Well-known member
Joined
Jul 26, 2010
Messages
5,958
Location
Northern VA
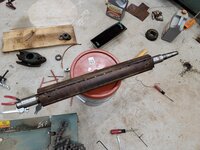
As removed
Screenshot_20240807_074019_Gallery.jpg

After evaporust.
20240806_203913.jpg

After 180grt emery
20240806_204500.jpg

And after getting the infeed almost installed I realized why that side was missing most of the retaining rings from the factory. It's currently locked up tight because the roller bearing journals don't have clearance to the shoulders and the overall length shoulder to shoulder is too long by at least 1/8". Looked like I'm pulling it and machining some clearance.

20240807_074511.jpg
 
To avoid these ads, REGISTER NOW!
OP
J

jar944

Well-known member
Joined
Jul 26, 2010
Messages
5,958
Location
Northern VA
Fixed the clearance issue. I took .100" off each shoulder (retaining clips were 2mm) ans reinstalled the roller. Everything works as it should now, unlike how it left the factory.

20240807_090801.jpg20240807_091859.jpg
 
OP
J

jar944

Well-known member
Joined
Jul 26, 2010
Messages
5,958
Location
Northern VA
Was that why it fell into disuse? (not to spec from the factory)

No, the factory solution was to omit the snap/retaining rings and let the bearings float on the shaft. The sprocket was the outboard retention. It sort of worked, though one bearing was almost out of its bore when I got ahold of it.

As far as I can tell this machine was at a small sawmill that shut down. It went to the owners brother and sat in a open shed until he was tired of looking at it.
 

M635_Guy

Well-known member
Joined
Dec 5, 2019
Messages
4,336
Location
NC
No, the factory solution was to omit the snap/retaining rings and let the bearings float on the shaft. The sprocket was the outboard retention. It sort of worked, though one bearing was almost out of its bore when I got ahold of it.
gRCGXj.gif poe6hb.gif
 
OP
J

jar944

Well-known member
Joined
Jul 26, 2010
Messages
5,958
Location
Northern VA
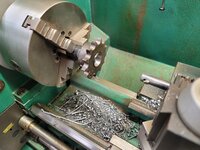
I decided to match the original sprocket retention method and thread the outfeed roller shaft. Left hand .950"x 24tpi because I was lazy and didn't want to swap change gears to cut metric threads.

20240815_212418.jpg20240815_212438.jpg

Just need to assemble the infeed roller and get both into the bearing blocks.
20240815_212925.jpg
 
OP
J

jar944

Well-known member
Joined
Jul 26, 2010
Messages
5,958
Location
Northern VA
Looks good sir!

Thanks. Hopefully it's back together this weekend.


Turned a bushing for the previous owners replacement attempt using a incorrect 1" bore (original was 25mm) sprocket and welded it in place. Boring it back out to .951 to match the outfeed roller. I'll cut the keyway last.

20240816_105915.jpg
 

loganb

ALLIANCE MEMBER
Joined
Dec 29, 2011
Messages
5,631
Location
Omaha, NE
If you decide you need a slightly smaller one and a road trip to the midwest...$450 gets you this 16" Powermatic right now here in Omaha

powermatic.jpg

A much more manageable 5hp motor :)
 
OP
J

jar944

Well-known member
Joined
Jul 26, 2010
Messages
5,958
Location
Northern VA
If you decide you need a slightly smaller one and a road trip to the midwest...$450 gets you this 16" Powermatic right now here in Omaha

powermatic.jpg

A much more manageable 5hp motor :)
Lol I'm trying to sell my 18" powermatic currently.. though not at that low of a price. Prices are depressed from the last few years apparently.

20240802_180027.jpg
 
OP
J

jar944

Well-known member
Joined
Jul 26, 2010
Messages
5,958
Location
Northern VA
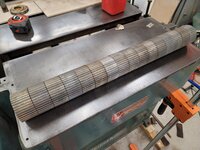
It's back together. I need to get the knives sharpened and installed then set the upper rollers/chipbreaker/and pressure bar heights based off the final knife height. I'm also looking for a pm224/225 knife grinder bar to retrofit to this planer to be able to grind in place.
20240817_133450.jpg
20240818_094505.jpg
20240818_094542.jpg
 
Last edited:
To avoid these ads, REGISTER NOW!
Top Bottom