I can't tell you how excited I am to say that electrical is complete, I now have lighting - and plugs - and (most critically in Florida) - AIR CONDITIONING!
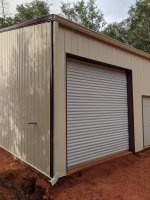
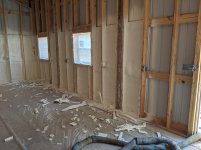
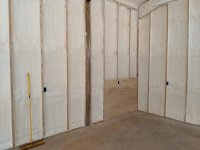
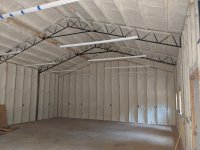
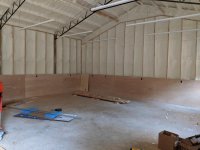
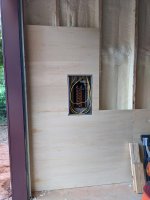
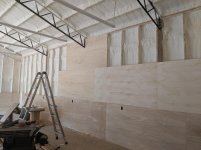
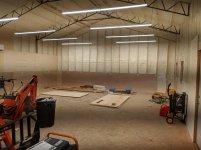
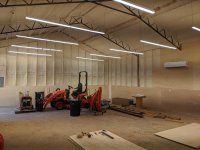
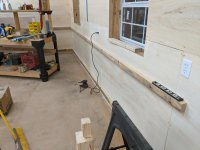
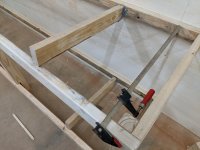
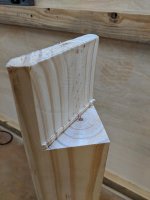
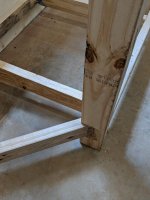
Alright. So, I've mentioned in the past that outfitting the interior walls with plywood sheeting was going to be a phased project, and that hasn't changed. However I was able to get one particular spot finished up to what it'll all ultimately look like, so I could hang the mini-split air handler there.
I've also mentioned that I bought a DIY mini-split and, while it was DIY, the instructions pretty much sucked. The manual started with operation - then went to exterior unit installation - then went to interior unit installation - then had a section about prepping the hoses, that should have been done before either interior or exterior unit was installed but also left you with the physical impossibility of threading 25' of tubing through a hole, oh by the way don't bend it more than three times, and also don't unroll more than you actually need from the coil, and hey! your manual has a paragraph about connections labelled A, B, C and D that are no longer labelled, but you won't know that until you're comparing your manual to the one that's online, and by the way there are NO instructions for getting the interior unit back off the bracket to reposition things but it's easy because it's just a couple plastic tabs that need pressed, although they're nearly impossible to reach with any tool known to man once the unit is hanging......ok. Getting myself a bit spun up there. Suffice to say it's not difficult to do, at all, AFTER you've done your first one. Also when they say "do it yourself", it doesn't really mean ALL by yourself, because at least with the 36k unit, stuff is just large and awkward. Next time, I think I'll try to bait a friend with some beer. The assistance would have been glorious.
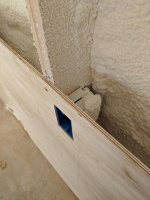
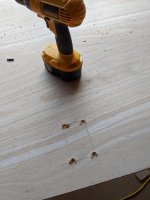
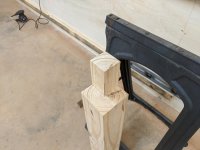
On to the install: The instructions included a cardboard template for the interior unit wall mount that I dutifully positioned and marked my wall attach points with, as well as the 3.5" hole for all the hoses and power lead to run. The scriptures give two different mounting heights, one for ceilings less than 9', the other for ceilings greater than 9'; mine is the latter so the base of the air handler needed to be at least 90.5" above the floor. I wanted to have the air handler centered on the back 40' wall, but that would have put the 3.5" hole straight through one of the 6x6 poles and I didn't want to play that game, so I shifted it slightly to the right for clearance. I marked my stud locations as the plywood was going up so I knew where the 2x6's were, and mounted the interior wall plate per the instructions. The 3.5" hole is supposed to slope "slightly" downhill from interior to exterior - 0.2", by the book - I got a little zealous and think I had a good 1" downhill slope. Not a super big deal, except the plastic protective tube they give you to slip through the hole protrudes about 3/8" on the bottom instead of sitting reasonably flush. Also, I've got 6" thick walls with 3/8 ply on the inside and about 1" ribs on the outside, so my standard size dewalt cordless drill juuuuust barely got the top edge of the hole saw blade through the exterior steel. Like anything else in life, just a couple inches longer would have made a helluva difference. Walking around outside to finish the drilling/hole cut, I find that I could not have nailed dead-center on one of the ribs any better if I had measured it out and tried! (Moral here - before settling on where to install the bracket, measure things out on the interior and exterior. Make sure your 3.5" hole will come out where you want on the outside, like somewhere in the 7" of FLAT sheetmetal, not anywhere on the 1.5" of ribbed sheet metal). I knew this would complicate installing the exterior trim piece for the plastic protective tube mentioned earlier, and my plan to install a cover over the exterior piping.
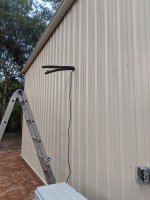
From there it was a matter of slipping that plastic protective tube through the hole, bending the refrigerant tubing on the back of the air handler out, and feeding the tubing/power lead/condensation tube through the 3.5" hole. Thence began the first of four install/removal processes for the air handler. Suffice to say: when you do it, make sure to get a roll of the protective wrap - it's not tape, like I thought it was - and wrap the tubing, drain hose and power chord before slipping them through the hole. Make sure you do it in the proper orientation with the drain tube on the bottom of the bundle as it's installed. I had the air handler on it's side for this part so the drain tube was actually on the right side as I wrapped it, but it's on the bottom when the unit is raised and rotated into position. Once the interior unit is mounted head outside and carefully bend the piping down, being careful not to kink it. Take some time to plan out how you want the rest of the refrigerant lines to run; they're a fixed length on the DIY kit (25' in my case), so I unrolled only as much as necessary to get from the interior unit lines we just bent, to the outside unit. Connect the lines to the interior unit lines hand-tight, then tighten using a double-wrench method. The kit comes with an adhesive-backed rubber material they call "sound deadening material" that gets wrapped around these connections after you've checked them for leaks, and then you're somehow supposed to be able to wrap all THAT with another piece of included foam insulation. Riiiight. Still haven't cracked that nut, and it's on my to-do list. Continuing, you've got to maneuver the remainder of this 25' roll of insulated tubing behind the exterior unit and bend the other ends of the piping (from the middle of the roll) in a fashion to connect to the exterior unit fittings without undue strain on the whole assembly. Let's just say this wasn't a PG-rated period of time. Once connected the exterior unit has a couple valves to open with an (included) allen wrench, and ta-da! Your HVAC lines are connected. Leak check again, then take that roll of protective-not-tape material and begin trying to wrap the whole 25' of tubing, and power lead, and drain hose, some of which is probably still coiled up nicely and tucked away behind the exterior unit. More creative language is helpful here and, if you find yourself coming up short with words, slice open the back of your hand on the sheet metal flange of your building so you can decorate portions of the wall/tubing/protective-not-tape material with blood. That part is also not in the instructions but I found it helpful. This is also about when I discovered my printed manual DOES update itself, because there was now a step to install a drain fitting on the bottom of the outdoor unit before you mount it to a pad. That step was not there in any of the seventeen previous times I read the manual, and I'm certain of it.
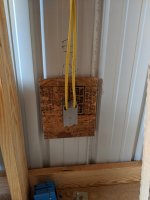
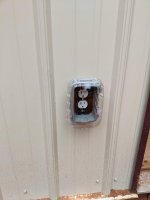
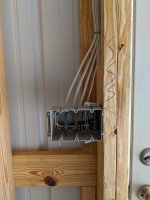
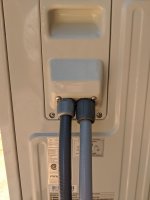
Up next is the electrical connection. My electrician installed an isolation box so it was a simple matter of pulling the power block from that to make sure I didn't electrocute myself. The electrical hookup itself was easy; remove the outside unit power panel cover plate, connect the labeled power leads to the designated spots, and put the cover back on. Since I'm always willing to complicate a simple step I bought a 1/2" screw-in conduit connector fitting and associated length of conduit to protect my power lead, mainly because it's what my electrician used to bring the 220v power to the unit and I figured things should match. Fortunately with the two conduit connector fittings installed, the cover plate needed a slight bit of grinding to fit over them; a simple task for a dremel and grinding wheel right up until the grinding stone came off the mandrel. Insert more language. I was lucky in that juuuuust enough material had been removed by then that the cover plate fit nicely back into place. From there the disconnect unit power block was re-installed and the unit was offically installed.
Next was a trip back inside the building and a quick mash on the indoor unit remote control power button...with no results. Trudge over to the circuit breaker panel and turn on the breaker, push power button again - nothing. Shake your head and mutter obscenities while installing batteries in the remote, then try again. At this point you're rewarded with the glow of the set temperature on the indoor unit, and the refreshing flow of air! The manual calls for some checks to make sure the heating & cooling functions work as they should, which only took a few minutes. Since then I've left the unit at 78°, aside from a short period I was in there working and I set it to 72°. It seems to be doing a fine job so far of regulating temperature in the building, and it's refreshing to walk in to a cool, low-humidity environment after being outside for any length of time. I haven't played with any of the other settings like 'fan only' or 'dehumidify' yet but it does a great job of pulling moisture out of the air, as evidenced by the near constant flow of water out of the drain tube when I first turned it on. Now that the building is reasonably air-conditioned the drainage has slowed to a dribble, but it ramps back up if I have the garage door open for any length of time.
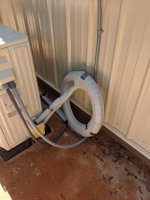
Back to what I mentioned earlier about covering the exposed outside lines; I bought a kit that is supposed to enclose the vertical portion of the lines from where they come out of the 3.5" wall hole, down to wherever you choose. If you're going to use one of these, make sure you install the top piece against your wall before threading the piping and power leads through. I didn't, effectively making the kit impossible to install. Also, I have no earthly idea HOW they expect the piping to be bent at a sharp enough angle coming out of the wall, to fit within the confines of the top piece of the cover kit. If you have a tubing bender I think you can make it happen. If all you've got are a couple of mark-1 mod-0 hands, I don't think it's possible without kinking the tubes. Additionally the concealment kit is just barely large enough to enclose the insulated pipes, power lead and drain line - there's no way it'll physically fit over the connections between the indoor unit and outdoor lines, especially after you add the sound-deadening material and then any kind of insulation over that. And, oh by the way, remember when I said all this is directly on top of one of the ribs on my sheetmetal? Yeah - that kit was about a $40 loss for me. I'm sure I'll find something somewhere in the barn that needs a fancy cover system and it'll come in handy for that! In the meantime I'm thinking about some 4" PVC, cut in half, with a 90° elbow at the top, and somehow siliconed/flex-sealed/JB-welded/clamped to the wall. More to come on that....I haven't quite figured out my solution yet.


 .
.

