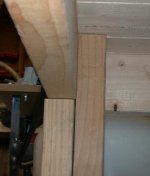
Hey guys I'm gonna be building my first work bench. The 1st picture is the bench i am mocking mine after the 2 nd picture is the base I want and the 3 rd is the space I have. I have no wood working skills any expertise or advice would be greatly appreciated.


You are using an out of date browser. It may not display this or other websites correctly.
You should upgrade or use an alternative browser.
You should upgrade or use an alternative browser.
Building a workbench for the 1st time help
- Thread starter ttimpe
- Start date


* Measure twice (or more), cut once.
* As this sounds like your first woodworking project, I would avoid mortise & tenon joints.
* Keep it simple, square, and level.
* Use screws instead on nails. Stronger, plus it makes things much easier to adjust or disassemble if needed.
* As this sounds like your first woodworking project, I would avoid mortise & tenon joints.
* Keep it simple, square, and level.
* Use screws instead on nails. Stronger, plus it makes things much easier to adjust or disassemble if needed.
regguy1
Well-known member
Before you build anything look through this thread, avoid the "I should've done this" syndrome
http://www.garagejournal.com/forum/showthread.php?t=464&highlight=workbench
http://www.garagejournal.com/forum/showthread.php?t=464&highlight=workbench
Slednut
Well-known member

Not sure what you want to do with your work bench.. if it'll be a work bench for wood working, an assembly table more along the lines of a catch all bench for sharpening things, working on parts or maybe just a flat place to do gluing jobs etc.
For wood working you need ridgid and flat.
Mortise and tenon may prove frustrating just starting out, and while screws can work I think a good way to look at most any supporting joint esp holding the top up - avoid just screwing a 2x4 across the sides of posts. Other than timberloks, most screws are quite brittle and don't handle shear forces well. They're meant to hold 2 pieces together, not support weight directly. Instead if you can, think along the lines of using 2 2x4's (or whatever material) glued and screwed together for an upright, one cut shorter than the other. Creating a notch to rest a load bearing cross piece on, then screw together. Then screws aren't bearing the weight.
The first image is not a very strong connection, it relies solely on the screws. The second image is a much stronger connection, fully supported with the screws just holding pieces together. (just as something to consider with pieces which will bear weight, regardless of your actual design)
Attachments

I'm gonna use 4x4 for my legs. It's gonna be a bench to work on bike things I ride bmx and mountain bikes. Just a basic workbench that can handle weekend abuse using 3/4 ply for the top supported by 2x4's
Sent from my iPhone using Tapatalk
Sent from my iPhone using Tapatalk
wintermute
Well-known member
Here are details on how I built mine with 4x4 legs.
wintermute gave you a great tutorial. I'd highly recommend tennions 4x4's and 2x4's and through bolts. If you can find a cheap source of butcher block great, otherwise MDF works just dandy. I built mine by myself when I was 10 with a speed square, tape measure, circular saw, chisel, hammer and drill. All those saying to avoid tennions, this is a great place to learn. It's a work bench, not fine furniture.
I think your plan looks good, only thing I might do differently is to make space for a bottom tool box (HF44"?) in that large opening.
I think your plan looks good, only thing I might do differently is to make space for a bottom tool box (HF44"?) in that large opening.
Last edited:
ez-duzit
Well-known member
...I'm gonna be building my first work bench...
I have no wood working skills...
Set a solid core door atop 2 rollaway base cabinets, with or w/o wheels.
theoldwizard1
Well-known member
Good idea. Not cheap.Set a solid core door atop 2 rollaway base cabinets, with or w/o wheels.
You can also use 3/4" plywood, but I would add a 4" wide piece of 3/4" plywood or 2x4 around all of the edges, for added stiffness.
To attach the top to the rollaway, place blocks of 2x4 on top of the cabinet next to the outer lip of the cabinet. Drill and screw through the lip into the blocks. Place construction adhesive on top of the 2x4s and then place you top on them. Make sure it is square. Add weights. Let sit overnight.
mhoss44
Well-known member
I agree with mortise and tenon. The 2x4 one shorter than the other made post can support a lot of weight, but mostly makes for a good heavy stable bench. The problem I see with the original diagram, the design appears to attach to a wall. That's a big no go for me.
Every time you bang on something, or something heavy on it, it transfers to the wall. Freestanding is the only way to do it. 2 sheets of 1/2 inch plywood makes a good solid top. You can sand and paint for a good surface.
Sent from my iPad using Tapatalk
Every time you bang on something, or something heavy on it, it transfers to the wall. Freestanding is the only way to do it. 2 sheets of 1/2 inch plywood makes a good solid top. You can sand and paint for a good surface.
Sent from my iPad using Tapatalk
Ya not going the mortise and tension didn't notice that one was that . It's gonna be 4x4 not gonna attach to wall unless I need to it sits against my bedroom wall. Thinking. 3/4 ply on top with 2x4 surrounding it
Sent from my iPhone using Tapatalk
Sent from my iPhone using Tapatalk
mhoss44
Well-known member
I think that would work great. Maybe some cross braces underneath. One time I built a bench 14 feet long, 27 inches wide. Posts were leftover 8 inch round fence posts, and the top and shelves were leftover treated 1x6. All this leftovers from a backyard fence. I used some 1/2 inch plywood across the top for a good flat surface.
Sent from my iPad using Tapatalk
Sent from my iPad using Tapatalk
mhoss44
Well-known member
Are you going to try and build the drawers ?
Sent from my iPad using Tapatalk
Sent from my iPad using Tapatalk
It's easy for a beginner to start upside down. Put the top of the workbench (MDF, plywood, etc.) on the floor then attach the 2x4's or 4x4's to it and then add your cross pieces and such. Then tilt it over when you are done. That way at least the top will sit level on the legs. And then of course make sure the legs are all the same length before attaching them and are level and plumb.
Last edited:
It's easy for a beginner to start upside down. Put the top of the workbench (MDF, plywood, etc.) on the floor then attach the 2x4's or 4x4's to it and then add your cross pieces and such. Then tilt it over when you are done. That way at least the top will sit level on the legs. And then of course make sure the legs are all the same length before attaching them and are level and plumb.
Thanks for the advice
Sent from my iPhone using Tapatalk
jesse72
Well-known member
Here is a link to the one I built a year ago. Similar to your ideas:
http://garagejournal.com/forum/showthread.php?t=210523
hope it helps!
http://garagejournal.com/forum/showthread.php?t=210523
hope it helps!
Here is a link to the one I built a year ago. Similar to your ideas:
http://garagejournal.com/forum/showthread.php?t=210523
hope it helps!
Perfect thanks!! Great build by the way
Sent from my iPhone using Tapatalk
