To avoid these ads, REGISTER NOW!

Building my ROTISSERIE!!

e-tek

Well-known member
Joined
Dec 19, 2007
Messages
10,690
Location
Saskatoon, SK
Finally getting to the rotisserie I've dreamt about!! Bought the steel last week, along with casters. The casters had just come in to the Steel Recycler and where on the scrap pile. I grabbed a wrench from one of the guys and went out there in my shorts and flip flops to unbolt them - while the guy swinging the GIANT magnet was working right behind me! :wtf: Being aluminum - and because everything is sold by weight - they came to about $4 each!!!! These are 5inch, ball bearing in cup, aluminum wheels. Perfect for this project!

IMG_2096.JPG


IMG_2093.JPG


IMG_2094.JPG


Wheels cleaned and greased:

IMG_2102.JPG
 
To avoid these ads, REGISTER NOW!

Fauj

Well-known member
Joined
May 24, 2010
Messages
53
Location
SoCal Desert.
There are also some free plans on Autobody101 as well. I looked them over yesterday and they didn't look too bad. The file you download has the full drawing inside of it.
 

Jim Stabe

Well-known member
Joined
Feb 18, 2009
Messages
801
Location
San Diego, Ca
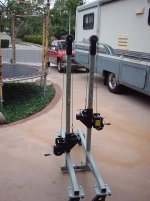
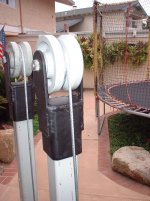
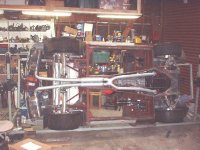
I'm not sure how you will get the car onto the rotisserie but you might want to consider what I did. I have to work alone much of the time so I needed a way to pick the car up off the ground. I used HF worm drive winches and a wheel from a motorized rolling gate.
Rotisserie.jpg

Rotisserie3.jpg

Rotisserie2.jpg

bottom2.jpg
 
OP
E

e-tek

Well-known member
Joined
Dec 19, 2007
Messages
10,690
Location
Saskatoon, SK
Wow - great resources guys - thanks. I was wondering about gettingthe car up to working height!

Your "Cobra" looks wicked from the bottom-side!!!!
 
Last edited:

Stick Figure

Well-known member
Joined
Aug 3, 2009
Messages
1,395
Location
Omaha, Ne
I figured you wouldn't but after seeing a car do a 360° turn at the flip of the wrist, i have to share that design when the subject comes up.

Most important is make you sure you post some project pics up. This area really seems to lack beyond the others most of the time.
 
OP
E

e-tek

Well-known member
Joined
Dec 19, 2007
Messages
10,690
Location
Saskatoon, SK
I figured you wouldn't but after seeing a car do a 360° turn at the flip of the wrist, i have to share that design when the subject comes up.

Most important is make you sure you post some project pics up. This area really seems to lack beyond the others most of the time.

Looking again at the Hoop set-up, I'm not usre I'd like the hoop being in the way, as well as having those attachment points. The thing about the "standard" rotisserie is that the attachment points are often the bumper points and the unit is out of the way of work being done.
 

MP&C

Well-known member
Joined
Oct 21, 2009
Messages
4,405
Location
Leonardtown, MD
Everything has advantages and disadvantages, in looking at the hoops, they save about 5 feet of overall length if you're working in cramped spaces, but add it to the side to make more cramped spaces. The hoops look to be in the way for priming, blocking, painting.....just about everything having to do with the top, bottom, and sides of the car. They would work well for painting the firewall and tail light panel.....then put the car over on a conventional rotisserie to take of everything else. :lol_hitti


For your standard rotisserie, the addition of some gusseted standoffs on the body supports will allow easy access all around the body mounting point for media blasting, priming, painting........


HPIM4767.jpg


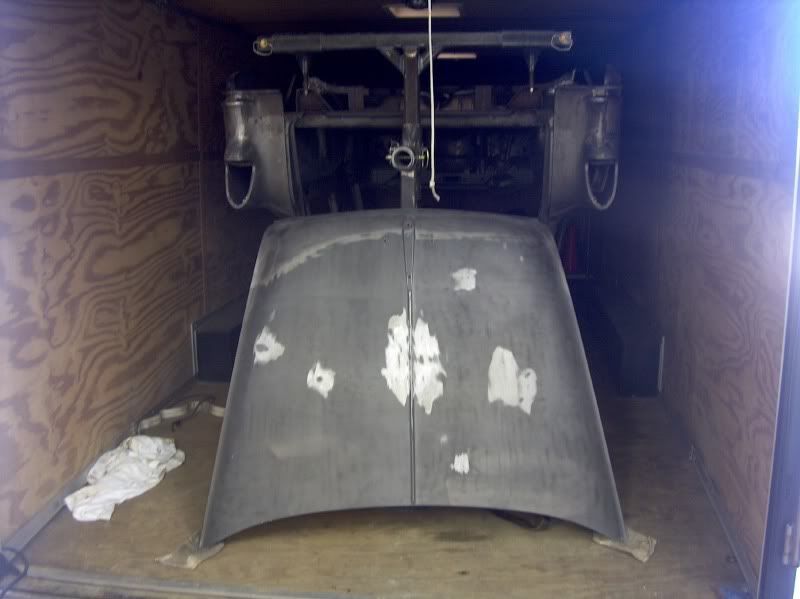
.......fits nicely inside a trailer for transport to the media blaster.....


HPIM4761.jpg


And the easily adjustable CG allows the car to effortlessly be rotated to any position......where it stays..


HPIM4763.jpg


The $1500 I saved over a hoop system (with casters) will easily pay for the paint on this. Yeah, E-tek, I think you're doing the right thing....and nice score on the casters!
 
Last edited:

caper150

Well-known member
Joined
Nov 20, 2007
Messages
1,106
Location
Mantorville MN
how much do you have into it in steel, the last time I priced up everything for onr I had plan to it came out to $750 and for that price I said hell I'll just buy one and save myself the trouble of all that welding, for now I am using the incredible tip over jig

0110001620.jpg

0110001610.jpg


and yes that is a 4 door 65 Galaxie sitting on it.
 
OP
E

e-tek

Well-known member
Joined
Dec 19, 2007
Messages
10,690
Location
Saskatoon, SK
Ah yes, the Incredible Tip-over Jig - still a wonderment of non-technological tool-making!!
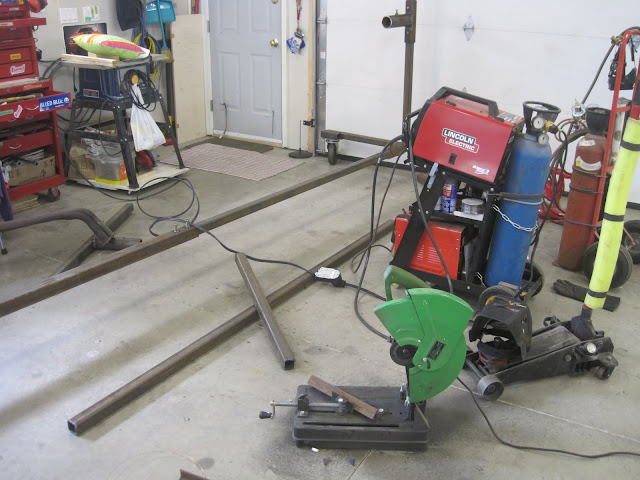
I bought all the steel and casters for $220 at my local steel recycler. All the Grade 8 nuts and bolts where another $30. A spool of mig wire and a bottle of Mig-mix will be another $60. So I'll be about $310 without paint (I'll just brush it with POR 15 that I already have). My time of course, is free and I like making things, that's why I do what I do - but if you didn't - then buying a nice one for around $1000 would be a consideration for sure. An interesting side note is that the instructions called for 4-5 cut-off wheels for the saw.....I used about 1/2inch of one 14inch wheel to make ALL the cuts (pics to follow!).

Unfortunatley, the kids nanny was sick all week so I had to play Mr. Mom, instead of Mr. Rotisserie. This weekend we are going camping, so I won't get back to it until next week. There's always a wrench somewhere waiting to jump into the fray! Oh well, had some great summer-fun-days with the boys..:thumbup:.
 
OP
E

e-tek

Well-known member
Joined
Dec 19, 2007
Messages
10,690
Location
Saskatoon, SK
After getting most my other projects done - and another rainy day in store - I was able to get the welding done on the rotiserrie!

IMG_2274.JPG


IMG_2278.JPG


IMG_2282.JPG


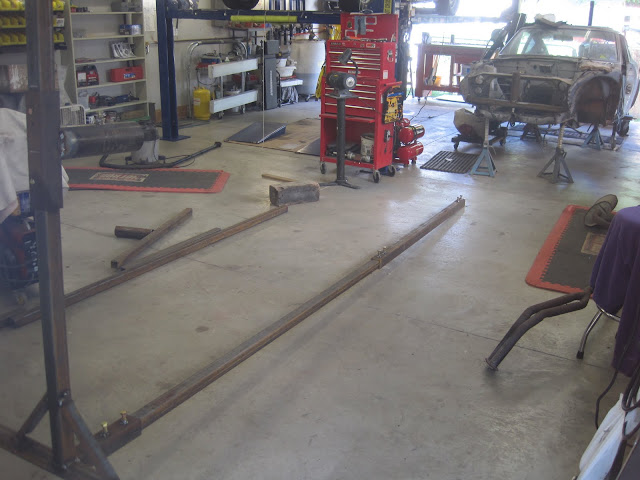
These are the rotating bits:

IMG_2284.JPG


All that's left to do now are to drill holes for the bolts, pins and casters, then fabricating the attachment points....
 
OP
E

e-tek

Well-known member
Joined
Dec 19, 2007
Messages
10,690
Location
Saskatoon, SK
Further progress today on the rotiserrie by E-tek and Sons:

IMG_2368.JPG


IMG_2370.JPG


IMG_2376.JPG


IMG_2377.JPG


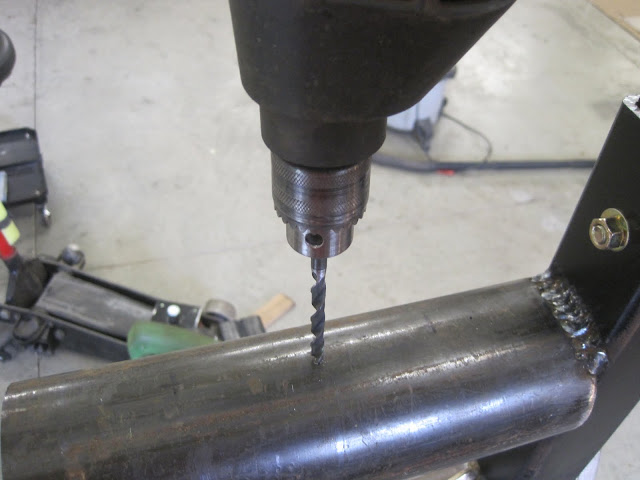
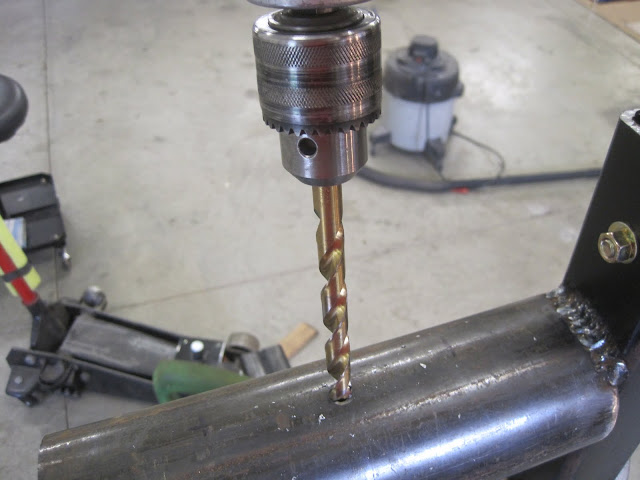
One thing I've realized is how CRAPPY are the drill bits I've been purchasing. Sure, they've been OK for sheet metal for years, but I ruined 10 or more drilling holes for the casters! I'll need to spring for some high quality bits to drill all the 9/16 & 7/16 holes required for the thumb screws and pivot pins!! What do you guys suggest??
 

MP&C

Well-known member
Joined
Oct 21, 2009
Messages
4,405
Location
Leonardtown, MD
Heck, I'd just plug weld them on using the caster mounting holes. Let them cool down in between each hole so you don't burn off the grease from the bearings, and don't clamp your ground across the bearings (take it to the rotis..)
 
OP
E

e-tek

Well-known member
Joined
Dec 19, 2007
Messages
10,690
Location
Saskatoon, SK
Heck, I'd just plug weld them on using the caster mounting holes. Let them cool down in between each hole so you don't burn off the grease from the bearings, and don't clamp your ground across the bearings (take it to the rotis..)

The casters are aluminum.....(as mentioned early on)
 

MP&C

Well-known member
Joined
Oct 21, 2009
Messages
4,405
Location
Leonardtown, MD
Oops, missed that. How about welding the bolts to the bottom of the square tubing to act a studs, position the casters and and nut 'em up...
 

79firebird

Well-known member
Joined
Aug 19, 2008
Messages
385
Location
Victoria bc
Looking good. what my buddy did with his home made one was he used the old style car jacks and it worked good for his old hurse
 
To avoid these ads, REGISTER NOW!
OP
E

e-tek

Well-known member
Joined
Dec 19, 2007
Messages
10,690
Location
Saskatoon, SK
Not sure yet what to use for raising/lowering, but there are a few good options here!

As for piant, I'll likely just brush it with POR15. I've done a few other things with POR15 and absolutely LOVE it. When not in use I intend to stack it outside behind the shop.
 

MScott

Well-known member
Joined
Jun 30, 2009
Messages
1,616
Location
Eastern Ontario
Not sure yet what to use for raising/lowering, but there are a few good options here!

As for piant, I'll likely just brush it with POR15. I've done a few other things with POR15 and absolutely LOVE it. When not in use I intend to stack it outside behind the shop.

My understanding is that POR15 does not last well when subjected to ultra-violet so storing it outside might not be the best idea unless you can cover it. (Or else paint over the POR15 with a cover paint.
 

Brad54

Well-known member
Joined
Jun 13, 2006
Messages
4,646
Honestly, I'd save the money on POR15 and coat it with heavy dose flat black Rustoleum. I've found that to be VERY durable.

If you wanted to be really slick, I like painting all non-contact areas on my shop equipment with Rust-oleum "Hard Hat" or "High Performance" red, and than any contact areas with Hard Hat/High Performance flat black.

Anywhere there is going to be metal-to-metal contact, hit with flat black. I painted my grandfather's vise table with it over 20 years ago... it's still at my dad's house, and he doesn't use it much, but I used it a lot for several years, and he is constantly setting stuff on it, and it looks like I just painted it yesterday.
I made my own vise table about 10 years ago, and I HAVE used it a ton, and beat on it with hammers, done a lot of metal work on/near it, etc. etc. and the top of the bench looks like it was just painted too.

-Brad
 

larry4406

Well-known member
Joined
Jan 27, 2006
Messages
19,565
Location
Northern Virginia
e-tek - what are you using to cut your tube steel? I just burnt up a Lennox 10" metal cutting blade 21886 in a miter box. Blade is rated to 5200 rpm, saw spins at 4900, so within specs. Blade is rated at 3/16 wall, I was cutting 3/16 wall 2.5"x2.5" tubing. I got 4.5 cuts and that was it. First 3 cuts were nice, went downhill from there.

Blade Details:
http://www.toolcenter.com/LENOX_circular_saw.html

Propaganda Video:

Meanwhile, I am out $80.
 
OP
E

e-tek

Well-known member
Joined
Dec 19, 2007
Messages
10,690
Location
Saskatoon, SK
e-tek - what are you using to cut your tube steel? I just burnt up a Lennox 10" metal cutting blade 21886 in a miter box. Blade is rated to 5200 rpm, saw spins at 4900, so within specs. Blade is rated at 3/16 wall, I was cutting 3/16 wall 2.5"x2.5" tubing. I got 4.5 cuts and that was it. First 3 cuts were nice, went downhill from there.

Blade Details:
http://www.toolcenter.com/LENOX_circular_saw.html

Propaganda Video:

Meanwhile, I am out $80.

Sorry - didn't see this...I'll check the brand later. It's an ABRASIVE cutting wheel, not a metal one. The same wheel has made about 20-25 cuts and was about 40% used doing this.
 

larry4406

Well-known member
Joined
Jan 27, 2006
Messages
19,565
Location
Northern Virginia
I have since bought an abrasive disc, works fine if you don't mind the dust, sparks, heat, and required grinding of the flash. Discs are quite cheap though.

Sent an email to Lennox questioning their product; no response as of yet.
 
OP
E

e-tek

Well-known member
Joined
Dec 19, 2007
Messages
10,690
Location
Saskatoon, SK
I have since bought an abrasive disc, works fine if you don't mind the dust, sparks, heat, and required grinding of the flash. Discs are quite cheap though.

Sent an email to Lennox questioning their product; no response as of yet.

Yup! The one I am using is a cheapie Powerfist - but they cut!!
 

larry4406

Well-known member
Joined
Jan 27, 2006
Messages
19,565
Location
Northern Virginia
I spoke to the customer service moran at Lenox. He tells me that "5200 rpm max" means that the blade is only to be used in a worm gear driven special metal cutting saw that runs at 5200 rpm exactly and never slower as slower speeds burn up the blade. He tells me to deal with the place I bought it from. I ask him where this is stated on the product descriptions, website, etc; he can't answer. I tell him that maximum means just that - no faster. There is no recommended minimum or ideal operating speed. I ask to speak to another person, he puts me to voice mail.
 
OP
E

e-tek

Well-known member
Joined
Dec 19, 2007
Messages
10,690
Location
Saskatoon, SK
Not a BBQ!!:bounce:

Got a bunch done on the rotisserie today (at least I THNK I did ;))

Here's what's going on it...

IMG_2423.JPG


IMG_2432.JPG


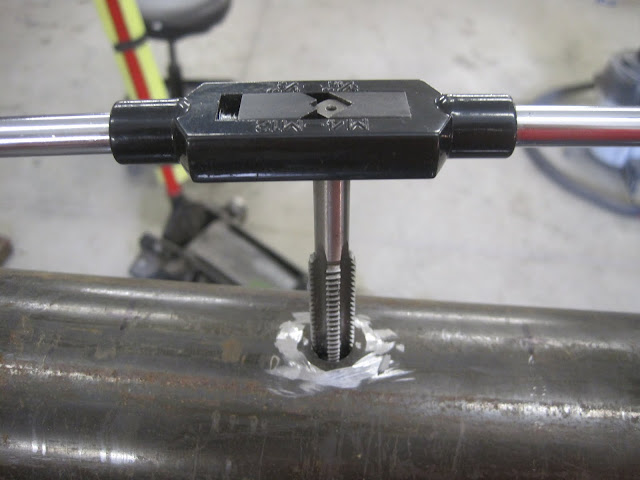
Thumb screws for rotating part and bottom connector:

IMG_2407.JPG


IMG_2409.JPG


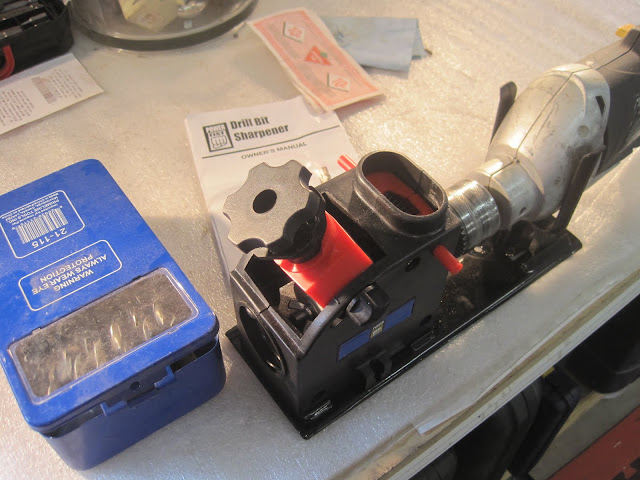
Switched to a titanium bit for the 7/16" holes....but still had to sharpen it after every 2-3 holes...

IMG_2411.JPG


Using my NEW sharpener (works good!)

IMG_2405.JPG


IMG_2413.JPG


IMG_2414.JPG


IMG_2416.JPG


IMG_2417.JPG


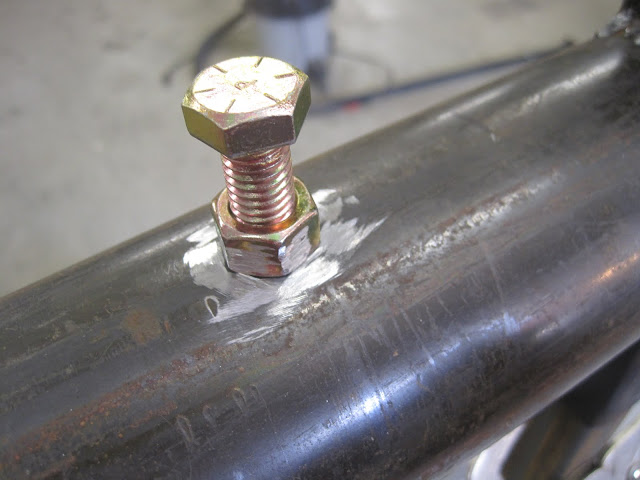
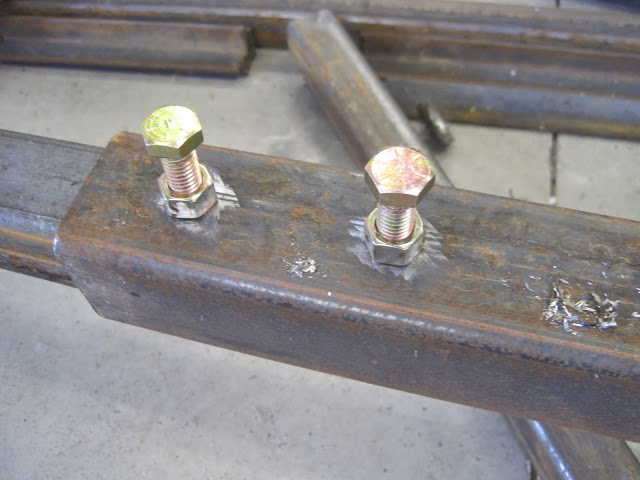
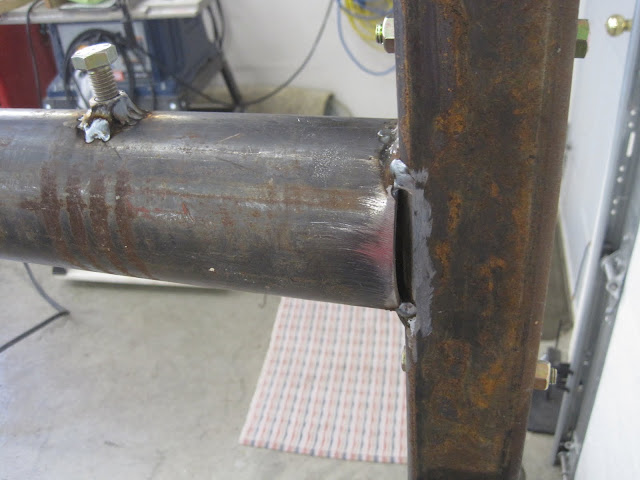
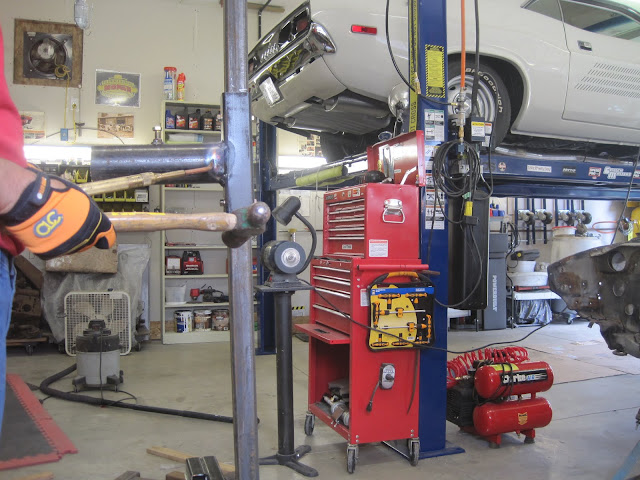
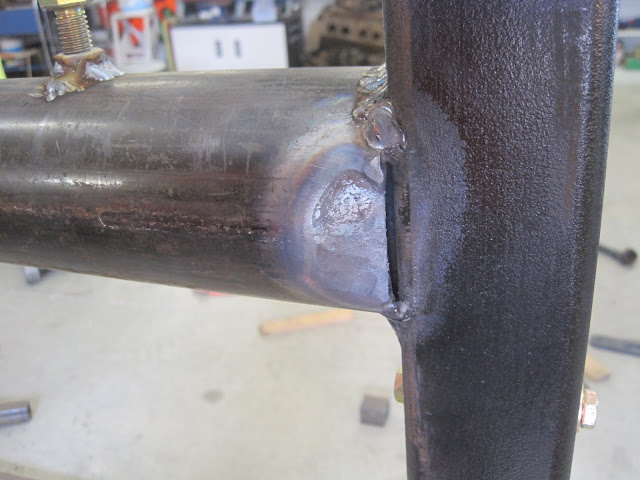
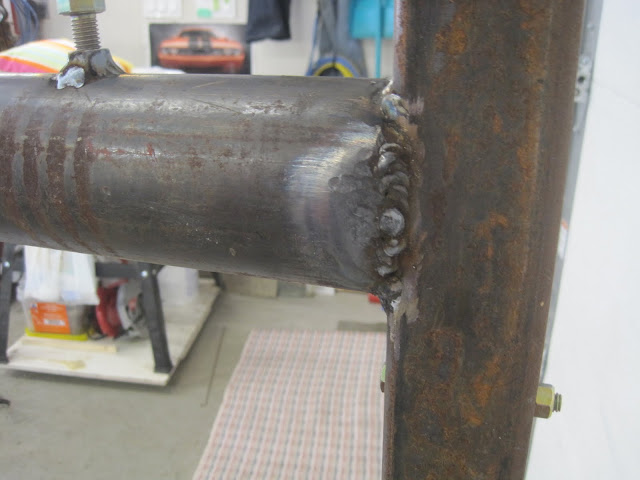
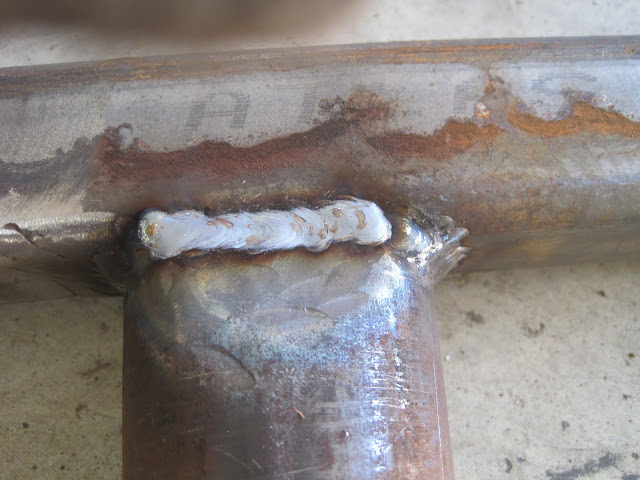
Two things going on in the next pic: The bolt is weled to the tube, finsihing the "thimb screw" and something I needed to address was the gap from the larger tube being welded to the upright. At first I thought about adding a piece in there, but then I thought if I just molded it closer I could weld it up and keep the one-piece strength:

IMG_2425.JPG


Everyones favourite tools: BFH and the fire-wrench!!

IMG_2427.JPG


IMG_2428.JPG


Then I welded it up - no really, that's welding!!:bounce:

IMG_2429.JPG


Last up was some gussets for the uprights.

IMG_2433.JPG


Then I removed the one end, placed it at the back of the car and slid the centre section under the car. Tomorrow I'll attach the arms to the car and jack it up to attach it all together (hopefully..). The difficult part will be attaching the front arm - not much there to work with! Thanks for looking!:beer:

IMG_2434.JPG
 

Jim Stabe

Well-known member
Joined
Feb 18, 2009
Messages
801
Location
San Diego, Ca
One thing you might want to think about is putting the tie bar between the two end uprights lower to the ground. You don't want to raise the car any higher than necessary to get it to flip over. This is what I did on mine and it works fine. It also strengthens the caster mounts
Rotisserie5.jpg
 

dcovey

Well-known member
Joined
Jan 18, 2009
Messages
153
Location
Kempner, TX
E Tek, Good stuff.

Good stuff from all. I was checking ebay and some other places for shop equipment and ran across this guy in England I think. Any way he has a you tube video demonstrating his rollover jig. I particuarly like the next to last song.


Simple design and it breaks down to practically nothing.

I do like the winch use in yours Jim, and it breaks down nicely.:thumbup:

Dave
 

Jim Stabe

Well-known member
Joined
Feb 18, 2009
Messages
801
Location
San Diego, Ca
E Tek, Good stuff.

Good stuff from all. I was checking ebay and some other places for shop equipment and ran across this guy in England I think. Any way he has a you tube video demonstrating his rollover jig. I particuarly like the next to last song.


Simple design and it breaks down to practically nothing.

I do like the winch use in yours Jim, and it breaks down nicely.:thumbup:

Dave
That is one of the nicest designs I have seen. I like that you can easily adjust the CG.
 
OP
E

e-tek

Well-known member
Joined
Dec 19, 2007
Messages
10,690
Location
Saskatoon, SK
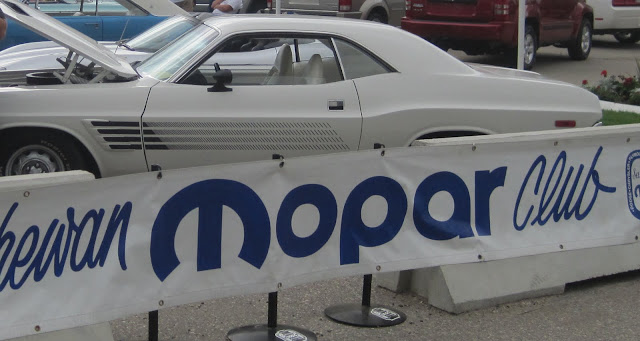
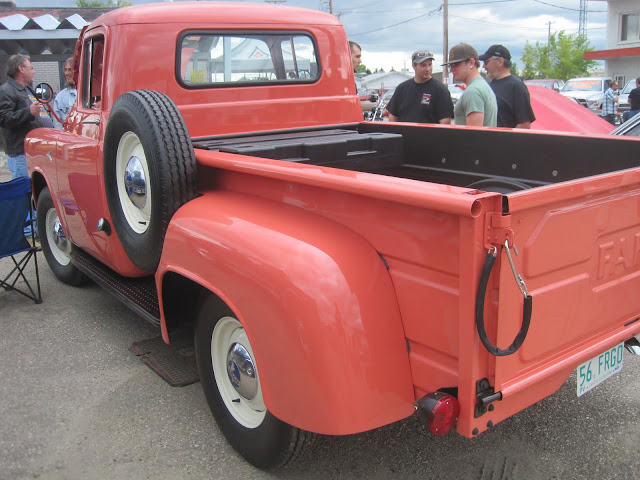
MOPAR Mania car show here today, so only got a little done on the twirler.... that's my ride up front (alomg with some old and young Mope fans!)

IMG_2437.JPG


My fave ride there today:

IMG_2463.JPG


IMG_2462.JPG


IMG_2461.JPG


IMG_2460.JPG


IMG_2459.JPG


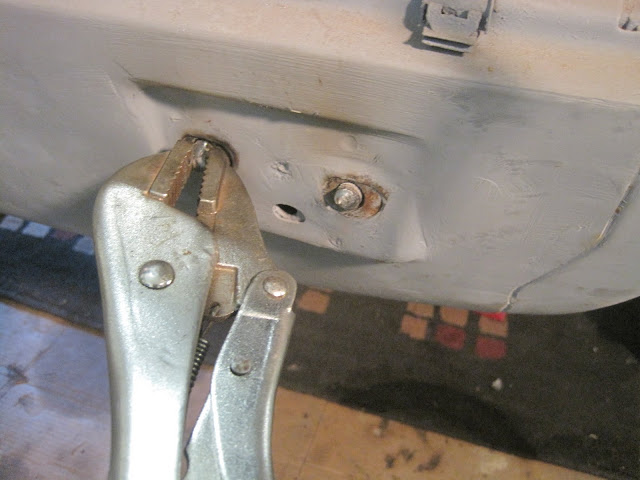
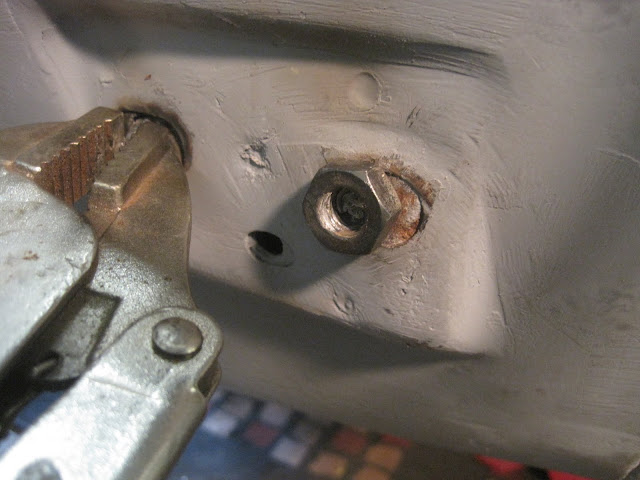
When I got back I realized I had to remove some rusted and broken-off bumper bolts before getting measurements for the rear bar.

IMG_2472.JPG


Welded a stud onto one bolt - and a nub to grab on the other - both worked...

IMG_2473.JPG


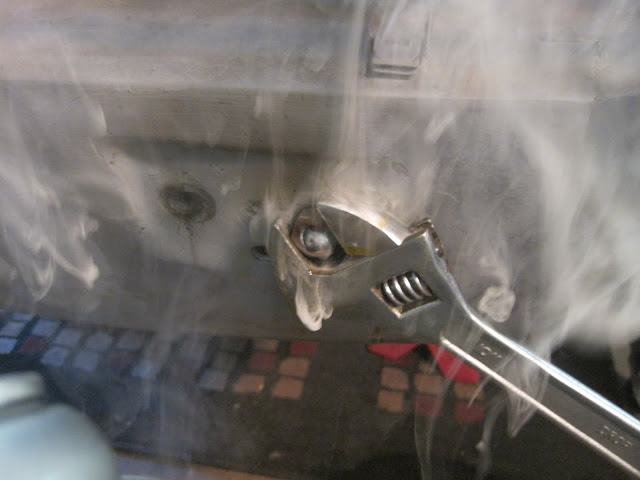
with KROIL and HEAT!!!

IMG_2474.JPG


Also heated, bashed and welded up the front end tube to car-bar portion. Tomorrow I just have to spend some time making brackets and bolting/welding them to the car. I think my welding improved overnight! :headscrat:bounce:

IMG_2476.JPG
 
Last edited:

D.J.

Well-known member
Joined
Sep 16, 2009
Messages
1,116
Location
New Haven IL
Tek: Nice job and I hate to mention it but if you made the pipe open on both ends at the lower horizontal you could slide the lower horizontal pole thru the bottom of the upright and it would make it easier to store and you wouldn't have to have different length poles for various projects of differing lengths. Unless you are doing this on the other end of the build? Just my $.02
________
PRILOSEC INJURY LAWYER
 
Last edited:
OP
E

e-tek

Well-known member
Joined
Dec 19, 2007
Messages
10,690
Location
Saskatoon, SK
Tek: Nice job and I hate to mention it but if you made the pipe open on both ends at the lower horizontal you could slide the lower horizontal pole thru the bottom of the upright and it would make it easier to store and you wouldn't have to have different length poles for various projects of differing lengths. Unless you are doing this on the other end of the build? Just my $.02

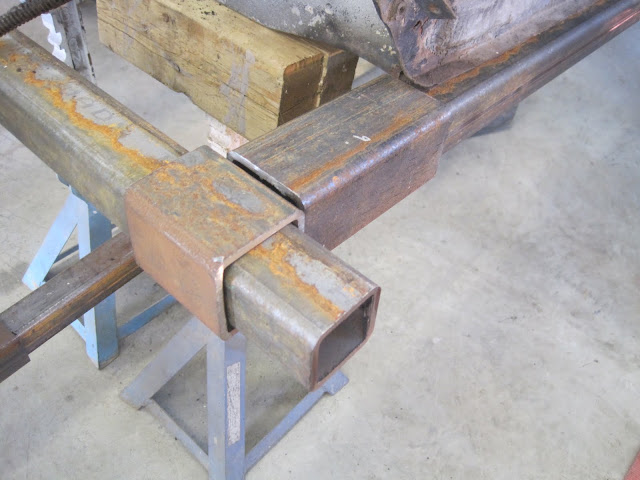
Thanks guys - love the input. The uprights each have an 8inch piece welded to the front, that the two long peices slide over, then onto each other. So the two uprights won't take up too much room really...
 
OP
E

e-tek

Well-known member
Joined
Dec 19, 2007
Messages
10,690
Location
Saskatoon, SK
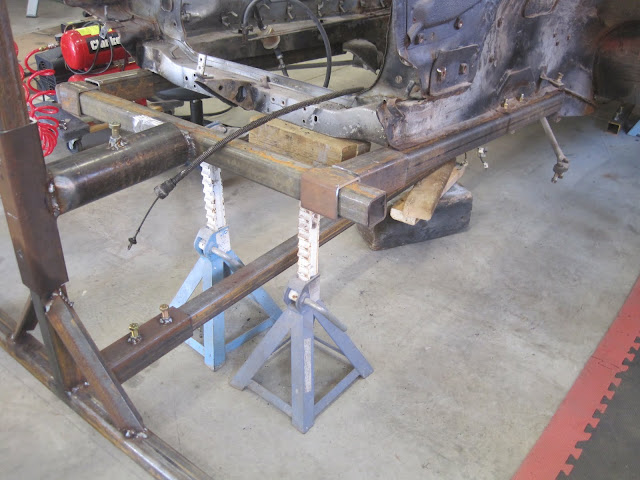
Lining up the front end attachments....

IMG_2484.JPG


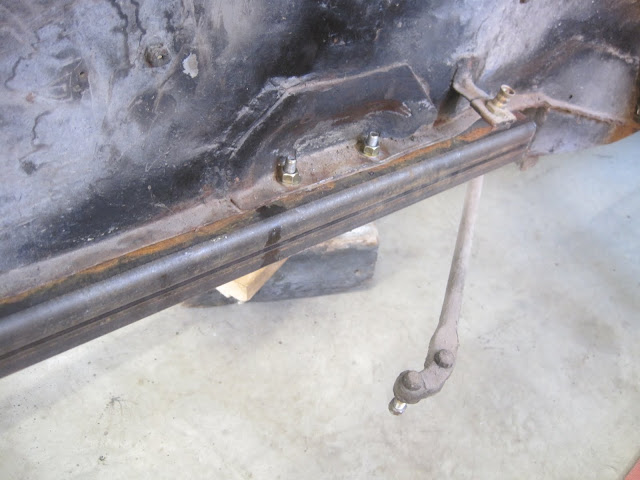
I ran sections of square tube down the frame rails to minimize the chance the rails would twist under the load.

IMG_2486.JPG


I drilled holes for grade 8 bolts to attach the arms to the frame tubing, then I'll weld the over-sliders to the portion that slides on the arms.
IMG_2485.JPG
 
To avoid these ads, REGISTER NOW!
Top Bottom