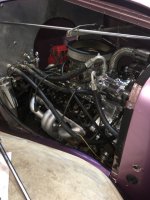
Andy the engine is oh so close now, well done.

That's a nice shot of your shop
Thanks, Steve! I'm on a downhill slide now, just have to be careful to not get in a hurry at this point. It's real easy for me to do. It's getting to where I can think about a punch list.
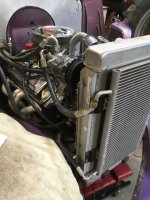
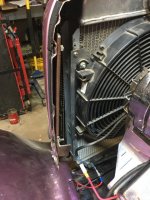
1 Mount radiator
2 Connect transmission cooler lines
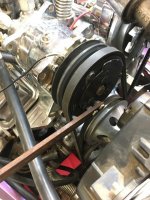
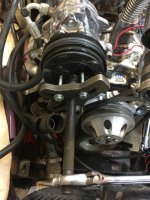
3 Mount alternator and A/C compressor and install belts
4 Mount A/C condenser
5 Reconnect wiring
6 Mount front cowl, stay arms, overflow tank and hoods
7 Make gaskets and mount headlights
8 INSTALL OIL
9 INSTALL WATER
10 INSTALL TRANSMISSION FLUID
11 Reconnect battery
12 Double check all connections
13 Start and idle on jack stands to circulate new transmission
14 Off stands and test drive
15 Install radiator flush and flush radiator
16 Refill with antifreeze
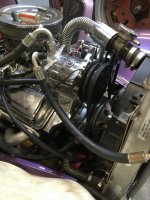
Sweet sixteen! Not on the list is the A/C compressor which does not work. It turns but seems stiff. It blows the fuse, I need to figure out if it's a bad compressor, overfilled, or just a bad clutch. Any suggestions?
If I have time, I also want to cast some new hood latch hooks and a custom air cleaner top, but those are looking more optional.
I think I remember reading somewhere that the gold Fram filters are decent; it's the orange ones at Wal-Mart that are crapola.
I use NAPA Gold filters on the cars I maintain. They're rebranded Wix and <$10 apiece. They also have better filtration efficiency numbers than the newly revamped Mobil 1 filters, which used to be my go-to.
Yeah, they didn't have the orange ones in this size

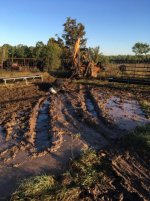
Good looking bunch of steers, and a great sunset scene of your shop.
Thanks! I like they way they lined up for the buyers. They picked one out (neighbors getting ready to fatten their first steer) and I put some orange paint on him for identification. Very holiday spirited.
Pattern was the sun through trees, not only did I take a picture, I looked too!
Congrats Andy on 300 pages. You have an amazing audience. I too quit using Fram filters after reading alot of bad stuff about them. Too bad it is all my grandpa and dad used back in the day. I only use AC/Delco now. And the proof there is a difference. On my LS Camaro when I switched filters I saw almost a 10psi difference in oil pressure across the board.
Bret
I know they get a lot of bad press. Do you realize I can save over $100 in the life of a car by risking an overhaul?

So tell me about the oil pressure difference. Did you see a 10 psi increase (meaning the new filter is passing oil more freely and must not be filtering as well) or a 10 psi decrease (meaning the new filter is more restrictive and oil is being bypassed, not filtered)?
It's an interesting subject and a lot of emotions and debate takes place. My take is that as long as the solid contaminates are small compared to the oil film thickness in the bearing improving filtration efficiency does not pay you much and may result in longer bypass during startup. I'm still sold on cheap filters, and like your dad and grandfather, have had great success with them.
I'm having fun now!
Post 6,002 in your thread Andy !!!
I was watching for post 6,000 to come around for a while and I just wasn't fast enough. Kind of like owning a car from new and waiting for it to hit 111,111 miles and you totally forget to look at the ODO and when you do it's 111,112

I'm right with you. Back in the old days, with no trip meter, I was an odometer watcher. I even like sequences, like 135, 790. Or 124,421. I took pictures of my first rollover to 100,000 (actually 99,999 to 00,000). My wife would join the fun, making fun of me, and we would usually miss the big event by 1 to 3 miles, as you say. Now it's all gone. My car keeps track of mileage so I don't even use the trip meter. Trip meter in my wife's car is almost to 7,000 without being reset.
The conundrum is, if there are 6,002 posts, the cover page correctly says 6,001 replies, plus the original post. So you were reply 6,001. Still missed the mark.

Rain and shop work today after a sloshy cow feeding experience. I should charge myself for the Dude Ranch experience I get.