xtremek
Well-known member
That was really nice of JB to share his slab of steel, but I'm guessing it all goes around where your at. It seems to be the way of good people.

Andy that is one fantastic piece of steel plate, well done JB
Don't worry we wont let you forget about the oil pump drive shaft but we all make mistakes as well.
Nice piece of plate Andy. [emoji106]
I've been looking for a suitable piece for quite a while. I'm quite adaptable regarding the dimensions, but fairly picky about price (read as "free" [emoji1] ).
Sent from my SM-G950F using The Garage Journal mobile app

Steel welding tables are great.
My 1/2 inch 1200mm x 600mm piece came from Germany
The table frame was left behind by the previous owner of my previous house.
Looks like JB grew out of his shirt

That was really nice of JB to share his slab of steel, but I'm guessing it all goes around where your at. It seems to be the way of good people.
Glad to see that you did not suffer a major setback with the oil pump.
Dwight


") But it was a good day. Didn't screw up any engines today.
But it was a good day. Didn't screw up any engines today.
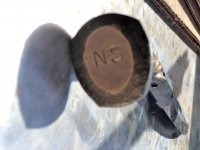
Nice job on the billet knob, Andy!
Thank you for the steel weight calculator. I'd thought there must be something like that, but hadn't ever come across it. And thanks for the heads up on the transfer punch set, too. I bought a set from HF not long after you mentioned it in this thread, and I've used them twice, including once today.
Looks good Andy.
 I'll refill the Coke machine.
Nice knob Andy! How is it retained?
Great score on the steel plate too. Will make a very nice fabricating bench top. Mine is only 1/2" thick. Part of me wishes it was thicker, another is very glad it wasn't.
Andy,
You are welcome for the information on the distributor. It is the least I could do based on what I have learned by reading your thread. I'm glad it troubleshot itself overnight. It is great when things work that way.
Congrats on two days of not not putting in an oil pump driveshaft!
The metal plate will make a nice solid table. Nice work on the winch.
Lynn
JB, Andy mentioned how the circle, or semi-circle, in the middle was going to be dealt with somehow. What did you actually do? Or is your half the half without the center cut?
That welding table looks awesome, but it makes my back hurt just looking at it.
All,
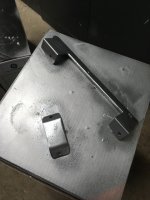
As Andy mentioned I made a quick trip over to get some help splitting the table top, drop off some aluminum (which I forgot sadly, but it isn't going anywhere soon so I'll take it by next time), tinker on the purplish car, and even ended up forging a knife shaped piece of metal. Andy is a swell guy I tell you what, here he is cutting the plate:

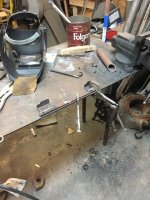
When I made it home the girls hadn't gotten back yet so I started cleaning and welding on it:

I've added a bit more steel since the photo for a shelf and mounted a vise but it'll be a hefty table. The legs are left over 3" x 5" x .25" (75mm x 125mm x 6.25mm)tubing, the total weight as is now is 510.77 lbs (231 kg) without the vise.
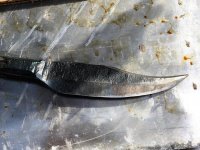
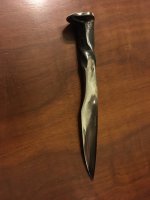
Here is the knife shaped piece of metal:

Andy taught me a lot about forging I didn't know and I'm glad to have learned a lot I hadn't known in the previously.
I didn't get any photos but did take a little ride in the purplish car which was a blast and will soon be a very fun car for his family to drive around in.
All in all a very fun day with lots of learning and joking, the cherry coke was delicious as well.
JB
JB, Andy mentioned how the circle, or semi-circle, in the middle was going to be dealt with somehow. What did you actually do? Or is your half the half without the center cut?
That welding table looks awesome, but it makes my back hurt just looking at it.
Mick,
My half had the half circle as well, nice of them to place the circle in the center of the plate huh. I welded it from the top side then ground the weld smooth as I was taking the mill scale off. Not a full penetration weld by any means but I don't think I'll really worry about it.
It hurts my back too, that is why I use other means of lifting, jacks, jack stands, cherry picker, etc. I used to be into powerlifting and could lift my fair share of heavy stuff, then herniated two discs in my lower back from running of all things. About that same time I started using machines/tools to move things when at all possible.
JB
Andy: nice work cutting that 1 inch steel plate in half so you and JB could each have a nice welding table. also sounds like the both of you had a great day together.
speaking of making a knife I think you might recall that my son in law gave me this knife a friend of his made out of an old RR spike. I probably have 100 old RR spikes here and there along with old files that one day I'll try to shape into knives for fun.
since you have an old CABOOSE in your front yard i'm guessing you might have a bucket or two of old RR spikes?
hope you had a great day!!
Great progress Andy.
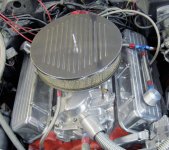
The list is getting shorter and I luv those rocker covers
Looking good on the progress Andy.
Your hood latch as all your work is very nice.
Vince
Andy my brother, among the many things we have in common is our taste in valve covers. I replaced the stock magnesium valve covers on the '87 Corvette with tall ball-milled aluminum (magnesium is hard to keep shiny). The center-bolt covers are more expensive but still less than $100.Anything from Speedway is worth getting.
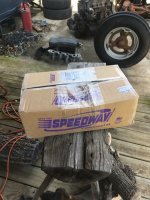
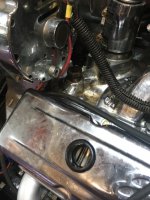
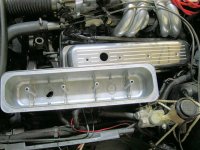
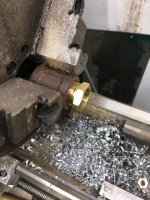
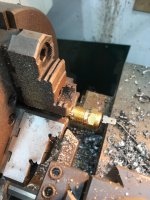
This was the new cast rocker covers I ordered for the purplish car in an attempt to get the rocker covers to seal. And they look nice. I thought about making them, but not for the price.

Andy, when you say "make do" I would say "I worked as hard as I could, and this is the best I could do". Your fab skills are fab.
Happy Saturday!
Andy: with all the time and success (and learning) your purple car provided are you getting the bug to maybe do more work on other engines or 4 wheel things?
also just an FYI. i'm not positive where all the RR spikes I own came from, but I didn't pick them up from the RR tracks or pay much for them. up here a lot of the old train tracks that were used for years were bought (or donated by RR companies) to become walking and riding trails so a lot of the tracks were removed hence maybe a huge surplus of RR spikes.
yep another great day and I think you are right it's SATURDAY!!
enjoy!!
Andy my brother, among the many things we have in common is our taste in valve covers. I replaced the stock magnesium valve covers on the '87 Corvette with tall ball-milled aluminum (magnesium is hard to keep shiny). The center-bolt covers are more expensive but still less than $100.

I liked them so much I upgraded the '72 Corvette valve covers and air cleaner to ball milled polished aluminum. I guess the big block covers are more expensive because they are so much bigger but they were still less than $100. I had upgraded both engines to full roller aluminum rocker arms so they got tall covers.

(I may need to trim the air cleaner hold down stud).
I think you got your $4 out of that can!
Purplish car is looking great.
I think the most impressive thing in this thread is the fact you got your wife onboard with a purchase.
I think the most impressive thing in this thread is the fact you got your wife onboard with a purchase.
Spot on, that is impressive
I used to use the heck out of it.I had the same experience trying to use one of those HF transfer "pumps."The thing works very well.

Thanks for looking in.
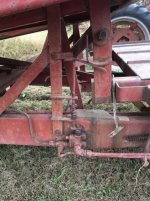
Andy haymaking is a little bit different than when I was a teenager.
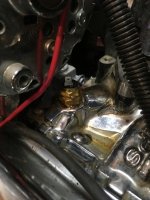
Although I use equipment from the fifties and sixties.Andy looks like you are making progress. Too bad the temp fitting leaked on you. The thermostat housing is just barely sipping on my 64' and I have put off draining everything thing so I can seal it better.
That's a good idea on dating the spray cans. I bet I have close to a 100 and no idea how old some of them are. I still have some I bought when I was a teenager in the 90's and they still work believe it or not.
Bret

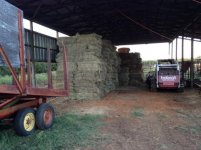
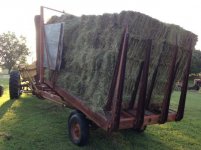
I love these old things. They pick up small square bales and dump them in a stack in the barn. Or outside in Colorado or Montana. When my wife saw my uncle's she wanted me to buy one. When your wife wants you to buy farm equipment (or shop equipment) be a good husband and obey.
Never argue with the wife when she wants you to buy tools or equipment.
I'm glad the farmers around me didn't have one of those, that was my major source of income until I could drive.
Hey Andy, shame about the leaking fitting.
Nice rocker covers. [emoji106]
Sent from my SM-G950F using The Garage Journal mobile app
I had the same experience trying to use one of those HF transfer "pumps."


![IMG_8042[1].jpg](/forum/data/attachments/719/719651-c1f1a459eb50fd05fecc606dc31d83a3.jpg)
![IMG_8047[1].jpg](/forum/data/attachments/719/719681-534aba42ccb81056ae9a37c3b9e84888.jpg)
![IMG_8046[1].jpg](/forum/data/attachments/719/719765-c87dcf5396ef60bbbe39162ee4500f80.jpg)