I don't have an personal experience with planishing welds but did stay at a Holiday Inn Express once.

From what I have read once you get your gaps in the panels set and begin to make tacks as the welds cool they start to close the gap ever so slightly. You would planish them after each tack in a consistent manner so as to not open up the gap but also enough to bring the gap back to original. MP&C's thread has a lot of great info on this as I'm sure there are many other resources on the web. Hope this helps, and if not my advise was worth what I charged.

JB
Thanks for the comments. I started out reading MP&C's thread and never got all the way through it. He does great work! Wish I could find time to read more.
I have stayed many times in Holiday Inn Express, earned lots of credentials.
Pretty much what JB mentioned. When spot or dot welding the weld shrinks the material relative to its surrounding material creating a pinching effect and planishing flattens the bead to push it out again. In effect reducing the rippling effect you get when **** welding patch panels as a series of interleaved spotwelds. A patch like the corner of a larger flat panel might also cause it to tin can and this is supposed to help reduce that.
Making great progress on the Studebaker Andy... wish I had a few more Saturdays like that.
You mentioned Harbour Freight... what did you buy?
")
Thanks for the additional comments! I always used to try to pound the weld back flat with gas on sheet metal, with some success.
Thanks for the kind words! I made a little progress today.
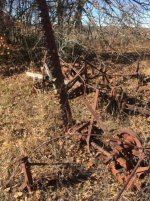
I bought two more die grinders. At $14 each you may as well minimize changing tooling. Specifically, I've been using a 3" cutoff disc in one and when it gets worn to about 1" I wanted to leave it on a grinder for working in tight areas rather than using it up and putting a new disc on. So now i have a 3" and a 1" disc die grinder.
Andy: your welding skills and the information on this thread are improving almost daily.
hope you are 100% again or still under the weather with a cold/flu?
so having your NEIGHBOR'S bull service your cows while your bull with the bad foot heals? sounds like a WIN WIN and happy you didn't buy the one that had you in his sites at the sales barn.
hope you are enjoying your SATURDAY!!
It's easy to improve when you have so far to go
I'm back to 100%, such as it is, a little nagging cough.
The neighbor's bull is not the genetics I would select, but a calf is better than no calf.
Every Saturday has been great!!
If you are not, try some 0.025" wire (and matching tip) for sheet metal.
I started with 0.030" wire. I decided to order some 0.025" wire today and it is expensive. Relatively. So I saw some 0.023". 2 thousandths doesn't seem like much until later when I realized 0.030 is just 5 thousandths bigger.

It is ER-70S-6. I hope my 0.025" feed roller will feed it. I assume if it will feed it should be a good as 0.025".
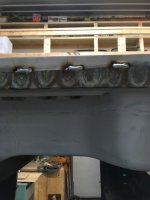
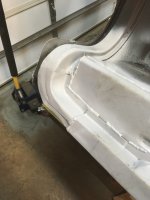
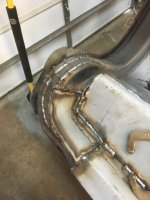
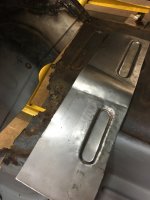
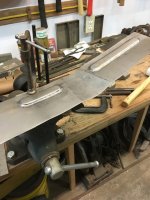
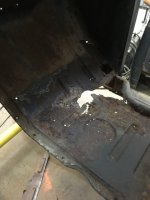
I have been fighting with the purchased box brace that goes under the running board. Either is was misfabbed, my truck is out of whack, or or I screwed up the elevation of the running board. After studying it for too long I decided to just alter the brace to fit.
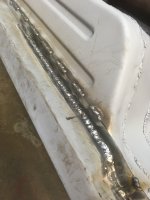
That's the box brace tacked in place. I cut 1/4" at the near end and down to 1/8" a foot back. That was after straightening the running board. I had to do this to get the brace to touch the front door pillar. Then when I pulled the flange down to the running board I had a pretty good gap. Some success at tacking across the gap without making a mess.
The outside of the brace welds to the running board. Originally spot welded, I think I'm going to skip weld it.
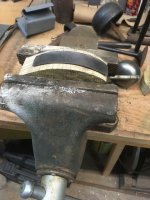
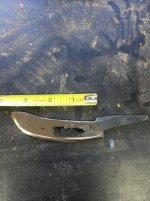
The running board had a bow in it so I did a bit of shrinking to get it straight (er). That's the discoloration.
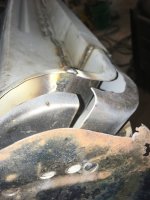
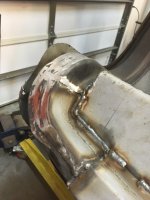
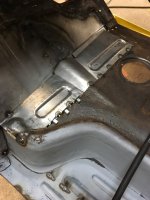
With the brace in place I got the old hat section pieces fit and painted. I decided to finish the hat section in place.
I wire brushed the glass off the welds on the inside of the brace. I'm pleased with them. Pretty sure I got good penetration.
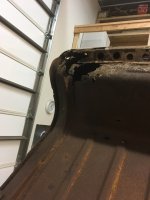
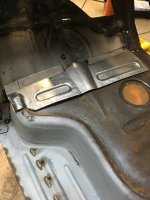
With any luck at all I'll get a hat section in place tomorrow. I did test fit the door yesterday and it looks like it will fit good. After the hat section goes in I should be ready to put the skin section on the rear quarter and make a new floor pan piece. I'm finally seeing some progress. I hope the other side goes quicker.
Thanks for bearing with me.