To avoid these ads, REGISTER NOW!

CL's score / clausing drillpress resto

OP
C

chris fresh

Well-known member
Joined
Jan 10, 2011
Messages
1,519
Location
savannah ga
I was going to PM you back....I have the step-pulley model so I wouldn't need the sticker of the variable speed dial. Also, I looked over my badges again and they're actually in REALLY good shape...so really no need to send them. However, I WOULD like to get my hands on some of those regular Clausing stickers you made for the front. That would pretty nice on my toolbox! :)

yeah man,no problem.i'll get them at to you in the next couple day's,i'll let you know when they have been mailed so you can keep an eye out.
 
To avoid these ads, REGISTER NOW!

mbatarga

Well-known member
Joined
Sep 14, 2005
Messages
883
Location
GA
I don't believe I saw anything about the "stickers" and how you are using them. Are they just printed on paper and you are gluing them to the original metal plates?
 
OP
C

chris fresh

Well-known member
Joined
Jan 10, 2011
Messages
1,519
Location
savannah ga
I don't believe I saw anything about the "stickers" and how you are using them. Are they just printed on paper and you are gluing them to the original metal plates?

the stickers are stickers.i have a friend who owns a graphic design company here in savannah.my badges are so bad that you can bearly read them.so i had him copy my original's and make stickers.these are going on top of my original plates and then re installed.it was post 49 and 50 that you missed.
 
OP
C

chris fresh

Well-known member
Joined
Jan 10, 2011
Messages
1,519
Location
savannah ga
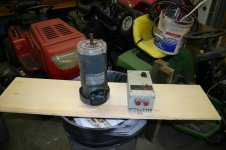
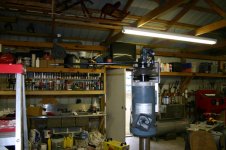
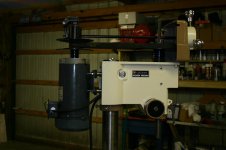
o.k so, for those of you following this thread,you know i'm looking for a motor.today a good friend of mine who likes to give me stuff came buy with this.it's a 1hp dc motor with the variable speed controller.he got it from his brother who works in a plant and said they use them on their drill press's at work.

i took some quick measurements and everything seems to line up exact.so i'm thinkin i'm all set,plus i'm diggin the idea of having infinite speed control.

what do you guy's think of this kind of set up? and do you like it,if you run the same thing.
 

Attachments

  • IMG_0534.jpg
    IMG_0534.jpg
    137.4 KB · Views: 86
OP
C

chris fresh

Well-known member
Joined
Jan 10, 2011
Messages
1,519
Location
savannah ga
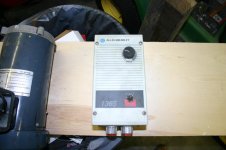
and the motor specs

also another question? since the controller has a start button on it,will i even need an on/off switch on the DP itself?
 

Attachments

  • IMG_0535.jpg
    IMG_0535.jpg
    132 KB · Views: 27
OP
C

chris fresh

Well-known member
Joined
Jan 10, 2011
Messages
1,519
Location
savannah ga
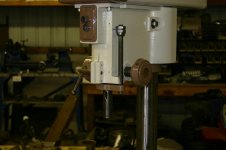
so today i got some more done,i finally made a wedge and removed the chuck to get the bracket on that hold's the depth gauge.then after installing that,i began to reassembale the housing for the variable speed.i reinstalled the back plate after degreasing and then installed the tube that hold's the shaft wich control's pressure on the rear pulley.
 

Attachments

  • IMG_0547.jpg
    IMG_0547.jpg
    127 KB · Views: 62
  • IMG_0548.jpg
    IMG_0548.jpg
    144.2 KB · Views: 47
OP
C

chris fresh

Well-known member
Joined
Jan 10, 2011
Messages
1,519
Location
savannah ga
heres the tube sticking through the front face piece,don't know if it's sticking out enough,i'm gonna have to go back and look at pics from when i broke it down
 

Attachments

  • IMG_0549.jpg
    IMG_0549.jpg
    131.2 KB · Views: 53
OP
C

chris fresh

Well-known member
Joined
Jan 10, 2011
Messages
1,519
Location
savannah ga
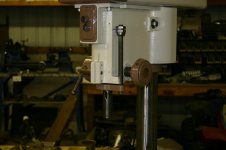
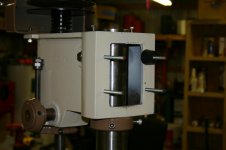
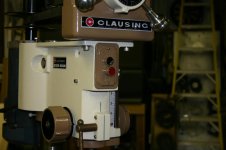
today i also got the knob's installed for the speed control,i cleaned and reused the studs they mount on,but after some practice, i'm going to make new ones out of stainless,but these will do for now. heres the head shot,as it's just about complete
 

Attachments

  • IMG_0552.jpg
    IMG_0552.jpg
    131.3 KB · Views: 116
OP
C

chris fresh

Well-known member
Joined
Jan 10, 2011
Messages
1,519
Location
savannah ga
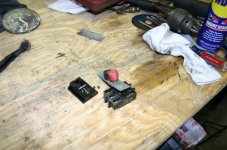
the next 3 things that i will be trying to finish up is the mounting of the new motor,copying the 3 handles that are bent and half stripped,and i've decided to reuse the switch that came in it because i can't get an exact one.plus i don't want to spend 80 bucks on one that's close.so today i decided to take the switch apart,i'm going to fill all the chips in the stop button,then repaint the red and black button's before putting it all back together.
 

Attachments

  • IMG_0555.jpg
    IMG_0555.jpg
    147.8 KB · Views: 42
  • IMG_0553.jpg
    IMG_0553.jpg
    147.1 KB · Views: 48

zruvalcaba

Well-known member
Joined
Oct 25, 2011
Messages
315
Location
San Diego, California
Looking really good Chris. I got all of my parts that will require painting stripped of their old paint today. Just need to finish the pulley shroud and the motor which I'll probably do last. I'll take some pictures tomorrow and post my progress. I'm thinking of doing Rust'O'Leum Dark Machine Grey and maybe the same white you used. Any chance I can get the brand and color?

Also, not sure if I asked you this but did you replace all of your hardware? All of my hardware is black and I noticed that yours is chrome.
 
OP
C

chris fresh

Well-known member
Joined
Jan 10, 2011
Messages
1,519
Location
savannah ga
Looking really good Chris. I got all of my parts that will require painting stripped of their old paint today. Just need to finish the pulley shroud and the motor which I'll probably do last. I'll take some pictures tomorrow and post my progress. I'm thinking of doing Rust'O'Leum Dark Machine Grey and maybe the same white you used. Any chance I can get the brand and color?

Also, not sure if I asked you this but did you replace all of your hardware? All of my hardware is black and I noticed that yours is chrome.

i'll find the pic i have of both paints,if i can't tonight,i'll take a close up tomorrow,i save all my can's for future touch up.and remember,this is base coat/clear coat.

as for my hardware,it's all stainless,i've swapped all of it.
 

DavidB

Well-known member
Joined
Feb 6, 2010
Messages
734
Location
Navarre, FL
today i also got the knob's installed for the speed control,i cleaned and reused the studs they mount on,but after some practice, i'm going to make new ones out of stainless,but these will do for now. heres the head shot,as it's just about complete

Those knobs look pretty sharp. They're definitely a step up from the stock ones!
 

zruvalcaba

Well-known member
Joined
Oct 25, 2011
Messages
315
Location
San Diego, California
Also, any tips for removing the chuck from the quill? I need to get the collar off and can not for the life of me figure out how to remove the chuck. I tried the instructions in the manual but that doesn't seem to work. Any tips?

Photo%20Dec%2011%2C%209%2042%2048%20AM.jpg
 
OP
C

chris fresh

Well-known member
Joined
Jan 10, 2011
Messages
1,519
Location
savannah ga
Also, any tips for removing the chuck from the quill? I need to get the collar off and can not for the life of me figure out how to remove the chuck. I tried the instructions in the manual but that doesn't seem to work. Any tips?

Photo%20Dec%2011%2C%209%2042%2048%20AM.jpg

i just did mine 2 day's ago,if you slide the spindle down and expose the shaft,you should have the same as me.the part that the chuck seats into is larger than the spindle.in the large part there is a slot.i made a wedge out of so 1/4 plate and tapped it in with a hammer.o.k maybe tapped is the correct work,let's just say i didn't baby it.after about 5 good wacks,it came out.i think i have a pic,i'll check and repost.
 
To avoid these ads, REGISTER NOW!
OP
C

chris fresh

Well-known member
Joined
Jan 10, 2011
Messages
1,519
Location
savannah ga
i can take a pic of the wedge i made and show you what i mean if your not getting what i'm trying to explain.


how do you know where am at
when ya haven't been where i've been
understand where i'm comin from.

HA! just kiddin ya man.
 

zruvalcaba

Well-known member
Joined
Oct 25, 2011
Messages
315
Location
San Diego, California
see the slot?that's where you drive the wedge

Mine's different. You have the M3T? I finally figured out how to get it off. Had to clamp down the quill rod in a vise and use a pipe wrench to unscrew the chuck. Felt like it hadn't been removed in 50 years.

Now, removing the quill return spring was fun. I popped it off and it flew all over the garage!! I can already tell that getting it back in will be fun. :(
 
OP
C

chris fresh

Well-known member
Joined
Jan 10, 2011
Messages
1,519
Location
savannah ga
made more progress today,i decided to get involved with the motor mounting stuff.i ran to lowes and picked up some 5/16 threaded rod and some rubber stoppers.i wanted to stud mount the motor because i didn't want to hunt and pay for the isolaters that were originally on there.
 

Attachments

  • IMG_0561.jpg
    IMG_0561.jpg
    129.9 KB · Views: 83
  • IMG_0564.jpg
    IMG_0564.jpg
    135.8 KB · Views: 70
OP
C

chris fresh

Well-known member
Joined
Jan 10, 2011
Messages
1,519
Location
savannah ga
got the pulley on and the linkage for the shifter
 

Attachments

  • IMG_0566.jpg
    IMG_0566.jpg
    143.1 KB · Views: 65
  • IMG_0565.jpg
    IMG_0565.jpg
    132.5 KB · Views: 56
OP
C

chris fresh

Well-known member
Joined
Jan 10, 2011
Messages
1,519
Location
savannah ga
and as mentioned earlier,i'm going to redo the switch,the stop button was chipped pretty bad.so another thing i got done was building up the surface of that switch with finishing putty.my guy called if dolphin glaze,if that means anything to anyone.anyway heres the beginning pic of it.
 

Attachments

  • IMG_0569.jpg
    IMG_0569.jpg
    137.7 KB · Views: 107
OP
C

chris fresh

Well-known member
Joined
Jan 10, 2011
Messages
1,519
Location
savannah ga
so i just found this and am still completely lost.i can wire an entire home,but when it comes to stuff with low voltage and converters,i look for out side help.this converter and motor were free to me,and the last thing i want to do is let the evil spirits out.

for anyone that knows this stuff and can simply tell me where the 110 hot and nuetral go and where the wires from the motor go,would be GREATLY appriciated.tia for any help on this.

heres what i found.

http://www.ab.com/support/abdrives/1365/1362.pdf


just checked the link,and it's good
 
OP
C

chris fresh

Well-known member
Joined
Jan 10, 2011
Messages
1,519
Location
savannah ga
Mine's different. You have the M3T? I finally figured out how to get it off. Had to clamp down the quill rod in a vise and use a pipe wrench to unscrew the chuck. Felt like it hadn't been removed in 50 years.

Now, removing the quill return spring was fun. I popped it off and it flew all over the garage!! I can already tell that getting it back in will be fun. :(

don't know anything about that,i never removed mine.i left it in when i blasted it,and i left it in when i punched the two pins out.didn't want to get involved with that whole thing.

hey did you measure it while it was out?looked pretty long,was just wondering. :lol:
 
OP
C

chris fresh

Well-known member
Joined
Jan 10, 2011
Messages
1,519
Location
savannah ga
so this whole switch thing was bothering me.the stop button was all chipped and looked like ****,the press is coming out so nice that i couldn't put that beat switch back in it.so i took matters into my own hands and reviewed all options.

1) a new switch that was close,was 80 bucks.
2) the old switch worked,but had the chipped issue.
3)even if i spent the money,there was no gaurantee that the new switch would fit the cover,that's already painted.
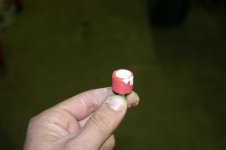
last option,fix what i had and paint it.so that's what i did.

i took the thing apart,built up all the areas with dolphin glaze and let it cure over night.then this morning i through a small drill chuck in my lathe and sanded it up.with a little bit of pressure in the center i was able to re create the cupped contour in the face of the button.after that i got a little primer,and then shot red.sorry,no pic of the red.
 

Attachments

  • IMG_0570.jpg
    IMG_0570.jpg
    137.6 KB · Views: 67
  • IMG_0571.jpg
    IMG_0571.jpg
    134.9 KB · Views: 81
OP
C

chris fresh

Well-known member
Joined
Jan 10, 2011
Messages
1,519
Location
savannah ga
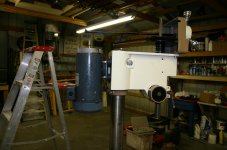
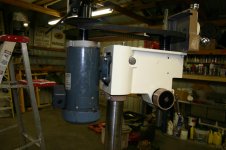
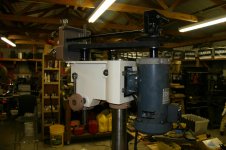
today was a pretty good day,this morning i started off with pulling the motor off and installing the spacers that were in between the old one and the head,something i forgot to do,then realized after i saw how much slack there was in the belt.heres where i felt good about making the studs that i mounted it on because i knew i had more than enough length for the spacer and the rubber bushings i made.

once put back together,everything lined up nicely.i ran my new cord,wich is 12/2 service cord up to the switch and out to the motor.it took about an hour to get the switch back together because of what i had to do to get the button out.so after putting it back together,making a rivet,re tapping the plate,not having the right screws,using longer screw's and making studs,it's back together and installed.

tonight i'm going to start making a bracket that hangs off the rear motor stud's,that the variable speed controller will mount to.luckily a friend stopped by and we think we have the wiring figured out,and i also have another guy comin by on thursday night who will know for sure.if all goes right,i'll be makin chips thursday night.
 

Attachments

  • IMG_0581.jpg
    IMG_0581.jpg
    127.7 KB · Views: 63
  • IMG_0580.jpg
    IMG_0580.jpg
    127.3 KB · Views: 96
OP
C

chris fresh

Well-known member
Joined
Jan 10, 2011
Messages
1,519
Location
savannah ga
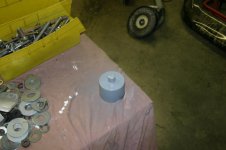
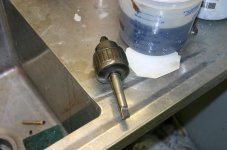
heres another shot of the back and the stud mount,and also the chuck.i wire wheeled it and have it soaking now,it was full of **** and would bearly move.after soaking it,i will get it free and oil it up.should work like a champ after i find a key to fit it.i think i might keep it out so that i can bring it a few places and try and match a key to it.
 

Attachments

  • IMG_0583.jpg
    IMG_0583.jpg
    134.8 KB · Views: 60
  • IMG_0584.jpg
    IMG_0584.jpg
    134.3 KB · Views: 54

DavidB

Well-known member
Joined
Feb 6, 2010
Messages
734
Location
Navarre, FL
The switch button looks great. You can't tell that anything was ever wrong with it. The DC motor is bigger than I thought when you showed it alone. I may end up trying some rubber isolators like you have on mine as I think I have a little bit of a shimmy from the motor.
 
OP
C

chris fresh

Well-known member
Joined
Jan 10, 2011
Messages
1,519
Location
savannah ga
The switch button looks great. You can't tell that anything was ever wrong with it. The DC motor is bigger than I thought when you showed it alone. I may end up trying some rubber isolators like you have on mine as I think I have a little bit of a shimmy from the motor.

i got the stoppers at lowes,there in the drawers.they have different sizes,but i got the largest ones wich are 13/16 at the small end,because there tapered.then i driled a hole through them and then split them in half with a fillet knife because they are are an 1'' and change thick.the original motor had them,so i copied it to keep the distance right for the belt,and oh yeah,the shimmy thing to.
 
OP
C

chris fresh

Well-known member
Joined
Jan 10, 2011
Messages
1,519
Location
savannah ga
The switch button looks great. You can't tell that anything was ever wrong with it. The DC motor is bigger than I thought when you showed it alone. I may end up trying some rubber isolators like you have on mine as I think I have a little bit of a shimmy from the motor.

also,the new motor is 1hp vs. the old at 3/4,maybe the difference is because of the whole dc thing,maybe they design them different.everything is exactly the same as the old tho.from the outside of the case to the center of the shaft is 4 1/2'',shaft length is the same at 1 3/4,and the mount is exactly the same also.just the length of the case is longer.

once i have it up and running,i'm going to tape off the surrounding areas and rattle can the motor black.might as well freshen that up to. :thumbup:
 
OP
C

chris fresh

Well-known member
Joined
Jan 10, 2011
Messages
1,519
Location
savannah ga
Yeah your chuck is different than mine.

Hey, where'd you get those rubber grommets? I need new ones for my motor mount. They're all brittle and dried out.

i bought rubber stoppers from the drawers at lowes,they were the big ones at 13/16.post #115 tells the whole story,look up.and oh,i sent those out to you smart guy,went out yesturday,should have them in a few day's
 
Last edited:
OP
C

chris fresh

Well-known member
Joined
Jan 10, 2011
Messages
1,519
Location
savannah ga
hey david,heres what i have.i mic'd the washer and my battery died on the mic before i could read it.but what i did was match the gap with something you could copy.i used two regular razor blades stacked.it's the same snuff fit as the washer was without crushing it.closest i can get for ya,maybe you can put the two blades together and mic them to see what you have.right now all my clearences are good except i have to find a way to stop the bolt from turning,when you turn the knob.check the pics
 

Attachments

  • IMG_0586.jpg
    IMG_0586.jpg
    133.4 KB · Views: 67
  • IMG_0587.jpg
    IMG_0587.jpg
    127.6 KB · Views: 62
To avoid these ads, REGISTER NOW!
Top Bottom