To avoid these ads, REGISTER NOW!

Above 1200 Sq/FT Cody's 33'x62' Garage

Wokspaces above 1200 squarefeet.

Bob Heine

ALLIANCE MEMBER
Joined
Oct 24, 2009
Messages
10,705
Location
Boca Raton, Florida
Cody, I forgot I did adjust the gaps. After I cut off all the Camaro fender stuff I cut the side pieces and then glued some sandpaper to the quarters to match the Corvette's shape.
attachment.php

attachment.php

attachment.php

The reason I added the spoiler was the exhaust setup in that first photo. Had to move the license bezel up a couple of inches and the rear end looked off with the stock height spoiler.
 

Attachments

  • 3-Right Side Alignment.jpg
    3-Right Side Alignment.jpg
    66.9 KB · Views: 1,144
  • 4-More Cutting.jpg
    4-More Cutting.jpg
    28.9 KB · Views: 1,150
  • 4a-More Fitting.jpg
    4a-More Fitting.jpg
    55.8 KB · Views: 1,153
To avoid these ads, REGISTER NOW!
OP
M

madison069

Well-known member
Joined
Nov 5, 2010
Messages
4,150
Location
Monroeville, PA
Cody, I forgot I did adjust the gaps. After I cut off all the Camaro fender stuff I cut the side pieces and then glued some
The reason I added the spoiler was the exhaust setup in that first photo. Had to move the license bezel up a couple of inches and the rear end looked off with the stock height spoiler.

Studying the first picture you posted of the corvette, i can now see the stock exhaust exit and how you moved them to the middle. Interesting modification, when did you do this modification? I'm guessing you were copying the imports with their center exit exhaust points? It did come out pretty good just in the fiberglass work stage! Got a finished/painted picture of the final result?
 

Bob Heine

ALLIANCE MEMBER
Joined
Oct 24, 2009
Messages
10,705
Location
Boca Raton, Florida
Studying the first picture you posted of the corvette, i can now see the stock exhaust exit and how you moved them to the middle. Interesting modification, when did you do this modification? I'm guessing you were copying the imports with their center exit exhaust points? It did come out pretty good just in the fiberglass work stage! Got a finished/painted picture of the final result?
Cody, this has been a very long drawn out process. It started out pretty simple, with a bumper re-design to get rid of another vertical element on the car. Probably a decade between having a friend weld up the pieces of four bumpers and the chrome shop making it look real. Stock bumpers on the left, my re-design temporarily hung on my car on the right. Monza exhaust on mine is pretty poor quality...

attachment.php


...so I bought a stainless 2.5" big block system from Magnaflow.
attachment.php


Simple job to install the system and I should have quit while I was ahead.
attachment.php


In the middle of this process I decided to change the rear suspension from a transverse leaf to coilovers and offset trailing arms so I could put bigger tires on the rear. I also noticed the two exhaust bezels weren't a lot wider than the license bezel.
attachment.php


After cutting and welding the stainless bezels together, I had a single, double-wide bezel.
attachment.php


Next problem is space. There isn't enough room under the license bezel so I need to move it up higher in the back panel. Not a lot, just a bit more than 2 inches as I recall.
attachment.php


That section was already modified to eliminate the fiberglass bumps that were under those vertical sections of bumper. Some aluminum straps and pop rivets and the fiberglass for the license bezel was re-attached and a few hours of making the fiberglass for the exhaust bezel and it was shaping up. OK, not really but it was just lots of fiberglass work behind the rear panel to get it all molded in.
attachment.php
 

Attachments

  • Bezels.jpg
    Bezels.jpg
    52.4 KB · Views: 1,020
  • Exhaust002.jpg
    Exhaust002.jpg
    119.5 KB · Views: 1,026
  • 72 corvette magnaflow exhaust 16841.jpg
    72 corvette magnaflow exhaust 16841.jpg
    56.3 KB · Views: 1,025
  • 1972 Corvette Bumpers.jpg
    1972 Corvette Bumpers.jpg
    43.6 KB · Views: 1,038
  • Center Bezel 6 Edge.jpg
    Center Bezel 6 Edge.jpg
    27.5 KB · Views: 1,004
  • Center Exhaust Mod 1.jpg
    Center Exhaust Mod 1.jpg
    106.2 KB · Views: 993
  • Alignment Brackets.jpg
    Alignment Brackets.jpg
    37.2 KB · Views: 973

Bob Heine

ALLIANCE MEMBER
Joined
Oct 24, 2009
Messages
10,705
Location
Boca Raton, Florida
By now I realized getting the look of the center outlet quad exhaust on the C5-7 Corvettes was going to be a big job. First thing I needed was a single muffler with two 2.5" inlets and two 2.5" outlets. Turns out Magnaflow makes a bunch of them and the inside is actually an X-pipe. I thought Magnaflow would also have offset dual tips I could just weld on the muffler but they don't and neither does anyone else. I hacked the tips off the original pair and made the offsets myself. Not real good fabrication involved but I faked it together. I was also learning to mig weld stainless steel in the process.
attachment.php


The space available for the mufflers was rather limited. Because of that I had to cut most of the pipe from the muffler and tack the tips on. Not as tight a fitup as a good fabricator would do but it was what it was.
attachment.php


Over the course of several months I was able to evolve the system. I changed the pipes leading to the muffler from one piece to a v-band setup with the muffler assembly separate from the center section. I also added a pair of electric cutouts with turndown tips. I was just using up the curves from the original Magnaflow system.
attachment.php


At the other end I made new header connectors using 3" stainless U-bends and 2.5" reducers to go through the transmission crossmember. The v-bands fit through the holes with the clamp removed. The engine has Jet-Hot coated ****** long tube headers that link up with the 3" connector pipes.
attachment.php


To answer your questions, my inspiration was the late model Corvettes center outlet exhausts, I started on this exhaust system in 2008 and finished it to the level shown in the first photo in 2013. Since then the car has made baby step progress but it's on my list of 2021 to-dos.
 

Attachments

  • Exhaust System Final Header End.jpg
    Exhaust System Final Header End.jpg
    113.8 KB · Views: 945
  • Exhaust System Final.jpg
    Exhaust System Final.jpg
    75.6 KB · Views: 945
  • Almost Finished.jpg
    Almost Finished.jpg
    73.2 KB · Views: 947
  • Alignment Clamp.jpg
    Alignment Clamp.jpg
    40.9 KB · Views: 945
OP
M

madison069

Well-known member
Joined
Nov 5, 2010
Messages
4,150
Location
Monroeville, PA
Damn Bob, that's some skill work there! Took a lot of creative ideas to achieve the final goal for sure!

I'm not even at that level modification yet with the camaro. I'm just trying to get it back together so I can drive it at this point! LOL
 
OP
M

madison069

Well-known member
Joined
Nov 5, 2010
Messages
4,150
Location
Monroeville, PA
Today was a turning point with the camaro body work/paint job! We got a color besides gray!

After going over the jambs/under trunk/under hood, I washed everything and dried it off. Then started staging the parts along with taping off areas that didn't need to be painted.

20201205_090732.jpg


Then once we were satisfied we started applying the sealer.

20201205_101849.jpg


Then there was no going back, let there be color!!

20201205_120704.jpg


Thats a serious red there!!

20201205_120654.jpg


My main job during the time my buddy was spraying was to keep the air hose out of his way and not let it get caught while working around everything. I was glad to do that for him while he wax his poetic skills on those sheetmetal! Watching someone with experience behind a paint gun was a site to watch! Im sure I just look like a bumbling fool when I'm painting the primer.

We are going to let it cure for a week or 2 before reassembling the panels, so in the mean time I need to move everything for the robotic team on Tuesday as my daughter's team is competing that day and need the space for it. Also I'll start painting the bolts and keep sanding some of the little stuff and front bumper cover to prepare for the total outside paint job!
 

bj383ss

Well-known member
Joined
Sep 29, 2011
Messages
3,166
Location
TX
Freaking awesome! That is what I need a buddy who has the resources and know how to paint a car.

Bret
 
OP
M

madison069

Well-known member
Joined
Nov 5, 2010
Messages
4,150
Location
Monroeville, PA
Freaking awesome! That is what I need a buddy who has the resources and know how to paint a car.

Bret


Thanks! Its nice to have someone who's experienced in body work to help guide me through it. I'm learning alot and also acquired some new tools! Hopefully once I get back in 2 weeks I'll have a day to reassemble it and hopefully be ready to take it all to his shop for the final paint and touch up on body!

Today was a day of setting the bolts up for some paint. Some will be painted the red, and others will be black. I'll clean them in the morning and shoot some paint on them before work. I setup the computer for church service so I could listen while working on labeling the bolts and ensuring I got them all.

20201206_163807.jpg


I did have to push the car aside so the robotic team can compete on Tuesday.
20201206_163910.jpg


With covid keeping the school closed ive open my garage to the robotic team thats all girls. My middle daughter is in the team and she was showing my youngest daughter and her friends what the little robot could do.

20201206_175349.jpg


I also cleaned this gear oil can and now I'm on the hunt for a cheap metal trash lid for it. Need a 15" diameter dome top trash lid, anyone know where I could find one?

20201206_141601.jpg


Oh and picked up some lawnmowers to put in the pile for rebuild at the beginning of the year with my middle daughter. Along with disposed some used oil. Was tired of kicking the jugs by the deep freezer so they needed to go!
 
OP
M

madison069

Well-known member
Joined
Nov 5, 2010
Messages
4,150
Location
Monroeville, PA
This morning I went ahead and prepared to do some painting. Seems we missed these fender mounts that goes inside the door jamb. Why I dont know but we missed it and so I taped off the surrounding areas and was able to paint this semi decent.

20201207_062443.jpg


Got some bolts painted red and cleared also. I'll have to be careful during reassembly of the car. Now that I think about it, I got some door hinge bolts that I forgot to paint. Doh! Oh well I can brush those 12 bolts and then clear them.

20201207_062437.jpg


I also painted some bolts black.

20201207_072413.jpg


Other then that, its been just a small step kind of day.
 
OP
M

madison069

Well-known member
Joined
Nov 5, 2010
Messages
4,150
Location
Monroeville, PA
So a little update on the camaro over the holiday break. I was able to get the doors installed with a cherry picker by myself, but its not aligned properly so ill have to wait for a buddy to help me.

20201218_103006.jpg


20201218_104247.jpg


I also got the door seals installed.

20201224_062539.jpg


And got the trunk lid installed along with the weatherstripping.

20201226_172559.jpg


I also took the time to align all of the rear parts to ensure they will still fit before paint.

20201227_100953.jpg


Then I finished sanding the old stupid primer off and g[tcit ready to primer. I even wet sanded the surface to ensure it would be smooth when primered.

20210103_055359.jpg


Well they weren't smooth after spraying the primer. So ill be blocking it this week to smooth it out.

20210103_071311.jpg


I also took the time to go through my interior parts, needless to say I got some extras so I will be cherry picking and eventually sell off the rest,.

20201227_074521.jpg


So thats pretty much where I am now with the camaro.
I ordered some new reversed polarity window motors and planning to install quick down modules to bring a little modern touch to the camaro. I also ordered new door glasses cause the old ones were chipped badly and apparently it rubbed a spot out in the glass against a bad guide which resulted in a really thin area of the glass. Dont want to be driving down the road and it shatters in pieces on me!
 
OP
M

madison069

Well-known member
Joined
Nov 5, 2010
Messages
4,150
Location
Monroeville, PA
Along with working on the camaro, I also made a noodle board for the wife. Started out with gluing up scraps to get a board.


20201218_120037.jpg


Them i cut it down to dimensions and hand planed the flat surface with a belt sander and hand plane. I also glued on the side risers so the board will fit over the stove burners without resting on the burners. I need more clamps!!

20201227_111018.jpg


Then I shaped it and sanded some more, then routed the edge so its not sharp. Once all done I started applying the finish on it. Yes its poly, but this board is being used to seat stuff on top and cover the stove burners. No real plans to use as a cooking surface with all of the cutting boards and counter spaces in the kitchen.

20201229_063142.jpg


And here it is finished and in its spot on the stove. Wife likes it so I'm happy with it.

20210101_093946.jpg


One afternoon, my wife said she smelt burning in the laundry room. Well the washing machine just got done finishing a load of clothes so I started investigating the washer. Eventually I determined the motor had failed on it as it was now locking up when I tried turning the motor by itself.

So here it is in the garage disassembled and waiting for a new motor. $120 later and the washer was back in the laundry room and back to washing clothes like nothing happened.

20201222_130005.jpg


Also the family got paint by numbers this Christmas, so we been working on it throughout the afternoon when we are settling down for the night. Mine is a picture of old cars by a barn. Can't wait to finish it!

20210103_174702.jpg


Along with the pandemic going on, I decided to build a workout area in the garage. I already had a bench press, and my father in law gave me this weight machine. Problem was the cable was broke, pulley was missing, and overall it needed attention. So I went through it and replaced the damaged items. Only thing I haven't finish is sorting out the lower pulleys, seems they are really restricted and will not roll easily. So ill be taking them apart to clean and lube sometime soon. Hopefully its just a clean and lube job.

20210104_210445.jpg


So thats some of the side items thats been going on in the garage and house.
 

bj383ss

Well-known member
Joined
Sep 29, 2011
Messages
3,166
Location
TX
Man you have been busy. The Camaro is getting closer. I don't think you have enough taillightss :D

The noodle board looks good.

I would not have the patience for the paint by numbers. My wifes does those along with puzzles.

Bret
 
OP
M

madison069

Well-known member
Joined
Nov 5, 2010
Messages
4,150
Location
Monroeville, PA
Man you have been busy. The Camaro is getting closer. I don't think you have enough taillightss :D

The noodle board looks good.

I would not have the patience for the paint by numbers. My wifes does those along with puzzles.

Bret

LOL, Yea i kinda started hoarding taillights. When I first started working on this car they didn't make reproductions. If you did get lucky and found a nice set it was close to $400-500 for a nice set of tail lights. So when I come across them for $40 a set I would buy them and set them on the shelf. Problem I had is each one has some kind of defect, either a spider crack, damaged lens, or faded. They now reproduce the lens but I've heard bad things about them if they are in direct sunlight for a long period of time, basically they fade fast in the sun. So I need to take the time and take the goods from each set and create an acceptable set of taillights for the camaro.

I'm being pushed to the limit with the paint by number in the patience department. What kills me is I'll put the brush in a spot and I can't get it to stay within the line. This results in me covering up a spot next to where I was painting. I've half joked about just getting a huge assortment of markers and finish coloring in the other spots.
 
OP
M

madison069

Well-known member
Joined
Nov 5, 2010
Messages
4,150
Location
Monroeville, PA
Only update I have is the camaro doors are aligned and I've started working on aligning the passenger side front fender. I did clean up the wood room and listed a bunch of stuff on Ebay this weekend. I need to start going through all of the drawers in the wood room and organize it all better, along with get rid of the extra stuff!
 
OP
M

madison069

Well-known member
Joined
Nov 5, 2010
Messages
4,150
Location
Monroeville, PA
So some update on the camaro project. I got the front fenders aligned and installed the hood. At this time the hood is aligned nicely, but I'd like to reduce the gap at the front of the passenger side fender. Short of enlarging the holes, im not sure what else I can do to push the fender in closer to the hood.

20210116_194839.jpg


20210116_194608_01.jpg


20210116_193044.jpg


20210116_192805.jpg


Yesterday I made a visit to the junkyard and was able to find a set of 2007 fusion bucket seats. For $36 for the seats and other electric items i got, I thought its worth a gamble. As time progress i can always upgrade the seats if I decide I don't like them. But for now they are nice and cheap!

20210118_170613.jpg


20210118_172552.jpg


20210118_172845.jpg


20210118_172801.jpg


Thats pretty much been it. Spent a lot of time finalizing the alignments on the fender and hood the past weekend. Hopefully I can do some more body work and move closer to giving it to the painter!
 

bj383ss

Well-known member
Joined
Sep 29, 2011
Messages
3,166
Location
TX
Those first 2 pics are just awesome. Almost looks like the car is finished. I think you did good on the seats. They fit the car well.

Bret
 
OP
M

madison069

Well-known member
Joined
Nov 5, 2010
Messages
4,150
Location
Monroeville, PA
Thanks Bret! I keep staring at those pics thinking of how its almost done, then I snap back into reality and see the long list of things to do. Those seats does fit pretty good, I was sitting in them earlier and they seem more comfortable the the original seats.

Looking closer at the seat tracks I realize I can take the lower half off since it's some kind of sensor frame for im sure the airbag and seltbelt buzzer system.

20210119_191103.jpg


20210119_191107.jpg


Also the driver side is apparently extended up, so once I power the seat up I can lower the seat and remove the factory brackets that bolts to the floor. This will prepare the seats for placements and beginning of the design of new brackets.

20210119_185106.jpg


Problem is the wiring. Some is attached to the airbags so I don't want to set the bags off. Wiring diagrams are not accurate online, and its possible these seats have heated seats. So I'm going to open the wire looms and start tracing the wires to ensure I find the exact power wires for the electric motors. Kinda like defusing a bomb but im not being timed so im taking my time!
 
Last edited:
OP
M

madison069

Well-known member
Joined
Nov 5, 2010
Messages
4,150
Location
Monroeville, PA
So this morning I finished removing the junk on the passenger seat and left what I believe to be the seat heating element wires in place. I also disabled the seat airbags by removing the wiring harness.

20210120_064415.jpg


I took the time to set the seat back in the car and used some wood blocks to prop the seat in place. Once I had it in its position I took some pics to show just how much it dropped. I think these seats will fit nicely in the car once I'm done.

20210120_061741.jpg


20210120_061818.jpg


Now to bag the passenger seat and put it out of the way so it dont get damaged and work on the driver side to figure out how to power the seat up. The tracks are in the highest position so I need to retract them up so the seat will lower down and remove the factory brackets. Along with remove the junk wirings.
 
OP
M

madison069

Well-known member
Joined
Nov 5, 2010
Messages
4,150
Location
Monroeville, PA
No updates here lately on the camaro. Been dealing with the passing of my Dad and sorting through his stuff he left behind. I currently have his boat and his gun collection which I'm going through. Been a difficult time as I was hoping to get the camaro on the road so we could go riding in it. But due to complications after a surgery that he wasn't able to avoid, he wasn't able to wake up from the surgery. For now I'm just going through the stuff that I brought home from Texas. Soon I will send the camaro to the paint shop as I'm tired of the body work and just want to get it painted.

In the mean time, I'll be building a shelf soon to have a place to store the gun cases that I've accumulated and hopefully get the gun cleaning supplies organized. So I'll post some of that as I make progress. I just ordered some label tape for my label maker so I can properly label the gun clean supplies.
 

Bob Heine

ALLIANCE MEMBER
Joined
Oct 24, 2009
Messages
10,705
Location
Boca Raton, Florida
Cody, so sorry to hear of your Dad's passing. Take time to grieve and know we're here for you if you want to tell us about him. Mine passed away more than 50 years ago so it isn't a fresh empty place.
 
To avoid these ads, REGISTER NOW!

bj383ss

Well-known member
Joined
Sep 29, 2011
Messages
3,166
Location
TX
Cody sorry to hear about your dad. Glad you made it out of the snow storm when you did. As Bob said we are hear to lend an ear if needed.

Bret
 
OP
M

madison069

Well-known member
Joined
Nov 5, 2010
Messages
4,150
Location
Monroeville, PA
Cody, so sorry to hear of your Dad's passing. Take time to grieve and know we're here for you if you want to tell us about him. Mine passed away more than 50 years ago so it isn't a fresh empty place.

Cody sorry to hear about your dad. Glad you made it out of the snow storm when you did. As Bob said we are hear to lend an ear if needed.

Bret

Thanks guys, I'll probably talk about him as time goes on. Difficult part so far was the daily conversations. We would call each other often throughout the week and now I just don't have someone to talk to on that kind of level. Sure I call other people but it's not the same.
 
OP
M

madison069

Well-known member
Joined
Nov 5, 2010
Messages
4,150
Location
Monroeville, PA
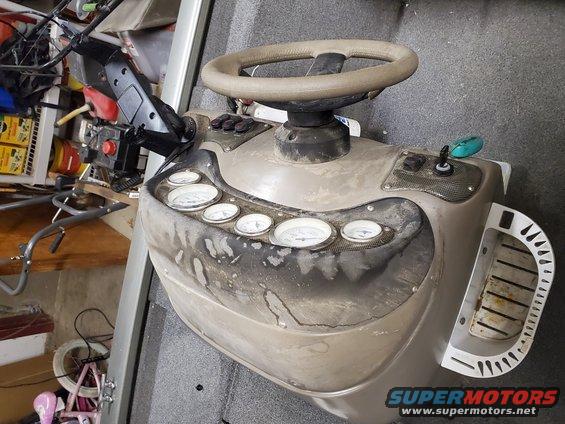
So back in 2005 he bought this boat, a 2005 Tracker Tournament V18. It was his first real boat and to boot it was brand new when he bought it. It was his pride and joy. He always bought the best for it and took it to the dealer to have them work on it if it needed anything. In the past he would just rent a boat at the lake he planned to fish, but he wanted his own.

20210303_170143.jpg


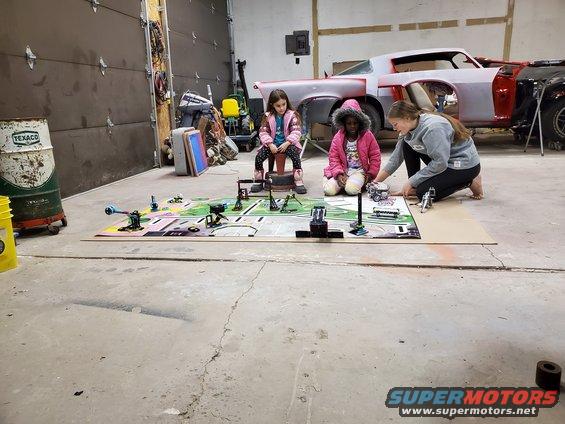
Dad was a big time fisherman who would fish large mouth bass tournaments often. Unfortunately, I never got to fish a tournament with him due to either college, work, or timing. He would talk a lot about his trips and what he caught during the tournament. He also enjoyed fishing for other fishes such as crappie, small mouth bass, and catfish. When I would go fishing we would talk about what kind of lure I should use to get the best result that day or if I should just use live bait for the best results. He would also buy the girls their fishing equipment, lures, and poles when he came up to PA, cause he wanted to make sure they went fishing. Even though they had everything they needed via my stuff, he wanted them to have their own tackle and so on.

Around 2012 he started looking at other boats and wanted me to take this boat home with me to PA. But I kept telling him not to buy another boat since there's nothing wrong with this one. Several times between 2012 and till he passed, he tried to give me the boat or have me take it, but I would refuse and told him not to get another boat and have to pay another payment.

Well, it finally came down to when he passed, that I would take the boat home with me. It's a bitter sweet moment as I'm happy to have his boat, but it also meant that he is not with me anymore. It's been hard to do anything regarding the boat since I've been home. But last weekend I started looking it over and pulled it out of the garage so I could pressure wash the salt off the boat and trailer. Pulling it from Texas to PA right before Texas was crippled with the severe cold was a rough experience. Luckily, I made it home without much issues, but it resulted in the boat getting covered in salt. I still need to hand wash the boat and then get a coat of wax on it to keep it protected in the sun. I ordered a cover for it today so hopefully it's a good cover and combined with a tarp the boat will be protected when I store it in the parking area behind the house.


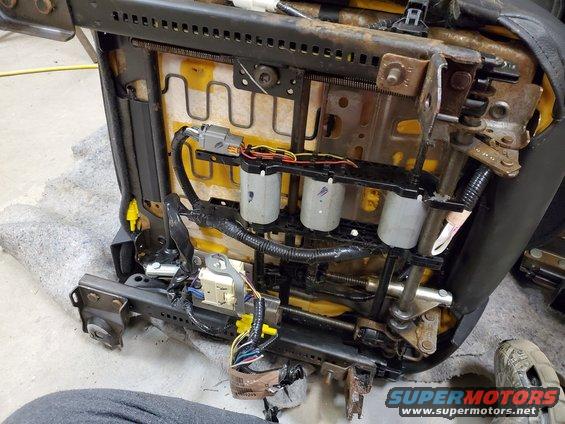
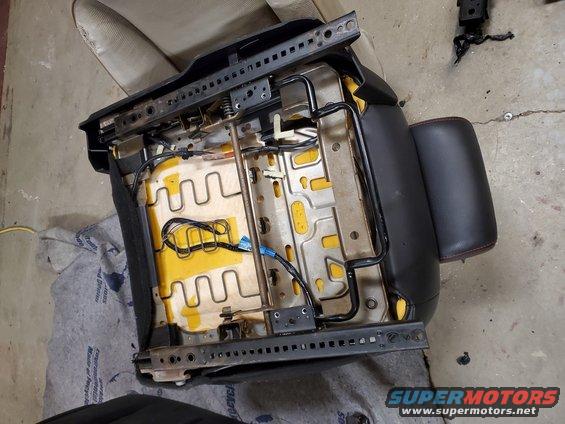
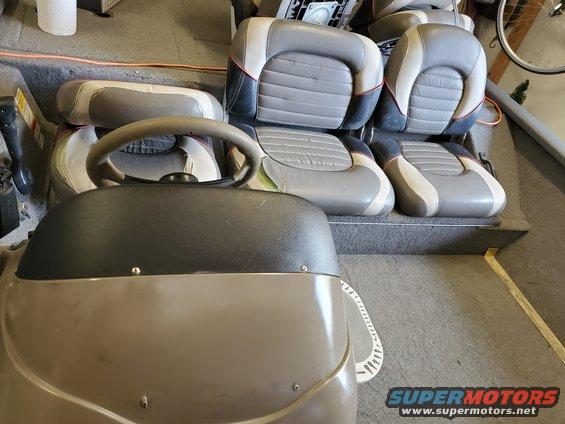
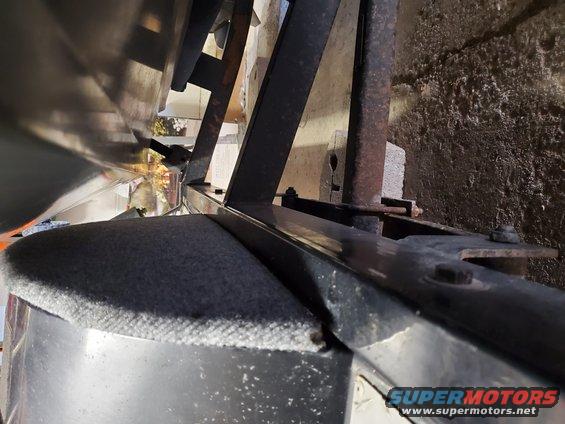
So looking inside the boat you can see the interior looks in good shape, only the seats shows some serious problems due to the seam is busting opening. Close inspection shows that the seam is just coming apart and not the material failing. So i might take the seats off and see how much it would cost to sew the seams on the seat covers. Most likely that Texas sun got to the threads as he didn't take the boat out in the last year and a half basically. He had it covered under a carport but that sun in Texas can do some serious damage to interior/fabric items.
20210303_170233.jpg


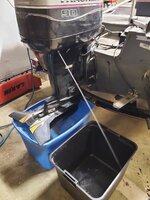
This boat has a 90hp Mercury motor 2 cycle. I do know this boat can move due to that big motor, only problem is it will limit me to which lakes I can go to here in PA. A lot of lakes are restricted to 20hp or lower motor. But luckily there are several Army Engineer Corp lakes that's unlimited HP and so I'll be going to those lakes to fish. I've toyed with the idea of putting a 9.9 Evinrude kicker motor on the back to allow me to fish the 20hp and lower lakes. But that's a later on project.
20210303_170243.jpg


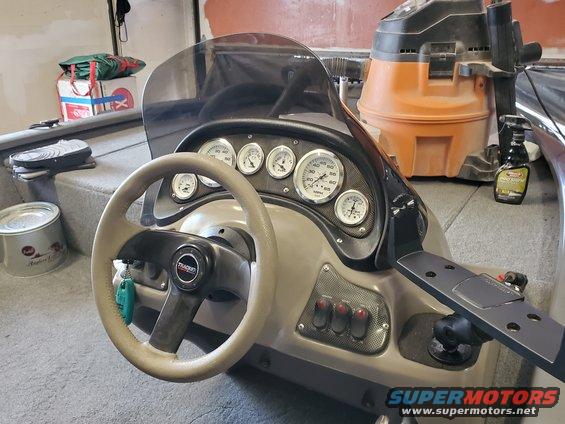
in 2019 He had the dealer install a new trolling motor on the bow of the boat. Did he need a new one, no. He just wanted a new one with more bells and whistles on it. Sadly the first day he took the boat out with the new trolling motor he couldn't get it to work properly. Later on he found out the batteries that was on the boat was shot and it resulted in the motor not working properly. He dropped the coins on new deep cycle batteries and a new charging system, but this was right around the time his health really started to fail and he never got to take the boat on the water with the new trolling motor, batteries, and new fish finders he had installed during the time the trolling motor was put on. We were going to take the boat out on March 27th to April 4th in 2020, but due to covid I wasn't able to fly to Texas due to my job restricting traveling outside of the state. To this day I'm still pissed about that whole deal, but I'm sure I'm not the only one. By the time I made it to Texas his health was worst and he wasn't able to handle the Texas sun during the middle of June so we weren't able to go fishing again.

20210303_170213.jpg


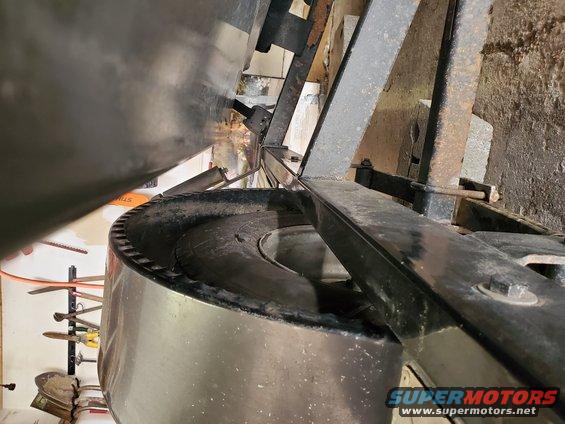
I like this decal on the back of the boat.

20210303_170254.jpg


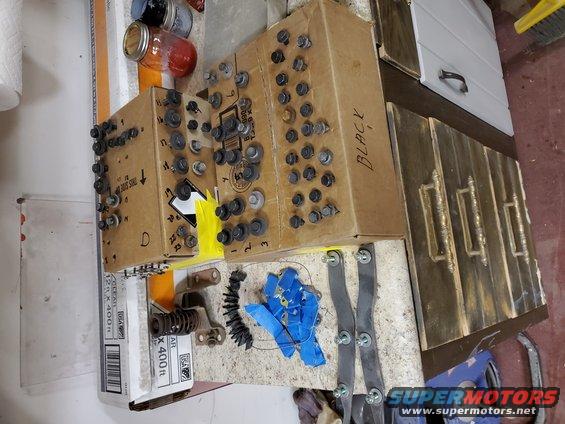
So like I said he really got into fishing. He had quite the setup on this boat. So many reels and rods along with several storage chambers full of lures and tackle boxes on the boat. I haven't pulled it all out, just took a picture of the poles to show mom that they were all on the boat. We were unsure of where his gear was since we didn't find them anywhere in the house or garage. I suspected it was all on the boat but he was in the process of selling this boat so we thought he took it all out. He claimed he couldn't find the titles or any papers saying the boat was paid off so he could remove the lien on the boat titles. Well I found all of the titles and papers in a folder titled "Boat" in his filing cabinet, so I suspect he might of just didn't want to sell it.

20210228_164646.jpg


Hopefully tomorrow I can take the boat to the inspection station so they can verify the VIN does match the title on the trailer. Then when I have mom sign the titles at the end of the month, I'll finalize the papers to get the boat in my name and be registered just in time to do some fishing next month hopefully. Course it's going to be an emotion fishing trip the first few times I'm sure.
 
Last edited:

jblnut

ALLIANCE MEMBER
Joined
Jan 17, 2015
Messages
6,990
Location
In the Middle of MN
Condolences on your father's passing from all of us over here.

That truly is a bittersweet deal about the boat. Looking at the pictures of that beauty it is obvious he loved it !! Seeing the meticulous care you give everything you've shown us this far it's in good hands and your Dad will be smiling when you use it with your family.

I'm always up for a good phone conversation or two or 100 with someone if you'd like :beer:
 
OP
M

madison069

Well-known member
Joined
Nov 5, 2010
Messages
4,150
Location
Monroeville, PA
One of the project this past week was to install a hitch on the riding mower. Why? Cause I wanted to be like George Jones and get my beer and go fishing on my mower. :lol_hitti

Not really, but the parking area of my house is pretty tight when I'm trying to back the boat when it's hooked to my truck. It's almost impossible to get it in the other part of the garage due to the length of the boat and truck. So I figured with the hitch I could pull my boat around, move the popup camper, and pull my little trailer around the yard easier then using the truck. So first thing to do is to remove the rear bagger plate since I don't really use it often in this yard.

20210311_180409.jpg


I took the time to remove the whole rear plate off the mower to make installing the hitch easier. After using a universal kit I found on Amazon, I drilled a few holes into the rear plate and installed the hitch. Proceeded to install the 2" ball which will fit the boat trailer and the popup camper.

20210311_183354.jpg


20210311_183754.jpg


Once i got it reinstalled on the mower, I proceeded to pull the boat out to get it hand washed with my youngest daughter's help! Looks funny with that little mower pulling the big boat, but it works!

20210313_135219.jpg


While looking over the boat and preparing to clean the console, I found a rock between the windshield and console. Since I needed to clean this area I decided the windshield needed to come off.

20210311_192341.jpg


Talk about being dirty! All that salt from the highway had coated the whole boat! So I used some window cleaner to clean the salt off and then used some dash black magic protector spray and got it all cleaned up and UV protected.

20210311_192512.jpg


Put the windshield back on and I must say it's looking really good!

20210312_125335.jpg


20210312_125859.jpg


20210312_125905.jpg


Looking over the trailer, I noticed that the passenger side wheel well was missing the inside part of the fender cover. It reminded me of the conversation of Dad telling me about the blowout he had and the tire took the fender piece off with the thread. If I had remembered I would of made the piece in Texas to protect the boat while bringing it to PA but I didn't remember the conversation and I was in a hurry.

20210313_144031.jpg


So I took a piece of 1/2" plywood and some left over outdoor carpet I had in the garage to make a new piece to keep the rocks from kicking up and hitting the boat. When I unload the boat at the lake, I'll screw in the two top screws to snug the piece down completely. But due to the tight space, I wasn't able to install all 6 screws, only got 4 of them in.

20210313_165406.jpg


After cleaning the boat I organized the garage some more, threw stuff away, went through my dad's collection of tools which mostly consisted of Wright branded tools, and shifted through the tackles with the oldest daughter. I had a few cold snacks and just enjoyed sitting in the boat while thinking of the first trip fishing in April with the kids. I still need to register the boat but still need my mother's signatures on the titles, which will be taken care of when I go to Texas end of this month for her birthday. Oh and I got my official Safety Education Certificate in PA which is a first for me cause I never did get one in Texas cause it wasn't required to drive this boat in Texas. I passed with a 98% score so I think I might be safe, yea right....
 
Last edited:
OP
M

madison069

Well-known member
Joined
Nov 5, 2010
Messages
4,150
Location
Monroeville, PA
Condolences on your father's passing from all of us over here.

That truly is a bittersweet deal about the boat. Looking at the pictures of that beauty it is obvious he loved it !! Seeing the meticulous care you give everything you've shown us this far it's in good hands and your Dad will be smiling when you use it with your family.

I'm always up for a good phone conversation or two or 100 with someone if you'd like :beer:

Thanks, it's been hard to not think about it, but I know he's looking down at us and smiling while thinking about us going fishing in the boat. But I'm also sure he's yelling at me about how I better not put a Bimini top on the boat cause I would have to drill holes on the boat rail to install it! LOL
 

Robey5

Well-known member
Joined
Jan 18, 2010
Messages
406
Location
North of Detroit, Mi
I have owned a boat in the past, and it made me decide that I am not a boat guy. Nevertheless; it appears that your dad really took care of this boat, and it is more than obvious he liked to fish. I can imagine that he is smiling from above in seeing that you are now going to care for it. Think of the time with the kids on that machine! Those memories are lasting, at least for me - in the times that I got to do such things with my dad when I was a kiddo.
 
OP
M

madison069

Well-known member
Joined
Nov 5, 2010
Messages
4,150
Location
Monroeville, PA
Well, during inspection of the roof, I noticed that there was a weak spot around the chimney and I told my wife that we're going to be redoing the roof this summer. She asked if I could add a front porch to the house and so that started my big summer project.

Here is the Before picture right before I poured the concrete, but after we ripped the ugly flowerbed in front of the house.
20210408_183729.jpg

The new slab, I was not a happy camper that day cause the concrete truck was late. Then the concrete set up within 45 mins of it being poured so it didn't give me time to finish the concrete. So in the end I left it cause we decided we wanted to tile the porch floor. So, with that in mind I just moved on with the project and will do the tile in the future.

20210617_121948.jpg

No turning back now as I punched holes in the wall for the support beam.20210802_200900.jpg
Starting the framing of the gable roof with common trusses. It was a load of fun doing this by myself. Learning how to cut the hip roof angles and measuring to the point that I wore a path on the roof felt.
20210812_185818.jpg

Finally got the roof framed and passed inspection before I sheathed the frame.


20210815_170247.jpg

I made a homemade material lift for this job and it has paid off in the end. I had my wife and father in law loading the lift with material at the bottom while I unloaded and moved everything on the roof. Oh and did I mention it was hot up on the roof! I would change my clothes everyday to them being soaked with sweat and it stunk from the sweat! No way I wanted to smell my own BO while on the job!

20210822_191737.jpg

In this picture I got the siding on and finished shingling the roof. Along with finish the flashing and reattached the old siding on the second floor of the house. I was glad to have it done at this point so I didn't have to worry able the rain. I'm not happy with the gutter and downspouts, so those are on my list to replace soon.

20210919_094636.jpg

On the underside I decided to go with brown soffit on the edge for 2' to make it blend with the house better, and then 8ft tongue and groove went up to fill in the rest of the ceiling. I also installed recessed LED lights with a dimmer switch and a ceiling fan for a nice breeze on the warm days.

20210915_142000.jpg20210919_145819.jpg

So, now I'm enjoying the time under the porch while I ponder my next steps of replacing the gutters/downspouts, and wrapping the porch posts. Along with eventually I'll put tiles down on the concrete, but for now we have an outdoor rug to make it look nicer.

I notice I didn't have a night picture so I'll take one this weekend to show off the light and firepit.
 
Last edited:
OP
M

madison069

Well-known member
Joined
Nov 5, 2010
Messages
4,150
Location
Monroeville, PA
One of my project to tackle on the boat was replacing the water pump. Last year the water stream that was coming out of the motor was weak and not a very confident stream pressure that made me think it was not working correctly. So after doing my standard reading online, I ordered the kit and got to work. As daughting as it was, it was an easy project. I just took my time and I was rewarded with a nice strong water stream! Before it would take a few seconds for the water to start shooting out. When I bumped the motor over it after replacing the pump it was almost instant that the water started shooting out. So now it's time to take a break and go fishing soon!!
 

Attachments

  • 20220205_190140.jpg
    20220205_190140.jpg
    359.3 KB · Views: 23
  • 20220206_084805.jpg
    20220206_084805.jpg
    327.4 KB · Views: 22
  • 20220206_095302.jpg
    20220206_095302.jpg
    262 KB · Views: 21
  • 20220222_121358.jpg
    20220222_121358.jpg
    294.2 KB · Views: 29

Bob Heine

ALLIANCE MEMBER
Joined
Oct 24, 2009
Messages
10,705
Location
Boca Raton, Florida
Cody, some people don't follow instructions well. When I replaced the impeller in the Mercruiser outdrive on our Century Raven the final step was to re-fill the gear oil. Pushing it into the drain hole was making a mess so I "filled" it from the hole at the top. It was a very expensive mistake and long paddle home.
 
OP
M

madison069

Well-known member
Joined
Nov 5, 2010
Messages
4,150
Location
Monroeville, PA
Cody, some people don't follow instructions well. When I replaced the impeller in the Mercruiser outdrive on our Century Raven the final step was to re-fill the gear oil. Pushing it into the drain hole was making a mess so I "filled" it from the hole at the top. It was a very expensive mistake and long paddle home.
Ouch! I was just wondering how did they push that oil in the gear housing back in the days? I found this pump attachment online and ordered it to make the job easier. As you can see in the picture, it just screws into the bottle and a little gray plastic piece attaches to the lower gear assembly. I just pumped it slowly into the house to let the oil spread around on the inside. Worked like a charm!
 

Attachments

  • 20220206_094359.jpg
    20220206_094359.jpg
    282.5 KB · Views: 39
OP
M

madison069

Well-known member
Joined
Nov 5, 2010
Messages
4,150
Location
Monroeville, PA
Currently I'm remodeling a bathroom in anticipation of my mother moving here in June. So alittle back story, I had installed an interior french drain at this house and in the process we ripped the bathroom out with the mind set to remodel it. 4 years later we finally decided its time to finish this project. Since this was a basement bathroom, it wasn't a big deal without the use of the bathroom. Needless to say, it's small and it's gonna take some creativity to make this room functional. So after getting a rough idea of what the wife wants, I got started on the project. Here is the before picture before I demo the walls, but after I had ripped the tub out and knocked everything off the wall.
 

Attachments

  • 20211213_174725.jpg
    20211213_174725.jpg
    324.8 KB · Views: 39
  • 20211213_174740.jpg
    20211213_174740.jpg
    254.5 KB · Views: 31
  • 20211213_174743.jpg
    20211213_174743.jpg
    322.4 KB · Views: 31
  • 20211213_174741.jpg
    20211213_174741.jpg
    320.8 KB · Views: 35
OP
M

madison069

Well-known member
Joined
Nov 5, 2010
Messages
4,150
Location
Monroeville, PA
Oh hey look, demo!!

So the bathroom was too small for a nice walk in shower. So the walls had to come down, just so I can gain 10 inches in width. Alot of work for 10 inches huh.

Luckily the demo hammer made short work of the cinder block wall and I got it all cleared out.
 

Attachments

  • 20220220_180234.jpg
    20220220_180234.jpg
    301.7 KB · Views: 34
  • 20220220_180241.jpg
    20220220_180241.jpg
    377.5 KB · Views: 34
  • 20220220_180243.jpg
    20220220_180243.jpg
    284.8 KB · Views: 30
OP
M

madison069

Well-known member
Joined
Nov 5, 2010
Messages
4,150
Location
Monroeville, PA
Oh look new wood stud walls!

So I got the walls put back in, put plastic down under the framing to keep moisture at a bay on the wood. I ran it up the side that is gonna be the shower area. I'm sure it's over kill but it can't hurt I figured. Here you can see the sink in place, bench in its rough area, new shower wall for valve and shower head. Plan is to put a full size cabinet over the sink, this way there is some storage space for meds and towels and such. Instead of be claustrophobic while washing your hands, I'm going to pull the sink out so it's easier to use the sink. The space behind the sink is just gonna be the mechanical space for the plumbing and such.
 

Attachments

  • 20220226_152346.jpg
    20220226_152346.jpg
    323.6 KB · Views: 30
  • 20220226_152316.jpg
    20220226_152316.jpg
    273.1 KB · Views: 28
  • 20220227_164433.jpg
    20220227_164433.jpg
    256.1 KB · Views: 29
OP
M

madison069

Well-known member
Joined
Nov 5, 2010
Messages
4,150
Location
Monroeville, PA
Last night I put the insulation on the exterior wall to minimize the temp swing in this room. Then I framed out the door way. The old door was a 26" door and I figured I need to be able to get a walker in and out, so a 32" door will go back in place. The corner between the shower and stairs is giving me fix on how to frame it. I stopped for the night and hopefully I'll figure it out tonight when I go back. I hope I get the framing done tonight so I can move on to electrical and plumbing. I can only just keep plugging away til it's done.
 

Attachments

  • 20220228_192256.jpg
    20220228_192256.jpg
    385.9 KB · Views: 27
  • 20220228_192303.jpg
    20220228_192303.jpg
    279.3 KB · Views: 26
  • 20220228_192314.jpg
    20220228_192314.jpg
    295.9 KB · Views: 26
  • 20220228_192319.jpg
    20220228_192319.jpg
    246.4 KB · Views: 39
OP
M

madison069

Well-known member
Joined
Nov 5, 2010
Messages
4,150
Location
Monroeville, PA
You ever get to a point that you want to rip out everything and put all new wires in the house cause of the hack that was done by previous owners?

While figuring out the wiring/electrical mess in the ceiling, I came across a few hidden junction boxes that was behind the false ceiling and romex wire going into a metal junction box with no connector to clamp the wire in the knockout opening. So basically the wire is just rubbing on the sharp edge of the box. With these metal junction boxes attached to the first floor, you know it's just slowly flexing up and down against that sharp edge. So far I've ripped 40 feet of old wires that was cloth wrapped and will be pulling more soon. Going to get some more romex connectors for the knockout openings and put new wires in place to eliminate some of the hidden junction boxes. The hidden boxes from what I can determine was just used to extend the wiring from the laundry room to the bathroom without replacing all of the wire.

The joy of remodeling a 80 years old home. Oh and electrical wire isn't cheap, but it's cheaper then burning your house down!
 
OP
M

madison069

Well-known member
Joined
Nov 5, 2010
Messages
4,150
Location
Monroeville, PA
Just a material run yesterday. I got 5 sheets of 1/2" gypsum boards, 5 sheets of 1/2" mold resistance gypsum boards (Does it really make a difference in bathrooms??) 8 - 1/2" cement boards, box of screws, romex connectors, and 5- 1x4 lumber boards which was a grand total of $340.

Is it just me or things seem to be extremely high in prices? Oh and we hit $4.19 for a gallon of gas last night! Glad I bought gas the other day at $3.54 a gallon.
 
OP
M

madison069

Well-known member
Joined
Nov 5, 2010
Messages
4,150
Location
Monroeville, PA
Small update, I got the electrical all figured out and installed the new lights in the bathroom for now. I'll have to remove the led fixture but it's a simple twist and pull task. I also plumbed up the water lines. My first time working with pex and using crimp rings instead of shark bites. I hope I got the crimps done right but we won't know til I make the connection to the water supply lines. I had to grab the sink shut off valves and apparently a shower head elbow cause one didn't come with the shower valve kit. I tried to avoid any fittings as much as possible but several spots were prone to kinks so I had to use the 90s more then I would had liked. But the way it's plumbed, it will be easy access to it all when I pull the sink cabinet out. Plus any drywall cutting can be done behind the sink the way this false wall is set. I'll be putting a 24" full size wall cabinet above the sink for storage/medicine cabinet. The false wall will make the cabinet seem flushed above the sink and not take up space above the sink, making it easier to use the sink. The small size of the bathroom is limiting my storage space so this was one solution that works out I think for future repairs and such. The I-beam above the wall is creating routing challenges, but in the end I'll put a small cabinet over the water line area to provide access to the shutoff valves for the bathroom and hide the water line and the one electric wire that's routed there for the light switch that controls the laundry room lights.
 

Attachments

  • 20220307_192251.jpg
    20220307_192251.jpg
    321.8 KB · Views: 26
  • 20220307_192303.jpg
    20220307_192303.jpg
    320.4 KB · Views: 26
  • 20220307_192614.jpg
    20220307_192614.jpg
    274.8 KB · Views: 26

bj383ss

Well-known member
Joined
Sep 29, 2011
Messages
3,166
Location
TX
Just a material run yesterday. I got 5 sheets of 1/2" gypsum boards, 5 sheets of 1/2" mold resistance gypsum boards (Does it really make a difference in bathrooms??) 8 - 1/2" cement boards, box of screws, romex connectors, and 5- 1x4 lumber boards which was a grand total of $340.

Is it just me or things seem to be extremely high in prices? Oh and we hit $4.19 for a gallon of gas last night! Glad I bought gas the other day at $3.54 a gallon.
Every time I go into Lowes now I spend at least $50. Things are sky rocketing! Our gas is at $3.79. Premium is at $4.39. I went ahead and filled the Camaro up. It hurt pretty bad. I will be driving the truck for now as it can use regular. Even though it gets worse mileage it works out cheaper in the end. We just got keep moving forward and be grateful we are able to buy products.

Bret
 
To avoid these ads, REGISTER NOW!
Top Bottom