To avoid these ads, REGISTER NOW!

Above 1200 Sq/FT Cody's 33'x62' Garage

Wokspaces above 1200 squarefeet.
OP
M

madison069

Well-known member
Joined
Nov 5, 2010
Messages
4,150
Location
Monroeville, PA
Every time I go into Lowes now I spend at least $50. Things are sky rocketing! Our gas is at $3.79. Premium is at $4.39. I went ahead and filled the Camaro up. It hurt pretty bad. I will be driving the truck for now as it can use regular. Even though it gets worse mileage it works out cheaper in the end. We just got keep moving forward and be grateful we are able to buy products.

Bret
I went yesterday for small stuff at home depot, $7 for a simple ****** for the shut off valve connection. Construction adhesive is in limited supply apparently and so I bought 6 tubes at $9 a tube. I was looking for liquid nail panel adhesive but they didn't have any in stock or at any stores nearby! Starting to look down the road at what supplies I need so I can be sure I get it soon before they sell out.

Oh and regular gas is $4.39 here, premium is $5!
 
To avoid these ads, REGISTER NOW!
OP
M

madison069

Well-known member
Joined
Nov 5, 2010
Messages
4,150
Location
Monroeville, PA
Last night I was able to finish up the plumbing for drywall! While inspecting all of the connections I found one connection that was just barely connected!! So I shut the water off and redid the connection. Oddly it wasn't leaking either, but I can see it popping when I got the wall closed in. The new connection looks better!

The shutoff valve connection for the sink cold water that has a minor weeping spot. I took it back apart to see if it had split or something but no crack was seen. So I taped the threads with more Teflon and reassembled. It still has a very faint weeping. Maybe try some paste next time?

The I-beam really messes with my path for everything electrical and water related. Need to see about getting the water lines closer to the wall but I don't want to kink it in the process. Was gonna throw a sheet of drywall up and see how it looks. As long as it's high enough to allow me to put a cover over it and allow a deep freezer be placed there, then I'll let it be. Otherwise I'll need to put some 90s there and turn it inward of the wall and run it closer. Ideally I would run the water line on the other side of the i-beam but I don't want to mess with the original water line as it's solid still. Just not a can of worm I want to deal with yet. If I ever replace the main water line with pex I'll open the wall up to move the lines. Tonight I'll be putting drywall up on the ceiling. I did place some nail plates on the studs where it was needed.along with putting more drywall support studs. I still got a few more drywall support studs to put in place. But I'll do it later when I'm by myself. My wife will help me with the ceiling tonight.
 

Attachments

  • 20220309_180414.jpg
    20220309_180414.jpg
    159 KB · Views: 141
  • 20220309_181013.jpg
    20220309_181013.jpg
    308.3 KB · Views: 85
  • 20220309_200452.jpg
    20220309_200452.jpg
    334.3 KB · Views: 54
  • 20220309_200458.jpg
    20220309_200458.jpg
    301.4 KB · Views: 50
  • 20220309_200855.jpg
    20220309_200855.jpg
    269.4 KB · Views: 60
OP
M

madison069

Well-known member
Joined
Nov 5, 2010
Messages
4,150
Location
Monroeville, PA
Tonight's progress before I had to leave to pick up the kids from work. Odd how fast you try to work in 2 hours, but only got 4 sheets hung, move 8 sheets from the garage to the living room, hung a light up for temp lights, and unplug a roof downspout of leaves so the flat roof would drain. Just seems like I'm not making as much progress as I should with simple drywall. Oh and yes corner of the purple board is all messed up cause it was too tight in that corner, but its gonna be hidden by a cabinet so I'm not too terribly worried about it. Either way I'll fix it when I do tape and mud work.
 

Attachments

  • 20220310_183127.jpg
    20220310_183127.jpg
    207.5 KB · Views: 51
  • 20220310_183138.jpg
    20220310_183138.jpg
    149.5 KB · Views: 52
  • 20220310_183150.jpg
    20220310_183150.jpg
    268.1 KB · Views: 68
OP
M

madison069

Well-known member
Joined
Nov 5, 2010
Messages
4,150
Location
Monroeville, PA
Wow. You’ve been at it pretty darn good over there. Do you have a prospective date on the ‘maro being road worthy?
I wish that car was on the road already. So far I've been through 4 different body shop and they all pretty much brushed me off.

If I can't get a shop to do it, then I'll get back on the camaro and just get it as best as I can and then paint it. I'm tired of it just sitting.
 
OP
M

madison069

Well-known member
Joined
Nov 5, 2010
Messages
4,150
Location
Monroeville, PA
So I've been steady working on the bathroom. I got the laundry room side of the walls sheeted and ready for mud/tape. I got the plumbing situated and ended up having to raise the floor up 1.5" to correct the height issue of the floor and drain. Using my level I marked around the floor for the height of the pour. Then I filled the space between the studs with wood board, not shown in the photos but I did. I also got the fullsize cabinet in place and determined the final height. I' still need to fill he gap on the top of the cabinet, but I think it's going to be a good addition. I got 90% of the bathroom wall sheeted and ready for tape/mud. Yes that one corner in the shower wall was really low. Last night I corrected that by shimming it out, but I didn't get a picture of it before hand. Last night I made a material run for all of the corner bead/mud/tape since the weather is suppose to be crappy the rest of the week. Didn't want any of the material to get wet. Hopefully by Sunday I'll have to walls close to finished for tiles and paint, but as long as I make progress i'll be happy!

Oh and my mother's move in date got moved to end of April so I got lest then a month to get this bathroom ready or she will have to stay with us in the guest room til I get this bathroom done.
 

Attachments

  • 20220311_183919.jpg
    20220311_183919.jpg
    176.1 KB · Views: 46
  • 20220315_185939.jpg
    20220315_185939.jpg
    139.7 KB · Views: 48
  • 20220315_192845.jpg
    20220315_192845.jpg
    173.7 KB · Views: 54
  • 20220316_181021.jpg
    20220316_181021.jpg
    326.2 KB · Views: 54
  • 20220316_185814.jpg
    20220316_185814.jpg
    157.1 KB · Views: 50
  • 20220321_201250.jpg
    20220321_201250.jpg
    384.6 KB · Views: 49
  • 20220321_201257.jpg
    20220321_201257.jpg
    167.1 KB · Views: 44
  • 20220321_201304.jpg
    20220321_201304.jpg
    136.6 KB · Views: 52
Last edited:

Robey5

Well-known member
Joined
Jan 18, 2010
Messages
406
Location
North of Detroit, Mi
Still enjoying the ride over here. Just curious - what are you intending to use as a clamping drain/liner or membrane for the shower? You planning on Kerdi? … or… sorry if I missed it.
 
Last edited:
OP
M

madison069

Well-known member
Joined
Nov 5, 2010
Messages
4,150
Location
Monroeville, PA
Still enjoying the ride over here. Just curious - what are you intending to use as a clamping drain/liner or membrane for the shower? You planning on Kerdi? … or… sorry if I missed it.

My plan is to use RedGard which is a liquid membrane. Base on everything I've read and being told, I will be applying the RedGard soon as I seal all joints, butts and corners with some thin-set on the wall and floor of the shower area. After I apply this membrane I'll do a flood test to ensure it doesn't leak before I install the mud bed mix with the final slope built in for the tile floor of the shower. I was planning to use a preformed pan, but nothing was available without custom making and that includes custom prices. So we will see how this works.
 
OP
M

madison069

Well-known member
Joined
Nov 5, 2010
Messages
4,150
Location
Monroeville, PA
Yesterday's progress was all about sealing gaps between cement boards and gaps between the wall and floor. I took the time to fill in the dimples from all of the screws too. I used a fiberglass type tape and some thin set mortar to fill the gaps. Need to set a level on the wall and make sure it's all good and level for the tiles. I also made the filler for over the medicine/storage/hybrid cabinet. Need to fill the gaps beside the cabinet and then I can start doing the mud and tape on the drywall.
 

Attachments

  • 20220323_201103.jpg
    20220323_201103.jpg
    254.7 KB · Views: 40
  • 20220323_201106.jpg
    20220323_201106.jpg
    238.9 KB · Views: 38
  • 20220323_201115.jpg
    20220323_201115.jpg
    162.6 KB · Views: 38
  • 20220323_201117.jpg
    20220323_201117.jpg
    290.1 KB · Views: 38
  • 20220323_201218.jpg
    20220323_201218.jpg
    138 KB · Views: 43
OP
M

madison069

Well-known member
Joined
Nov 5, 2010
Messages
4,150
Location
Monroeville, PA
Biggest pain the *** door I've ever installed. That cinder block wall with a 6 inch wide wood frame was not easy to match up. Also that cinder block wall was junk, crumbly, and no good for screwing screws in. I should of tore that wall out too. Either way, I got it in. Got 3 good screws in that didn't cause a crumbly mess. Then using spray foam I filled the gap with the hope that it made a good bond to the cinder wall. After an hour that foam was holding the door frame in very well! I got gaps to fill but I'll get it done before I mud and tape. The outside of the door will get a succo treatment to match the cinder wall.
 

Attachments

  • 20220324_194535.jpg
    20220324_194535.jpg
    141.5 KB · Views: 35
  • 20220324_194646.jpg
    20220324_194646.jpg
    164.5 KB · Views: 37

Robey5

Well-known member
Joined
Jan 18, 2010
Messages
406
Location
North of Detroit, Mi
Red guard is a nice product, I used it some time ago on my last shower that I did. I was told that you don’t have to do more than one coat, but because I am “that guy” … I used a PASCO liner (under the substrate, on the horizontal - as a pan) and then hit the whole ball o’ wax with 2 coats of the red guard.

I could not detect any leakage, so after having overdesigned that mess and using it a lot over the 4 years we used it, so I will subscribe to use of red guard.
 
OP
M

madison069

Well-known member
Joined
Nov 5, 2010
Messages
4,150
Location
Monroeville, PA
THe past few work session has been about filling in gaps, and doing the first mud/tape sessions. Using my table saw I cut down a 2x4 to fit in the gap between the door and drywall. I then wrapped the corners with corner bead. I'll take bondo over there and i'll be filling in the holes and irregulars with it after I sand everything down. Tonight I'm just going to be sanding the first tape session, just to knock the high spots down and then get my wider blade out and get the walls smoother. I enjoy watching the master do these task, but doing them myself they rarely look like the art that the master make them look like.
 

Attachments

  • 20220329_171315.jpg
    20220329_171315.jpg
    201.5 KB · Views: 27
  • 20220329_174629.jpg
    20220329_174629.jpg
    168.1 KB · Views: 23
  • 20220329_194011.jpg
    20220329_194011.jpg
    214.3 KB · Views: 22
  • 20220329_194050.jpg
    20220329_194050.jpg
    155.1 KB · Views: 24
  • 20220328_194810.jpg
    20220328_194810.jpg
    170.3 KB · Views: 21
  • 20220328_194846.jpg
    20220328_194846.jpg
    173.2 KB · Views: 21
  • 20220328_194835.jpg
    20220328_194835.jpg
    159.1 KB · Views: 20
  • 20220328_194855(0).jpg
    20220328_194855(0).jpg
    150.7 KB · Views: 20
  • 20220329_194004.jpg
    20220329_194004.jpg
    180.8 KB · Views: 38
OP
M

madison069

Well-known member
Joined
Nov 5, 2010
Messages
4,150
Location
Monroeville, PA
Been awhile since I've posted, but I'm still plugging away on the bathroom. Got the liquid waterproof membrane rolled on and then got the walls primed. Still some imperfections in the wall so I went back eith some thin joint compound on them last night. I also got the mud pan in and sloped with a guide kit. Last night me and the wife played with the tiles to get the pattern that she liked ironed down before I started the actual tiling process. It's time to start tiling the shower area.
 

Attachments

  • 20220414_184156.jpg
    20220414_184156.jpg
    156 KB · Views: 33
  • 20220414_184200.jpg
    20220414_184200.jpg
    153.4 KB · Views: 34
  • 20220414_184211.jpg
    20220414_184211.jpg
    106.8 KB · Views: 39
  • 20220420_190102.jpg
    20220420_190102.jpg
    228.7 KB · Views: 42
  • 20220420_192451.jpg
    20220420_192451.jpg
    211.1 KB · Views: 42
  • 20220420_192734.jpg
    20220420_192734.jpg
    204.8 KB · Views: 50

Robey5

Well-known member
Joined
Jan 18, 2010
Messages
406
Location
North of Detroit, Mi
Awww! That’s gonna look sweet! Those slope-guide kits are really nice; there is no way to eff the drain/slope up with one of those, and you can practice a layout right “in situ”. Moar pix please!
 
OP
M

madison069

Well-known member
Joined
Nov 5, 2010
Messages
4,150
Location
Monroeville, PA
SO a month later, after moving my mom, going to court in Texas for my dad's estate probate, and several hospital visit for my mom we have finally seen the end of the shower tiling process! Now it's a case of cleaning and getting all grout lines ready for the grout. I figured I could get it ready for grout over the weekend and maybe get it all grouted next week after work. Keeping all of the tiles lining up on each wall section was a chore for me, but I think I was able to achieve it!
 

Attachments

  • 20220526_194801.jpg
    20220526_194801.jpg
    185.8 KB · Views: 37
  • 20220526_194755.jpg
    20220526_194755.jpg
    266.2 KB · Views: 40
  • 20220523_195748.jpg
    20220523_195748.jpg
    200.9 KB · Views: 39
  • 20220523_195737.jpg
    20220523_195737.jpg
    165.2 KB · Views: 40
  • 20220523_195721.jpg
    20220523_195721.jpg
    221.5 KB · Views: 38
  • 20220518_191053.jpg
    20220518_191053.jpg
    317.7 KB · Views: 41
OP
M

madison069

Well-known member
Joined
Nov 5, 2010
Messages
4,150
Location
Monroeville, PA
Some more photo that didn't get loaded in the last post for some reason.
 

Attachments

  • 20220526_194754.jpg
    20220526_194754.jpg
    280.3 KB · Views: 43
  • 20220513_121627.jpg
    20220513_121627.jpg
    336.5 KB · Views: 43
  • 20220513_121629.jpg
    20220513_121629.jpg
    353.1 KB · Views: 40
  • 20220511_183450.jpg
    20220511_183450.jpg
    304.2 KB · Views: 54
OP
M

madison069

Well-known member
Joined
Nov 5, 2010
Messages
4,150
Location
Monroeville, PA
Oh and why was the tiles placed weirdly in the one picture around the notch in the wall? Cause I didn't like how the first tiling around the niche looked like, so I had to remove the tile the next day and repair the wall/liquid membrane before I could continue tiling. Attached is the first tiled job around niche.
 

Attachments

  • 20220515_155059.jpg
    20220515_155059.jpg
    218.3 KB · Views: 76
OP
M

madison069

Well-known member
Joined
Nov 5, 2010
Messages
4,150
Location
Monroeville, PA
Cody, that's a really nice shower enclosure. The first tiling around the niche looked good but I agree the final version looks better.
Thanks! It's been a long project, my supervisor, I mean wife is tired of me working on it. Or as she puts it" dragging it out". I'm ready to be done with it just as much as she is. But I'll eventually get it all done and then my mother can move into that part of the house.

I believe I'll be grouting the tiles tomorrow, wish me luck as I'll be using the epoxy grout and I've had not had the pleasure of using it before.
 
To avoid these ads, REGISTER NOW!
OP
M

madison069

Well-known member
Joined
Nov 5, 2010
Messages
4,150
Location
Monroeville, PA
Oh and some pictures after cleaning the tiles all up and removing thinset from the grout lines.
 

Attachments

  • 20220528_150545.jpg
    20220528_150545.jpg
    422.7 KB · Views: 64
  • 20220528_150541.jpg
    20220528_150541.jpg
    309.3 KB · Views: 57
  • 20220528_150609.jpg
    20220528_150609.jpg
    323.2 KB · Views: 72

loganb

ALLIANCE MEMBER
Joined
Dec 29, 2011
Messages
5,517
Location
Omaha, NE
Thoughts and prayers with you and your family that's a tough 16 months. The bathroom will be there when you're ready for it and you wouldn't be the first person who had kept their mind at bay by keeping your hands busy

The work so far looks great by the way!
 
OP
M

madison069

Well-known member
Joined
Nov 5, 2010
Messages
4,150
Location
Monroeville, PA
Took the boat out for a cruise on the river, along with try to locate the leak that the boat seemed to have. Based on the location of the water stream in the hull of the boat, it appeared the water was coming from the back driver side of the boat. When I got back out of the river I looked closer in that area and found the dealer "special" work done back here. Apparently Dad had installed a few fish finders on this boat and since he never did the install work, he always paid the dealer to do it. Well, the dealer struck again with steel screws and household silicone. Along with the multiple holes in the boat as the transponder was changed it appears. I removed all of the old screws, cleaned the surface up so the new special "high dollar" Marine adhesive/sealant has a good bite. The expensive adhesive/sealant is a 3M product number 5200. The stuff is like anti-seize to me as I just had to look at it and my hands, arms, and clothes was covered in it regardless how careful I was with it. After ensuring i had the right stainless steel screws for the holes, I removed the screws one by one and dipped the screws with the adhesive and squeezed a dab in the hole since I can't access the back side of this part of the boat. tried to load a picture of the inside but the photo was too big. then once I got all of the screws back in the hole and installed the transponder back in place, I smoothed the adhesive around the screw heads and let it all cure for a day before I sprayed the area with rustoleum hammer gray. It blended in pretty good so I'll leave it as it is for now. I'll take it back to the river this weekend and see if this fixed the leak. If this did the trick, I'm sure dad would be kicking himself for not checking this out cause he was trying to find this leak since 2016 or so.

If the leak isn't fixed, I got aluminum sealed rivets on order to remove the screws from the boat for a more permit fix. Then I will install a plastic block over the screw holes to allow me to mount the transponder on the plastic block instead of on the boat itself. Thereby eliminating any holes in this area and not having to put new holes in the boat. But for now I'm gonna try the screws since they were easy to get locally and I needed the boat sealed up for an upcoming fishing trip at Put-in bay, Ohio.

as for grieving, I've been enjoying going back through the old family photo albums. I'll be going back over to the other house to grab some more photo albums as there was a bunch of them. I eventually need to transfer the photos to new albums due to the old ones are falling apart. If anyone has any suggestions on better organizing the photos and reducing their foot print, I'm all ears before I go buying more albums.
 

Attachments

  • 86846914-E0C0-4C7E-B956-6F6BE80C0727.jpeg
    86846914-E0C0-4C7E-B956-6F6BE80C0727.jpeg
    323.6 KB · Views: 49
  • 98181579-6088-4850-957D-49474929FEC3.jpeg
    98181579-6088-4850-957D-49474929FEC3.jpeg
    299.7 KB · Views: 42
  • F34FC616-70C0-4EE7-A960-52605985D82B.jpeg
    F34FC616-70C0-4EE7-A960-52605985D82B.jpeg
    308.1 KB · Views: 47
Last edited:
OP
M

madison069

Well-known member
Joined
Nov 5, 2010
Messages
4,150
Location
Monroeville, PA
Back to the drawing board on finding that leak. The area that the water goes into the boat is basically a blind area due to being filled with foam and there's a plate over the whole foam deal. I got to thinking, just maybe the plate is diverting the water from somewhere toward the front of the boat, but the plate is keeping it from going to the center till it gets to the rear of the boat. I'll have to go over the boat's outside with a fine tooth comb and see what I find.
 
OP
M

madison069

Well-known member
Joined
Nov 5, 2010
Messages
4,150
Location
Monroeville, PA
Between family trip and chores, I was able to get a little work done at the other place in the laundry room. Figured the laundry room has been a mess for too long so I went ahead and finished painting the cinder block wall and got the vinyl plank flooring down.

I first had to remove everything to have a nice work area. Then I scrapped and ground down any high spots in the floor. Then I poured self leveling in the section of floor that was no where near level. Once all of that was set, I started laying the flooring down. It wasn’t perfect and I’m not sure what else I could of done to get it exact. But the floor is a lot better then what was previously there.

Hopefully by putting the vinyl planks down as per instructions, there won’t be any issues with these. But it was quicker then lying tiles so there’s that going for it.
 

Attachments

  • E4E498EE-7F5D-4D35-9DCF-3C73457C5F73.jpeg
    E4E498EE-7F5D-4D35-9DCF-3C73457C5F73.jpeg
    374.3 KB · Views: 35
  • CF28C853-F9ED-49AC-A549-02D99C554803.jpeg
    CF28C853-F9ED-49AC-A549-02D99C554803.jpeg
    536.7 KB · Views: 29
  • 67ACF71E-0985-4531-9B41-DFC152D5DA0A.jpeg
    67ACF71E-0985-4531-9B41-DFC152D5DA0A.jpeg
    317.9 KB · Views: 24
  • EA737A86-0CBA-478C-B099-FCD0C5EEBD86.jpeg
    EA737A86-0CBA-478C-B099-FCD0C5EEBD86.jpeg
    306.2 KB · Views: 24
  • 9B2BBB7C-A157-4B74-B36E-D4334B543BEA.jpeg
    9B2BBB7C-A157-4B74-B36E-D4334B543BEA.jpeg
    396.7 KB · Views: 24
  • 3A69E8C2-9997-4349-95AD-975F9DAD49FA.jpeg
    3A69E8C2-9997-4349-95AD-975F9DAD49FA.jpeg
    297.3 KB · Views: 33
Last edited:
OP
M

madison069

Well-known member
Joined
Nov 5, 2010
Messages
4,150
Location
Monroeville, PA
And the finish pictures
 

Attachments

  • 3452EC80-EF76-439E-AFBC-92F424D7A682.jpeg
    3452EC80-EF76-439E-AFBC-92F424D7A682.jpeg
    301.6 KB · Views: 32
  • 56EED639-480F-49CC-8770-FE158152B7F4.jpeg
    56EED639-480F-49CC-8770-FE158152B7F4.jpeg
    287.9 KB · Views: 31
  • 69CABEE6-CF43-478C-91D8-459AC936950B.jpeg
    69CABEE6-CF43-478C-91D8-459AC936950B.jpeg
    350.6 KB · Views: 30
  • 8A497342-8418-41F8-9264-81BB833F2FF1.jpeg
    8A497342-8418-41F8-9264-81BB833F2FF1.jpeg
    328.6 KB · Views: 30
  • 761157E6-DE70-4C90-9C11-0255B9D148F0.jpeg
    761157E6-DE70-4C90-9C11-0255B9D148F0.jpeg
    287.9 KB · Views: 35

wasfast

Well-known member
Joined
Apr 10, 2014
Messages
874
Location
San Diego CA
I'd guess that the floor is "level enough". Small amounts of variation aren't a durability issue, just that some planks may "give" as you walk over them.
The only additional step would have been to self level the whole area a small amount VS just the "low spots". Looks great.
 
OP
M

madison069

Well-known member
Joined
Nov 5, 2010
Messages
4,150
Location
Monroeville, PA
I'd guess that the floor is "level enough". Small amounts of variation aren't a durability issue, just that some planks may "give" as you walk over them.
The only additional step would have been to self level the whole area a small amount VS just the "low spots". Looks great.

True, I probably should of just self leveled the whole floor. There was a crack in the floor that had a little hump. I took the time to level it some but I'm sure it wasn't perfect, just close enough that the level looks like it's making complete contact. Then where the new and old concrete met up, there seemed to be a gap big enough that some of the self level weep into the crack and so there is like a shallow divot. But luckily most of these little issues was along the walls where traffic was gonna be low and only cabinets will be placed at or the appliances was gonna reside. Also the flooring around the water tank isn't perfect. I didn't want to drain the tank and move it, call it being lazy which I did call myself lazy for not doing that, so I just cut the planks to go around the tank base with a gap between the tank and planks so future tanks should be able to sit on the concrete floor.

Overall, the new floor did make a nice difference in the room and hopefully it will be easier to keep clean in there once I find some cabinets and get those installed for storage of cleaning products and such.
 
OP
M

madison069

Well-known member
Joined
Nov 5, 2010
Messages
4,150
Location
Monroeville, PA
Recently my father in law needed me to cut a few boards and so I used the miter saw to perform the task. While we were in the room with the miter saw it was painfully obvious that I needed some new lights in that room. Apparently 3 out of the 4 drop light didn't work properly and one of the three seemed to think it was a strobe light.
83211039-B707-4316-968D-446EE4E3AE95.jpeg

Yes the room is messy, As I'm getting back into the camaro project. But after shuffling stuff around I was able to get the new drop lights installed, figured I'd better go LED and for $160 for 4 of them they weren't cheap but wasn't high compare to the cost of redesigning the original fixtures.

FDB5ED2C-0E73-4CF3-B490-C4247D24DB7C.jpeg

Then I took some time to go through the Honda generator and installed a new carb. Problem with it was the choke wasn't working properly. After installing the new carb I discovered that there was an interference with the throttle linkage and the original step motor that's on the carb and I had to do some plastic surgery. After messing with it for awhile I now have a working generator and just need to find a home for it somewhere in the garage. This generator was my dad's and I know for a fact he didn't use it no more then 5 hours in the time he has owned it so it's practically brand new.

134E1EA5-E793-407B-9879-4C5A7A73620B.jpeg
As I mentioned, I started working on the camaro again and just starting with baby steps before I get back to the almighty bodywork part of the project. During close inspections I I found that both turn signal sockets had some kind of defect, one had a bad terminal and it resulted in the terminal just falling out of it's place. The other socket had a broken tab on the inside of the socket. So I took the time to order some AC Delco brand sockets since the Dorman didn't have great reviews. Then I wrapped the harness with a cloth type wrapping and wrapped the main section of the harness. I'll wrap the light wirings once I get the replacement sockets installed.


DB63852C-89FA-48DE-9F76-43EE15BC0FF7.jpeg5F1D7226-0DD9-40F2-9BD9-254DE80D24AA.jpegC9146312-9DA6-4D69-B063-920A35D10875.jpeg

Since I was pulling wiring harness off the shelf I figured I'd pull the dash pieces off the shelf and inspect them. A couple of years ago I bought this red dash assembly and I have to say, it's in great condition for it's age. It has minor hair line cracks on the dash pad but nothing major. Due to the high chance of the hair line cracks getting bigger when i install the dash, I'm now thinking of just buying a replacement dash or get a cover. I haven't made my mind up but I like the idea of saving money with just a cover, but there is only a $260 difference in price between the 2. Since I'm gonna be looking at the dash alot while driving, I've been leaning toward the replacement dash. My goal is to have a two tone interior color, so the dash pad will be black while the lower dash section is to be tan. This theme will be followed in the rest of the car's interior.E47A0809-FBED-450C-8898-20DF4CDF95A0.jpeg
 
Last edited:
OP
M

madison069

Well-known member
Joined
Nov 5, 2010
Messages
4,150
Location
Monroeville, PA
As I continued cleaning the bench, I started creeping over to the drawers of hardwares. Needless to say it was a mess. I started throwing junk away and collected the bolts in one bucket, screws in another, until I had about 4 gallon of bolts and screws along with a bunch of empty drawers.

Still need to sort out the stuff in the drawers but at least now it’s all combined in the same drawers. One day I’ll start sorting the bolts, but for now they stay in the buckets.

30F1F28E-615E-4A86-8E4F-DB4DBDB01A6B.jpeg
 
OP
M

madison069

Well-known member
Joined
Nov 5, 2010
Messages
4,150
Location
Monroeville, PA
Saturday I spent the day cleaning and prepping the dash pieces for dye. Here are the lower dash parts treated with plastic adhesive promoter and taped off.
clean dash parts.jpg

Then once it was dried as per it's required time I shot the color coat in 3 light coats to get good coverage.

painted dash parts.jpg
painted dash 2.jpgclose up of painted dash.jpg

I got some clear coat coming in the mail, so I'll spray these with the clear coat for extra protection and then I'll wrap the pieces up with packing foam and plastic sheet to protect the pieces.

My best dash has a couple of small cracks in it so I rather repair them instead of buying a whole new dash.
DASH.jpg
DASH CRACK.jpg
dash crack 2.jpg

I started practicing on the original dash as it was cracked beyond salvageable. Once I figure out a technic that works for me, I'll apply it to the good dash. I'm using a product call Padded Dash Filler by Polyvance. It has a little bit of flex when it's setup so I can see that working well with the dash pad.

practice dash.jpg

Then Sunday I took on the task of replacing my oldest step daughter's brake lines on her car since one started leaking on her. Her Dad tried to get a mechanic to do the job but they all refused to do it. I can't blame them though, it is a time consuming task. Needless to say all of the lines needed to be replaced. But I was trying to repair them one by one to ensure they didn't leak before I removed the next line.

But of course one of the nut has corroded so bad that it took the thread out of the old proportion valve assembly and so now after 8 hours of replacing 3 lines and checking for leaks, has went down the drain since I have to get a new proportion valve before I can continue.

The before shot,
brAKE LINE.jpg

The leaking offender is the left one,

stripped brake line.jpg


Once these lines are replaced, as long as nothing else major gives out, Id say there will be 6 years left in the car which is perfect as she will graduate from college by then and she can get her a new car.
 
OP
M

madison069

Well-known member
Joined
Nov 5, 2010
Messages
4,150
Location
Monroeville, PA
Kept playing with the old dash to try to recreate the texture after sanding the area smooth. I'm close to being comfortable doing this repair on the "good Dash". This section looks pretty good and I can only spot one little divot in the finish. But the texture isn't the same as the original so I'll have to do some blending on the good dash.
3E399C75-9C2C-4BF9-AB2F-D6CD7E2F689F.jpeg

Then i shot the lower dash parts with low luster clear coat, it was looking pretty good this morning. I'll let it cure for another day and then I'll wrap all the parts with thin foam and plastic to protect them till they are needed.

58FE42D4-59AD-44D3-9BEB-AD3B0B5312FA.jpeg

Then I took a little time on moving the stereo out to the main auto area. The receiver I had in the wood room was starting to give me trouble. Wouldn't play at a decent volume without the sound cutting out unless I turned it back down and one of the speaker output died on the the receiver. So instead of digging into it, I just decided it was time to reuse the old Sony 4 piece stereo system. I got a bluetooth dongle on order so I can use my phone for streaming music, and I also ordered a preamp for the record/phono player. It should come in today so I'll find out if I made the right choice in using this stereo. But I had the old cassette player going with Hank Williams coming out of those speakers.

744B8129-D911-4A06-85C7-6136C2DD49EF.jpeg
 
Last edited:
OP
M

madison069

Well-known member
Joined
Nov 5, 2010
Messages
4,150
Location
Monroeville, PA
Nothing much to report other than continue cleaning the garage and working on the oldest's car still.

I did take the time to wrap the lower dash pieces with 1/8" foam and plastic to protect them on the shelf until they are needed. Now I need to repair the upper dash half so I can paint it and get it protected and out of the way until I can reinstall it in the Camaro.

My old quick lift jack was giving me a lot of trouble as it wouldn't hold when I stop pumping the jack up. I tried to get a rebuild kit for it but the one place I found the kit available seems to not have it on the shelf. I had ordered the kit about 3 months ago and the kit never came in. So, I got tired of waiting and told the company to just refund me and I went to Harbor Freight and got the Daytona Long Reach low Profile jack. Nice jack so far and it went under the civic with no issues.
25B8A060-CE44-42E3-B5C1-7B2C528D8005.jpeg

After spending 6 hours replacing the proportion valve and making up 3 brake lines, the civic is almost done. It seems I still have a slow leak somewhere at a flare. But due to the proportion valve location it's not very easy to watch each flare to see which one is weeping. So, I'll bust out the mirrors and light another day and see if I can get a better view of each flare on the proportion valve.

The rest of the weekend I spent on cleaning the house, yard, and what not. But when I got 30 mins of time for the garage I would shift through the buckets of bolts and stuff to break them up into major categories. At the moment I got one more bucket to go and it's all of the screws, which I'm not looking forward to sorting those out. I went ahead and put the piles back in the organizer drawers to get them out of my way and now I can just pull a drawer out and sort them later into a better system.

A0F2E0F8-A3A8-4075-B2B6-E5C0A1749E11.jpeg

352DF9E5-AD0D-45AE-9487-DB03EA2A7FBE.jpeg


Eventually I'll need to get all of the stuff together as I have Plano boxes with hardware in them and I got boxes where I ordered hardware for the camaro which needs to be organized. But I don't have to do it all at once. But I do suspect I'll need to figure out something bigger to hold all of the hardware if I want it all in one spot. But that's a never-ending task I think we all deal with in the garage.
 
Last edited:
OP
M

madison069

Well-known member
Joined
Nov 5, 2010
Messages
4,150
Location
Monroeville, PA
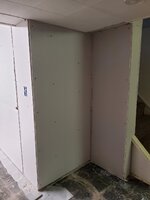
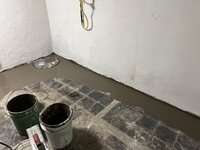
Not a lot to add to the post, but I got some stuff done around the house and garage. Saturday morning, I decided to tackle this corner with the cutting torch cylinder. Yes, it's a safety hazard, but luckily this is a low traffic spot, so nobody has hit the cylinders. So, to rectify that I picked up a harbor freight cutting torch cylinder cart. Sad thing is I had 2 of them back in Texas at my dad's place but I didn't load up the cutting torch stuff when I was in Texas. Oh well, it's a shoulda coulda woulda moment that I can't dwell on. So, I cleaned up the area and put the cylinders in the cart for better storage and easier maneuvering. Here is a before pic of the corner.

9E155F13-5A15-43DA-B745-78D73BA06723.jpeg

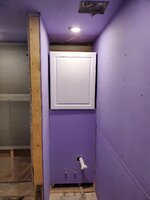
And the after with the nice cart loaded up, I installed a ratchet strap instead of using the dinky straps that came with the cart.

88AED13B-C015-4646-84F2-0CC67BA4A918.jpeg

Eventually I need to install a cabinet above this area for the welder stuff but One of these days I want to pick up a mig welder so I'm holding off on any permanent storage solution.

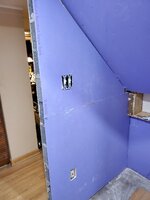
I need to eventually tackle this corner but the majority of the stuff in this corner is camaro related parts so I'm hesitant on clearing out this area right now. There's some outdoor cooking supply that needs a home, engine lift and stand. Then it becomes camaro and lawnmower parts after removing the large items. One day at a time.
50373B2C-3963-4CA8-BA53-374798701846.jpeg

Then me and the oldest tackled her car brake line again (I wanted her involved so she understands how much time and work it is repairing cars) and this time around I took an inspection mirror and light under the car and started watching the fittings for any leaks. Well, it turns out the one line that I didn't flare was the culprit! I used a pre-flared line from the auto part store when I made the first line and once the others started leaking from being touched, I started making all the flares with the coil of brake lines. Well, I didn't suspect the one from the store would have had issues, but it did. So, once I made a new line and replaced the store pre-flared line, I bleed the brakes again and watched for any leaks. I'm happy to report that the brake line job is complete, and the car is out of my garage now! No pics, sorry I was just focused on getting the brakes done.

Then I washed the camaro down to get it ready for more body work. My plans are to tackle the bodywork one weekend and just do my best to get it done! Just maybe, I can get it over to my buddy's place to get it painted before Christmas.

5B5AFCA9-DB56-4814-916C-0006FF203056.jpeg

I also cleaned the wood room and got the countertop cleared off.
00D64EE8-3947-4545-9766-D29E97F99B3F.jpeg

Well, that's pretty much the weekend fun, other than the typical family run around and such.
 
Last edited:
OP
M

madison069

Well-known member
Joined
Nov 5, 2010
Messages
4,150
Location
Monroeville, PA
Last night I got a coat of high build primer on the hood top and sprayed guide coat all over the car. I was able to get the roof and top half of the trunk blocked. I found a lot of low and high spots that I missed the last time I did this work. Guess I was in a rush that I just wanted to get it done soon before dad passed. This time around I'm doing a section at a time and going slowly. Once I get the top half of the car blocked, I will go over it with filler and get it smoothed out where it's needed. Then I'll set the car on jack stands so I can work the bottom half easier and continue blocking and filling. Once it's all blocked and filled, I'll tape off the jambs and so on before I spray another coat of high build primer on the car. If you don't know what comes after spraying another coat of high build, I envy your naiveness.

Beginning with primed hood and guide coat,
498849B3-C9B9-4DE5-AC07-A6B2ABB0A330.jpeg
After blocking the roof and top half of trunk

303ED797-37FE-48A1-8B0D-272612426FDB.jpeg
 
Last edited:

bj383ss

Well-known member
Joined
Sep 29, 2011
Messages
3,166
Location
TX
I don't envy any of that. I let a little secret out I didn't guide coat anything on my truck. Did I miss a few low spots? Sure did!

Bret
 
To avoid these ads, REGISTER NOW!
Top Bottom