Update.
With the beautiful weather both days this weekend, I got off my *** and put in some quality hours on this thing.
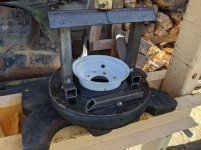
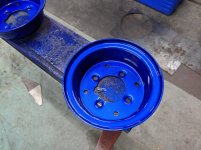
I started out by reassembling the wheels. Yeah, it was kind of a PITA, but unlike the first time, I knew what to do, and had the jigs ready to go for the press. Since I didn't have the learning curve, and didn't have to stop, it took about 1/4th the time. I decided to paint the hubs gloss black for two reasons. First, for some contrast. Second because I didn't have any more of the blue paint.
Assembled wheel and hub assembly:
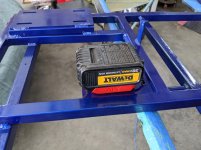
After the wheels were done and installed, I was ready to move on to the wiring. I started by mounting the battery holder. This is a 3D-printed piece designed to hold the 20V Dewalt batteries. It's attached with stainless-steel screws with rubber pads underneath to mitigate vibration. The wires pass through rubber grommets of course.
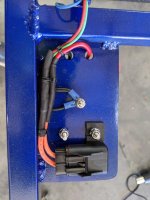
Underneath is the fuse holder and ground connections to the frame:
Dewalt 20V battery in place:
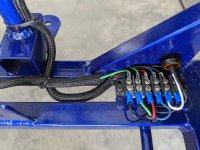
After routing all the wires for the lighting, I made the connections via a terminal block up front. I used the fabric wire loom to clean every thing up.
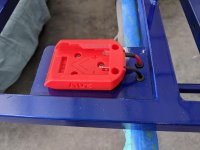
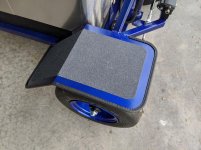
I wanted to be able to remove the cooler if needed for draining, cleaning, or whatever, so I used a pair of toggle clamps to secure the cooler to the frame. The stainless skin on the cooler is pretty thin (think beer can) so I used rivets to attach a 16GA stainless-steel plate to distribute the forces over a wider area.
Secured to the frame:
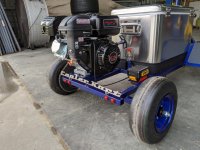
I actually got further along, enough to make it mobile, but a snafu caused me to have to re-order a part that won't be here until Thursday. Once the part arrives, I should be able to finally ride this thing!
Stay tuned...


 Worst case, I have to modify the frame and get a different cooler.