To avoid these ads, REGISTER NOW!

Craftsman 150 drill press question

To avoid these ads, REGISTER NOW!
OP
L

lafester

Well-known member
Joined
Mar 1, 2017
Messages
2,191
Location
Northern CO
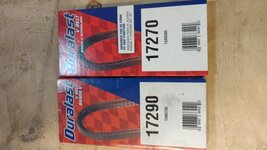
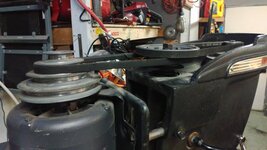
Please post a picture of your set-up. There are several variables which affect belt length.
The current belt is 28"

Probably worked ok for the non tilt motor bracket.aaecc52423cfcde08e8ea651683c4d87.jpg
 

Attachments

  • aaecc52423cfcde08e8ea651683c4d87.jpg
    aaecc52423cfcde08e8ea651683c4d87.jpg
    40.3 KB · Views: 0

FrankLee

Well-known member
Joined
Sep 13, 2010
Messages
3,617
Location
seMI, 48317
The current belt is 28"

Probably worked ok for the non tilt motor bracket.]

In your case, it may be that the Dayton motor has a shorter stance. What is the distance between the centerline of the motor shaft and the motor base? Compare to your craftsman motor.
 
OP
L

lafester

Well-known member
Joined
Mar 1, 2017
Messages
2,191
Location
Northern CO
In your case, it may be that the Dayton motor has a shorter stance. What is the distance between the centerline of the motor shaft and the motor base? Compare to your craftsman motor.
The Craftsmen is at least 1/2" less. Doesn't really matter... The Dayton and belt were taken from the donor. The only difference is the mount. Regardless 28" was too long anyway and tomorrow I should have a proper 27” to test.
 
OP
L

lafester

Well-known member
Joined
Mar 1, 2017
Messages
2,191
Location
Northern CO
Put the 100 model depth gauge and stop on and it fits perfectly. My other one is much nicer and easier to read so it will be going back on as soon as I find a stop for it.
 
OP
L

lafester

Well-known member
Joined
Mar 1, 2017
Messages
2,191
Location
Northern CO
New belts are installed. Could have gone with a 26" for the rear but the 27" is fine.
Having trouble getting the reducer pulley tight in the column. It has a little play and can't tighten the hex screw any further. Thinking I did not align the screw properly with the gap in the sleeve. So I get to pull it all apart and try again.

Initially read the speed chart wrong and had the belt positions flipped.... high rpm is not good when everything isn't lined up yet. Once that was sorted and lined up it does run pretty smooth even with the sloppy middle pulley.
40f64bf012383bb23e39fccb76923be8.jpg

Ok got the middle pulley in nice and solid and everything running pretty good. Once it warms up outside I will think about doing a full teardown and rebuild.
 

Attachments

  • 40f64bf012383bb23e39fccb76923be8.jpg
    40f64bf012383bb23e39fccb76923be8.jpg
    39 KB · Views: 0
Last edited:
OP
L

lafester

Well-known member
Joined
Mar 1, 2017
Messages
2,191
Location
Northern CO
After getting the pulley and belts sorted out I decided to see why the base was wobbling. Tried a few things but nothing was working. Finally figured out the pole was too far down... raised it up 1/2" and its steady as a rock now. I've been using a bottle jack and some 2x6 blocks to fine tune the head height and it worked just as good raising the pole up just enough to get it off the floor.
 
OP
L

lafester

Well-known member
Joined
Mar 1, 2017
Messages
2,191
Location
Northern CO
Still in shock. Sold all the parts off the donor already and made enough to cover both presses and gas money. That doesn't even include the badges, motor or head plus the stuff I'm keeping.
38135ca94568e42884fadcf65060ce91.jpgbe3538b52f4c254fc7cef871b135147b.jpg
 

Attachments

  • be3538b52f4c254fc7cef871b135147b.jpg
    be3538b52f4c254fc7cef871b135147b.jpg
    38.9 KB · Views: 1
  • 38135ca94568e42884fadcf65060ce91.jpg
    38135ca94568e42884fadcf65060ce91.jpg
    35.2 KB · Views: 0
Last edited:
OP
L

lafester

Well-known member
Joined
Mar 1, 2017
Messages
2,191
Location
Northern CO
Figured out what I'm going to do with the 100 craftsman badge.
It is going on the front of the table. Looks great so far I just need to find the rivet that flew across the garage when I popped it out.

3e57681d0286d782f4d324983a3d0647.jpg

Had to use the larger rivets as I didn't have a proper size bit for the smaller ones. Almost looks like it belongs there.
 

Attachments

  • 3e57681d0286d782f4d324983a3d0647.jpg
    3e57681d0286d782f4d324983a3d0647.jpg
    39.7 KB · Views: 0
Last edited:
OP
L

lafester

Well-known member
Joined
Mar 1, 2017
Messages
2,191
Location
Northern CO
Just got my rapid adjust feed stop ordered off ebay. Messaged the seller with all the parts listed a few days ago and he was nice enough to let me know when he was ready to put it up. Its dirty, missing the lock lever and has a bolt in its place but its a good start.
a7b42727632b41a8820435d6287a523e.jpg
 

Attachments

  • a7b42727632b41a8820435d6287a523e.jpg
    a7b42727632b41a8820435d6287a523e.jpg
    42.2 KB · Views: 0
Last edited:
OP
L

lafester

Well-known member
Joined
Mar 1, 2017
Messages
2,191
Location
Northern CO
Thanks again to FrankLee for his awesome guides.

I was rereading the table lock guide and it inspired me to try and get the lock cylinders out to free the tilt table from the column. I had tried to do this before but feared destroying them in the process. Got them out and slid the table right off.

Just got the tilt lock cylinders out and the damn thing still doesn't tilt. Was thinking I should have kept the head lock arm and bolt for the tilt lock. Oh well it's gone now.

Tilt table is completely torn down. Took a little encouragement but it suddenly came apart pretty easy. Started cleaning up the column... that could take a little while.
 
Last edited:

FrankLee

Well-known member
Joined
Sep 13, 2010
Messages
3,617
Location
seMI, 48317
Thanks again to FrankLee for his awesome guides.

I was rereading the table lock guide and it inspired me to try and get the lock cylinders out to free the tilt table from the column. I had tried to do this before but feared destroying them in the process. Got them out and slid the table right off.

Just got the tilt lock cylinders out and the damn thing still doesn't tilt. Was thinking I should have kept the head lock arm and bolt for the tilt lock. Oh well it's gone now.

Tilt table is completely torn down. Took a little encouragement but it suddenly came apart pretty easy. Started cleaning up the column... that could take a little while.

I'm happy to know my posts are helping.

Many times, those tilt table are stuck. I think they were rarely used. They usually come apart after a little persuasion and cursing. I did have one on DP #25 where I could not get it apart no matter what I did or said.

The tilt locks never came with a handle, afaik. I do have several spare cast lock cylinder sets and plenty of handles... especially the tapered handles.
 
OP
L

lafester

Well-known member
Joined
Mar 1, 2017
Messages
2,191
Location
Northern CO
Cleaned up the benchtop pole and put everything together to use as a stand.
It's a little short for me and will have to play with it for awhile to determine if it gets a permanent home. There is also the possibility of using it for the press and using the big column for a stand. I suppose if I made a rolling base for it that would solve everything.

Oh and more good news on the rapid adjust situation. A very kind member here is sending me a complete set with the lock screw. Now I just need to find a table lift ha ha. I see I've missed a couple for sale... one as recently as last week. Typical. Not going to shell out huge bucks for one though so I need to find a donor.
b891beefdb99c7793274e76651eed96e.jpg
82f3d70de83d64ba4a07366ed4b7ccef.jpg
 

Attachments

  • b891beefdb99c7793274e76651eed96e.jpg
    b891beefdb99c7793274e76651eed96e.jpg
    111.3 KB · Views: 0
  • 82f3d70de83d64ba4a07366ed4b7ccef.jpg
    82f3d70de83d64ba4a07366ed4b7ccef.jpg
    30.8 KB · Views: 0
Last edited:
OP
L

lafester

Well-known member
Joined
Mar 1, 2017
Messages
2,191
Location
Northern CO
I'm happy to know my posts are helping.

Many times, those tilt table are stuck. I think they were rarely used. They usually come apart after a little persuasion and cursing. I did have one on DP #25 where I could not get it apart no matter what I did or said.

The tilt locks never came with a handle, afaik. I do have several spare cast lock cylinder sets and plenty of handles... especially the tapered handles.
I don't think I need a handle but a column cap would be pretty sweet.
 

FrankLee

Well-known member
Joined
Sep 13, 2010
Messages
3,617
Location
seMI, 48317
Cleaned up the benchtop pole and put everything together to use as a stand.
It's a little short for me and will have to play with it for awhile to determine if it gets a permanent home. There is also the possibility of using it for the press and using the big column for a stand. I suppose if I made a rolling base for it that would solve everything.

Oh and more good news on the rapid adjust situation. A very kind member here is sending me a complete set with the lock screw. Now I just need to find a table lift ha ha. I see I've missed a couple for sale... one as recently as last week. Typical. Not going to shell out huge bucks for one though so I need to find a donor.

I don't think I need a handle but a column cap would be pretty sweet.

The bench drill press column is the same height as most of the Craftsman pedestal columns. They could actually be interchanged because they also have the same diameter. The pedestal columns may have a thinner wall tho.

IMO, the drill press stand is far superior than the pedestal stands. It is significantly heavier and has a larger footprint making it much more stable. YMMV.

Once you install your grinder or whatever on the stand, the working height is much better. The floor standing set-up is also a great option, depending on the tool to be mounted.


That's awesome about the feed stop collar assembly!


I don't have any column caps available at the moment.
 
Last edited:
OP
L

lafester

Well-known member
Joined
Mar 1, 2017
Messages
2,191
Location
Northern CO
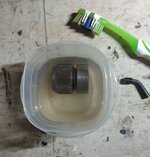
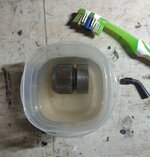
Got my feed stop from the member here today. Already looking pretty good in the vinegar.
I was always under the impression that it was two pieces. Works pretty good though, much nicer then spinning the nuts down.

c7f9699df1e02161bafdd91a61ee7cc6.jpg

Update: it is two pieces they were just frozen together. Has the spring inside to really fine tune the stop position. Nice. Getting pretty clean now but will let it soak over night.

4fb64f32b5374e3c65c9f10e83afb674.jpg
 

Attachments

  • 4fb64f32b5374e3c65c9f10e83afb674.jpg
    4fb64f32b5374e3c65c9f10e83afb674.jpg
    91.9 KB · Views: 0
  • c7f9699df1e02161bafdd91a61ee7cc6.jpg
    c7f9699df1e02161bafdd91a61ee7cc6.jpg
    65.6 KB · Views: 0
Last edited:

jp828108

Well-known member
Joined
Jun 28, 2011
Messages
484
Location
Ohio
looks like that cleaned up pretty nice. Have you had a chance to play around with the cross slide vice? I have been considering one, but can't decide if I want to get a cheaper harbor freight or save up and get a high quality brand.
 
OP
L

lafester

Well-known member
Joined
Mar 1, 2017
Messages
2,191
Location
Northern CO
looks like that cleaned up pretty nice. Have you had a chance to play around with the cross slide vice? I have been considering one, but can't decide if I want to get a cheaper harbor freight or save up and get a high quality brand.
I did a little yesterday. It's not a precision vise for sure but it is much better then nothing. I really have nothing to compare it to. You tube has some videos and ways to fine tune it a bit.
 
OP
L

lafester

Well-known member
Joined
Mar 1, 2017
Messages
2,191
Location
Northern CO
looks like that cleaned up pretty nice. Have you had a chance to play around with the cross slide vice? I have been considering one, but can't decide if I want to get a cheaper harbor freight or save up and get a high quality brand.

Hey I didn't even notice it was you. Thanks again and yeah it is starting to look like new. I've never done a vinegar soak before... always just took a wire wheel to everything.

The vise is ok and for me it is more then good enough to start with. If I ever get to a point where every micrometer matters then I will start looking for a nice one. It really just depends on what you will be using it for and how much money you are willing to devote to one vise. They must be ok because you never see them on craigslist, only the pricey ones.
 

jp828108

Well-known member
Joined
Jun 28, 2011
Messages
484
Location
Ohio
Hey I didn't even notice it was you. Thanks again and yeah it is starting to look like new. I've never done a vinegar soak before... always just took a wire wheel to everything.

The vise is ok and for me it is more then good enough to start with. If I ever get to a point where every micrometer matters then I will start looking for a nice one. It really just depends on what you will be using it for and how much money you are willing to devote to one vise. They must be ok because you never see them on craigslist, only the pricey ones.
No problem. Glad it worked out.

Thanks for the input on it. I might pick one up. Just looking to get holes positioned close and make it a little easier. So sounds like i can get some movement and precision with that. Would just be eyeballing marks since its just a drill press and not a mill with dro.
 
To avoid these ads, REGISTER NOW!
OP
L

lafester

Well-known member
Joined
Mar 1, 2017
Messages
2,191
Location
Northern CO
No problem. Glad it worked out.

Thanks for the input on it. I might pick one up. Just looking to get holes positioned close and make it a little easier. So sounds like i can get some movement and precision with that. Would just be eyeballing marks since its just a drill press and not a mill with dro.
Looks great!

a869c11d8780682933d289aaead776d2.jpg
 

Attachments

  • a869c11d8780682933d289aaead776d2.jpg
    a869c11d8780682933d289aaead776d2.jpg
    42 KB · Views: 3

jp828108

Well-known member
Joined
Jun 28, 2011
Messages
484
Location
Ohio
That really is a sharp looking unit you have gotten yourself there. How does the 3rd pulley do for slowing it down for metal? I have a DC motor that I am thinking about trying to outfit on mine instead of a 3rd pulley. Mine isn't nearly clean as yours though.
 
OP
L

lafester

Well-known member
Joined
Mar 1, 2017
Messages
2,191
Location
Northern CO
That really is a sharp looking unit you have gotten yourself there. How does the 3rd pulley do for slowing it down for metal? I have a DC motor that I am thinking about trying to outfit on mine instead of a 3rd pulley. Mine isn't nearly clean as yours though.
Been testing out a 2" Forstner bit @ 175 rpm and it did great. Had some belt slippage on a huge knot but that could be due to the quality of a hf bit. Also fine tuned the belt tension since then.

Update: just tried out a 3" hole saw and got some belt slippage. I did complete the hole though. I think using the smallest pulley might be an issue here. Going to try again @ 400 rpm.

One thing I don't like is the lack of mid range speeds.

Yeah I'm very happy how everything turned out. Really though I like the look of them in any original condition better then painted.
 
Last edited:
OP
L

lafester

Well-known member
Joined
Mar 1, 2017
Messages
2,191
Location
Northern CO
After scouring all of craigslist for weeks I finally found a press with the atlas table lift.
Took a day of negotiating but they are going to pull the lift off and send it to me.
I am paying up for it, but still a fair amount less then ebay pricing if one were to ever come up for sale.

I figure at some point I will find a good flipper or two locally and will make up the cost that way. Even if I don't, having a lightly used 150 with reduction pulley and atlas lift for under $200 is a pretty good deal.
 

Attachments

  • 00505_isT8hiJJidm_600x450.jpg
    00505_isT8hiJJidm_600x450.jpg
    17.2 KB · Views: 53
Last edited:
OP
L

lafester

Well-known member
Joined
Mar 1, 2017
Messages
2,191
Location
Northern CO
Got a bunch of free points from sears and picked up their low end craftsman 29 pc titanium drill bit set, 2 14 pc titanium sets and 2 of these WEN 12" Drill Press vise grips. The bits seem to be fine, nice and sharp at least out of the box and after a few test holes. I lose and break bits all the time so this should keep me in stock for awhile.

When I was at WalMart last night I noticed the steel case on the 29 pc was identical to the Black and Decker 29 pc black oxide kit. Also noticed the B&D 6 pc wire wheel kit and sanding drum kit were identical to the HF ones I looked at the day before.

The WEN clamps are great and two of them will lock down your work in almost any direction, and are tall enough to have a second piece underneath. If you have some points to burn and need a drill press clamp I recommend.
 

Attachments

  • prod_1869872012.jpg
    prod_1869872012.jpg
    34.4 KB · Views: 13
OP
L

lafester

Well-known member
Joined
Mar 1, 2017
Messages
2,191
Location
Northern CO
So while I was getting set to test my new clamps I decided to check out the lock collar above the chuck and see how tight it was. I watched a video on chuck removal today so for some reason I now think I know what I am doing.

Just with the end of the chuck key I was able to easily loosen the collar. The threads, collar and chuck look basically new so I just tightened it up and continued testing. Once I pull it apart I will know for sure but damn I think this thing basically sat in the shop for 50 years. The seller said he renovates houses and finds this stuff all the time just left behind.

Funny thing is the sliding xy vise that was on it was very dirty and full of metal shavings. I think the seller put it on there from another find and never cleaned it up.
 
Last edited:
OP
L

lafester

Well-known member
Joined
Mar 1, 2017
Messages
2,191
Location
Northern CO
Was looking at the pic of the table lift and it really looks like they have a stop collar below the table and above the bottom lift collar. No idea why anyone would do that but I'm sure gonna try to get it included with the deal. Also not sure why every cl post has to have blurry pics.

Thinking they put it there to use as a spacer for easier access to the lock arm below.
 

Attachments

  • IMG_20180213_024247.jpg
    IMG_20180213_024247.jpg
    111.6 KB · Views: 31
Last edited:

FrankLee

Well-known member
Joined
Sep 13, 2010
Messages
3,617
Location
seMI, 48317
Was looking at the pic of the table lift and it really looks like they have a stop collar below the table and above the bottom lift collar. No idea why anyone would do that but I'm sure gonna try to get it included with the deal. Also not sure why every cl post has to have blurry pics.

Thinking they put it there to use as a spacer for easier access to the lock arm below.

That machine is a third(?) generation Emerson. The table is not original to that machine.

Yes, that picture is blurry, but I'm thinking the casting of the table falls below the table clamping collar and prevents full contact around the column of the lower lift collar on the table collar. IMO, that is a thinner spacer that fits behind the table protrusion. Below is an example on a different style table.


The lock arm seen under the table is on the lower lift collar and should normally be unlocked when used as a table lift.

How far away from you is that lift?
 
Last edited:
OP
L

lafester

Well-known member
Joined
Mar 1, 2017
Messages
2,191
Location
Northern CO
Tonight I got my 1/2 hp vintage craftsman motor running and swapped it with the dayton 1/2 hp on my dp. Did some more testing with the 3" hole saw, moved the belt up one notch and tightened it down real good. No more slipping and it rips right through a 2x6 no problem. I believe the new belts just need to break in as you can really feel where they were bent for so long on the shelf.

The new (old) motor is doing great and it's nice to have a reverse switch built in. Once it warms up and I get my other projects out the door I will rebuild and paint it. It's pretty cool to see a 70 year old motor fire right up and go to work without doing anything to it except swapping the cord. Well I did clean out some of the sludge in the bearings and add a little new grease but that's it.

Still waiting on the atlas lift but I did get a pressmate yesterday. I'm trying to resist putting it on since it is new in box, but if the other one takes much longer it will have to come out to play.
 
OP
L

lafester

Well-known member
Joined
Mar 1, 2017
Messages
2,191
Location
Northern CO
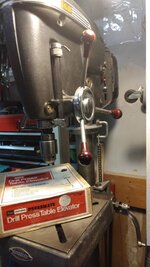
The pressmate finally made it on a drill press after 30+ years. Unfortunately I don't have enough room for it without some handle modifications. Seems to work pretty well though otherwise.a1b29a9911431cb90603ee038533f7a8.jpg

Sent from my ZTE A2017U using Tapatalk
 

Attachments

  • a1b29a9911431cb90603ee038533f7a8.jpg
    a1b29a9911431cb90603ee038533f7a8.jpg
    44.1 KB · Views: 0
OP
L

lafester

Well-known member
Joined
Mar 1, 2017
Messages
2,191
Location
Northern CO
Finally got my Atlas table lift along with an Emerson Craftsman drill press.

Starting to clean everything up and look for damage.

Looks great to me and can't wait to put it on my 150. The pressmate is now for sale and will be in the classifieds soon.acbe9f781ff088f2e1d96078a8cfa301.jpgf41566cdc89b014e59280c7ce7d7f5e1.jpg11c0e316dbc1b915c30771f37e830199.jpg829140d4143ea62de1612cf895c23281.jpg604b1a2f5b92df323093c64ecf7a10aa.jpgbdc4542ea4f5fbabe4b7df918fc11ae8.jpg

Sent from my ZTE A2017U using Tapatalk
 

Attachments

  • acbe9f781ff088f2e1d96078a8cfa301.jpg
    acbe9f781ff088f2e1d96078a8cfa301.jpg
    50.1 KB · Views: 0
  • 11c0e316dbc1b915c30771f37e830199.jpg
    11c0e316dbc1b915c30771f37e830199.jpg
    37.4 KB · Views: 0
  • 829140d4143ea62de1612cf895c23281.jpg
    829140d4143ea62de1612cf895c23281.jpg
    37.8 KB · Views: 0
  • 604b1a2f5b92df323093c64ecf7a10aa.jpg
    604b1a2f5b92df323093c64ecf7a10aa.jpg
    38.3 KB · Views: 0
  • bdc4542ea4f5fbabe4b7df918fc11ae8.jpg
    bdc4542ea4f5fbabe4b7df918fc11ae8.jpg
    31.6 KB · Views: 0
  • f41566cdc89b014e59280c7ce7d7f5e1.jpg
    f41566cdc89b014e59280c7ce7d7f5e1.jpg
    43.7 KB · Views: 0
OP
L

lafester

Well-known member
Joined
Mar 1, 2017
Messages
2,191
Location
Northern CO
The atlas lift is all apart and almost clean. Everything looks great except the bearing which for some reason is cracked in several places. Ordered a new one but will still put it together before it gets here. I figure it was working fine before so it should still work at least for a few days. The plan is just to clean it up and put it back to work as I like the way it looks as is.

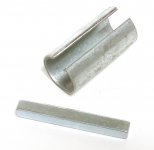
The dp is back together, just need to figure out the motor situation. Wanted to swap motors but I need the larger keyed shaft for the pulley and the motor I want to use has the thinner shaft. My other option was to swap in my band saw motor but it is non reversable and going counter clockwise.
d41d6cdbfbf2d30c7bf6f7feb9c309bb.jpg699078f396f46df6d8b6f0d7c9f22c57.jpgc7a835ac9333b08795a0e3070e5fbe45.jpg
 

Attachments

  • 699078f396f46df6d8b6f0d7c9f22c57.jpg
    699078f396f46df6d8b6f0d7c9f22c57.jpg
    35.3 KB · Views: 0
  • c7a835ac9333b08795a0e3070e5fbe45.jpg
    c7a835ac9333b08795a0e3070e5fbe45.jpg
    36.8 KB · Views: 0
  • d41d6cdbfbf2d30c7bf6f7feb9c309bb.jpg
    d41d6cdbfbf2d30c7bf6f7feb9c309bb.jpg
    39.9 KB · Views: 0
Last edited:

6PTsocket

Well-known member
Joined
Mar 12, 2014
Messages
4,593
The atlas lift is all apart and almost clean. Everything looks great except the bearing which for some reason is cracked in several places. Ordered a new one but will still put it together before it gets here. I figure it was working fine before so it should still work at least for a few days. The plan is just to clean it up and put it back to work as I like the way it looks as is.

The dp is back together, just need to figure out the motor situation. Wanted to swap motors but I need the larger keyed shaft for the pulley and the motor I want to use has the thinner shaft. My other option was to swap in my band saw motor but it is non reversable and going counter clockwise.
d41d6cdbfbf2d30c7bf6f7feb9c309bb.jpg699078f396f46df6d8b6f0d7c9f22c57.jpgc7a835ac9333b08795a0e3070e5fbe45.jpg
That is not a problem. Google "motor shaft adapter". You will see all kinds of stuff but you want the sleeve with the window for the key or the partial sleeve with the key. Just put your size requiremets in your search, like 1/2 to 5/8 motor shaft adapter. Try ebay. They are common and cheap. The problem is when you want to go the other way and your motor shaft is too big for your rare multi step pulley.

Sent from my SM-G900V using Tapatalk
 
OP
L

lafester

Well-known member
Joined
Mar 1, 2017
Messages
2,191
Location
Northern CO
Yeah I've found some but they are a bit pricey for a simple sleeve.
Once I find a good source I will post a link.

So I've installed the lift twice now and changed sides twice on top of that. Decided having it opposite of the quill crank is best and using the tilt table allows it to face straight out for easier turning. It turns fairly smooth but I am sure the new thrust bearing will make it perfect.

Really really like this lift, too bad they are so hard to find.
 
OP
L

lafester

Well-known member
Joined
Mar 1, 2017
Messages
2,191
Location
Northern CO
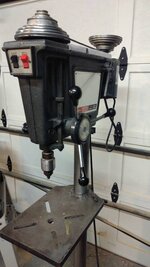
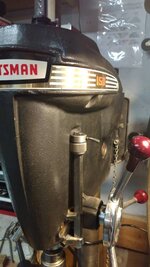
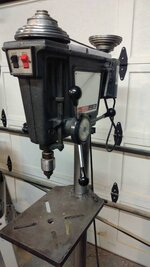
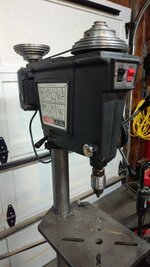
I think I finally have everything set up how I want it.

3754e3936d664ad5da4f29fa0b5f2ca8.jpg
 
Last edited:
OP
L

lafester

Well-known member
Joined
Mar 1, 2017
Messages
2,191
Location
Northern CO
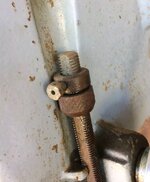
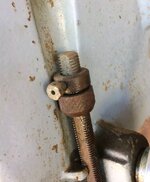
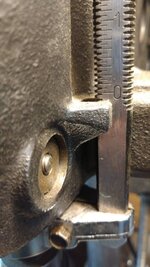
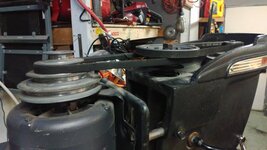
Not quite sure how to fix this...
The collar is up all the way.

I'm guessing it's just not meant to be exact, that's what the quill lock is for.
96649cb8e4b0fcc68c925a36afcb15b9.jpg
 

Attachments

  • 96649cb8e4b0fcc68c925a36afcb15b9.jpg
    96649cb8e4b0fcc68c925a36afcb15b9.jpg
    41.6 KB · Views: 0
Last edited:

FrankLee

Well-known member
Joined
Sep 13, 2010
Messages
3,617
Location
seMI, 48317
I think I finally have everything set up how I want it.

That is looking great!

Not quite sure how to fix this...
The collar is up all the way.

I'm guessing it's just not meant to be exact, that's what the quill lock is for.
I never paid too much attention to the position of the scale. I just checked and the two I have are like that. I don't think it matters because the real zero is when the drill bit touches the work. It's all relative.
 
OP
L

lafester

Well-known member
Joined
Mar 1, 2017
Messages
2,191
Location
Northern CO
Re: Craftsman 150 drill press and other tools

Just picked these up today. One will replace my current saw and then flip the other along with my old one. My question is one has what looks like a 6 in (its a 10 in) pulley to slow it down as it was running a 3400 motor. My old bs has a 1750 motor but it looks kind of cheap compared to my 3400 motor.

I have the option to run either motor and big or small pulley... I could really slow it down with the big pulley and my 1750 or keep the better built 3400 motor. No idea what to do here. Thinking I'll keep the 3400 and eventually I'm sure I'll have an extra 1750 I can swap in for metal if I want.

Not really an upgrade except for the table, and coolness factor. Looks like I might be able to modify my fence from the little companion table saw. The guides will bolt right up to the table, then add some spacers to make it the right width.

FYI I think I posted the pics of my old saw in my jointer thread. It's just the common 12" craftsman band saw / sander you see everywhere. It has a light, which is nice but that table is cheap and has the one plastic side.

Paid $60 for the pair + a cheap home made stand. No motors.

attachment.php
 

Attachments

  • Screenshot_20180426-204737.jpg
    Screenshot_20180426-204737.jpg
    19.1 KB · Views: 101
Last edited:
OP
L

lafester

Well-known member
Joined
Mar 1, 2017
Messages
2,191
Location
Northern CO
Re: Craftsman 150 drill press and other tools

Got my band saw kind of set up. What a mess. I wanted to swap pulleys and that was a big mistake. The big one came off but not until i put a nice wobble in it. The smaller pulley is now destroyed with cuts, drill holes and burn marks. That thing was simply not coming off.

Of course I had to pick the nicer exterior saw over the nicer interior along with the pulley I needed. Anyway I think the key is to let the motor spin off the pulley but I didn't figure that out until after the destruction.

Tonight I finished shortening the fence and it really worked out well. Now I have a factory looking fence that really holds tight. Just had to trim about 1.5 in of the end and drill a couple new holes. Also had to add that much thread on the end of the clamping shaft and trim off the extra length.
 

Attachments

  • IMG_20180501_004850.jpg
    IMG_20180501_004850.jpg
    68.1 KB · Views: 10
  • IMG_20180501_004351.jpg
    IMG_20180501_004351.jpg
    112.3 KB · Views: 9
  • IMG_20180501_004539.jpg
    IMG_20180501_004539.jpg
    148.1 KB · Views: 11
  • IMG_20180501_004252.jpg
    IMG_20180501_004252.jpg
    103.7 KB · Views: 11
Last edited:
To avoid these ads, REGISTER NOW!
Top Bottom