To avoid these ads, REGISTER NOW!

Craftsman 150 drill press questions

jbrwn

Member
Joined
May 8, 2023
Messages
20
Location
Missoula, MT
Hello - I just picked up a craftsman 150 drill press this past weekend and would like to restore it. This will be my first time restoring a tool so apologies in advance for the noob questions.

I did search the forums and read a ton already as well as watched a series of YouTube videos from a channel called Jeff’s shop who I understand also posts here. Blown away by the high quality content the community is putting out.

Anyways a few questions:

1. I don’t plan on repainting which I understand means I shouldn’t soak the painted parts (or badges) in simple green. Should I just wipe these parts with simple green or do a 24hr citric acid soak or maybe both?

2. I don’t need a high polish finish but I do want to make everything look good as long as I have everything dissembled. In the Jeff’s shop video he makes use of lathes for sanding and bench grinder w/ a wire wheel for cleaning things up. I don’t have either. Is it worth it to hand sand and hit parts up with a wire brush or drill mounted wheel instead?

3. Is it possible to service the chuck without complete disassemble? If not completely rebuilding should avoid soaking in degreaser or citric acid?

4. There is no switch on the motor currently. Any tips on how to add one of those toggle switches I’ve seen on a few these old DPs?

THANK YOU!
 

Attachments

  • 67260524-B684-4683-B10B-742AB68E9419.jpeg
    67260524-B684-4683-B10B-742AB68E9419.jpeg
    960.7 KB · Views: 109
  • A3F6A713-B2D5-4DE2-A69E-E20D4A4F89C8.jpeg
    A3F6A713-B2D5-4DE2-A69E-E20D4A4F89C8.jpeg
    911.3 KB · Views: 83
  • 4006E922-757C-4016-909C-6FEF9226E134.jpeg
    4006E922-757C-4016-909C-6FEF9226E134.jpeg
    646.3 KB · Views: 63
  • 19F5D73E-D5EB-437F-8F5D-8CB59F918BD3.jpeg
    19F5D73E-D5EB-437F-8F5D-8CB59F918BD3.jpeg
    1,018.9 KB · Views: 54
  • A680C267-6106-4F6B-A6FE-11C3742BEDEF.jpeg
    A680C267-6106-4F6B-A6FE-11C3742BEDEF.jpeg
    679.5 KB · Views: 56
  • 25C29164-1CE0-479F-8030-047E091A83D9.jpeg
    25C29164-1CE0-479F-8030-047E091A83D9.jpeg
    961.2 KB · Views: 60
To avoid these ads, REGISTER NOW!

FrankLee

Well-known member
Joined
Sep 13, 2010
Messages
3,617
Location
seMI, 48317
I prefer to preserve the original paint.

I use Grez-Off with a small plastic brush on the painted cast iron parts. It does an amazing job. I follow up with a paste wax.
I also use G-O on the pulleys and hub.

Rusty bare steel parts get soaked in citric acid in HOT water. It only takes a couple hours. Steel wool easily removes the residue.


There really is no substitute for dismantling a chuck. I would not recommend soaking an assembled chuck in CA or evaporust. If you must soak in something, ATF would not harm it but it would be dripping for a while.


What’s your location?
 

FrankLee

Well-known member
Joined
Sep 13, 2010
Messages
3,617
Location
seMI, 48317
A foot switch works great with a motor with no switch. . You can get a momentary switch at HF for under $20.
 

gleman

Well-known member
Joined
Jun 24, 2019
Messages
3,059
Location
Michigan And Florida too!
Nice DP! The paint is fairly tough, I'd scrub the hell out of it before I'd consider repainting.

Clean up the bare metal to your satisfaction only. Is this a garage princess or are you going to use it a lot?

Sandpaper, steel wool, wd40 and a little sweat cleans up most sins. This is a project you should enjoy. No need for extra tools.

@FrankLee is right about the chuck. I've learned a lot, taking time to disassemble a rebuild things.
 

Davefr

Well-known member
Joined
Jan 7, 2010
Messages
11,845
Location
OR
You can improve the column by getting a roll of 1" sandpaper and wrap it around the column and pull it back and forth and work it from top to bottom. Use WD-40 as a lubricant. Progress from medium to fine then clean it good and apply a coating of Johnsons paste wax. It'll make a nice satin finish.

Hit the table top and base with a DA sander with medium to fine discs then wax.

You won't get Jeff's chrome like finish but it's pretty easy and will look a whole lot better.
 
OP
J

jbrwn

Member
Joined
May 8, 2023
Messages
20
Location
Missoula, MT
Frank, thanks for the quick reply! I am located in Montana USA.

Is the Grez-Off just a preference vs simple green for painted surfaces or is it a truly superior product. Just curious as i don't think its available locally. I can order it if needed though. Do you do a rinse after applying or just wipe clean.

For the steel wool what grade do you use and do you use any kind of lube with it. is scotch brite pads an equal alternative here as well. asking as i think i already have some lying around.

Thank You!
 

FrankLee

Well-known member
Joined
Sep 13, 2010
Messages
3,617
Location
seMI, 48317
Frank, thanks for the quick reply! I am located in Montana USA.

Is the Grez-Off just a preference vs simple green for painted surfaces or is it a truly superior product.
G-O is my preference but here are other similar products. IMO and IME, simple green doesn’t come close. I’ve posted many examples
Just curious as i don't think it’s available locally. I can order it if needed though. Do you do a rinse after applying or just wipe clean.
Yes rinse
For the steel wool what grade do you use and do you use any kind of lube with it. is scotch brite pads an equal alternative here as well. asking as i think i already have some lying around.
I use multiple grades of steel wool. But use what you have. Scotch brite will work too.
Thank You!
 

11b30b4

Well-known member
Joined
Jul 16, 2020
Messages
1,029
Location
GA
Hello and welcome to GJ. I am glad you found my YT channel helpful. It looks like everyone here has made several great suggestions. If you want to preserve the paint then avoid simple green. With all the tools and methods I show in videos I intend to strip and repaint all the tools I work on. Getting your 150 into tiptop work order should not be too hard. I will say that honestly the only way to get the chuck working like new is to disassemble it, clean it, grease it, then assemble it. I have a video that is all about the Jacob's chuck here:
 
OP
J

jbrwn

Member
Joined
May 8, 2023
Messages
20
Location
Missoula, MT
Right on. Appreciate all the guidance!

One more question what do you all usually do for motors?

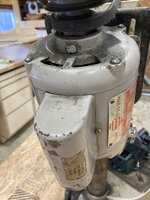
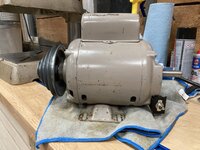
The powr kraft motor runs pretty smooth but I do need to replace the power cord. I was thinking about pulling it apart and cleaning the internals but hesitate as I have never worked on an electric motor before and I can’t find much info about this model online.

One interesting note is that it seems to have lube ports on each end.
 

Attachments

  • 764EB4B1-281C-4F3B-9093-4A349F5134F9.jpeg
    764EB4B1-281C-4F3B-9093-4A349F5134F9.jpeg
    670.2 KB · Views: 44
  • 1646FBFC-DCD5-4552-86A2-713DE53666FC.jpeg
    1646FBFC-DCD5-4552-86A2-713DE53666FC.jpeg
    560.9 KB · Views: 38
  • D973E008-EABA-4BC6-9FA0-228E0898AC76.jpeg
    D973E008-EABA-4BC6-9FA0-228E0898AC76.jpeg
    674.3 KB · Views: 38
  • 5A43EAF8-6D4A-4D3F-B6F9-66EE04458BDD.jpeg
    5A43EAF8-6D4A-4D3F-B6F9-66EE04458BDD.jpeg
    679.5 KB · Views: 40

11b30b4

Well-known member
Joined
Jul 16, 2020
Messages
1,029
Location
GA
Lube ports are because it has sleeve bearings rather than ball bearings. I would not recommend opening the motor unless you know what your are doing or are willing to risk damaging the motor. Personally, I would replace the motor with a used Craftsman 115.6962 motor. They are easily found on Craigs list, FB marketplace, etc... The Craftsman would complement the drill press and be period correct. If you do replace the motor just make sure its 1/2 HP or more and runs at 1725 or 1750 rpm. Do not get anything faster like 3650 rpm, those motor are for saws not drill presses. If you decide to keep the power kraft motor you can install a power switch when you replace the power cord. should be fairly simple.
 
OP
J

jbrwn

Member
Joined
May 8, 2023
Messages
20
Location
Missoula, MT
Thanks again for the response. Unfortunately I live in a somewhat remote area so craigslist and FB are pretty limited when it comes to this stuff. Ill probably just rock the powr kraft for now. If im not opening it up is it worth hitting the internals with compressed air and/or contact cleaner through vents or something like that?. probably overthinking things at this point but am excited to work on this DP.
 

FrankLee

Well-known member
Joined
Sep 13, 2010
Messages
3,617
Location
seMI, 48317
Grez-Off examples:

52317164576_da3e7210fe_w.jpg52336282451_7638e0f1e3_w.jpg52336578329_4a49c7913f_w.jpg


115-7566-grinder-9-55-jpg.1801873


before-after.JPG
 
Last edited:

alfadan

Well-known member
Joined
Mar 9, 2007
Messages
2,115
Location
Augusta, ks
If you keep the motor with oil cups, I would take it off the press and put just 2 or 3 drops of light oil in the cups and let it sit horizontally for a day or so. Put a cord on it with whatever switch you want and run it!
 
OP
J

jbrwn

Member
Joined
May 8, 2023
Messages
20
Location
Missoula, MT
If you keep the motor with oil cups, I would take it off the press and put just 2 or 3 drops of light oil in the cups and let it sit horizontally for a day or so. Put a cord on it with whatever switch you want and run it!

Right on. I was just looking up how to oil these things. Thanks!
 
OP
J

jbrwn

Member
Joined
May 8, 2023
Messages
20
Location
Missoula, MT
Frank, the Grez-Off pictures are amazing. Honestly a bit shocked at how much grime came off. Thanks for following up on that!
 

Davefr

Well-known member
Joined
Jan 7, 2010
Messages
11,845
Location
OR
Right on. Appreciate all the guidance!

One more question what do you all usually do for motors?

The powr kraft motor runs pretty smooth but I do need to replace the power cord. I was thinking about pulling it apart and cleaning the internals but hesitate as I have never worked on an electric motor before and I can’t find much info about this model online.

One interesting note is that it seems to have lube ports on each end.
There's really not a lot that needs cleaning in a DP motor other than ball bearings but yours has sleeve bearings. If you do replace the motor I'd go 3 phase and VFD it. A VFD and DP is a marriage made in heaven.
 
OP
J

jbrwn

Member
Joined
May 8, 2023
Messages
20
Location
Missoula, MT
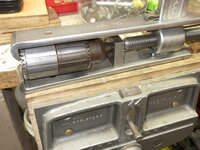
Hello everyone - The chuck on my DP is a Jacobs 633C. Im missing a key. I believe the "correct" key is a jacobs k3c but I have seen folks say that a k3 will work as well. Does anyone know what the difference between these two keys are? The appear identical.


Also, how similar is the 633C to the 34-33C. Would the video jeff posted above still serve as a good guide for rebuilding this chuck?

Thanks again!
 

jfk92

Well-known member
Joined
Mar 22, 2023
Messages
48
Location
New Jersey
Congrats on the DP - I recently finished restoring one of mine. Don't let the chuck intimidate - the video offered is great. I pressed mine apart to find a handful of teeth were destroyed internally on each of the chuck jaws :cautious: - the jacobs rebuild kits I've seen are twice what I paid for the DP - so now lurking and waiting for an appropriate chuck to come up for sale online! Good luck!
 
To avoid these ads, REGISTER NOW!

Indexmill

Well-known member
Joined
Apr 12, 2013
Messages
1,414
Location
Central NC
Hello everyone - The chuck on my DP is a Jacobs 633C. Im missing a key. I believe the "correct" key is a jacobs k3c but I have seen folks say that a k3 will work as well. Does anyone know what the difference between these two keys are? The appear identical.
Those chucks are the same; one is just older than the other. The keys are the same.
 

11b30b4

Well-known member
Joined
Jul 16, 2020
Messages
1,029
Location
GA
My video goes over the key and how to grab one. They go for around 10.00. Also check out this thread:
About halfway down on the first page is a ton of info for parts and where to get them.
Lastly, when you press the chuck apart be sure to have the jaws protrude about 1/2" otherwise you will break off teeth. I do not know if thats what happened with JFK92s chuck or if they were broken previously but I have snapped a back tooth or two in disassembly before.
The rebuild kits are way overpriced in my opinion and when I needed a chuck, I just ordered a new one. The new Jacob's chucks are not made in the USA but they are good quality and I have had no issues with them.
 

jfk92

Well-known member
Joined
Mar 22, 2023
Messages
48
Location
New Jersey
So I believe the damage was already done to my chuck teeth - it was always difficult to manipulate and locked up at times. I did keep the jaws protruding when pressing it apart - upon disassembly there was also no debris of teeth that fell out (if I had done it). But jbrwn if you follow 11b30b4's video's closely - all is rather easy - they are very thorough and clear!
 
OP
J

jbrwn

Member
Joined
May 8, 2023
Messages
20
Location
Missoula, MT
Ok another update - got everything disassembled except for the chuck. Watched Jeff’s videos of the chuck rebuild. Very very helpful.

For removing the chuck sleeve, Jeff mentions using a section of pipe/tubing. Is there something off the shelf from the big box stores that works well for this or are people fabricating their own pieces (or in franks case just using another sleeve)?
 

Attachments

  • 76857D9C-6AAE-4E44-8742-7044EF4E934D.jpeg
    76857D9C-6AAE-4E44-8742-7044EF4E934D.jpeg
    990.8 KB · Views: 46
OP
J

jbrwn

Member
Joined
May 8, 2023
Messages
20
Location
Missoula, MT
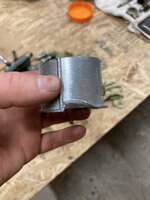
Ok Jacobs chuck is disassembled. I removed the sleeve with a cheap harbor freight puller. Took a lot of wrestling but I didn't have a vice big enough for this. I *do not* recommend this method lol.

For the “sleeve tube”I used a 1 1/2 EMT coupling cut in half. i measured the sleeve at 1.67 ID and 1.93 OD and the coupling ID is something like 1.75 It’s pretty thin metal. probably something a bit more substantial would be better. As you can see I almost ripped it apart with the puller.

Anyways happy Mother’s Day to all who celebrate
 

Attachments

  • 0F985D2A-A4F1-4DB7-8785-A739DBD7411F.jpeg
    0F985D2A-A4F1-4DB7-8785-A739DBD7411F.jpeg
    497.1 KB · Views: 52
  • 1A4903CC-19E4-4637-A18D-3A918A740C6C.jpeg
    1A4903CC-19E4-4637-A18D-3A918A740C6C.jpeg
    912.7 KB · Views: 38
  • 45B0A7A1-6D95-4BFD-8643-C576225EF612.jpeg
    45B0A7A1-6D95-4BFD-8643-C576225EF612.jpeg
    1.3 MB · Views: 39

11b30b4

Well-known member
Joined
Jul 16, 2020
Messages
1,029
Location
GA
congrats on getting the chuck apart. I need to turn notifications on for this thread so I can respond in a more timely manner. I now use an old sleeve that FrankLee sent me but before that i was using a coupler. No idea what size it was, I too the chuck (assembled) to home Depot and walked around until I found something that fit. The coupler I have (at work now or I would measure it for you) is loose so not a great fit and you can see me struggle to keep it aligned in my videos but it works. I did purchase an actual tool for this but it was designed for the 33b and the the 34c with the safe lock ring so its too short and now sites in a bin.
 
OP
J

jbrwn

Member
Joined
May 8, 2023
Messages
20
Location
Missoula, MT
congrats on getting the chuck apart. I need to turn notifications on for this thread so I can respond in a more timely manner. I now use an old sleeve that FrankLee sent me but before that i was using a coupler. No idea what size it was, I too the chuck (assembled) to home Depot and walked around until I found something that fit. The coupler I have (at work now or I would measure it for you) is loose so not a great fit and you can see me struggle to keep it aligned in my videos but it works. I did purchase an actual tool for this but it was designed for the 33b and the the 34c with the safe lock ring so its too short and now sites in a bin.
Hey no worries. Yeah it sounds like an old sleeve is really the best. Just need to collect more DPs and parts :cool:.
 
OP
J

jbrwn

Member
Joined
May 8, 2023
Messages
20
Location
Missoula, MT
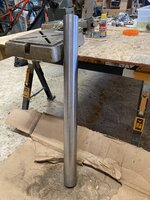
And here are a few progress pictures. Sanded/polished the column and pulleys by hand. Would not recommend unless you are looking for an arm workout lol.

A couple other notes. I used a brass brush to clean the pulleys and it did leave some scratches that I couldn’t completely sand away. Just a note to my future self to be less aggressive when cleaning parts.

Hard to tell from the picture but the column does have some pitting. Very hard to remove it just with hand sanding.
 

Attachments

  • 2F9615F4-D9F2-4D07-8E95-C5D5027D932D.jpeg
    2F9615F4-D9F2-4D07-8E95-C5D5027D932D.jpeg
    905.2 KB · Views: 41
  • BB38BCCE-7192-4A2D-A547-367E6F642231.jpeg
    BB38BCCE-7192-4A2D-A547-367E6F642231.jpeg
    1.1 MB · Views: 40
Last edited:
OP
J

jbrwn

Member
Joined
May 8, 2023
Messages
20
Location
Missoula, MT
Happy Friday y’all. More progress pics.

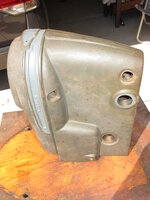
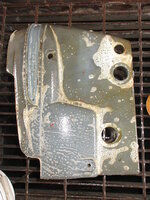
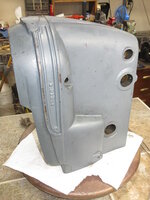
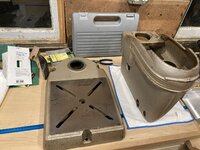
Got everything cleaned up except for the chuck. For cleaning the painted cast iron parts i first tried simple green and a nylon scrub brush. While this worked ok i found that doing a soak for ~20 minutes in a tub of simple green worked a lot better. Hard to tell from the pics but the body got quite a bit cleaner than the base and table which didn't get the soak treatment.

For the parts i did a 24hr simple green soak followed by 24hr citric acid solution soak. Then for the small parts i used 00 steel wool to clean them up. For the bigger cylindrical parts i hand sanded with 600/800/1000 wet sand paper and then polished with a metal polish. Lastly everything is sprayed down with super lube spray and wiped down again. This is pretty much step for step what Jeff did in his rebuild videos minus the use of a lathe and wire wheel.

You may also noticed that i stripped the paint off the motor mount (it was painted black). I didn't actually mean to do this but the mount got put into the simple green bath which does strip paint if you let it work long enough. Oh well. its just going to be unpainted metal now.
 

Attachments

  • D4B68CA0-492B-4DC9-BD47-AE81E93438D5.jpeg
    D4B68CA0-492B-4DC9-BD47-AE81E93438D5.jpeg
    741.8 KB · Views: 32
  • DA05A4A7-B654-4844-8726-E0C36D856D7B.jpeg
    DA05A4A7-B654-4844-8726-E0C36D856D7B.jpeg
    1.2 MB · Views: 29
  • 315EDE11-344A-4460-BA53-E6B03199A825.jpeg
    315EDE11-344A-4460-BA53-E6B03199A825.jpeg
    852.1 KB · Views: 29
Last edited:
OP
J

jbrwn

Member
Joined
May 8, 2023
Messages
20
Location
Missoula, MT
Ok everything is put back together and up and running. Big thanks to everyone who helped me out in this thread an to everyone who has posted about their DP rebuilds online.
4B2AA13E-FB79-4FA1-80D2-0964BA3D5062.jpeg

One thing i asked about previously was about adding a switch to the motor. Here is what i came up with. It just a steel L bracket with a toggle switch attached to one of the motor end bracket screws. it gets the job done but not sure i would recommend this approach due to the exposed wiring. Already gave myself a shock fiddling with the motor position lol.
27DBEC09-3F40-434E-BD27-D5A696A2166B.jpeg5011DF14-EDE9-494B-915A-DAA0773AC02A.jpeg

One thing that did give me a bit of trouble is the motor/pulley position and belt tension. Im not actually sure i have this totally figured out. When i first set things up i had issues with the motor "bouncing" on start up. Like the torque of the motor would pull the top towards the DP and the bottom with the threaded stud would swing away and bounce a few times. Not exactly the same as described in this thread but some of the advice did help.

I ended up reducing tension in the belt which seemed to help but i still get some bounce on startup when the belt is on the top pulleys (fastest speed). Reducing tension any more seems to make things a bit too sloppy.
B993BE66-F702-4483-AFFA-3C6C43DEE313.jpegA2AF6632-EEDB-4CC0-95E4-95EA834EF5E6.jpeg

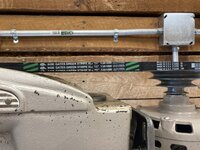
Lastly i did replace the belt with this cogged v-belt which honestly didn't seem to make any difference. It actually feels a bit stiff to be honest. Maybe its the synthetic rubber vs natural rubber? Anyways if anyone has any additional tips that would be great. i could probably live with it as is but would love fix the bounce and get this thing dialed in.

 
Last edited:

FrankLee

Well-known member
Joined
Sep 13, 2010
Messages
3,617
Location
seMI, 48317
Very nice job cleaning up that machine!

One thing i asked about previously was about adding a switch to the motor. Here is what i came up with. It just a steel L bracket with a toggle switch attached to one of the motor end bracket screws. it gets the job done but not sure i would recommend this approach due to the exposed wiring. Already gave myself a shock fiddling with the motor position lol.
You might reconsider that foot switch. Or at least use some shrink tubing over the switch terminals.

Lastly i did replace the belt with this cogged v-belt which honestly didn't seem to make any difference. It actually feels a bit stiff to be honest. Maybe its the synthetic rubber vs natural rubber? Anyways if anyone has any additional tips that would be great. i could probably live with it as is but would love fix the bounce and get this thing dialed in.
Several years ago, Autozone started sourcing some belts from Mexico. I found those to be terrible... very stiff. I could always identify those belts immediately because they had a very shiny outside circumference. If yours is Mexico, return it. Belts from U.S. or India were always good.
 
OP
J

jbrwn

Member
Joined
May 8, 2023
Messages
20
Location
Missoula, MT
Probably my final post on this thread. Thanks again everyone! Regarding the motor, pulley and belt alignment. I did swap out the cheap Duralast made in Mexico belt with a more expensive gates belt and it did seem to help. Also added a rubber bumper to the threaded post on The motor mount and this actually helped reduce the chatter and vibration quite a bit.
 

Attachments

  • 6C4DB8BD-6D46-493B-8630-32A675655830.jpeg
    6C4DB8BD-6D46-493B-8630-32A675655830.jpeg
    802.2 KB · Views: 34
To avoid these ads, REGISTER NOW!
Top Bottom