To avoid these ads, REGISTER NOW!

Craftsman 150 Drill Press Restoration

tideluva

Member
Joined
Dec 5, 2017
Messages
16
Location
Jemison, AL
First post here so be gentle :).

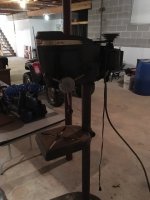
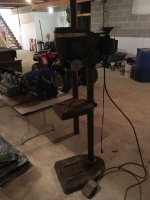
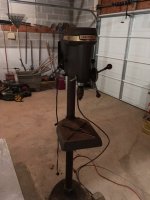
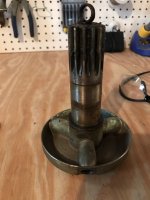
I know there are a ton of these refurbish posts for these Drill Presses but I was hoping you could indulge me so that I can chronicle my restoration of my grandfather's DP. He and I used to tinker in his shop so this is sentimental to me.

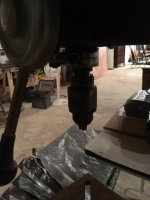
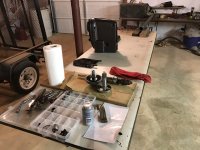
I will start with some "before" photos. I will post progress photos as I go so this may take a while. Any help that you can offer would be appreciated. I am using several of the posts here as guides but I can always appreciate more guidance if/as necessary.
 

Attachments

  • image1.JPG
    image1.JPG
    70.2 KB · Views: 159
  • image2.JPG
    image2.JPG
    76.9 KB · Views: 120
  • image3.JPG
    image3.JPG
    78 KB · Views: 135
  • image4.JPG
    image4.JPG
    64.4 KB · Views: 116
  • image5.JPG
    image5.JPG
    62.8 KB · Views: 108
  • image7.JPG
    image7.JPG
    63.9 KB · Views: 115
  • image8.JPG
    image8.JPG
    135.9 KB · Views: 111
To avoid these ads, REGISTER NOW!

FrankLee

Well-known member
Joined
Sep 13, 2010
Messages
3,618
Location
seMI, 48317
Welcome!

Consider yourself indulged! Those of us who are fans of these classic machines never tire of seeing one more cleaned up and back in service. Yours has a good history too. I for one am looking forward to watching your progress.

There are plenty of us to help if you have any troubles or questions.

(Please update your profile with your general location.)
 
Last edited:
OP
T

tideluva

Member
Joined
Dec 5, 2017
Messages
16
Location
Jemison, AL
Profile updated!

I do have a couple of quick questions:
1. Is the feed return handles supposed to return back to the original position? If so I guess my return spring is shot or the like.
2. Is there a parts sourcing list to find the replacement parts?
Thanks!
 

FrankLee

Well-known member
Joined
Sep 13, 2010
Messages
3,618
Location
seMI, 48317
Profile updated!

I do have a couple of quick questions:
1. Is the feed return handles supposed to return back to the original position? If so I guess my return spring is shot or the like.
2. Is there a parts sourcing list to find the replacement parts?
Thanks!

1. Yes. The quill should return to its uppermost position.
The spring could be fubar, but there may be more likely reasons:
- dirt and grime are making the quill or pinion shaft stick
- the spring simply needs to be adjusted

Based on the condition from your photos, I would suggest not adjusting the return spring until after dismantling and thoroughly cleaning all internal parts. If parts are sticking because of grime, tightening the spring may ruin it.

2. Yes. Find the manual for your model on that vintage machines website.

There is an exploded view and list of all parts.
Most parts can eventually be found on eBay or a locally sourced donor machine.
 
Last edited:
OP
T

tideluva

Member
Joined
Dec 5, 2017
Messages
16
Location
Jemison, AL
I could use some help please. I have (almost) disassembled the whole thing. It was quite easy except for the spindle pulley. Which leads to my first question:
1. I have sheared one of the 2 screws that you must remove to get out the spindle. I have the head soaking in some PB Blaster but any suggestions would be appreciated.
2. How do I disassemble the Hub, Pinion, Spring and Pin Assembly? I saw the instructions on how to remove it but not dissassemble it. Apparently my grandfather was a HUGE fan of grease. And also more grease.
After I get those settled it is onto cleaning! I might can get my wife on board with that as that is her love language. Weird I know.
Thanks again for all your help!
 

FrankLee

Well-known member
Joined
Sep 13, 2010
Messages
3,618
Location
seMI, 48317
I could use some help please. I have (almost) disassembled the whole thing. It was quite easy except for the spindle pulley. Which leads to my first question:
1. I have sheared one of the 2 screws that you must remove to get out the spindle. I have the head soaking in some PB Blaster but any suggestions would be appreciated.
2. How do I disassemble the Hub, Pinion, Spring and Pin Assembly? I saw the instructions on how to remove it but not dissassemble it. Apparently my grandfather was a HUGE fan of grease. And also more grease.
After I get those settled it is onto cleaning! I might can get my wife on board with that as that is her love language. Weird I know.
Thanks again for all your help!

1. I'm not clear on whether you have the pulley is still in or whether it's out but the screw is still in stuck. Did the screw shear when you were trying to unscrew it? Or when you were tapping out the pulley assembly? Pictures would be very helpful here.

2. There is a pin in the hub that passes through pinion shaft. That pin holds the hub to the shaft and also passes through the loop on the spring.
One end of that pin is knurled. You should be able to see some witness marks on the edge of the hole on the hub from the knurling. You want to identify that end and drive the pin out from the non-knurled end.
 
OP
T

tideluva

Member
Joined
Dec 5, 2017
Messages
16
Location
Jemison, AL
Thanks for the reply. The screw was bent after getting the spindle out. I had to cut the bent threaded end off so I could try to back it out again to no avail. At this time I just need to be able to remove the screw head and partial threaded section so it can be replaced later.
View attachment 712111

View attachment 712112
In regards to the pinion, I am not sure I follow. I attached a pic as well if it along with the plethora of grease. I really just need excuse to use that word.
Thanks!

View attachment 712113
 
OP
T

tideluva

Member
Joined
Dec 5, 2017
Messages
16
Location
Jemison, AL
I noticed that the attachements didn't come through. For some reason they are not able to attach more than one. This is the inside where I cut the screw off.
 

Attachments

  • FullSizeRender.jpg
    FullSizeRender.jpg
    94.3 KB · Views: 68
Last edited:

FrankLee

Well-known member
Joined
Sep 13, 2010
Messages
3,618
Location
seMI, 48317
Thanks for the reply. The screw was bent after getting the spindle out. I had to cut the bent threaded end off so I could try to back it out again to no avail. At this time I just need to be able to remove the screw head and partial threaded section so it can be replaced later.

Ok. A couple options here...

Firstly, just leave it there and use the one new screw on the other side. The next generations of Emerson Craftsman drill presses use only one screw.

Secondly, if you're a-r like me and it must come out, use the largest drill bit that will fit in that access hole. Drill the old screw head until you get a nice center point hole. Then, use a smaller bit to drill out the rest of the screw. Use an easy-out then a tap to clean out the threads.

In regards to the pinion, I am not sure I follow. I attached a pic as well if it along with the plethora of grease. I really just need excuse to use that word. Thanks!

No problem. This post shows several dismantled pinion/spring/hub assemblies. It should make more sense to see the parts.
https://www.garagejournal.com/forum/showthread.php?p=6347465#post6347465


I forgot to mention earlier that most times, once the pin is removed, the pinion shaft should twist and pull out by hand.

Other times, it may need some persuasion with a block of wood and a hammer. The block of wood should be slightly longer than the pinion shaft when the wood is abutting the lip of the hub.

And rarely, no matter what you try, the pinion shaft will not come out of the hub.


Before dismantling the pinion/hub assembly, I like to scribe a small mark on the shaft and the hub. It makes assembly easier. The pin holes are never bored perfectly centered and the holes will only line up one way.

And to make matters worse, the holes are never the same between assemblies. That means that the hub or the pinion shaft must be redrilled when swapping or replacing these parts.
 
Last edited:
OP
T

tideluva

Member
Joined
Dec 5, 2017
Messages
16
Location
Jemison, AL
Well success! I got the pinion assembly apart. Crazy thing is I couldn't see the other side of the pin (where you knock it out) because it was so caked on with crud.
I have started cleaning the parts so do you just use a scotch brite pad for the main housing? I am not wanting to repaint just clean it really well and properly lube it.
I cleaned the smaller parts and just have the larger parts as well as the chuck left.
@FrankLee I can't thank you enough for all of your help.
I do think I will have to do some work on the motor as it sounds pretty bad. I will look at your posts on motors.
 

FrankLee

Well-known member
Joined
Sep 13, 2010
Messages
3,618
Location
seMI, 48317
Well success! I got the pinion assembly apart. Crazy thing is I couldn't see the other side of the pin (where you knock it out) because it was so caked on with crud.
I have started cleaning the parts so do you just use a scotch brite pad for the main housing? I am not wanting to repaint just clean it really well and properly lube it.
I cleaned the smaller parts and just have the larger parts as well as the chuck left.
@FrankLee I can't thank you enough for all of your help.
I do think I will have to do some work on the motor as it sounds pretty bad. I will look at your posts on motors.

Good news!

Yes. I gently clean painted surfaces with a SB pad and mineral spirits.

I never cracked open a motor like yours, but can't imagine that they're very different than the older styles. It appears yours is a ball bearing motor?

How does the spring look?
 
Last edited:
OP
T

tideluva

Member
Joined
Dec 5, 2017
Messages
16
Location
Jemison, AL
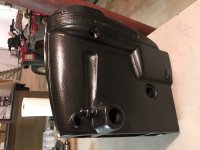
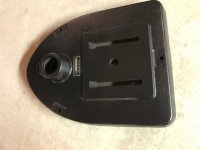
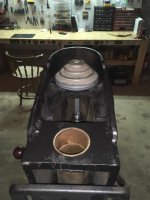
Sorry for the delay as I have been out of town working. I initially intended to just clean up everything and reassemble it but it appears that the base and main housing was not going to be sufficient to just clean it so I painted the main parts with the ever-popular hammered rustoleum black paint. It actually looks better than I thought.
As for the motor, I have postponed that until after I get everything assembled so I can keep parts together without mixing them up.
As for the spring and all other stuff it looks great. I am missing the base shoe but I am going to look to see if I can find it at my grandfather's house.
I am so glad I found this site as you have been a wealth of information and peace of mind.
 
OP
T

tideluva

Member
Joined
Dec 5, 2017
Messages
16
Location
Jemison, AL
Here are some updated shots.
 

Attachments

  • IMG_0411.JPG
    IMG_0411.JPG
    75.2 KB · Views: 95
  • IMG_0410.JPG
    IMG_0410.JPG
    63.2 KB · Views: 81
  • IMG_0409.JPG
    IMG_0409.JPG
    103.1 KB · Views: 87

FrankLee

Well-known member
Joined
Sep 13, 2010
Messages
3,618
Location
seMI, 48317
Sorry for the delay as I have been out of town working. I initially intended to just clean up everything and reassemble it but it appears that the base and main housing was not going to be sufficient to just clean it so I painted the main parts with the ever-popular hammered rustoleum black paint. It actually looks better than I thought.
As for the motor, I have postponed that until after I get everything assembled so I can keep parts together without mixing them up.
As for the spring and all other stuff it looks great. I am missing the base shoe but I am going to look to see if I can find it at my grandfather's house.
I am so glad I found this site as you have been a wealth of information and peace of mind.

Here are some updated shots.

Very nice!

I had a dp once were the PO made a shoe from a piece of thick-wall pipe. It was maybe a 120 degree arc cut from a 2" diameter pipe. It actually worked well.
 

Roberts210

Well-known member
Joined
Dec 21, 2015
Messages
3,177
Location
Missouri
That is looking real good. Grandpa would be proud. You are fortunate to have his drill press. Keep the pics coming.

Rebuilding a motor is not difficult. I don't know if you have ever rebuilt one, but before you crack it open, take a small punch and mark the end caps . and .. and also mark their relative positions on the body of the motor so when you re-assemble it you can clock the end caps in the very same position they were in before you took it apart.
 
OP
T

tideluva

Member
Joined
Dec 5, 2017
Messages
16
Location
Jemison, AL
Thanks! I am excited that this weekend I should be able to put her back together again! Hopefully not another Humpty Dumpty occurrence. I have recorded a quick video before I broke it down of the noise coming from the motor. I was able to isolate it to the motor itself as the rest is extremely quiet.
Any suggestions of what to look for when I start on the motor? Thanks for all the help.
 
To avoid these ads, REGISTER NOW!

FrankLee

Well-known member
Joined
Sep 13, 2010
Messages
3,618
Location
seMI, 48317
Thanks! I am excited that this weekend I should be able to put her back together again! Hopefully not another Humpty Dumpty occurrence. I have recorded a quick video before I broke it down of the noise coming from the motor. I was able to isolate it to the motor itself as the rest is extremely quiet.
Any suggestions of what to look for when I start on the motor? Thanks for all the help.

It's difficult to tell from a before video with everything assembled and dirty, but the motor bearings do sound dry. The motor stops awfully fast when power is cut.

It could be the centrifugal switch, if it has one. They can wear through.

A new belt will help. You really won't know for sure until you crack it open.

What model number is the motor?

Also, because of the family history, do you have any of the original paperwork or receipts?
 
Last edited:
OP
T

tideluva

Member
Joined
Dec 5, 2017
Messages
16
Location
Jemison, AL
Regarding the paperwork I don't have any. If I remember correctly I was around 6 when he got it so that would put it at about 1981 so it was 20 some odd years old by then. I think he got it from a fellow worker at the steel mill.

The motor is a Craftsman 113.12130 and I am going to try to attach a picture of the nameplate.

I am going to fabricate a Base Stop tonight and then start putting it together this week so I can designate some time to this motor. I HOPE it won't be too bad. I don't have any special tools for this so we will see!
 

Attachments

  • motor.jpg
    motor.jpg
    66.5 KB · Views: 48

FrankLee

Well-known member
Joined
Sep 13, 2010
Messages
3,618
Location
seMI, 48317
Regarding the paperwork I don't have any. If I remember correctly I was around 6 when he got it so that would put it at about 1981 so it was 20 some odd years old by then. I think he got it from a fellow worker at the steel mill.

The motor is a Craftsman 113.12130 and I am going to try to attach a picture of the nameplate.

I am going to fabricate a Base Stop tonight and then start putting it together this week so I can designate some time to this motor. I HOPE it won't be too bad. I don't have any special tools for this so we will see!

You're likely going to need a puller when dealing with any kind of bearings in these old machines.

If you haven't found it already, here's the manual for your motor
http://vintagemachinery.org/pubs/222/9507.pdf

Generally, the bearings are tightly pressed onto the shaft and slip-fit into the end caps.

I'm not positive, but looking at the exploded view, it looks like after you remove the thru-bolts you can gently tap the shaft from the terminal end with a rubber mallet and remove the rotor with the fan-end cap attached. Then, reaching through the stator, remove the screws the terminal bar, the switch contacts and thermal switch. The terminal end will then be free from the stator. Tap the rotor shaft from the fan end to remove the fan end cap.
 
Last edited:
OP
T

tideluva

Member
Joined
Dec 5, 2017
Messages
16
Location
Jemison, AL
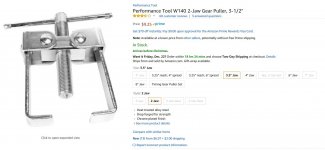
So for a bearing puller would this do?

There are other options but this is just what pulled up.
 

Attachments

  • puller.jpg
    puller.jpg
    99.2 KB · Views: 27

FrankLee

Well-known member
Joined
Sep 13, 2010
Messages
3,618
Location
seMI, 48317
For versatility, I'd want something with a longer reach, a narrower/adjustable spread and heavier duty. Sometimes it takes considerable force to break the bearing free to get it moving.

You should be able to guesstimate size on your motor by the exposed shaft and the diameter of the portion of the end of the cap where the bearing resides.


Another option is to borrow a puller from an auto parts store. Some places have a tool loaner program.
 
Last edited:
OP
T

tideluva

Member
Joined
Dec 5, 2017
Messages
16
Location
Jemison, AL
Well I had a productive weekend. I got a bunch of honey-do's complete and got to assemble the drill press.
I installed the spring incorrectly and need to make the necessary adjustment. It wants to stay fully extended instead of fully retracted. Should be an easy fix.
I still need to clean and install the band at the top. I want to be careful not to be too abrasive with it. What do you use to clean yours?
I have another project to finish this week before starting with the motor. I am pretty sure I will at least need to get new bearings for it. I saw where you ordered from Accurate Bearing previously. Is this still the go-to for you?
Lastly, since I have a little time to order a bearing puller, I have been unable to find one locally so I can look at the size in person. Do you have an online recommendation? I just have no idea where/how to proceed.
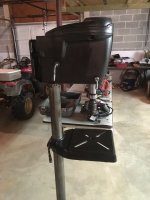
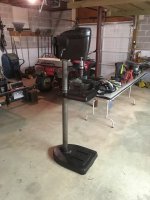
Here are some pics for your viewing pleasure!
 

Attachments

  • IMG_0625.JPG
    IMG_0625.JPG
    97.1 KB · Views: 66
  • IMG_0624.JPG
    IMG_0624.JPG
    94.1 KB · Views: 73
  • IMG_0623.JPG
    IMG_0623.JPG
    89.2 KB · Views: 81
  • IMG_0622.JPG
    IMG_0622.JPG
    96.8 KB · Views: 84
  • IMG_0621.JPG
    IMG_0621.JPG
    99.1 KB · Views: 79

FrankLee

Well-known member
Joined
Sep 13, 2010
Messages
3,618
Location
seMI, 48317
Well I had a productive weekend. I got a bunch of honey-do's complete and got to assemble the drill press.
I installed the spring incorrectly and need to make the necessary adjustment. It wants to stay fully extended instead of fully retracted. Should be an easy fix.
I still need to clean and install the band at the top. I want to be careful not to be too abrasive with it. What do you use to clean yours?
I have another project to finish this week before starting with the motor. I am pretty sure I will at least need to get new bearings for it. I saw where you ordered from Accurate Bearing previously. Is this still the go-to for you?
Lastly, since I have a little time to order a bearing puller, I have been unable to find one locally so I can look at the size in person. Do you have an online recommendation? I just have no idea where/how to proceed.
Here are some pics for your viewing pleasure!

That is looking really great!

The spring is installed correctly, but you wound it the wrong way. It happens frequently. Before you do anything, take a peek inside to make sure the spring did not go wonky.

When these springs were manufactured, the barrels were wound in a counter-clockwise direction. At rest, the barrel is approximately 4" long and 5/8" diameter. When installed and adjusted, they are tightened counter-clockwise. That will tighten the coils into a slightly smaller diameter and slightly lengthen the spring.


When wound incorrectly clockwise, the coils are enlarged slightly and the spring is shortened slightly. In that case, IMO, there is a greater chance that the coils can twist out of shape at the end where they are outside the pinion shaft.

The spring below is from an earlier 100 or 150 machine. You can see that the end of the spring is wider than the rest. This suggests to me that it was once wound clockwise.


Chances are that you're ok.


There are many options on cleaning, but check this post on how I clean badges, plates and panels.
https://www.garagejournal.com/forum/showthread.php?p=6060823#post6060823


Yes, I use Accurate Bearing. Please be prepared when you call or you may not have a good experience. Better yet, use their website, find the bearings you need and request a quote. You'll get a call back, likely from Lynn. Also, the link below is the VM wiki page with a cross reference of bearings for many Craftsman machines and motors. Not all are listed, but it is a rather extensive list.
http://wiki.vintagemachinery.org/ReplacementBearingListCraftsman.ashx

Most of the bearings I get from AB are either from Taiwan (TPI) or Japan (Nachi). I've always been satisfied with them, but some guys insist on US manufactured bearing. There's no problem with that either.


I can't really recommend a source for pullers. I found every one of mine at estate sales. I really like my Proto set, though.


Also fyi, your feed stop collar assembly is installed upside-down.
 
Last edited:
OP
T

tideluva

Member
Joined
Dec 5, 2017
Messages
16
Location
Jemison, AL
So I had some more time to dedicate to this project and I am so close I can smell it. Maybe that is just the fumes from the degreaser but I digress.

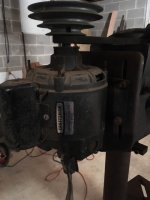
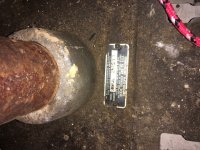
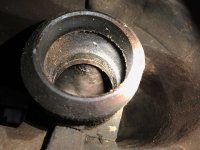
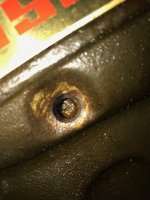
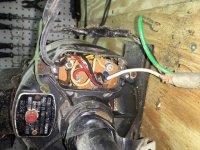
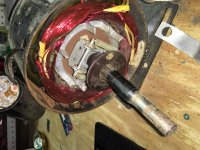
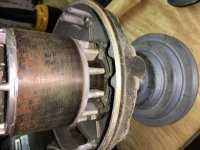
I had a moment to take apart the motor and only one bearing is bad. Apparently a bunch of grit had gotten in there and caused the terrible noise and action. I went to my local NAPA and they ordered the part for me. I like to support locally if possible. I am attaching some pictures for your viewing pleasure of the motor.


As for the spring I have a simple question: Do you have to "prime" the spring when you attach it to the pin? In other words to I need to put a turn on the spring and attach to the pin when the quill assembly is fully up or just hook the spring on the pin with the quill assembly fully upright?
 

Attachments

  • IMG_0627.JPG
    IMG_0627.JPG
    133.5 KB · Views: 38
  • IMG_0634.JPG
    IMG_0634.JPG
    130.9 KB · Views: 35
  • IMG_0636.JPG
    IMG_0636.JPG
    102.3 KB · Views: 30

FrankLee

Well-known member
Joined
Sep 13, 2010
Messages
3,618
Location
seMI, 48317
As for the spring I have a simple question: Do you have to "prime" the spring when you attach it to the pin? In other words to I need to put a turn on the spring and attach to the pin when the quill assembly is fully up or just hook the spring on the pin with the quill assembly fully upright?

On the later models like yours, I first install the hub/pinion/spring assembly into the head frame, then hook up the spring, then install the quill assembly, then adjust the spring tension.
 
Last edited:

rrich1

Well-known member
Joined
Oct 7, 2015
Messages
793
Well I had a productive weekend. I got a bunch of honey-do's complete and got to assemble the drill press.
I installed the spring incorrectly and need to make the necessary adjustment. It wants to stay fully extended instead of fully retracted. Should be an easy fix.
I still need to clean and install the band at the top. I want to be careful not to be too abrasive with it. What do you use to clean yours?
I have another project to finish this week before starting with the motor. I am pretty sure I will at least need to get new bearings for it. I saw where you ordered from Accurate Bearing previously. Is this still the go-to for you?
Lastly, since I have a little time to order a bearing puller, I have been unable to find one locally so I can look at the size in person. Do you have an online recommendation? I just have no idea where/how to proceed.
Here are some pics for your viewing pleasure!
I cleaned the bands for the head and motor with some metal polish on a buffer wheel for my drill. I didnt press too hard and wanted to clean it up not make it perfect. Pics of mine in my rebuild thread.

https://www.garagejournal.com/forum/showthread.php?t=352178&highlight=drill+press
 

rickhigginshtbr

Well-known member
Joined
Aug 7, 2012
Messages
1,551
Location
Lower Bucks, PA
Alright, don’t want to hijack your thread, but I got a (hopefully) simple question with these. So I’m tearing down 150 #3 for me, and ran into this:
363abd70185dced9242e35d7e824e77b.jpg
fca7aad0b77397a77c4390cf07cf0cd9.jpg
I believe someone had this apart before and somehow put that on backwards. How does someone propose I take that out?


Sent from my iPhone using Tapatalk
 

Attachments

  • fca7aad0b77397a77c4390cf07cf0cd9.jpg
    fca7aad0b77397a77c4390cf07cf0cd9.jpg
    728.2 KB · Views: 2
  • 363abd70185dced9242e35d7e824e77b.jpg
    363abd70185dced9242e35d7e824e77b.jpg
    735.1 KB · Views: 2

lafester

Well-known member
Joined
Mar 1, 2017
Messages
2,191
Location
Northern CO
Alright, don’t want to hijack your thread, but I got a (hopefully) simple question with these. So I’m tearing down 150 #3 for me, and ran into this:
363abd70185dced9242e35d7e824e77b.jpg
fca7aad0b77397a77c4390cf07cf0cd9.jpg
I believe someone had this apart before and somehow put that on backwards. How does someone propose I take that out?


Sent from my iPhone using Tapatalk
Remove the handle, then the bolt.
 

Attachments

  • 363abd70185dced9242e35d7e824e77b.jpg
    363abd70185dced9242e35d7e824e77b.jpg
    113.8 KB · Views: 2
  • fca7aad0b77397a77c4390cf07cf0cd9.jpg
    fca7aad0b77397a77c4390cf07cf0cd9.jpg
    105.6 KB · Views: 4

FrankLee

Well-known member
Joined
Sep 13, 2010
Messages
3,618
Location
seMI, 48317
Alright, don’t want to hijack your thread, but I got a (hopefully) simple question with these. So I’m tearing down 150 #3 for me, and ran into this:
I believe someone had this apart before and somehow put that on backwards. How does someone propose I take that out?

Handle should be held on with a small hex screw. Should be able to remove the handle and the access the bolt underneath.


Yes. There is a set screw on the opposite side of the hub from that handle. Usually a 3/32" allen wrench will loosen the set screw, or sometimes small flat head screwdriver on a slotted screw, which will allow the handle to be removed from the bolt head.

Or, if you're dismantling the head frame, remove the pinion/hub assembly, remove the quill/spindle assembly, and the entire quill lock assembly will slide out as one piece.

29946529164_9230eb93ba_n.jpg
 
Last edited:
To avoid these ads, REGISTER NOW!
Top Bottom