Sorry if this has been covered...
Frank - Please talk about what you have learned about the aging of grease in general on these drill presses and other mid century Craftsman, Delta Rockwell etc woodworking machines.
For example If one were to find one of these Cman presses you restore in pristine condition that has been sitting in Grandpa's climate control basement since new w only light occasional use can the bearings be left alone as is ?
Obviously exposed grease is easy to re[place so I guess I'm asking about old sealed bearings.
Another example - I recently got a decent looking condition used Delta Rockwell 12-14 tablesaw...have not yet checked out... IF the arbor bearings run quiet smooth and true do I need to worry about changing them? only due to 70 yr old grease ?
Would really appreciate all you've learned about this... I have cleaned up (NOT fully torn down and rebuilt) a few USA Old Arn items and have been lucky so far after a few years of light use... So MY experience is limited.
Thank you, Marc
So yeah, exposed grease is
sometimes easier to deal with on the quill and pinion. Sometimes that grease is still liquid, and other times it has hardened.
The more difficult exposed grease to clean-up is inside the head frame casting... especially at the bottom of the nose cavity and on top of the quill guides. Most of the time, it's just do the best I can with Grez-Off and small plastic-bristle brushes; tooth brushes and those cheap HF brushes.
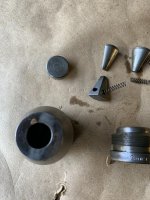
For quill bearings, it all depends on, A) whether the bearings turn smoothly, and, B) whether the spindle slides out with little effort.
If the spindle slides out of the bearings with little effort, I will usually remove bearings from the quill, remove one shield from each bearing, clean and assess whether to repack or replace.
If the quill bearings seem good AND the quill does not slide out, I will drip some 3inONE SAE 20 motor oil around the inner races and let that seep in. That will rejuvenate the grease somewhat.
If the quill bearings seem gritty, and the spindle does not slide out easily, I will press out the spindle, remove bearings from the quill, remove one shield from each bearing, clean and assess whether to repack or replace.
I always remove the bearings from the spindle pulleys and
usually remove one shield from each bearing, clean and assess whether to repack or replace.
I always clean and assess whether to repack or replace motor bearings that are open on the outboard side.
So, I always try to reuse bearings when possible. Many guys disagree with that philosophy, but that's ok.
When replacing bearings, I always use sealed bearings for motors and quills and shielded bearings for spindle pulleys.
Because MSA/Slo-Speed pulley bearings are more difficult to press off/on, I made a gadget to inject new grease through the gap between the inner races and the shields.


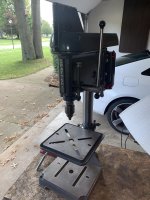


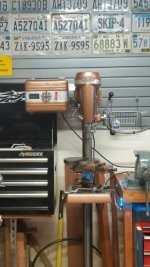
 It's sitting out in the rain I think. Oh the horror! Might be a 1950 from the deteriorated 1/2hp motor plate. Looks like it has a Vari-Slo and a tilt table. I wish I had either one.

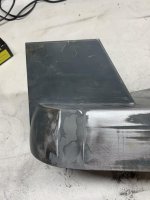
 . I stopped by the shop to pick up something and spied one of the products I've used on chrome for years called Quick-Glo. I used it quickly on the motor band. Sorry for the lousy pictures but I was in a hurry, this was after about a minute of rubbing. I read that the stripes on the this model of motor band are delicate so I went easy with the original heavy duty paste. Jay Leno did a promo for them years ago because they are an American owned product invented in Chicago in 1957, something I like about it too. Check out his promo here, this stuff is more that just a rubbing compound, it's great on chrome and tools too, might help protect the bare steel these projects too: