To avoid these ads, REGISTER NOW!

Craftsman Red/Gray Top Box Restoration

Zeeman

Well-known member
Joined
Mar 21, 2016
Messages
1,185
Location
Bartow County Georgia
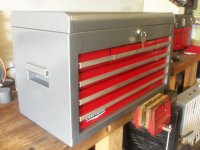
Well, thanks to Lookn4'67Galaxieconv, I have a new top box. I got it the day before yesterday and have already begun the restoration.

I've completed three of these so far, and also 3 rollers. I just recently finished the last roller I had so this was perfect timing. I am expecting a new lock and Craftsman emblem in the mail any day now, so I'm pretty excited.

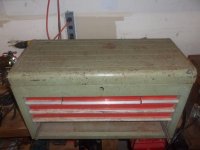
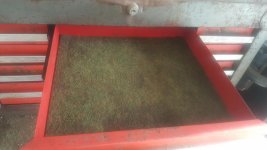
Here it is in all of it's original (plus ugly green coating) glory!

You might wonder what options my top box has other than the cool custom color option. If you haven't noticed, this box has the super rare top-right-corner lock. I don't think it came with the padlock originally. That had to be a separate purchase.

I'll try to put more details in this thread than I have in the past, so tune in if you are interested.
 

Attachments

  • 101_2293.jpg
    101_2293.jpg
    125.2 KB · Views: 59
  • 101_2297.jpg
    101_2297.jpg
    99.8 KB · Views: 56
  • 101_2296.jpg
    101_2296.jpg
    110.8 KB · Views: 56
To avoid these ads, REGISTER NOW!
OP
Z

Zeeman

Well-known member
Joined
Mar 21, 2016
Messages
1,185
Location
Bartow County Georgia
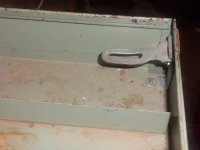
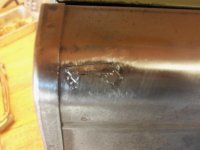
I'm thinking about starting a poll to see whether or not you guys think I should keep the lock option...... Nahh, I'll just weld a tiny piece of metal onto the top and weld the two screw holes shut.

I dented the ends of the slot slightly so my welds would not stand too proud of the top surface. There will still be some grinding and bodywork to do, but nothing like the first top box I restored. You can see more information on it here: https://www.garagejournal.com/forum/showthread.php?t=344841. It's called "Saving a Craftsman Tool Chest" in case my link does not work. Wow, I still can't believe I took that project on. I was new to the Red/Gray addiction then and that 'save' was my first.
 

Attachments

  • 101_2298.jpg
    101_2298.jpg
    101.2 KB · Views: 42
  • 101_2294.jpg
    101_2294.jpg
    89.2 KB · Views: 39
  • 101_2297.jpg
    101_2297.jpg
    99.8 KB · Views: 39
  • 101_2324.jpg
    101_2324.jpg
    138.1 KB · Views: 47
  • 101_2329.jpg
    101_2329.jpg
    87.9 KB · Views: 45
OP
Z

Zeeman

Well-known member
Joined
Mar 21, 2016
Messages
1,185
Location
Bartow County Georgia
I just realized how many of my tools/things I use on a regular basis are blue-ish. This picture shows some of the stuff I use for cleaning. I always clean all surfaces well (most of the time two scrubs) before doing any sanding. Surface prep is very important as you all know.

I don't have a sandblaster, but if I did my hands and fingers would have stopped vibrating by now. I only got one 'wire brush rash', and it's not too bad.

I wish I knew how to type text, post a picture, type more text, post a picture, etc. but I don't. I'm Sorry this is not more of a narrative with pictures thread. Maybe someone can tell me how to do what I described above.
 

Attachments

  • 101_2301.jpg
    101_2301.jpg
    148.2 KB · Views: 50
  • 101_2305.jpg
    101_2305.jpg
    155 KB · Views: 46
OP
Z

Zeeman

Well-known member
Joined
Mar 21, 2016
Messages
1,185
Location
Bartow County Georgia
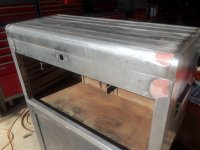
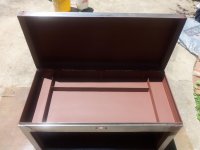
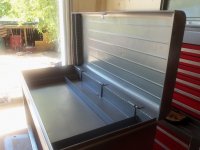
Here's where I stand at the moment. 99% of outside paint removed and inside the top sanded well enough to accept primer and paint.
 

Attachments

  • 101_2310.jpg
    101_2310.jpg
    148.5 KB · Views: 52

lbpd716

Well-known member
Joined
Apr 18, 2019
Messages
136
Location
California
I have the same box =)

Mine was my fathers. Its complete but starting to really fall apart. I'd like to do a restoration on it too, but looking for a donor box to fix up some bent pieces on the top I don't think are within ability to repair by normal means.

If you figure out a trick to getting the trim unpopped from the drawers - please let me know.

I have a neighbor who sells paint (industrial/automotive) who said he would be able to use some special cameras to get the correct or closer match than average off the shelf paint can do. When I get the information on it I will let you know.
 
OP
Z

Zeeman

Well-known member
Joined
Mar 21, 2016
Messages
1,185
Location
Bartow County Georgia
I have the same box =)

Mine was my fathers. Its complete but starting to really fall apart. I'd like to do a restoration on it too, but looking for a donor box to fix up some bent pieces on the top I don't think are within ability to repair by normal means.

If you figure out a trick to getting the trim unpopped from the drawers - please let me know.

I have a neighbor who sells paint (industrial/automotive) who said he would be able to use some special cameras to get the correct or closer match than average off the shelf paint can do. When I get the information on it I will let you know.

Thanks Ipb. I have done several and used Rustoleum Sunrise Red and Rustoleum Gray Hammered. The colors on the front can fade over time, but when I first began my projects I matched the Rustoleum to the underside of a drawer.

I've taken the trim off quite a few drawers. It's just 'pinched on in a few places. I used a blount chisel and a hammer. You can also use a piece of hardwood and a hammer. If the ends get boogered up, just grind them off a little. I sprayed mine with penetrating oil and let them soak overnight.

Which pieces are you saying are bent too much? You can un-bend or fix almost anything on these boxes. Post a picture or two. I don't mind and would like to see your 6 drawer.
 
OP
Z

Zeeman

Well-known member
Joined
Mar 21, 2016
Messages
1,185
Location
Bartow County Georgia
Looks good, Wes. This one won't be anywhere near as challenging as your first one! :pimpflash

LOL, THE Wall Of Craftsman... yes I know that wall from the annals of this forum.

My wall is of similar size to the OP's wall. Newer... red with dark drawers... but my wall none the less.

I'll have to check you WOC out. Do you have pictures in the Red/Gray thread?
 

lbpd716

Well-known member
Joined
Apr 18, 2019
Messages
136
Location
California
Which pieces are you saying are bent too much? You can un-bend or fix almost anything on these boxes. Post a picture or two. I don't mind and would like to see your 6 drawer.

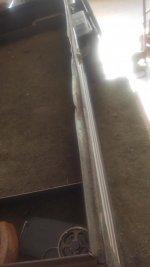
The top where the bends are to close up the top are pretty tweeted on my Dads box. My plan was to tig in a donor along most of the top.

Everything on this box will be a slow process, as I don't think I will be able to source the glued in drawer liners. Dad says they were cut from pieces of fabric that hung between mechanics stalls at the vw/Porsche dealer he worked at to help prevent door dings.
 

Attachments

  • 20200509_074824.jpg
    20200509_074824.jpg
    132.1 KB · Views: 37
  • 20200509_074837.jpg
    20200509_074837.jpg
    40.2 KB · Views: 33
  • 20200509_074858.jpg
    20200509_074858.jpg
    136.1 KB · Views: 36
Last edited:
To avoid these ads, REGISTER NOW!
OP
Z

Zeeman

Well-known member
Joined
Mar 21, 2016
Messages
1,185
Location
Bartow County Georgia
Hey 716, That lip in the middle picture is bent pretty bad. I would try to fix it first but I'm not that good of a welder. I am finishing up with the body filler where I had two holes and a slot to fill.

If you use a couple of adjustable wrenches and open them just a little more than the thickness of the lip, you'll be able to persuade most of that back out. The flat piece of metal along the front/top could be fixed with hammer and dollies. Those boxes are sorta scarse around me, so that's why I would try to fix it. A doner would have to be in pretty rough shape for me to cut it up.

It's neat that the box was your dads and I know you will be proud when you finish it.
 

lbpd716

Well-known member
Joined
Apr 18, 2019
Messages
136
Location
California
Thanks Zeeman -

We recently got him his long desired Snap On sets and he was going to get rid of these. I just couldn't let them go. I can remember not being tall enough to see into the top drawer of the bottom box and will be fixing that one up as well. It's an old Century box and I've never seen another one like it.

Any donor of a similar thickness and finish will probably do - I just want to get the thing rang down as perfect as possible. I also have the same year two drawer portable box. I'm going to try to make a tool to grab the pinches on the back of the trim pieces to see if I can get them off without dinging them up too bad. Might see about getting replacements machined if I cant clean these up to satisfaction.
 
OP
Z

Zeeman

Well-known member
Joined
Mar 21, 2016
Messages
1,185
Location
Bartow County Georgia
Wow, you are going to fix it up right. It seems California has a lot more of these tool boxes than we do. You'll probably find a doner.
 
OP
Z

Zeeman

Well-known member
Joined
Mar 21, 2016
Messages
1,185
Location
Bartow County Georgia
Today I mostly sanded drawers and washed them again. I did get some bodywork done. When it gets warmer and there's not a lot of tree/weed parts in the air, I'll paint. I also got my Craftsman lock and keys today. It was sent after the Craftsman emblem, so I'm a little worried that the emblem might be lost.
 

Attachments

  • 101_2332.jpg
    101_2332.jpg
    100.9 KB · Views: 36
  • 101_2335.jpg
    101_2335.jpg
    116.5 KB · Views: 36

lbpd716

Well-known member
Joined
Apr 18, 2019
Messages
136
Location
California
Zeeman,

You are at an excellent point to reinforce the lid where it meets the piano hinge. They tend to crack and start to open up on the the top end caps near that hinge.
 
OP
Z

Zeeman

Well-known member
Joined
Mar 21, 2016
Messages
1,185
Location
Bartow County Georgia
Lookin4, It is. I got the outside painted and the drawers done yesterday. The top did not turn out to my satisfaction, so I am going to have to sand it and wait two days before re-painting. More pictures to come.

I hope you find a bunch more that you don't need, Ha!
 
To avoid these ads, REGISTER NOW!
Top Bottom