
Rockett69
Well-known member
Jimgood, read through your resto, awesome work! I dont want to hijack the thread, but I couldn't help but notice something sorta familiar about the box. I know I've seen one like it before, but I dont own any old school boxes.. until yesterday....
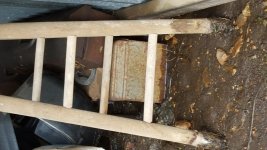
Long story short, went to my parents house yesterday and stumbled across 2 craftsman boxes, buried in a mucky corner in the pole barn. I was told they were my grandpa's. .... now I remember where I saw them. I know nothing of vintage craftsman boxes, but perhaps yall can help identify them. I intend to rescue them this next week. Sorry I only got the one pic. You and the GJ family inspired me to restore those boxes. Just wanted to share with you, keep up the great work!!!
Long story short, went to my parents house yesterday and stumbled across 2 craftsman boxes, buried in a mucky corner in the pole barn. I was told they were my grandpa's. .... now I remember where I saw them. I know nothing of vintage craftsman boxes, but perhaps yall can help identify them. I intend to rescue them this next week. Sorry I only got the one pic. You and the GJ family inspired me to restore those boxes. Just wanted to share with you, keep up the great work!!!
Attachments
Last edited:


