To avoid these ads, REGISTER NOW!

Dad's Retirement Shop

arkyengineer

Active member
Joined
Jul 7, 2014
Messages
32
Location
Northwest Arkansas
Hello everyone,

I have been lurking here for a little while now and decided that since my shop is still in the engineering and financing stage (I haven't figured out where to site it and don't have the money) I figured I would share the shop my Dad and I built for him to retire with.

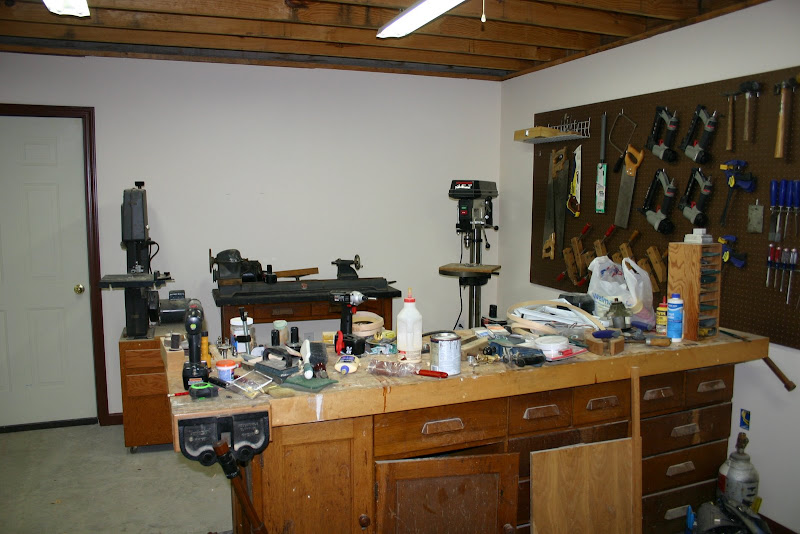
A little about me and my Dad. I am a professional civil engineer (primarily water and wastewater infrastructure) and my Dad is a professor of Chemistry at the local university. We mess around in a little bit of everything hobby wise including some metalworking, woodworking, auto repair (as needed not for fun), home remodeling, old tractor restoration, hit and miss engines, old machine tool restoration, etc. Pretty much anything either one of us finds interesting we do. Not generally very quickly but since it is not a job there is no rush.

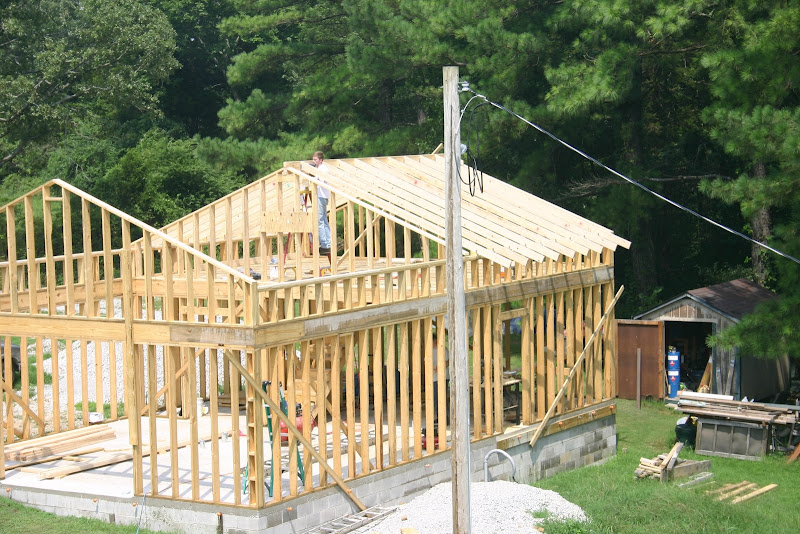
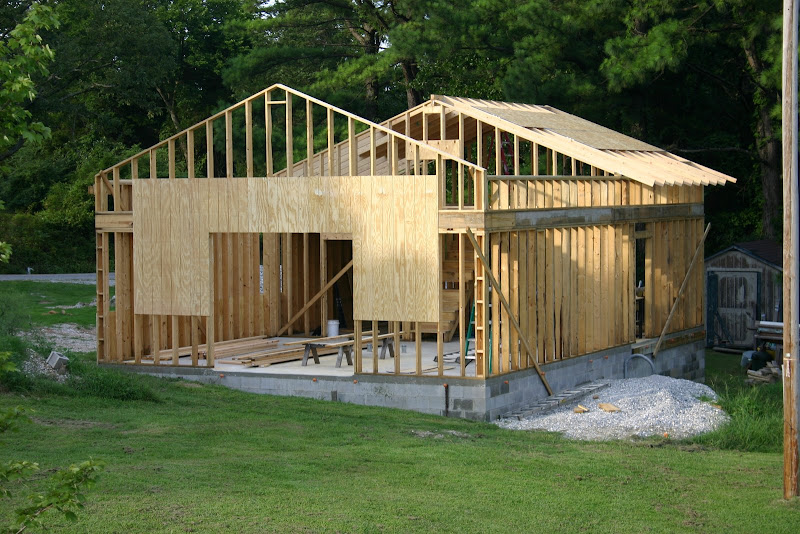
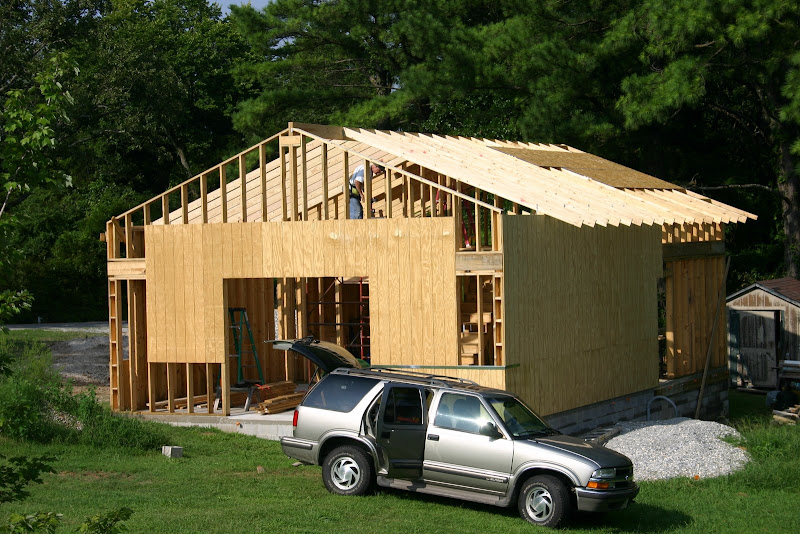
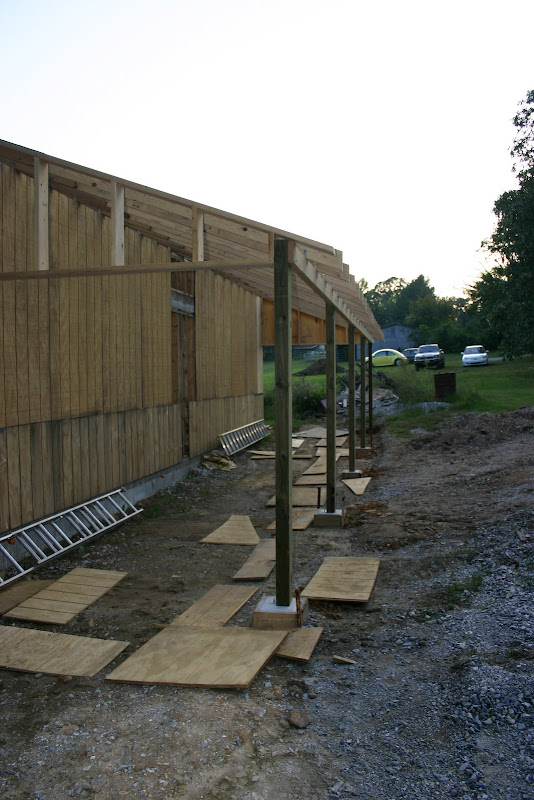
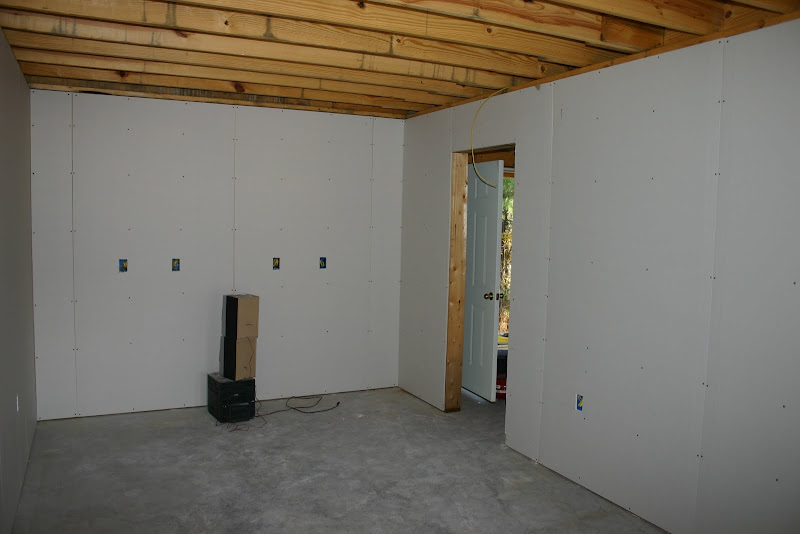
The shop was constructed starting in Spring of 2007 and took about two years to finish. Dad and I did all of the construction except for footing concrete placement and the slab placement. With those we built the forms and had a crew come in to do the concrete work.

I will be posting the series of construction photos in sequence but since the building is finished if you what to see a more detailed picture it will depend on what has already been taken or if it is still accessible. Please feel free to ask any questions you might have and I will try and answer them.

Josh

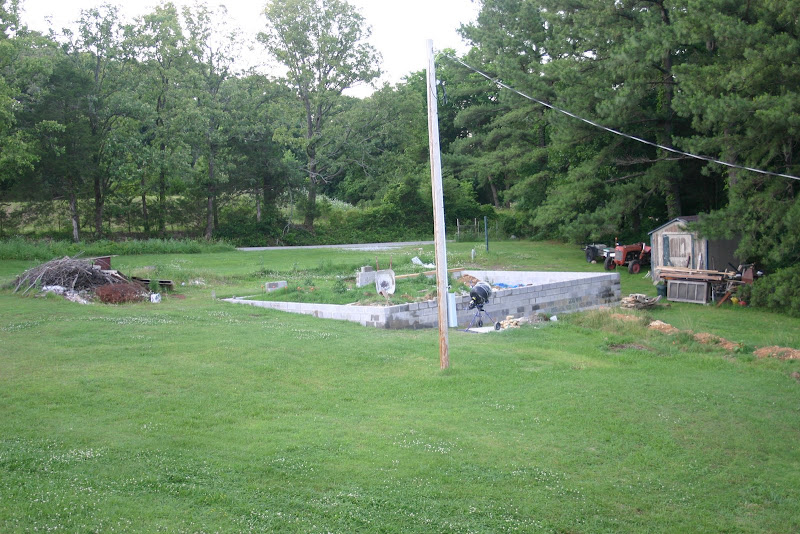
The site prior to construction.

IMG_0777.JPG


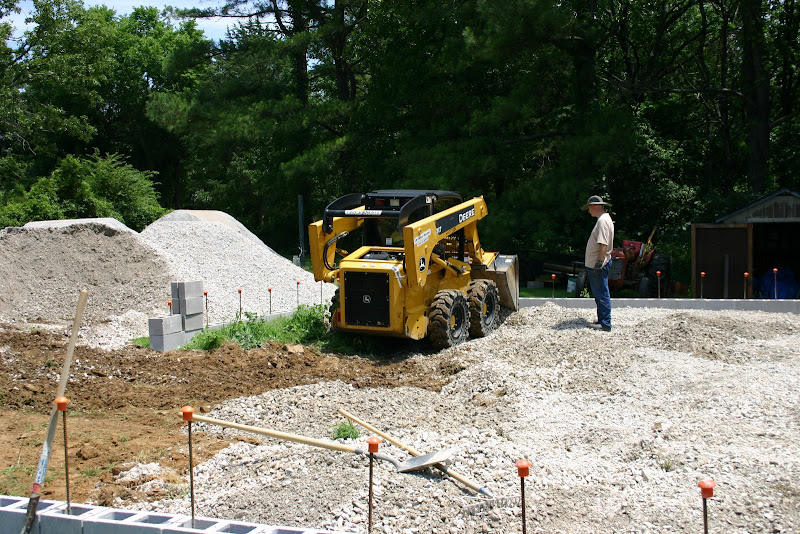
Digging the footing.

IMG_0780.JPG


IMG_0782.JPG


IMG_0801.JPG


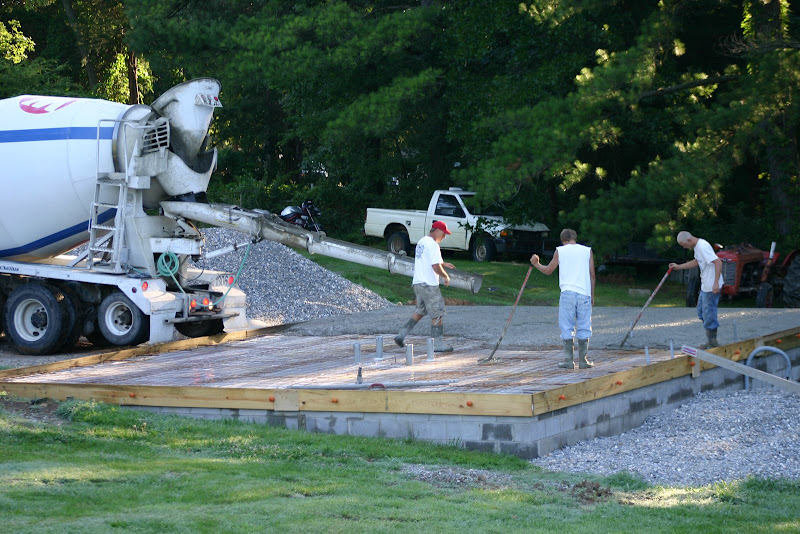
The formwork in for the footing concrete placement.

Copy%2520%25282%2529%2520of%2520IMG_0838.JPG
 
To avoid these ads, REGISTER NOW!
OP
A

arkyengineer

Active member
Joined
Jul 7, 2014
Messages
32
Location
Northwest Arkansas
The house is constructed of D section logs which are solid wood about 7 inches thick and shaped like a D if you look at them in profile. My folks tell me that it is surprisingly energy efficient but I can tell you it is a pain in the **** if you want to add any utilities in an exterior wall.

The site is about 2 acres.

Josh
 
OP
A

arkyengineer

Active member
Joined
Jul 7, 2014
Messages
32
Location
Northwest Arkansas
Here are some pictures of the formwork going in. Note the steps in the footing to accommodate the site grade.

IMG_0831.JPG


IMG_0832.JPG


IMG_0833.JPG


The bottom cord of the footing is reinforced with 2 #4 bars. They are sitting on the ground in the pictures but before concrete was placed rebar chairs were used to provide a concrete cover of 3 inches.

IMG_0834.JPG


IMG_0836.JPG


Getting ready to place the concrete. We had a horizontal concrete pumper come in to make sure we could get concrete to all of the needed locations.

IMG_0839.JPG


IMG_0840.JPG


Concrete in the forms. This would later be screeded flat.

IMG_0842.JPG


IMG_0843.JPG


Josh
 
OP
A

arkyengineer

Active member
Joined
Jul 7, 2014
Messages
32
Location
Northwest Arkansas
Foundation Walls

Due to the topography of the site we used a filled block wall foundation instead of a simple slab on grade.

IMG_0949.JPG


IMG_0958.JPG


We drilled and epoxied a #4 bar in every other block cell and then filled the cells with concrete. Each filled cell actually has two pieces of bar in it. One is epoxied into the footing and is only long enough to obtain the required development length and then a second was used when all of the blocks were in place to provide enough steel to tie into the slab reinforcement. The made setting the blocks easier and still provided the required strength.

IMG_0959.JPG


One the taller sections of wall we filled every cell with concrete due to a concern that the slab concrete would not fill the entire depth.

IMG_0957.JPG


IMG_0970.JPG


Once the concrete in the cells had set we were ready to backfill inside of the walls.

IMG_0977.JPG


Josh
 

KULIWOBBY

Well-known member
Joined
Feb 28, 2011
Messages
227
Location
NE Iowa
Are you going to remove the sod and weeds and roots from inside the foundation before backfilling? Why? It settles and creates voids under the concrete floor.
 

Kevin54

MEMBER EMERITUS
Joined
Jan 12, 2005
Messages
29,341
Location
Urbana, Ohio
Nice so far, and looking forward to some more pics. Please tell me that you scraped the topsoil off before filling with gravel.

BTW....Welcome to Garage Journal. You'll find so much stuff on here that it will make your head spin.

So let's get the rest of the pics up of dad's garage!!!!
 
OP
A

arkyengineer

Active member
Joined
Jul 7, 2014
Messages
32
Location
Northwest Arkansas
There was very, very little of what is technically classified as topsoil on this site. In Arkansas during the spring green stuff will grow just about anywhere. The material inside of the footing that was covered in grass is a sandy clay with a little weathered shall mixed in depending on the elevation. It is a ok, compactable, low expansion (low PI) material that should be fine as a fill. Before we backfilled we removed most of the organics and spread the remaining material. Then we let it set for a couple of weeks in the rain.

Following that we backfilled with Class 7 base placed and compacted in 8" to 12" lifts.

IMG_0990.JPG


IMG_0991.JPG


As a surface to the Class 7 we placed and compacted 4" of screenings to act as a void filler and leveling surface.

IMG_0993.JPG


Then we let the fill settle for 2 months.

On top of that we installed a plastic vapor barrier and a welded wire mesh.

IMG_1011.JPG


IMG_1002.JPG


IMG_1005.JPG


Please note the bent wall bars integrated into the floor slab reinforcement. Also we used eye bolts looped over the bars and bolted through the perimeter form boards to eliminate the need for bracing. It also allowed us a location to bolt the deck onto the slab without needing wedge anchors.

Here you can see the subouts for the infloor lighting and the electrical service for the table saw.

IMG_1004.JPG


After that we were ready to place the concrete. Here is Dad waiting on the concrete to show up.

IMG_1016.JPG


IMG_1019.JPG


IMG_1020.JPG


The concrete work was one the only place we paid for help. We were concerned that we would get 18 CY on the ground and not be able to finish it and get it smooth. The few hundred dollars the crew charged was well worth the reduced risk.

The finished 25'x40' slab.

IMG_1022.JPG


The slab has been in place for almost 6 years now with only a few hairline cracks so I think it turned out pretty well. We will see how it handles the Cincinnati Horizontal Mill Dad just acquired.

Josh
 

1jjpop

Well-known member
Joined
Nov 24, 2009
Messages
481
Location
Central Iowa
Looks like wire is on the ground ,I read once that 90% of wire doesn't get pulled up or set on chairs .Hard to do concrete work & not stand on it.
 
OP
A

arkyengineer

Active member
Joined
Jul 7, 2014
Messages
32
Location
Northwest Arkansas
Looks like wire is on the ground ,I read once that 90% of wire doesn't get pulled up or set on chairs .Hard to do concrete work & not stand on it.

The did go around after they had the initial load on concrete on and with a hook pull the wire up. Even so I suspect a lot of it is still in the bottom 1/2" of concrete.
 
OP
A

arkyengineer

Active member
Joined
Jul 7, 2014
Messages
32
Location
Northwest Arkansas
Wood Framing

After the concrete set we started on the walls. The walls are framed with 2x6s.

Here you can see us raising the upper section of the endwall for the vaulted portion of the shop.

IMG_1030.JPG


IMG_1034.JPG


IMG_1045.JPG


Here is the shop with most of the walls complete.

IMG_1049.JPG


IMG_1052.JPG


Starting to install rafters.

IMG_1054.JPG


IMG_1058.JPG


Decking going on.

IMG_1062.JPG


IMG_1070.JPG


Stairs to the attic storage space.

IMG_1072.JPG


IMG_1073.JPG


Looking toward the main door.

IMG_1074.JPG


The personnel door.

IMG_1076.JPG


Siding

IMG_1068.JPG


IMG_1071.JPG


IMG_1066.JPG


More siding and the ridge beam for the vaulted room.

IMG_1077.JPG


More rafters.

IMG_1084.JPG


IMG_1088.JPG


IMG_1089.JPG


IMG_1090.JPG


IMG_1091.JPG
 
OP
A

arkyengineer

Active member
Joined
Jul 7, 2014
Messages
32
Location
Northwest Arkansas
Shop Porch

There is a porch on that side of the building it was the next item constructed.

IMG_1111.JPG


Footings for the porch/overhand posts.

IMG_1112.JPG


IMG_1114.JPG


IMG_1115.JPG


IMG_1116.JPG


Here you can see the framing for the porch and the start of framing for the overhand roof.

IMG_1118.JPG


IMG_1119.JPG


IMG_1121.JPG


Josh
 
OP
A

arkyengineer

Active member
Joined
Jul 7, 2014
Messages
32
Location
Northwest Arkansas
Roofing

Since at this point it was in the middle of summer and very hot in Arkansas Dad decided we were ready to roof.

Here is the framing for the roof overhangs.

IMG_1124.JPG


Here are the eves.

IMG_1176.JPG


The back porch.

IMG_1178.JPG


The other overhang.

IMG_1179.JPG


Installing decking.

IMG_1185.JPG


IMG_1188.JPG


IMG_1191.JPG


IMG_1193.JPG


And metal roofing.

IMG_1194.JPG


IMG_1198.JPG


Snapping chaulk lines so the roof screws are in a straight line.

IMG_1202.JPG


IMG_1204.JPG


The back porch roof.

IMG_1228.JPG


Josh
 
OP
A

arkyengineer

Active member
Joined
Jul 7, 2014
Messages
32
Location
Northwest Arkansas
Interior Work Starts

Now we are getting to the dusty part. The shell was now complete and we could start installing insulation and drywall.

Here we are getting ready to install the first piece of drywall. You can see the batt insulation is in place in the smaller rooms.

IMG_1269.JPG


The electrical service for the shop. we installed a 400A meter base with 2 200A breakers. One breaker serves the house and one breaker serves the shop. The shop primarily runs on 120V 20A breakers but has a couple of bigger ones for a few tools (220V 100A for the welder, 220V 30A for the compressor).

IMG_1270.JPG


Some more pictures of the inside prior to drywall.

IMG_1271.JPG


The inside of the shop is divided into three "rooms" one for metal working machinery, one for the wood working machinery, and one as an assembly/welding/disassembly bay.

IMG_1272.JPG


The first piece of drywall up.

IMG_1273.JPG


One wall mostly done.

IMG_1274.JPG


One room done.

IMG_1275.JPG


IMG_1276.JPG


IMG_1277.JPG


IMG_1278.JPG


Room number 2 half done.

IMG_1279.JPG


IMG_1280.JPG


Room 3 mostly done.

DSCN0100.JPG


Mudding the ceiling.

DSCN0111.JPG


Josh
 
To avoid these ads, REGISTER NOW!
OP
A

arkyengineer

Active member
Joined
Jul 7, 2014
Messages
32
Location
Northwest Arkansas
Interior Finishing

We apparently slacked off a little taking pictures during the project closeout but here are some of the finished product. All we missed was electrical closeout, paint, and trim (all of which make boring photos) so I hope nobody is too upset.

Here is Dad working on a pegboard in the main shop bay. You can see into the wood shop area and the welder and hood in the main bay.

IMG_1350.JPG


Looking into the metal shop.

IMG_1351.JPG


Inside the metal shop.

IMG_1352.JPG


Metal shop looking the other way.

IMG_1353.JPG


Looking out from the wood area.

IMG_1354.JPG


The other side of the main bay.

IMG_1355.JPG


IMG_1360.JPG


The wood area.

IMG_1356.JPG


Up into the attic storage space.

IMG_1357.JPG


More of the main bay/wood area.

IMG_1358.JPG


The main door.

IMG_1359.JPG


Our garbage find wood lathe.

IMG_1361.JPG


The wood shop area again.

IMG_1362.JPG


I will try and take some more pictures of the shop now that it has had a little time to evolve. These were taking within a couple months of finishing the project.

Let me know if there is anything anyone wants a better picture of or if anyone has any questions.

Josh
 
OP
A

arkyengineer

Active member
Joined
Jul 7, 2014
Messages
32
Location
Northwest Arkansas
How many tubs do you have and what's in them all

The bins and tubs on the far wall are all nuts and bolts. As for a number I have no idea.

Great job, there's a ton of great project ahead. Wish my kids could be working along side me at your place. This would be my dream. Trade ya.

You will just have to build your own. Dad and I used to work out of half of a 2 car garage and when I graduated college my parents decided it was time to move and build a shop. So we did. It was a great project and a lot of labor but I really enjoyed it.

Very Nice. What is your dad doing with the shop? Besides handing out in that awesome space.

Right now we are working on a 1940 Farmall A, a 24" Cincinnati Drill Press (see the thread here), a house remodel for my Grandmother (complete gut), and preping to recieve a Cincinnati No. 2 Grinder, a Cincinnati Horizontal Mill, and a 13" Monarch lathe that all need restoration.
 

EricP

Well-known member
Joined
Jan 30, 2014
Messages
136
Location
Alabama
mcleodross

Did you sheetrock around the stairs or did you take them down, sheetrock, and then put them back up?
 
OP
A

arkyengineer

Active member
Joined
Jul 7, 2014
Messages
32
Location
Northwest Arkansas
Any chance could u take closer pics of the tubs and contents

Sure.

mcleodross

Did you sheetrock around the stairs or did you take them down, sheetrock, and then put them back up?

We installed the sheetrock around the stairs. The fit is ok but the intention at the time was to cover the small gap with a trim board. Has not happended yet and I doubt it will.

Josh
 

EricP

Well-known member
Joined
Jan 30, 2014
Messages
136
Location
Alabama
That makes sense. I'm doing a similar set of stairs in my shop and was curious if there was an easier way to deal with the trimwork around them. Thanks.
 
OP
A

arkyengineer

Active member
Joined
Jul 7, 2014
Messages
32
Location
Northwest Arkansas
Here are some pictures of the current state of the interior. I was going to take a few more but the shop is kind of a mess getting ready for some new toys that should be arriving today. Sorry for the poor quality of some of the pictures they were taken with a cell phone.

Here is the welding table and cart.

20140720_200806.jpg


Here is the wood area with the new Delta 20" bandsaw in the back.

20140720_200831.jpg


Here is the miter saw. It is not visible in this picture but one of the stair riser fill boards is missing so you can feed stock through the stairs.

20140720_200846.jpg


20140720_200854.jpg


Here is one of our more creative ideas. Since the miter saw dictates the width of the bench we decided to make use of some of the extra depth by storing the pipe clamps there.

20140720_200902.jpg


Here is one of the two racks for metal shorts.

20140720_200937.jpg


Josh
 

DEnd

Well-known member
Joined
Oct 25, 2008
Messages
218
I was wondering why you were missing a riser. That's a pretty good Idea. I love your cabinet base for the miter saw as well.
 

turbowoodworker

Well-known member
Joined
Mar 18, 2012
Messages
3,526
Location
Apex NC
Pretty cool! Is that a surplus chem lab fume hood or are you growing anthrax and plague in a level III biohazard hood for the armegeddon?
Maybe making your own explosives?
 
OP
A

arkyengineer

Active member
Joined
Jul 7, 2014
Messages
32
Location
Northwest Arkansas
I was wondering why you were missing a riser. That's a pretty good Idea. I love your cabinet base for the miter saw as well.

Thanks. The space under the stairs can kind of be a dead zone but we figured that putting the miter saw there would allow us to use the space and not loose another whole wall for that tool.

Lucky Dad! I hope he enjoys it in good health.

Yes he is and I hope so too.

Pretty cool! Is that a surplus chem lab fume hood or are you growing anthrax and plague in a level III biohazard hood for the armegeddon?
Maybe making your own explosives?

We purchased to hood as surplus from the university. It is a chem lab fume hood we planned on using as a place to strip and clean parts as well as paint. They were remodeling the building it was in and it was available as scrap. We have never actually gotten it hooked up since the fan system is building based and we haven't figured out a workable alternative that produces enough airflow. Right now it has been temporarily moved into storage to make way for a new piece of equipment.
 
To avoid these ads, REGISTER NOW!
Top Bottom