To avoid these ads, REGISTER NOW!

Above 1200 Sq/FT DFB's Garage

Wokspaces above 1200 squarefeet.
OP
D

D.F.B

Well-known member
Joined
Aug 2, 2023
Messages
1,555
Location
Australia
Did Faych make a full recovery? What breed? We need some better pics of your good-looking pup.....
Thankfully, Faych made a full recovery. He's had a few rough runs over the years, but I'm thankful of every moment. I don't mean this to offend, but "people" often do my head in, whereas he's been my loyal best friend all along. He's approaching 12 years old, so he's going deaf and, but no less playful and daggy..................true to form for an English Cocker Spaniel.

fayc123.jpg

1.jpg

may33.jpg

may175.jpg

IMG_5675.jpg

IMG_6890.jpg

IMG_8211.jpg

IMG_85742.jpg

IMG_8723_(2).jpg

hssut1.jpg

IMG_9128.jpg

IMG_9437.jpg

IMG_1892.jpg

IMG_0068.jpg

IMG_0201.jpg

IMG_6384.jpg

IMG_5371.jpg
 
To avoid these ads, REGISTER NOW!
OP
D

D.F.B

Well-known member
Joined
Aug 2, 2023
Messages
1,555
Location
Australia
I've been helping a family friend buy a Mustang over the last few days. For whatever reason, he decided that he just had to have one, and who can blame him! This guy has had a huge variety of cars, including a Mercedes Benz SL55 AMG with that glorious supercharged V8. For him, getting a Mustang was about having some fun.

Having decided that he liked the S550 better, and that he wanted the later FN model, from there I guess he just needed some first-hand ownership advise. My main advice was around not expecting perfection, which he understood after owning a previous generation Jeep Grand Cherokee. Being a Ford, the mechanicals are robust, with the basic engine and transmission architecture being used in the F-series, they kinda have to be. I think I was also able asses the examples he was looking at in terms what was standard and what was fitted aftermarket. But most of all, it was about confirming that nothing else on the market at those prices can compete with the fun factor a Mustang brings to the table.

After looking at a late build GT Hardtop in Velocity Blue, he ultimately ended up buying this 2018 build example in Race Red. I mean, the man has exceptional taste......................

IMG-9761.jpg

IMG-9762.jpg

The car has the factory "over-the-top" fade stripes, aftermarket gloss black spoiler and window louvers, additional pony badges fitted to the fenders and aftermarket side scoops. The badges and window louvers will most likely go. It's fitted with the standard seats and 10-speed auto, no Magneride either. Apparently, it's been ceramic coated as well.

The car is perfect for him and I hope it brings plenty of joy.
 
OP
D

D.F.B

Well-known member
Joined
Aug 2, 2023
Messages
1,555
Location
Australia
Gearing Up!

Previous to my S550, the only manual cars I had driven were basic work vehicles, think delivery vans and single-cab pickups trucks. In 2010, I took delivery of manual PK Ranger, which became my daily driver. That car was replaced in 2016 with a new PX MK II Ranger. In both cases, Ford did not even offer an automatic transmission, so I really didn’t have a choice. I would complain about the diesel-manual combo being a drag in daily driving, but both of those cars taught me how to heal-toe rev match and hone my shifting skills.

DSC-0139.jpg

IMG-1118.jpg

IMG-2501.jpg

For any other car I have bought, I’d confidently say that a manual was never part of the equation, to the point where it wasn’t even considered for more than a second. Why? Because in most cases, the auto was faster or the better option, to the point where I truly doubted the whole point of a manual in modern motoring. Once upon a time, you bought the manual because it had more gears, was faster, more efficient and overall, the better driving experience. However, once automatics started to match and then exceed a manual in terms of gear count, the balance shifted. You know, a lot is said about “save the manual” or “you’re not a real car enthusiast if you don’t like or buy a manual”. Said people will almost always have an automatic in their daily driver, probably the “fun” car too. So, what is the hype about? If they are so good, why don’t car companies sell more of them…………….and that includes sports cars where both options are offered.

So, after all that……………………I’ve said this before, but it wasn’t until I bought a Mustang did I come to understand why so many people get hooked on the whole V8 manual thing. In complete contrast to what I said above, I didn’t even consider the auto when placing my order for the S550. Why? Because if I was jumping in the deep end, I wanted the full Mustang experience.

ax12.jpg

MUSTANG-INTERIOR-SHOWN-2.jpg

Very early on, I felt like I had made a mistake going for the Getrag MT-82 6-speed manual. The strange clutch action made it difficult to drive off the line, it was a case of stalling it or stuttering away from a set of lights. Not cool. :rolleyes: I was dialing up revs like I would normally, when in fact it was better to allow the car to it for you, as in, ease off the clutch and the computer responds with the correct amount of throttle. Obviously that changes when doing a hard launch, but it took me a while to get used to that arrangement. Once I did though, I began to really love that relationship between hands and feet.

IMG-5041.jpg

Now, the elephant in the room……………..the Chinese made Getrag MT-82 and its reputation for poor reliability. The thing is, I think what ruins this transmissions reputation is a lack of build consistency rather than quality. Some of them are brilliant, some of them are grindy, some of them make a lot of noise, some of them break. Mine? Well, it was extremely noisy at low speed from brand new and had the very occasional gritty shift into third. The later 2018+ MT-82 D4 was stronger than before, but was way overgeared for the high revving Coyote, which sifted the balance toward the 10-speed auto. I have a personal belief that those who manage to blow up MT-82’s are shifting them in the most brutal of ways, then complaining when it breaks. There are plenty of videos on YouTube showing some tuff young lad powershifting his Mustang (or Camaro, Corvette……….) to prove this theory.

MUSTANG-SHOWN-WITH-6-SPEED-MANUAL.jpg

It wasn’t until I got to drive a few 6-speed auto Mustang GT’s did I fully appreciate the manual experience. The Ford-GM ZF 6-speed copy was ok, but nowhere near as good as the real ZF 6-speed, they just lacked the sharpness of the manual and felt like an old school slush box in comparison. With the MT-82 manual, I liked it more than the internet had me believing. The direct shift linkage made this version more precise compared to the MT-82 fitted to my Ranger and its horrible remote shifter linkage system. I especially loved the ultra-short gearing, which made the car feel more powerful than it was. I also liked the shift weight and crisp feel through the just-right shifter. Many owners swapped out the shifter knob, but I thought Ford got it right. I would have liked a better pedal placement to make heal-toe easier, many fitted aftermarket kids to remedy this.

aq1.jpg

So why, you may ask, did I go for the 10-speed automatic if I loved the manual V8 Mustang experience? Once again, I wanted to try something new. If Ford had put the Tremec in the GT as well as the Darkhorse, maybe that would have made the decision harder to make. I think its pretty obvious that the Tremec is what Ford should be using instead of the MT-82, for both strength and the shorter gearing. So, choosing the 10-speed was for two reasons, the aforementioned “something new” and for the shorter gearing and how it better suits the high-revving Coyote V8.

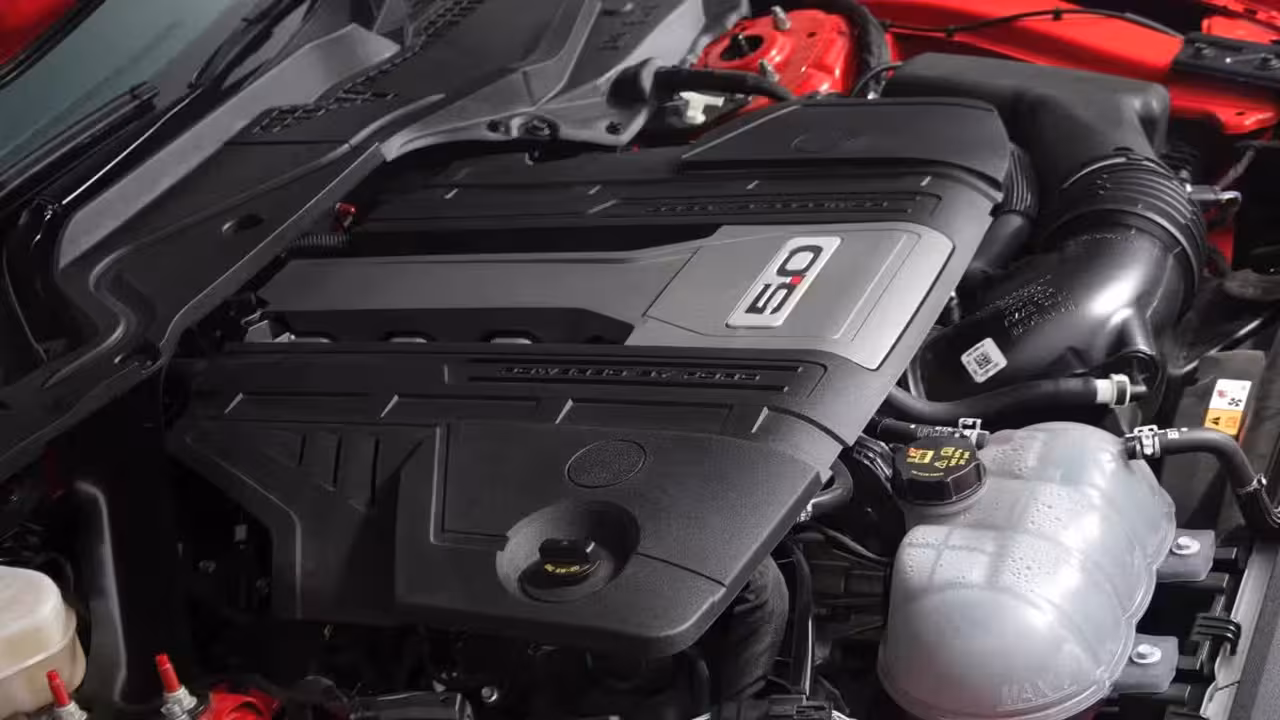
The 10-speed automatic was part of a co-development between Ford and General Motors, designed for use in rear-wheel-drive applications. Ford actually did the design work here, with GM taking lead on the 9-speed transverse gearbox. Both companies manufacture their own versions and it’s widely fitted to a range of models, on the Ford side that includes the F-150, Ranger, Bronco, Explorer/Aviator, Expedition, Mustang and even the RWD Transit. While there are five different torque ratings for this gearbox, the Mustang uses the 10R80 version, which started production at Ford's Sharonville Transmission plant in 2018. The 10R80 is a conventional torque converter automatic, with the overall design layout based on the ZF 8-speed. It features a unique triple-clutch arrangement, all the while being the same physical size as the previous 6-speed auto.

10r80.jpg

10r803.jpg

I’ve driven plenty of 10-speed automatic Ford’s, both in Ranger and Mustang. Obviously, the diesel 10-speed experience is a world apart from a V8 Mustang, so comparisons and comments regarding those are not relevant here. I have driven S550’s with the 10-speed, and found them excellent when the hammer went down, but felt they were lost at low speed/normal driving conditions. Too many gears, too many choices. So, ordering a new S650 10-speed was a moment of blind faith.

IMG_2159.jpg

u4.jpg

In the intervening years, Ford have worked hard on improving the calibration for the 10-speed auto, both in Ranger and Mustang. The most obvious change I have noticed is they do far less gear-skipping, so the upshifts are smoother and more natural feeling. In early examples, I found that the gear skip left the engine labouring after an upshift.

In this S650, so far I have been really liking this transmission. I think it goes without saying, I really dislike CVT autos, but then I also don’t really love DCT’s either. For me personally, a torque converter is the perfect compromise, especially since the advent of the ZF 6 and 8-speeds. The slushiness of a traditional torque converter is mostly gone, so you get a much more responsive feel and none of the abruptness that can come from a DCT. In the Mustang, the shift speeds both up and down are great, the rev-match down shifts are epic! The gearbox shift response and calibration can be altered via the drive mode, and manual shifts are available at any time via the paddles, reverting back to auto after afterwards. Manual control can also be locked by moving the shifter from D to M.

I will say though, manual inputs by the paddles are quite delayed. I went looking to see if the drive mode selection made a difference here, however there was no mention of improved response, just that the actual gear shifts were quicker in Sport/Drag/Track modes, not necessarily faster manual response. Those modes do provide more sensitivity to throttle inputs when left in drive, likewise holding gears for longer before upshifting.

In normal driving, the transmission is very smooth and natural feeling. Having said that, you do hear the car shifting a lot. In heavier acceleration, up to a point at the moment as the car is still too new for aggressive driving, the shifts are firm and quick in engagement. As mentioned, those rev matched down shifts are a delight, especially the 3rd to 2nd. I also love having paddle shifters on a performance car for the first time. At some point, I may look at extenders for the paddles, they are just a tad small, especially when cornering.

IMG-2714.jpg

IMG-2715.jpg

If I was to critique, it would be minor. The above-mentioned slow response to manual inputs being the main one. The second, I would still love to have manual function with the gear lever, something Ford themselves did so right with the BA through FGX Falcons, push forward to downshift, pull back to upshift. And lastly, with so many gears to account for, it can be hard to know what gear is being used unless in manual mode. On the Ranger, you can actually initiate a gear count in auto mode, which I find quite useful.

IMG-2728.jpg

Overall, I’m happy I went automatic this time. I did think I would get bored without the manual transmission, but that hasn’t really played out so far. An automatic just suits my driving style more, and with a competent auto, it means I can set it to KILL and have some fun, then select D and enjoy the comfort at the end.
 

Dixie_Flatline

Well-known member
Joined
Oct 30, 2024
Messages
387
Location
Tennessee
Is the gear indicator not available on the new Mustangs? On the F-series trucks and my Expedition its still there regardless of being in automatic or manual modes. Obviously I am not doing much spirited driving in either one, but its nice to see what gear its in only so I can complain when its not shifting of its own accord on a long hill. On a daily driver I love having an automatic, especially once I am stuck in traffic! My knees are shot, so holding a clutch for long periods can start to become painful.

That being said, I absolutely loathe automatics in commercial/class 8 trucks. The best way to explain their performance is that its like having another person operating the clutch for you. Backing up to a dock and need to ease the clutch out for just a few more inches of travel? Nope. Its a lot of nothing...nothing...nothing...and now we are banging into the dock. If they all behaved the same it would simply be a matter of learning the timing and throttle inputs, but every single one I have driven has worked differently. In a truck just give me a manual and be done with it!

Otis says hello!20241022_154846.jpg
 
OP
D

D.F.B

Well-known member
Joined
Aug 2, 2023
Messages
1,555
Location
Australia
Well, the native pressure pump did its job! Was in and out of hospital in 5 hours, and despite the usual runaround with paperwork, I managed to hit theater at the exact time I was booked for, can't ask for more than that. Pump and tube are gone, wound finally stitched up. It felt like I took ages to go under this time, which I suspect I got dosed up more than last time because apparently it took me a while to wake up, and I still feel groggy.

Many thanks to those who reached out. I have had sick pay substituted instead of burning my leave. I needed that push because I was just going to ignore it and just focus on getting better.

I'm still a little movement restricted, but.........................LETS GET THIS SHOW BACK ON THE ROAD!
 
OP
D

D.F.B

Well-known member
Joined
Aug 2, 2023
Messages
1,555
Location
Australia
Is the gear indicator not available on the new Mustangs? On the F-series trucks and my Expedition its still there regardless of being in automatic or manual modes. Obviously I am not doing much spirited driving in either one, but its nice to see what gear its in only so I can complain when its not shifting of its own accord on a long hill. On a daily driver I love having an automatic, especially once I am stuck in traffic! My knees are shot, so holding a clutch for long periods can start to become painful.

That being said, I absolutely loathe automatics in commercial/class 8 trucks. The best way to explain their performance is that its like having another person operating the clutch for you. Backing up to a dock and need to ease the clutch out for just a few more inches of travel? Nope. Its a lot of nothing...nothing...nothing...and now we are banging into the dock. If they all behaved the same it would simply be a matter of learning the timing and throttle inputs, but every single one I have driven has worked differently. In a truck just give me a manual and be done with it!

Otis says hello!20241022_154846.jpg

The only gear indication is gear level position (PRNDM), or if manual mode is selected, the gear is shown on the screen. The other trick is to pull a upshift paddle at any moment, it will display the current or next available gear. As you say, I like to know which gear is in play, which is hard to count because there are so many gears in play with the 10-speed. In old 4 or 6-speed auto's, I could count/predict which gear was selected. Not here. Keep in mind, only the mechanically minded or car extreme car enthusiast is going to notice this sort of thing, but I think Mustang sort of pre-qualifies for a feature like this.

svt.jpg

On my father's 2020 PX MK III Ranger Wildtrak, in automatic mode you can press one of the + or - shift buttons to initiate a current gear display on the small gauge cluster screen. It's actually a really good learning tool for figuring out how the gearbox shifts, this is how I learnt about the skip-shifting. In light to moderate throttle inputs, it will start in 1st, skip to 3rd, then 5th, then 7th and so on. With heavy throttle inputs or if put in Sport mode, it will shift sequentially. Important to note you can initiate the gear indicator in Sport mode as it will activate manual mode.

jan21198.jpg

jan21197.jpg

As for those shift buttons, they are ridiculous. On the previous PX MK I model (or vehicles with the 6-speed auto), those had a proper push-pull gear selector for manual inputs. Because the Ranger was developed in Australia by the same talented Aussies who worked on the Falcon/Territory, they also had the correct push forward for downshifts, pull back for upshifts.

IMG-2728.jpg

As for "automated manuals" used in commercial/class 8 trucks, I don't envy your position there.

Also, thanks for everyone introducing me to your dogs. They are such loyal, non-judgmental creatures. When I got home from hospital today, mine was waiting for me. They just "know" when to hang around and comfort or cheer you up.
 
OP
D

D.F.B

Well-known member
Joined
Aug 2, 2023
Messages
1,555
Location
Australia
At the moment, I'm super keen to get this installed.................................

IMG-2707.jpg

IMG-2712.jpg

Compared to the S550, the added hardware on the Gen-4 Coyote means the install now includes two brackets that need to be installed, which stand the catch can off the rocker covers.

(Image courtesy of Mustang7g forum)

PXL-20241109-035001899.jpg
 

tweidman

Well-known member
Joined
Dec 1, 2009
Messages
502
Location
Ackermanville, Pa.
I'm glad to hear that he made a full recovery. Thanks for the dog pics. As you might be able to tell from my avatar, I'm a fan of the spaniels, and setters too. We currently have two Irish red and white setters. But I still miss my English Springer Spaniel (Asher), he was such a good boy.
 
OP
D

D.F.B

Well-known member
Joined
Aug 2, 2023
Messages
1,555
Location
Australia
Ford Performance Oil / Air Separator Kit Installation

One of the things I love about Mustang ownership is the huge aftermarket support for the car, allowing customers to tailor the car to their heart’s desire. Now, I normally don’t do aftermarket, so this is where Ford Performance comes into the equation. Ford recognizes the desire for high quality aftermarket parts, and so via Ford Performance, owners can buy and fit OEM quality parts without voiding warranty or looking tacky. To me, this means my car remains OEM looking, and without the janky fitment often found on aftermarket parts.

Like my previous Mustang, I’ve decided to fit a Ford Performance Oil/Air separator, or catch can. Now, there are countless aftermarket options in this space, some actually offer easier emptying via a screw-on cannister. But some of those also require butchering of the OEM hoses. So, I think you can see why I stuck with the OEM+ option here, it just fits as it should.

s650oas.jpg

For S650, Ford Performance are selling this kit with a pair of catch cans, one for each cylinder bank. On earlier S550’s, only the left-hand bank was covered, although FP did offer a dual kit for Mach1 and Bullitt due to the removal of that hideous engine cover. Because of the dual cans and double the hose count, you are looking at twice the price. I was actually a little shocked by the price of this kit offered by local vendors, but once I had added shipping and currency conversion, then factored import duty, its no cheaper ordering from the USA directly.

https://www.themancavegarage.com.au...rue&sa=false&sbp=false&q=false&category_id=57
https://www.herrodperformance.com.au/2024-mustang-5-0l-air-oil-separator-kit-l-r/

IMG_2707.jpg

IMG_2712.jpg

Installation is easy, if someone with low mechanical confidence like me can do it, so can you. Each kit comes with a QR code that links you to the Ford Performance website, where you can then download the installation instructions. Word of warning for RHD customers, the instructions are orientated for LHD/US market cars, so take that into consideration when directed to work on the "passenger" side or "drivers" side. You will also notice differences in the pictures as the RHD cars have different placement of the battery and wiring harnesses. What you see in the following install should provide a better guide for RHD applications.

https://performanceparts.ford.com/download/instructionsheets/IS_M-6766-A50D_012524.PDF

Only basic tools are needed. I'd suggest a smaller 1/4-inch socket set, ratchet spanners and a torque wrench if you are super keen..............or super ****.....................I'll let you figure out which is me. ;)

IMG-2790.jpg

On S550, the catch can was attached to the rocker cover using push pins that clicked into two existing holes. On S650, the new throttle body arrangement means the catch cans need to be mounted on the body, which explains the two black painted steel brackets. Those two brackets are your starting point.

For the right-hand (driver) side, the bracket with two mounting points is used. You first need to remove the two 8mm fasteners from the grounding straps.

IMG-2743e.jpg

Using the two stud bolts supplied with the kit, install these in the same locations using a 13mm ratchet spanner. Ford suggest tightening to 12 Nm, but you will only have access to the lower stud for a torque wrench.

IMG-2754.jpg

IMG-2756.jpg

Next, wrangle the bracket onto the studs. I found it needed some slight persuasion to align the two bracket holes, which I suspect was due to the slight difference in RHD layout. Using the supplied 10mm nylock nuts, secure the bracket in place with a ratchet wrench. Ford suggest 10 Nm for these fasteners, but again, only the lower nut is accessible with a torque wrench.

(Apologies for this image, just couldn't get it right)

IMG-2762e.jpg

To fit the left-hand (passenger) side bracket, only one mounting point is used. First, you need to remove the wiring harness clip from the coolant tank stud. You may need to use angled pliers to help release this press-fit clip, it fought me a little.

IMG-2746e.jpg

The bracket is then slid over the stud and secured with the remaining 10mm nylock nut, again 10 Nm is the spec. On RHD cars, you will need to hold the wiring harness away with your finder to get the bracket in place and secure that nut, LHD cars don't have a harness here. You will also notice it orientates a specific way to straddle the coolant tank. I didn't photograph this, but you will see what I mean. I found a deep socket useful here, but a socket extension will work too.

IMG-2782.jpg

With the brackets installed, you can now remove the factory PCV hoses. These are removed by pushing on the release tab and gently lifting off the spigots. Ford Performance recommend removing the engine cover to get access to the connection on the intake manifold. However, the strut tower brace makes this hard and rather than risk damaging it, I simply unclipped and raised the front of the cover enough to get access to the hose.

Right-hand rocker cover spigot -

IMG-2767.jpg

Intake spigot -

IMG-2770e.jpg

OEM right-hand PCV hose -

IMG-2766.jpg

The left-hand side hose is easily accessible and removed.

The following images will show the catch can slid down onto the mounting brackets prior to hose installation. You may find it easier to install the hoses first, then sliding the catch can into place, lining up the hoses as you go.

Each of the four supplied hoses are the same OEM grade as fitted on the production line and are perfectly molded for this application. No janky, ill-fitting hoses here. The hoses aren't interchangeable, but you will quickly understand which hose goes where.

IMG-2774.jpg

IMG-2778.jpg

For the line routing back to the intake manifold, make sure it goes under the existing rubber hose. Click the engine cover engine back in when you are done.

IMG-2780.jpg

IMG-2787.jpg

It's also worth going around and checking the catch can screws as mine required some additional torque to ensure tightness. You will need a T25 Torx bit for this.

From here, you are done!

IMG-2792.jpg

Now, the elephant in the room.............are these catch cans necessary? I guess that depends on how long you intend on keeping the car and how particular you are. These catch cans stop oil vapor being deposited into the intake manifold. Some engines produce more of this oil vapor than others, especially engines that are often run at higher RPM's.............which is precisely the Mustang's MO. So, too me fitting these makes a lot of sense. On my previous car, despite only doing low kms, the engine often got a high RPM workout. The below was after 7-months....................

IMG_2955.jpg

IMG_2960.jpg

IMG_2962.jpg

IMG_2970.jpg

Not terrible, but also not something that needs to be captive in the one-piece intake manifold. If you covered more kms than me, you would likely have a lot more than that.

So, well worth doing if you intend on keeping the car longer term. And the best bit? I got to make use of those fancy tools! 😁
 
OP
D

D.F.B

Well-known member
Joined
Aug 2, 2023
Messages
1,555
Location
Australia
Battery & CTEK Pig Tail Installation

I'm sure many will remember this, but late into my ownership of the S550, I had a little hiccup with the battery. The cause and result were both my own and the dealers doing. Because these batteries are covered and hidden from view, an owner is less inclined to inspect for condition.............out of sight, out of mind. On the dealer's behalf, the car had been serviced a week prior to me discovering this problem. They supposed to inspect battery condition during scheduled services.............they even note it on the invoice and emailed condition report. If both of us had done our jobs, then perhaps the following wouldn't have happened.

IMG_0390.jpg

As I said at the time, batteries have a lifespan, this one being the OEM fit and 8-years old. What pis.ed me off the most was that it wasn't picked up and sorted while I had the car in for service.................despite noting it was in fact inspected. It clearly wasn't! Not only had the battery failed here, even if it still started the car fine, it also ruined the negative terminal and my CTEK pig tail. I cleaned it up best I could, then slathered it with Vaseline until I could have the battery replaced.

IMG_0488.jpg

I sent an expertly worded email with supporting images and highlighting of the service report to the service department. The service tech was scolded for his negligence, and I was profusely apologized to. In the end, they offered to replace the battery free of charge as a goodwill gesture, fitting a new negative terminal and pig tail in the process.

Except, that wasn't the end of it. When I got the car back, I noticed instead of washing the battery tray out, they used compressed air and showered the engine bay in potassium hydroxide. Which then involved a lot of work to remove and neutralize. Then throw in the oil they spilled down onto the exhaust manifolds during the service, they completely ruined my pristine car. That was the final straw with the dealer, I won't be going back unless I need warranty work on the S650.

As you can imagine, I don't want a repeat performance. I've since gone around and applied battery terminal protector to all my cars, as such it was the S650's turn today.

To gain access to the battery, you need to CAREFULLY remove the plastic fasteners that hold the rubber cover in place. These fasteners are fiddly and prone to being dropped into the abbis, ask me how I know this! If you do lose them, these are what you need....................

https://globaltrim.com.au/products/ford-mustang-clip-battery-cover-compartment-hold-down-7mm-dia

IMG_2488.jpg

(S550 shown, but they are virtually the same)

IMG-E2024.jpg

From here, you have direct access to the battery. There are many terminal protectors on the market, I'm using the CRC version, which you spray directly onto the negative terminal. If you end up with overspray, a little mineral spirit on a rag will easily remove it.

IMG_2794.jpg

IMG_2796.jpg

IMG_2802.jpg

While I had it uncovered, I decided now was a good time to fit a pig tail for my CTEK chargers. This is probably redundant now that Ford include a remote positive terminal next to the fuse box, but that would require using the fiddly alligator clips. The pig tail allows charging access to the battery without removal of the cover, negating the need for those alligators and can then be tucked back under the cover when finished.

In the past, I found the terminal nuts were captive, so I had to secure the eyelets with a second nut. CTEK have a version with open eyelets to account for this, but they weren't in stock for me today.

https://www.repco.com.au/globes-bat...eye-terminals-56-260/p/A9337381?kwSearch=ctek
https://www.repco.com.au/globes-bat...e-connector-terminal/p/A5611358?kwSearch=ctek

IMG_2803.jpg

IMG_2810.jpg

IMG_2814.jpg

There are a few different ways to rig up a trickle charger line, some even do it via the fuse box. On all my cars, I just fit them to the terminals and have done so for a decade now.

With the cover back in place, and no lost fasteners, I decided to dress the engine bay plastics with Carpro Reload. I love Reload on trim, it adds richness to the finish without looking greasy or slick. It's also going to last a lot longer and won't attract/retain dust.

IMG_2817.jpg

IMG_2825.jpg

IMG_2826.jpg

Now I just need to track down a badge for the strut tower brace. Ford were fitting them to all Mustang GT's, without one it looks very unfinished. From what I read, they stopped fitting them due to a supplier shortage, but probably more in line with saving fifty cents per car. Darkhorse still have them though.
 

Dixie_Flatline

Well-known member
Joined
Oct 30, 2024
Messages
387
Location
Tennessee
Good to hear you got the wound sealed back up and are on the mend. A little wire loom and/or fabric tape will have those trickle charging wires disappearing!
 
OP
D

D.F.B

Well-known member
Joined
Aug 2, 2023
Messages
1,555
Location
Australia
Finally getting to wash cars again!

Washing the Ranger was the last thing I did before heading to the doctor, then being sent to hospital on November 6th. And even then, I didn't get to finish the job. It was then lent to my father to move a two-piece sofa, so it was covered in bugs and traffic film from wet roads last week. So, yes, it was bugging me.

Adam's Mega Foam was the soap of choice, which I also used on the wheels, Brake Buster for the tyres. I was then dried with Clean Maker, Gyeon Quick Detailer for the door jambs and tray, Bilt Hamber Traceless for the glass.

For the interior, I wanted to go a little deeper than the usual wipe over with a detailer. The drivers floor mat was cleaned with McKee's and the Detail Factory Tire Brush. I then used P&S Xpress to lightly scrub the door panels, steering wheel, gear shifter and lower scuff panels, the rest was wiped over with a towel. I don't normally do this, but today I followed with Koch Chemie Top Star, probably not a bad idea now we are approaching summer UV levels.

IMG-1292.jpg

IMG-3509.jpg

Dressing the tyres, I chose 3D Cermaic Matte Tire. This creme like product spreads easily, so a little goes a long way. It's also easy to achieve that subtle enhanced look without gloss, a follow up wipe levels it even further. It smells lovely too. Certainly a sleeper product.

https://detailingshed.com.au/produc...te-tire?_pos=1&_psq=3d+ceramic+m&_ss=e&_v=1.0

IMG-2853.jpg

IMG-2854.jpg

I'm also driving cars again! :cool: You know how it is, there is always something you forget to pick up from the shops! ;)

IMG-E2836e.jpg
 

Qualitytools

Well-known member
Joined
Apr 30, 2014
Messages
2,850
Location
SOCAL
As mentioned previously, I decided to order some larger orifice nozzle tips to dial back some of the pressure generated by the new pressure washer.

In general, the smaller the orifice, the more pressure generated. The tradeoff is lower flow rate. When you move up the scale, the pressure decreases and the flow increases. Every pressure washer plays this balancing game to deliver what the manufacturer wants to achieve. This is how cheaper pressure washers make those headline psi ratings on the box, at the expense of the water flow.

However, fitting smaller orifice sizes forces the motor to work harder and draw more current. Also, for car washing, ultimate psi ratings are not the goal, flow is. Ideally, you are aiming for about 1000 to 1500 psi, with as much water flow as possible.

I have been using these Mosmatic rubber shrouded nozzles for a while now, in this case fitted with 4.0 tips.

IMG-1178.jpg

IMG-3772.jpg

IMG-0925.jpg

In operation, this has the KHD10 doing about 1800 psi, which means I have some leeway to dial the pressure back. Looking at the pressure vs flow charts, this puts me at either 4.5 or 5.0 orifice size. Easy, off I went to order some.................

Except the two sellers of the Mosmatic nozzles in Australia do not offer 4.5 or 5.0 sizes. Typical. I didn't want to go back to the unprotected tips, and I'm not completely sold on the MTM Aqualine rubber nozzles.

These Mosmatic nozzles are made up of four parts; the 1/4 quick connect plug, the nozzle holder, nozzle tip and rubber shroud. This means the nozzle tips can be removed and replaced. Which also meant several hours trawling the internet trying to find the correct parts.

I eventually landed on B.A.R Group, their catalog in particular, tracking down the part numbers and placing an order for 25- and 40-degree 4.5 orifice tips.

https://online.flippingbook.com/view...530/#zoom=true

https://www.bargroup.net.au/shop/ite...-nozzle/29839/

IMG-8683.jpg

If this still has the unit delivering too much pressure, I can then step up to the 5.0 orifice.

I complain about having to trawl the internet, but I love doing this, the thrill of the chase!
Recently found your thread and enjoying reading thus far, thanks for sharing. Is that a Mosmatic wand you are using? I recently purchased one but having a difficult time finding the correct fitting to be able to install quick connects on the output end. So far for me it looks like I will need a couple of adapters in order to get it set up and I would rather not have several adapters to do so. Any suggestions? I am in the US. thanks 😊
 

customh

Well-known member
Joined
Feb 18, 2013
Messages
562
Location
East Bethel, MN
Recently found your thread and enjoying reading thus far, thanks for sharing. Is that a Mosmatic wand you are using? I recently purchased one but having a difficult time finding the correct fitting to be able to install quick connects on the output end. So far for me it looks like I will need a couple of adapters in order to get it set up and I would rather not have several adapters to do so. Any suggestions? I am in the US. thanks 😊

Obsessed Garage will help you. Here's a starting point:
 
OP
D

D.F.B

Well-known member
Joined
Aug 2, 2023
Messages
1,555
Location
Australia
Recently found your thread and enjoying reading thus far, thanks for sharing. Is that a Mosmatic wand you are using? I recently purchased one but having a difficult time finding the correct fitting to be able to install quick connects on the output end. So far for me it looks like I will need a couple of adapters in order to get it set up and I would rather not have several adapters to do so. Any suggestions? I am in the US. thanks 😊

The Mosmatic wand is the OG-spec version, which is has specific connections compared to the original.


IMG_0796.jpg

IMG_0792.jpg

IMG-0884.jpg

I'm assuming your wand is not fitted with quick connects, like below? In which case, you need a female thread 1/4-inch coupler and a 1/4-inch female thread plug. That then allows fitment of a nozzle on the outlet, and connect to the inlet via your gun.


OP
D

D.F.B

Well-known member
Joined
Aug 2, 2023
Messages
1,555
Location
Australia
Heart & Soul!

There are a few prerequisites for me to like a car. Those would include exterior styling, exterior colour, the transmission type and, crucially, the engine and how it sounds. Ever since I helped my dad rebuild the engine on the lawn mower, I’ve been obsessed with engines, how they work, how they sound. And when it comes to cars, I probably choose the engine over the car itself.

IMG_2825.jpg

I like a variety of different engine layouts. I love the off-beat thrum or a 3- or 5-cylinder engine. Inline 6's have a special place in my heart, especially that manic BMW E46 M3. The VW VR6 and Alfa Busso V6's sound amazing. That loping wail of an Aston Martin V12 will always be a favorite. But, having grown up in Australia, the V8 has always been the holy grail, so guess I followed true to type.

I didn't own a V8 until 6 years into my driving career, prior to that I was more of an inline 6 kind of guy. My first V8 was 5.6-litre Windsor V8 in a 2002 T3 TS50. That engine sounded like a good old fashioned muscle car, raw and rough around the edges. Glorious in other words!

T3-WINDSOR-V8.jpg

I traded that car for my second V8, a 2014 FGX Falcon XR8. While this engine doesn't have the that glorious blood'n'guts wail of the Windsor V8, the Miami has an intoxicating blend of Cleveland V8 crackle mixed with delicious supercharger whine. Oh, and it goes like the clappers!

fgxm104.jpg

My third V8 was a Gen-2 Coyote in the S550 Mustang. In classic 5.0-litre capacity, while this engine was heavily choked by the standard AU-spec exhaust, with an aftermarket cat-back it sounded glorious. I love naturally aspirated engines, in particular the throttle response and crisp induction noise. Everyone focuses on the exhaust note with V8's, but the Coyote has lush induction noise as well. It’s also such a rev-happy engine, one that really loves winding out to the redline.

gt50105.jpg

And my fourth V8? Well, that is sitting in my garage right now, the latest version of the Coyote V8. Because I skipped the Gen-3 Coyote, stepping into the S650 Mustang GT is quite the upgrade compared to its Gen-2 predecessor. While the basic bones are the same, there are quite a number of differences here, to the point where some backstory is required.

IMG_2232.jpg

In 2010, Ford redesigned the modular V8 to create a thoroughly refreshed and simplified V8 engine lineup. While the old 5.4 continued in the Mustang GT500, gone where the multitude of 4.6 and 5.4 V8 engine variants, differentiated by cylinder head and valve count. Certain aspects were carried over to utilize existing modular factory tooling, for example the bore spacing, deck height and bell housing bolt pattern. The firing order was also changed, from the 1-3-7-2-6-5-4-8 of the older modular, to 1-5-4-8-6-3-7-2 shared with the Ford Flathead V8. This explains why the Coyote sounds very different to those 4.6 and 5.4’s and produces a sharper/raspier note. Overall, the new 5.0 Coyote represented Ford throwing all the good bits in the pot, adding some herbs and spices, stirring, then dishing out a very tasty meal! No more low spec V8’s, the Coyote had it all!

coy1.jpg

2011gt101.jpg

At it's core, the Coyote is an all-aluminum quad-cam V8 with four valves per cylinder and independent variable valve timing for both inlet and exhaust camshafts. The heads were new and featured different camshaft location to the older 4V heads. And it’s the Ti-VCT system that most differentiated the new engine over the older DOHC modular V8’s. Those 4V engines never got VCT and needed a supercharger to flesh out the low rpm torque. Anyone who has driven a 5.4 BOSS will know what I mean here.

The early examples of this engine are now known as the Gen-1 Coyote and were fitted to the F-150 and late SN197 Mustang.

coy0.jpg

coy2.jpg

coy3.jpg

coy4.jpg

coy5.jpg

coy6.jpg

The Gen-1 Coyote also provided the basis for the FPV Miami V8, a $36-million development. These used common block and cylinder heads, combined with a variety of locally sourced parts to create a unique package, the first factory supercharged Coyote in the world. Interestingly, the carry over Falcon powertrain control module did not have enough inputs to support the DI-VCT system, so only the intake camshafts are variable on a Miami, the unused exhaust side simply capped off with a rubber boot.

More here -
Ford Miami V8 Engine: Boss 315, 335 and 351 – Australian Car.Reviews

2010_FPV_FG_BOSS_V8_ENGINE.jpg

fgxm101.jpg

vct102.png

For the S550 Mustang, Ford implemented several improvements to boost power and torque, with these engines considered the Gen-2 Coyote. Revving to 6800 rpm, I always felt like the rev-limiter stepped in far too early, such was the rev happy nature of this engine.

gt50102.jpg

The Gen-3 Coyote represented quite the upgrade. Instead cast cylinder liners, Ford switched to Plasma Wire Arc Transfer liners, in the process bumping the cubic capacity from 4951cc (302ci) to 5035 cc (307ci). Also new, Ford installed direct injection, while keeping the traditional port injection. The concept here being the direct injection provides low rpm fuel economy, while the port injection maintained top end power. Keeping the port injectors also helps prevent the buildup of carbon. There were new camshafts, larger valves and a revised intake manifold. Compression ratio was also bumped via new raised dome pistons, and the oil pan was changed from steel to composite. Power and torque improvements were quite noticeable, as was the new 7500 rpm rev limit. This gen also had the hideous flying saucer engine cover in an attempt to cover up all the DI hardware and clatter.


For Gen-4, it was about finessing the details. Ford revised the exhaust manifold, introduced a new intake system with dual 80mm throttle bodies and the oil pan was returned to steel, presumably to suppress the BBQ tick. Darkhorse models got revised camshafts and forged connecting rods from the GT-500. Power and torque were boosted to 480, 486 with the Active Exhaust and 500 hp for the US-market.

To show the evolution of specs from the Coyote’s introduction to this day, I created a spreadsheet. Note that I’ve used the US-spec performance numbers for the Mustang. While there was some power loss for RHD due to different exhaust headers, the differences between US and AU power figures is due different measurement standards, the AU numbers don’t do justice to the improvements Ford made over the years. For comparison, I've also included the Miami figures.

Screenshot-277.png

So why do I love this engine so much? Because Ford still makes it! Instead of downsizing and adding their EcoBoost technology, they have kept the Coyote naturally aspirated. Sure, there are more potent V8’s on the market, but they are at the very least twice the price, not to mention sound absolutely terrible. I CAN NOT stand that horrible synthesized buzz pumped into the cabin of a BMW M 4.4 V8, or the muffled fart noises coming from a 4.0 AMG V8. The sounds coming from the 5.0 Coyote V8 are all natural and authentic.

IMG-2232.jpg

Staying naturally aspirated, there is a crispness to the induction note with the Coyote. On the outside, it sounds absolutely ***** as it charges towards you, and from behind the wheel, I love how it barks back through firewall. The Active Exhaust may be tuned via valves and software, but the sound is pure, crisp and as loud as it should be. For S650, it will give the occasional pop on overrun, but there is none of the tacky AMG farting going on here.


A lot of first time Mustang owners who came out of high-performance Falcon’s would complain about a lack of torque. The reality is, the torque was there, you just had to rev it harder to achieve it. From my perspective, we were spoiled with those turbo and supercharged Falcon’s, they were torque monsters. The Coyote on the other hand loves to rev, and to me, that makes it more rewarding to drive. I have yet to fully wring the S650’s neck, but there seems to me more low rpm torque compared to my old Gen-2 Coyote, and with the short gearing, it feels faster and more urgent.

IMG_2826.jpg

As I endured the 2-year wait for this car, many suggested I cancel the order and supercharge my S550. To me, that car was more than powerful enough without throwing a blower into the equation, in the process muffling that induction note I so loved. And including the fact I already had a supercharged Coyote in the XR8, I just didn't see the point.

I think what I was anticipating most about this new car was the engine, in particular the higher rev limit and amazing Active Exhaust. And so, sticking to the "plan", my reward is a great sounding engine that has not disappointed.

To close, this video sums up why the V8 is the holy grail for many car enthusiasts.

 
To avoid these ads, REGISTER NOW!

Qualitytools

Well-known member
Joined
Apr 30, 2014
Messages
2,850
Location
SOCAL
The Mosmatic wand is the OG-spec version, which is has specific connections compared to the original.


IMG_0796.jpg

IMG_0792.jpg

IMG-0884.jpg

I'm assuming your wand is not fitted with quick connects, like below? In which case, you need a female thread 1/4-inch coupler and a 1/4-inch female thread plug. That then allows fitment of a nozzle on the outlet, and connect to the inlet via your gun.


Thanks for the reply, OG was not very helpful unfortunately due to the fact one cannot communicate with them prior to the purchase. For one they do not have a phone to discuss products before purchase, I ended up ordering and returning a couple of things that could have been solved by a phone call but took weeks to get the shipmen and return them.

I actually have this wand: 41" long steel wand with a 32" poly grip. Usable in car wash and pressure washing applications up to 4000 PSI. 1/4" MNPT inlet and a 3/8" MNPT nozzle socket outlet.

I ended up having to get an adapter for the outlet that will take a 1/4" FNPT quick connect. It looks a bit goofy but it works.

Thanks for your input, keep up the posts as I am enjoying reading thru them, by the way I am only on page 3 :)
 
OP
D

D.F.B

Well-known member
Joined
Aug 2, 2023
Messages
1,555
Location
Australia
It was the XR6's turn to appear on camera today. I'm still learning here, both in camera location and editing, so excuse the quality.


The main thing I wanted to convey here is the sound of the naturally aspirated 4.0 inline 6. Most videos on YouTube are of modified examples, which are generally louder but not necessarily better sounding. The Ford inline 6 was never designed for high rpm running, it was always about low to mid range grunt. I say this because even though its smooth, she's pretty harsh sounding up top, that raspiness is something I actually like. I also love that tone change as it pauses and then gets back on it for upshifts. You will also note the lack of rev-matching for manual downshifts, something Ford never did on the Falcon despite the ZF gearbox being capable of this feature, Aston Martin DB9's for example. The 6R80 ZF clone, which was made by Ford under license from ZF, manages rev-matching too, so I don't know if it was a limitation of the Falcon platform or just Ford being cheap.
 
OP
D

D.F.B

Well-known member
Joined
Aug 2, 2023
Messages
1,555
Location
Australia
Ok, so I went for a little drive today and wow, Magneride paid for itself today!

Previous to today, my assessment of Magneride centered around how much it improves the ride quality in normal driving conditions. Sure, its still got an edge to it, but its much more refined than what I'm used to.

There is a short, sharp little road that I know of, different to what I have previously described and shown in the above videos. It was clearly designed by someone who likes to drive, the larger sweeping bends are connected to a series of tight lower speed corners that really test the steering response and chassis composure. This sort of road is not normal for this area, I live in a flat valley, winding mounting roads are few and far between.

The first run I did in with my Custom Mode 1, which uses the Normal base drive mode, meaning Normal Dampers, I then have the steering set to Comfort, the DSC on and the auto-stop-start turned off. Oh, and Track exhaust. ;) With the gearbox in manual, I attacked the road and came away impressed, throttle response from this engine is superb, the steering kept up and the brakes brilliant.

I then decided to turn around and do the same run in Track mode. This puts everything to STUN, so the firmest dampers, firmest steering, sharpest throttle response, track exhaust. This does impact the ride, but WOW, the car felt tight and confidence inspiring, basically removing the body movement present in normal mode. This includes when accelerating, braking and cornering. I can't say that my previous Mustang could be described as confidence inspiring, it was more a case of hanging on.

I then went again in the tamer Sport mode, which is generally designed for on-road performance driving. This reverts to the quieter sport exhaust and dials the dampers down a notch to account for typical lumpy public roads. It keeps the heavier sport steering though. Important to note that Sport does not illuminate the DSC-off light on the dash like Track does, which is probably smart. In Sport mode, the car felt impressive, but not as tight as the Track mode damper setting, didn't have the same rev-match punch and the quieter exhaust was certainly noticed.

So, for driving like this, I have gone and made a separate Custom Mode. Track for the base drive mode, mainly for the damper selection, but also for the killer exhaust mode, sharper throttle response, sharper downshift blips. I then disable the stupid auto-stop-start. Ideally, I'd want comfort steering, but that is not changeable in this mode.

Take aways? Magneride rocks! If you are on the fence, just get order it. It has a two-fold benefit, superior ride for when cruising, but a much sharper feeling car when the red mist descends. So happy I chose this option. 😁

IMG-2910.jpg
 
OP
D

D.F.B

Well-known member
Joined
Aug 2, 2023
Messages
1,555
Location
Australia
My Waxit Black Friday purchase. Only realized after the purchase that I also needed another 4-litre of Reset. doh.gif

IMG-2918.jpg

IMG-2921.jpg

It's also great to see new Carpro products launched for Sema are arriving in short order. WheelX is a iron remover type wheel cleaner, it offering more lubrication that IronX alone.
 
OP
D

D.F.B

Well-known member
Joined
Aug 2, 2023
Messages
1,555
Location
Australia
My routine of late has been to get a few things done in the morning, then jump in a car and go for a drive in the afternoon. Yesterday I picked up a GoPro head mount strap and was keen to get some footage of the new Mustang, nothing crazy, just a cruise and maybe a little squirt to showcase the sound of the engine.

I took several small videos, inspected the footage of the one I thought was the best and came home satisfied. After I uploaded the videos, non are them are usable. :cautious: The camera was angled too high as I rested against the headrest, so the view of the gauges is limited to a slither at the bottom of the shot, the rest a view out the window and the headliner. :confused: With how the camera sits on your head, despite checking in the vanity mirror, it's hard to see the viewing screen to check your angles.

But that's video, for me anyway as I fumble my way around this new medium. I will reshoot the videos tomorrow, with a repositioned camera. If there is some consolation, the car looked and sounded great on camera.
 

jonshonda

Well-known member
Joined
Jul 17, 2017
Messages
4,731
Location
Wisconsin
^It's amazing how difficult it can be to get a well framed shot with video, with everything coming together enough to even be presentable....much less worth publishing. That's the one thing I learned when I took interest in photography, if you shoot 500 shots and wind up with a handful of them worth sharing you are doing ok.
 
OP
D

D.F.B

Well-known member
Joined
Aug 2, 2023
Messages
1,555
Location
Australia
With your interest in detailing, have you watched or followed Pan the Organizer?
I was a subscriber but never really had an interest in his videos. Then the stunt he pulled after launching his own brand, I unsubscribed. I'm not saying his products aren't good, but the path he took was frankly stupid and, in the aftermath, he has not won me over or convinced of his integrity. I also have problems with how he goes on the attack, then turns it around to look as if he the victim. I've probably said enough.
 
OP
D

D.F.B

Well-known member
Joined
Aug 2, 2023
Messages
1,555
Location
Australia
Changing gears today..........................

IMG-2940.jpg

I have been planning this project for nearly a year, and I've had the parts sitting in the cabinet for months. This engine is off my very first lawn mower, one that made me a fortune over the years. It's been a smoker for a while now, so I thought I would have a go at re-ringing it. Not going to lie though, I've been apprehensive doing this.

First up, I disconnected the throttle cable. On this era of Victa, the Briggs & Stratton engines had an alloy adaptor ring that sits between the deck and sump. This helps space the crankshaft to the correct height and accounts for the different mounting points between Briggs and the Victa engine. Removing the blade carrier first, you then remove the three bolts that secure the engine and adaptor ring to the chassis.

IMG-2937e.jpg

I then drained the oil and fuel from the engine.

I have to admit, the next step nearly had me backtracking and putting the project on ice. That next step being the blade disk boss that is press-fit onto the crankshaft. There are two ways to remove these, by hammer or puller. However, I don't have a vice or anvil to support the crankshaft to "shock" it off via hammer. So, I needed a puller. I had actually planned on buying a puller, but for some reason didn't bother. So, off I went to Total Tools to buy a puller.


Then, after a little bit of stuffing around, I was ready to quit. But, after consulting Youtube and a change in technique, the blade boss slid off the crankshaft as easy-peasy! I have said this before, but Youtube is such a brilliant resource for learning. At one point, I thought I was going to have to introduce heat, but not something I wanted to do for obvious reasons.


From here, things went relatively smooth. After cleaning off the 23 years' worth of crud from the underside of the engine, I then cracked the sump bolts loose. I then lightly tapped on the sump, which slid easily down and stopped. So, I tapped the sump back in place and lightly scuffed the crankshaft where the blade boss had been, the sump then slid off with ease. I then removed the cylinder head, making sure to keep track of the bolt locations as there are longer versions for around the valves. I then removed the oil slinger, cracked the conrod bolts, tapped off the cap, then pushed the piston out of the cylinder.

It was then clean, clean, clean. Starting with the piston, I removed the old rings, then started removing the buildup of carbon on the crown. Because of the oil consumption, there was also significant carbon deposits on the cylinder head and valves, the crankcase and sump were surprisingly clean, a testament to frequent oil changes. I then removed the old gasket material off the head and sump mating surfaces, followed by cleaning everything with kerosene and set aside ready for reassembly tomorrow.

The piston has some very mild scoring, but they are smooth and won't catch a fingernail, the cylinder likewise. There was plenty of blowby on the piston though. To be honest, I wasn't expecting anything more than that, the engine always had plenty of fresh oil in it, so the wear on the piston and cylinder is from use, not abuse.

Having done all that, I'm still apprehensive about the end result. At the very least, I'll be happy to have the engine back together and running, but ideally, I hope to have cured its smoking habit.
 
OP
D

D.F.B

Well-known member
Joined
Aug 2, 2023
Messages
1,555
Location
Australia
Work continued on the Sprint 375 rebuild this morning. With the hard work done yesterday, it was all about putting it back together.

I didn't fully disassemble this engine, the exercise was simply to replace the rings and see what that got me. Apart from burning oil, the engine started easily and was strong running. Despite working it to near death, it was always well maintained with fresh oil and clean air filters. If you can imagine a teenage DFB, well I looked after that engine like one of my cars today!

I hope you can tell the sentimental tone so far, because that is how I feel about this mower. It started my mowing business in my early teens and went on to make me a LOT of money over many years. Even after upgrading to bigger and better machines, I would often take this mower with me, its just so light and easy to use. It owes me nothing, and so I have kept it as a reminder of my youth. I haven't taken it on a job for a very long time now, but it gets the occasional run on my own lawns.

To be clear here, these engines were basically a throw-away item, rebuilding one is not an economically viable proposition. So unless you are sentimental like me and have the time and desire to do so, then you would be better served replacing the engine with a long block for as little as $250. In my case, I used about $70 in parts, a $40 puller, a $60 ring compressor and $20 for ring pliers, so yeah, an extra $60 would have bought me a new engine. :rolleyes:

Briggs & Stratton 3.75hp (575EX Series) Lawnmower Engine – Small Engine Warehouse Australia

Parts for this partial rebuild involved piston rings, and the associated gaskets and seals. I decided to use OEM Briggs & Stratton rings, then aftermarket head and sump gaskets, and a new Stens lower crank seal.

IMG-2941.jpg

The first thing I did today was to remove the camshaft, lifters and crankshaft cam gear out of the crankcase to provide better access for reassembly. I didn't want to mess with these, but they simply lift out so easily that there was no reason not to. I then cleaned and inspected these parts and set them aside for later. The lifters and (plastic) cam had minimal wear, remarkable considering how much work this engine has done.

After giving everything a final clean down, including the cylinder and crankcase, I started by installing the new oil seal on the sump. I then lubed the piston and installed the piston rings, the hardest being the two-piece lower oil control ring which fought me a little. After each ring went on, I staggered the end gaps and clamped it in the ring compressor, which was a little tricky but I got there. Time for everything to go back together!

First up, installing the piston and rod back into the cylinder. After applying oil to the cylinder, the conrod big end and more on the piston, I lined up the piston and ring compressor with the cylinder, then gently tapped the piston down with the handle of my hammer. I don't know if its just me, but I love the tap-tap-tap sound of a piston being installed into a cylinder. The conrod was then lined up with the crankshaft, both with plenty of assembly oil. I then installed the end cap, again well oiled, then torqued in increments to 11.3 Nm. A quick spin over verified my work.

Next, re-installing the lifters, oiled for good measure. These simply slide back into place, the oiled camshaft then drops into its recess in the block, holding the lifters in place. The oiled crankshaft timing gear slides onto its key, making sure to rotate the crank first to align the timing marks on the gear and camshaft. The camshaft driven oil slinger then drops onto the top of the camshaft.

It was then time to start sealing the engine back up. The gasket kit comes with several paper sump gaskets in differing thickness, I just went with the standard 0.015" item. With the gasket lined up and held with the dowels in the block, I then oiled the crankshaft and oil seal and gently tapped the sump back down till it was nicely seated and flush. I then went around re-installing the sump bolts, firstly winding them down until they seated. Working in a cross pattern, the bolts were torqued down in increments to the 10.17 Nm spec, re-checking a few times to make sure it was all down square.

Next, the cylinder head. Using two of the bolts to hold the new gasket in place, I lined the head up with the block and wound the bolts down until they seated. With the rest of the bolts seated, I then torqued them to 16 Nm, again working in a cross pattern and in increments till the spec was achieved. The supporting bracket was then re-secured and the spark plug installed.

Old worn rings, head gasket and oil seal.

IMG-2943.jpg

Getting the engine back on the mower deck took a little patience to align the three bolts and adaptor plate. I then re-installed the blade boss and blade carrier, then connected the throttle cable. With 600ml of fresh Penrite SAE30 mineral oil in the sump and fuel in the tank, it was time to fire it up, fire it up, fire it up, fire it up...............................(sorry, a Taryl Fixes All reference).

After priming, the engine took three pulls to fire, accompanied by a small plume of smoke as the assembly oil burnt away, followed by some minor lingering smoke. I have to admit, I was a little concerned my efforts hadn't been completely successful at this point, however it was only a gentle waft rather than a constant stream, indicating that it was simply oil in the muffler burning off. After leaving the engine to run for 10 minutes, it was running clean, clear and strong...........no smoke!

I DID IT!! 😁


Apart from solving the smoking habit, the most noticeable result of this project was how much compression the engine now has, evident from the extra effort required to pull the engine over.

My biggest fear in the lead up to do this repair was getting everything back together in the right place. But this engine is so ****** simple, that when I stepped back and thought about it yesterday, it's almost impossible to put it back together the wrong way. The piston and rod assembly can only go one way, otherwise you wouldn't have access to the end cap bolts. The camshaft, lifters and timing gear are all recess fit, making it simple to remove and re-install correctly.

As I said earlier, you would never rebuild one of these engines unless its something you really wanted to do, simply because of the throwaway society we live in. And a small engine shop wouldn't want to do it either, the argument being that parts and labor to do so would probably buy you two brand new engines!

But that was not the point here. I wanted to do this for sentimental reasons, but also out of curiosity. As a bonus, I got to learn how to use a puller and piston ring compressor, while also putting my tools to good use. As a learning experience, I would call it a success. But to have also achieved the desired result, as in no more smoking, well that makes me very happy.

(Sorry about the lack of photos for this project. I was covered in oil and filth, which I didn't want all over my camera or phone, and I was also focused on the task at hand.)
 

Qualitytools

Well-known member
Joined
Apr 30, 2014
Messages
2,850
Location
SOCAL
I was a subscriber but never really had an interest in his videos. Then the stunt he pulled after launching his own brand, I unsubscribed. I'm not saying his products aren't good, but the path he took was frankly stupid and, in the aftermath, he has not won me over or convinced of his integrity. I also have problems with how he goes on the attack, then turns it around to look as if he the victim. I've probably said enough.
Thanks for sharing your thoughts
 
OP
D

D.F.B

Well-known member
Joined
Aug 2, 2023
Messages
1,555
Location
Australia
Thanks for sharing your thoughts
To balance my previous post, I will say that Pan's content is all about approachability. No doubt many have learned about new products or techniques after watching his videos, in effect giving others the confidence to buy and try things for themselves. As a product resource, he has provided viewers a massive back catalog of information. Knowlege is power.

My earlier comments were based on not only what has happened over the last couple of months, but also prior to the whole Awards Video debacle. Early in his Youtube career, he would drop into the Autogeek forum to post a video and boost view count. He would rarely hang around to join the discussion or contribute to the knowledge bank. When he did join in, it was often only after being quite reasonably questioned on a product or technique, where he would take it as a pot shot and turned sour. Same when he was called out for trying to bump view counts, he turned super defensive and abrasive. Same happened over the whole Awards Video thing, quite reasonable questions or remarks were made by his viewers, where he turned defensive and played the victim.

I'm sure he is a nice guy, but the way he conducts himself online (off camera) is boarder line narcissistic.
 

customh

Well-known member
Joined
Feb 18, 2013
Messages
562
Location
East Bethel, MN
Same when he was called out for trying to bump view counts, he turned super defensive and abrasive. Same happened over the whole Awards Video thing, quite reasonable questions or remarks were made by his viewers, where he turned defensive and played the victim.

I'm sure he is a nice guy, but the way he conducts himself online (off camera) is boarder line narcissistic.
I never got to watch the "Awards Video"- but the fact that he made that video, and either knew or didn't know that he was going to get the backlash AND is still defending it to this day..... borderline narcissistic? He's way beyond the border and I don't need a degree to diagnose that one @D.F.B
 

Qualitytools

Well-known member
Joined
Apr 30, 2014
Messages
2,850
Location
SOCAL
I was not aware of the award as I have just recently stumbled on his videos within the last few weeks.

To balance my previous post, I will say that Pan's content is all about approachability. No doubt many have learned about new products or techniques after watching his videos, in effect giving others the confidence to buy and try things for themselves. As a product resource, he has provided viewers a massive back catalog of information. Knowlege is power.

My earlier comments were based on not only what has happened over the last couple of months, but also prior to the whole Awards Video debacle. Early in his Youtube career, he would drop into the Autogeek forum to post a video and boost view count. He would rarely hang around to join the discussion or contribute to the knowledge bank. When he did join in, it was often only after being quite reasonably questioned on a product or technique, where he would take it as a pot shot and turned sour. Same when he was called out for trying to bump view counts, he turned super defensive and abrasive. Same happened over the whole Awards Video thing, quite reasonable questions or remarks were made by his viewers, where he turned defensive and played the victim.

I'm sure he is a nice guy, but the way he conducts himself online (off camera) is boarder line narcissistic.

I never got to watch the "Awards Video"- but the fact that he made that video, and either knew or didn't know that he was going to get the backlash AND is still defending it to this day..... borderline narcissistic? He's way beyond the border and I don't need a degree to diagnose that one @D.F.B

Thanks for sharing your views and thoughts, funny one never knows how some of these people are.
 
OP
D

D.F.B

Well-known member
Joined
Aug 2, 2023
Messages
1,555
Location
Australia
I never got to watch the "Awards Video"- but the fact that he made that video, and either knew or didn't know that he was going to get the backlash AND is still defending it to this day..... borderline narcissistic? He's way beyond the border and I don't need a degree to diagnose that one @D.F.B

I'm glad its not just me who can spot the narcissist side of him.

Prior to all this, I would occasionally watch a video, mainly if it was about a product that he got early access to and hadn't been released yet. For the most part, for someone who lives and breaths detailing, I just didn't get much out of his videos. I also found he did more talking about detailing that actually detailing.

That doesn't mean he doesn't offer value. For many, his content is a great learning tool for those wanting step up beyond just washing your car once a month at the local pay-n-spray.

I was not aware of the award as I have just recently stumbled on his videos within the last few weeks.

Thanks for sharing your views and thoughts, funny one never knows how some of these people are.

For context, over the last 5 or 6 years, Pan has done a annual awards video where he ranks the top three products across several categories. This year was different.

Days after launching his own line of products called Clean by Pan the Organizer, he published this year's award video. With the exception of product categories his line doesn't compete, every product he does offer ended up in first place. This was never not going to be called out, so I struggle to understand why he thought it would go un-noticed and that viewers would simply lap it up. You could spot what was going to happen here from a mile away. The backlash was so strong that he ended up removing the video.

Ever since, he has been in damage control. While no doubt some of the comments were too strong, I know of people who asked simple, reasonable questions that got aggressive replies from Pan or had their comments deleted. He then turns it all around and labels anyone who dared to quite rightly question his integrity as haters or trolls.

It's also strange that the product line hadn't even got into the hands of customers or social media reviewers when the award video dropped. So while he may have been testing the products for a year in the lead up to launch, no one else was able to verify his "winning" products. If he was smart, he would have withheld the awards for this year, withheld his own products for this year or changed the format to remain impartial and credible. Had he done that, he wouldn't be spending time and effort on damage control that would be better spend promoting the brand.

The thing that I simply can't understand is why he pulled this stunt. He has a huge following, the products no doubt are excellent, and in fact, the initial batch sold out within 48-hours. In other words, he didn't need to do what he did. There is a saying in retail that goes like this; a good salesman knows when to STOP selling. The time to stop selling is when the customer gets their money out, which in Pans case, was after the product line was a sell-out success. But pulling this stunt just undermined his hard work.
 
OP
D

D.F.B

Well-known member
Joined
Aug 2, 2023
Messages
1,555
Location
Australia
Wash day on several fronts today.

First, my little man was off for a bath and haircut..........................

IMG-2981.jpg

Next up, the XR6.............................

IMG-2957.jpg

Shine Supply Wise Guy on the tyres, then Shine Supply Shift for the wheels and paint. Drying Aid was ADS Amplify, interior wiped over with ADS Pilot, glass via Gyeon Q2M Glass and tyres dressed with Auto Finesse Satin. Covered up, it was time to move on.

For the Mustang, this was wash number four, and the second since the coatings went down on the paint and wheels.

IMG-2958.jpg

IMG-2963.jpg

IMG-2973.jpg

A little post wash rinsing action for you....................


Wise Guy was again used on the tyres, but I switched to Carpro Reset for the wheels and paint. Drying aid was also ADS Amplify, switching to ECH20 for the door jambs and engine bay. With the hood vent on this car, I've found there is a lot of extra water to mop up in the engine bay after washing. Amplify also went on the wheels before dressing the Michelin's with OG Tire Dressing. The interior only needed a wipe over with a damp towel, then a quick vac of the carpet mats. Invisible Glass for the windows.

While I have ordered a new one, it's interesting to note that the S550 cover will fit the S650 to perfection. This particular one is the CoverCraft FormFit, which I got while they still had an Australian agent.

CoverCraft -
Covercraft Custom Form-Fit Car Cover

IMG-2977.jpg

The new one I have ordered from Purefit, who were actually the old CoverCraft agent, so the new ones are virtually the same thing. I will say though, the Purefit website is woeful with several bugs, and even after contacting them, the owner clearly doesn't notice these bugs. So, be careful when ordering.

2023-2025 Ford Mustang Coupe GT + aerial 2 mirrors (no wing) Purfit In – purfitcovers.com
 
To avoid these ads, REGISTER NOW!
Top Bottom