To avoid these ads, REGISTER NOW!

Drill Press. Runout vs quill slop?

uart

Well-known member
Joined
Nov 17, 2011
Messages
1,226
Location
Australia
I've noticed that many of the lower cost Chinese drill presses these days seem to have a lot of quill slop. At least compared to older Taiwanese models I've seen.

Recently I bought a cheap DP and it runs ok and gets the job done, but it has way more slop than my older Taiwanese one. I thought maybe I just got unlucky, however I've since had a look at a few others in local shops and many of them (even ones costing more than mine) seem to slop around to a fairly similar degree.

At first I thought it was a run out issue but soon realized that "run out" and "quill slop" are two different things, and on this DP the slop is quite a lot larger than the run out.

So just wondering what is the deal with quill slop? How much is acceptable in a cheap DP, and what is it's relation to run out. I mean: is run out still the more detrimental issue? And just how bad does the slop have to be before it's a worse thing than the run out?

It seems to me that if quill slop is of similar magnitude to run out then it's probably fairly irrelevant. And it's probably only an issue if the slop get quite a lot greater than the run out that? Anyway just thinking out aloud here, but does that sound about right?
 
To avoid these ads, REGISTER NOW!
OP
U

uart

Well-known member
Joined
Nov 17, 2011
Messages
1,226
Location
Australia
I got a dial indicator today and am going to try to measure the quill slop and the run out. Does anyone know what sort of ball park figures I should be seeing for these?
 

ttpete

Well-known member
Joined
Mar 8, 2011
Messages
6,737
Location
Dearborn, MI
To me, a drill press is for drilling holes that don't require precision. Anything requiring precision hole location and/or diameter is done on the mill.
 

zkling

Well-known member
Joined
Jan 23, 2007
Messages
16,939
There might be provisions to take it up. On older machines the casting had a cut to allow it to be compressed to allow for wear. Newer machines I've seen tend to go to dog point set secrews and the like, where they omit a milling operation for a drilling and tapping operation.
 

paulsomlo

Well-known member
Joined
Jul 16, 2013
Messages
3,907
Location
Northern Colorado
I've been battling a loose quill for some time now on a Delta 12" Benchtop drill press that I've had for about 15 years now.

Runout and a loose quill are mutually exclusive - you can have one without the other. I've measured the runout at the taper, where the chuck mounts, and it's less than 0.001". With the chuck mounted, a machined pin in the jaws shows about 0.003" of runout. I can get about 0.002" of shim in between the quill and it's housing, which doesn't see like much, but out at the end of a drill bit, it becomes a real pain in the ***. The quill has a slot that runs axially which engages an antirotation pin. I've tried putting a brass shoe in that slot with a setscrew to take out the slop, as well as inserting a 0.001" brass shim into the space between quill and housing, roughly 90 degrees to the brass shoe. The quill tends to stick a bit, but it helped slightly.
 
OP
U

uart

Well-known member
Joined
Nov 17, 2011
Messages
1,226
Location
Australia
To me, a drill press is for drilling holes that don't require precision. Anything requiring precision hole location and/or diameter is done on the mill.

Good point ttpete. Yes it makes holes ok but definitely lacks precision compared to my very old and well used Taiwanese unit. To tell the truth I'd never paid all that much attention to quill slop before, but it's really quite astounding how good the old DP is in comparison. It was only ever a low cost DP even when new (in the '80s), it's had the snot beat out of it but still has no detectable play in the quill and no discernible run out.

BTW. I don't own a mill (or a lathe). Apart from an assortment of corded and cordless hand tools my only machines are the DP and a bench grinder.
 
Last edited:
OP
U

uart

Well-known member
Joined
Nov 17, 2011
Messages
1,226
Location
Australia
There might be provisions to take it up. On older machines the casting had a cut to allow it to be compressed to allow for wear. Newer machines I've seen tend to go to dog point set secrews and the like, where they omit a milling operation for a drilling and tapping operation.

Yeah there is like a set screw (see pic), but it's got a square end which mates with a keyway in the quill. This can't easily be tightened however, because the square end won't rotate in the keyway. I'm thinking about making up a brass part to replace this with, one that will let me "gib" it up a little bit.
 

Attachments

  • originalgrubsrew1.jpg
    originalgrubsrew1.jpg
    54 KB · Views: 69
To avoid these ads, REGISTER NOW!
OP
U

uart

Well-known member
Joined
Nov 17, 2011
Messages
1,226
Location
Australia
Runout and a loose quill are mutually exclusive - you can have one without the other. I've measured the runout at the taper, where the chuck mounts, and it's less than 0.001". With the chuck mounted, a machined pin in the jaws shows about 0.003" of runout. I can get about 0.002" of shim in between the quill and it's housing, which doesn't see like much, but out at the end of a drill bit, it becomes a real pain in the ***. The quill has a slot that runs axially which engages an antirotation pin. I've tried putting a brass shoe in that slot with a setscrew to take out the slop, as well as inserting a 0.001" brass shim into the space between quill and housing, roughly 90 degrees to the brass shoe. The quill tends to stick a bit, but it helped slightly.

Thanks Paul. Yeah that's what I was planning to do. To hopefully modify that anti-rotation pin (I called it a set screw above) to tighten it up a bit.

BTW. The runout (measured on a round bar just below the chuck) seems quite acceptable, only about 0.003", however the total quill play measured at the chuck seems like about 7 to 10 times that figure.
 

paulsomlo

Well-known member
Joined
Jul 16, 2013
Messages
3,907
Location
Northern Colorado
Yeah there is like a set screw (see pic), but it's got a square end which mates with a keyway in the quill. This can't easily be tightened however, because the square end won't rotate in the keyway. I'm thinking about making up a brass part to replace this with, one that will let me "gib" it up a little bit.

I turned a small, round piece of brass that extends into the threaded hole for the setscrew, so as to retain it as the quill travels. A better proposition would be something like a piece of keystock, but made out of brass. You'll need to make a hole in it that can engage a pin on the end of a setscrew, so that it doesn't move with the quill. You probably already figured this out, but you need to remove the quill before removing the set screw with the squared end.
 

justanengineer

Well-known member
Joined
Apr 5, 2011
Messages
7,722
Location
Motor City
To me, a drill press is for drilling holes that don't require precision. Anything requiring precision hole location and/or diameter is done on the mill.

JMO but accuracy depends largely on the work being done and the machines available. For the common <0.750" work the machine is pretty irrelevant bc the cutting tool is the limiting factor for size, and you should be within ~0.010 on location regardless. Along those lines, a drill in a mill is just as inaccurate as one in a decent drill press. OTOH, I ream and bore holes, use port and spotface tools very accurately all the time at work with a 3 hp drill press.

As for the OP, I prefer to be <0.003 runout at the spindle taper with zero quill slop.
 
OP
U

uart

Well-known member
Joined
Nov 17, 2011
Messages
1,226
Location
Australia
Thanks again Paul and justanengineer.

Here's an update. I went to get some brass bolts to make a new setscrew but my local hardware place only carried them in a few imperial (inch) sizes, which seemed kinda weird as Australia is a metric country.

Anyway I've got hold of a couple of pieces of brass rod. Nothing the right size so I'm going to have to try and grind them down to fit. I've only got a bench grinder and some files (and a pretty basic tap and die set) to do this, but I'll see how it goes. Will post up some pictures tomorrow after I do it. :)
 

paulsomlo

Well-known member
Joined
Jul 16, 2013
Messages
3,907
Location
Northern Colorado
You might try getting an off the shelf setscrew and just making up a slug that fits in the hole. Make the slug so that it protrudes into the hole, so that it stays put as the quill goes up and down. Truthfully, on mine, I just used the original setscrew and turned it around, so that the slotted end is threaded into the casting. If you want a different setscrew, I just measured the original, it's M8x1.25.
 
OP
U

uart

Well-known member
Joined
Nov 17, 2011
Messages
1,226
Location
Australia
You might try getting an off the shelf setscrew and just making up a slug that fits in the hole.

You're a mind reader Paul. That's exactly what I was planning on doing (actually had already started). Will post pictures later and take some measurements (my cheap dial indicator from ebay just arrived on Friday).
 
OP
U

uart

Well-known member
Joined
Nov 17, 2011
Messages
1,226
Location
Australia
Ok I made the mods yesterday and it seems to have improved things quite a lot. It's definitely not perfect, but it's certainly a lot better than it was.

First is a picture of the drill before I did anything to it. You can see the set screw at the side. It looks like it's adjustable, but it's not really.
attachment.php


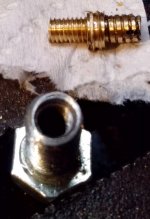
I drilled out the end of an 8mm bolt and tapped a 5mm insert hole. Then I made up the insert shown from the brass rods I got.
attachment.php


Here it is after I loctited it in and trimmed and polished it.
attachment.php


I figured the above would help more with side to side slop, but maybe not so much with front to back. So I decided to make a second set screw and tap a new hole into the front part of the head of the drill.

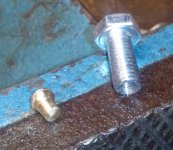
I was a little leery about what I might hit drilling here, so I only drilled a really small inspection hole at first. It went though ok so I drilled and tapped it (without disassembling the head) out to 6mm. Here is the set screw I made for the new hole in the front of the drill.
attachment.php


And loctited in and polished up a bit.
attachment.php


An finally the completed drill with both of the new set screws installed. Oh yeah, I piled on heaps of moly grease as well, so I'll have to clean the mess up a little bit. There's definitely a big improvement now. :)
attachment.php
 

Attachments

  • originalgrubsrew1.jpg
    originalgrubsrew1.jpg
    54 KB · Views: 117
  • bushsrew1a.jpg
    bushsrew1a.jpg
    57.2 KB · Views: 116
  • bushsrew1.jpg
    bushsrew1.jpg
    56.9 KB · Views: 117
  • bushsrew2a.jpg
    bushsrew2a.jpg
    50.7 KB · Views: 117
  • bushsrew2.jpg
    bushsrew2.jpg
    54.2 KB · Views: 116
  • bushscrewsinstalled1.jpg
    bushscrewsinstalled1.jpg
    53.1 KB · Views: 117
Last edited:
OP
U

uart

Well-known member
Joined
Nov 17, 2011
Messages
1,226
Location
Australia
A quick update. My cheap $8 dial indicator arrived from "evilbay" this week, so I was able to check the slop and run out.

Not too bad now. Run out was about 3 to 4 thou (measured just below the chuck), and the quill slop was just a little more than this, about 5 to 6 thou.

I'm happy enough with this for a cheap drill press. The 280 RPM min speed of this one is a big improvement over my previous DP for metal work, even though it is still slightly less smooth and precise than that older (Taiwanese) one.
 

Attachments

  • dial indicator.jpg
    dial indicator.jpg
    22.4 KB · Views: 8
To avoid these ads, REGISTER NOW!
Top Bottom