To avoid these ads, REGISTER NOW!

E-tek Restorations: PROJECT THREAD

OP
E

e-tek

Well-known member
Joined
Dec 19, 2007
Messages
10,690
Location
Saskatoon, SK
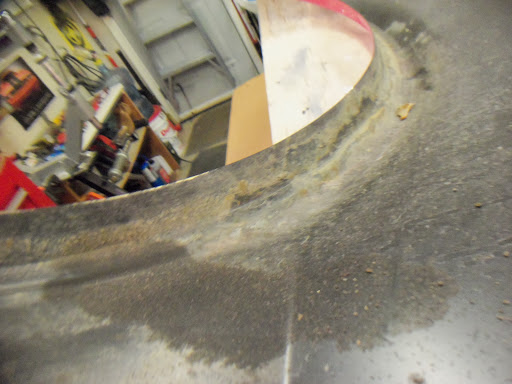
Believe me Kevin I take those things into consideration right from the start. But since the door that was on there was fitting fine - and those hinges had not been modified - I knew it had to be the door or hinges we got. Also, moving the fender would be the LAST thing you want to do at the start, or even now. The front end lined up "OK" when I got it, plus you'll recall I cross-measured and it was within spec.
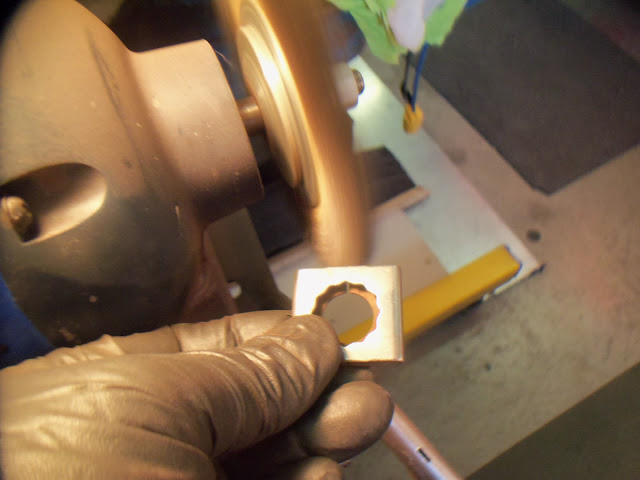
I can't recall if I explained what happened when I called the supplier, but they had found out that the manufacturer DID have issues with that batch of hinges - which was obvious to them once I sent them the photo's showing the extra material on the one side!! When I took some material off, it got much better, but instead of leaving it like this, I called to complain.
Anyways, we'll see how different the 'new' hinges are when they come.
 
To avoid these ads, REGISTER NOW!
OP
E

e-tek

Well-known member
Joined
Dec 19, 2007
Messages
10,690
Location
Saskatoon, SK
Today was paint day - and another way to use your 4-post lift: as a quick set-up paint booth!

106_6636.JPG


Inner window garnish moldings for 40 Ford:

106_6638.JPG


240Z front suspension/bake parts:

106_6639.JPG


106_6640.JPG


106_6643.JPG


Rebuild should be fun with ALL new parts (and urethane bushings!):

106_6644.JPG
 

Kevin54

MEMBER EMERITUS
Joined
Jan 12, 2005
Messages
29,341
Location
Urbana, Ohio
106_6585.JPG


As clean as the fender arch looks in that pic, you may want to cut out a large patch panel from it and hang onto it. You never know when you may need another Camaro patch panel for that fender area or someone else working on a Camaro might
 
OP
E

e-tek

Well-known member
Joined
Dec 19, 2007
Messages
10,690
Location
Saskatoon, SK
106_6585.JPG


As clean as the fender arch looks in that pic, you may want to cut out a large patch panel from it and hang onto it. You never know when you may need another Camaro patch panel for that fender area or someone else working on a Camaro might

Good idea! I just wish I had room to save stuff like that.... :(
 
Last edited:
OP
E

e-tek

Well-known member
Joined
Dec 19, 2007
Messages
10,690
Location
Saskatoon, SK
Just more of the same today - put another few coats on the window moldings and started rebuilding the Z parts:

106_6645.JPG


106_6646.JPG


106_6647.JPG


Rack cleaned up well for being 45 years old!

106_6648.JPG


Shiny new boots!

106_6650.JPG
 

racer8432955

Well-known member
Joined
Jul 7, 2007
Messages
172
Thanks guys - lots of work re-skinning a car for sure! As for the plug-stick, I had considered putting a box on my welding cart (a la Roberts), but the cords are generally so short I want to be able to plug them in right next to my work area - so that seemed like a good alternative.

Robert - good questions on the rust paints and welding. As you are likely aware, POR and RB are "Single Stage Humidity-Cured Epoxy" coatings, making them extremely easy to apply (no mixing) and - of course - they are formulated and tested to be superior to automotive primers in how they de-humidify, convert and encapsulate rust.

I've spent a LOT of time and effort to find and use the correct, best-made and highest quality coatings in the correct applications and 'basic' epoxy primers just can't compare as a rust inhibitive coating like POR15 or RustBullet, so I'm just not comfortable spraying an epoxy primer over rust, or in areas prone to rust - and then hoping for the best. Now, "some" epoxy primers are rust-specific (Sher-Wills Epolon II Rust Inhibitive Epoxy Primer), but usually they are not.

As for welding around these coatings, we all know welding has to be done on clean metal and any contaminants, from rust to e-coatings, to epoxy primers and paints have to be removed from the welding surface, but of course anytime you weld you'll burn any primers or paints nearby as well, and yes - the rust paints do put off quite a bit of noxious smoke! Usually whatever precautions I've taken to avoid the welding fumes also suffices for the burnt primer or paints nearby. I generally wear a welding mask when welding more than a few spots and also have an exhaust fan running to remove the welding fumes and smoke from the shop.

After the welding has cooled I just brush on a second application of the rust paint. With POR15 you can just touch up the spots that were welded/burned through, but RustBullet requires a second complete coat, so I did that after I finished the welding in the area.

As for the Cougar - it's back in bodyshop purgatory....I feel bad for the owner, as I suggested the shop, but he says he's not in a rush and at least we know this particular shop will give him a show-quality paint job when they finally get it done. However, it's just another reminder why I do what I do, why there is always work for people like us ;) and why I've found other places to get paint work done since...

E-tek,
First off thank you for sharing your amazing work! Your talents are absolutely incredible!
I, being a novice, still do not fully understand the above regarding rust prevention. Say when you are welding together the seams of two panels. Do you, prior to welding, coat each (inner) surface with POR or Rust Bullet, and then (plug) weld through it? If so doesn't that contaminate the weld as MPC said? If coating after welding won't all the bare metal, that is touching (surface to surface), begin rust eventually? Could a weld thur primer be used in this situation? If so, do you have any questions on a quality weld thru primer?

Sorry for the 40 questions, I greatly admire your work and feel your opinions are the correct way.

Thank You,
JE
 
OP
E

e-tek

Well-known member
Joined
Dec 19, 2007
Messages
10,690
Location
Saskatoon, SK
E-tek,
First off thank you for sharing your amazing work! Your talents are absolutely incredible!
I, being a novice, still do not fully understand the above regarding rust prevention. Say when you are welding together the seams of two panels. Do you, prior to welding, coat each (inner) surface with POR or Rust Bullet, and then (plug) weld through it? If so doesn't that contaminate the weld as MPC said? If coating after welding won't all the bare metal, that is touching (surface to surface), begin rust eventually? Could a weld thur primer be used in this situation? If so, do you have any questions on a quality weld thru primer?

Sorry for the 40 questions, I greatly admire your work and feel your opinions are the correct way.

Thank You,
JE

To clarify my process, what I do is coat EACH surface with POR15 or Rust Bullet (unless it has a solid E-coat already on it), then REMOVING it just from the areas to be welded (with a flattened drill, small grinding disc, or whatever), then scuffing and re-coating any areas that had the coating removed due to welding or grinding. IMO, this method has shown itself to be the best way to: (1) SEAL any prior corrosion on seams and panels to be welded,to and (2) protect against any future corrosion.

I used to use weld-through primers, both Zinc and Copper, first on their own, then on areas I'd removed rust coatings for welding, but after much trial and research, found these - or any - coatings just don't hold up to the heat of welding. Sure, you can "weld-through" these weld-through coatings, but that doesn't mean much in the end. They burn off almost completely, conferring no additional protection.

Hope that helps clear it up! :thumbup:
 
OP
E

e-tek

Well-known member
Joined
Dec 19, 2007
Messages
10,690
Location
Saskatoon, SK
Got quite a bit done today on the drivers side quarter and inner fender of the Camaro... unfortunately, my camera crapped out and I lost a bunch of photo's...but you can just go back a few pages and turn your screen 180 degrees...

Suffice to say, the drivers side is now ready for a couple of small patch-repairs, then new panel attachment. I'll re-take some photo's tomorrow.

Also got some final detailing on the 240Z front-end parts so I could start their re-assembly. I'd love to have this think on wheels soon!

106_6662.JPG


106_6663.JPG
 
OP
E

e-tek

Well-known member
Joined
Dec 19, 2007
Messages
10,690
Location
Saskatoon, SK
Earlier we where talking about how much rust paint I remove for welding. In this case, the new panel has E-coat and after drilling holes for plug welds, I grind the sharp bits off, as well as a bit of the surrounding to ensure the weld has sufficient clean metal to adhere to:

106_6673.JPG


Inners prepped and ready for panel installation:

106_6668.JPG


106_6669.JPG


Before the day was over, I did a quick front end mock up with the 240 parts:

106_6666.JPG
 

racer8432955

Well-known member
Joined
Jul 7, 2007
Messages
172
To clarify my process, what I do is coat EACH surface with POR15 or Rust Bullet (unless it has a solid E-coat already on it), then REMOVING it just from the areas to be welded (with a flattened drill, small grinding disc, or whatever), then scuffing and re-coating any areas that had the coating removed due to welding or grinding. IMO, this method has shown itself to be the best way to: (1) SEAL any prior corrosion on seams and panels to be welded,to and (2) protect against any future corrosion.

I used to use weld-through primers, both Zinc and Copper, first on their own, then on areas I'd removed rust coatings for welding, but after much trial and research, found these - or any - coatings just don't hold up to the heat of welding. Sure, you can "weld-through" these weld-through coatings, but that doesn't mean much in the end. They burn off almost completely, conferring no additional protection.
Hope that helps clear it up! :thumbup:

That helps.
Thank you!
 
OP
E

e-tek

Well-known member
Joined
Dec 19, 2007
Messages
10,690
Location
Saskatoon, SK
Time to pop the top on this tin can!

000_0116.JPG


000_0117.JPG


000_0118.JPG


000_0119.JPG


000_0121.JPG


Chunk of bondo that was stuffed into a rust hole:

000_0122.JPG


Check out the rust build up:

000_0123.JPG


Underside of roof panel:

000_0125.JPG


000_0126.JPG


000_0127.JPG


Support structure will need some repair as well:

000_0128.JPG


106_6694.JPG


Cleaned up the edges for welding:

106_6686.JPG


106_6685.JPG


The rest will get coated with RustBullet (after being treated with MetalReady) -

106_6687.JPG


106_6690.JPG


106_6693.JPG
 
Last edited:

DynoDave

Well-known member
Joined
Mar 25, 2005
Messages
1,685
Location
Michigan
Wow...I would think the owner would be very HAPPY with the decision to cut the roof off after seeing all that.
 

MP&C

Well-known member
Joined
Oct 21, 2009
Messages
4,396
Location
Leonardtown, MD
All caused from condensation within the roof running down to the roof structure.

Ed, that can of worms looks all too familiar. You'll be able to give the Camaro a much better life ahead now that the exploratory surgery has shown what lurks beneath..
 

NASTYZEN

Well-known member
Joined
Jun 11, 2010
Messages
2,823
Location
St-Colomban,Que. Canada
If you can get all these after market parts... Couldn't you buy an entire car in pieces and save yourself a whole lotta trouble by going from scratch? Just saying.:headscrat
 

sselander

Well-known member
Joined
Nov 20, 2008
Messages
2,041
Location
CT
Looks like Ed is having fun as is with the Camaro ..
Looks like a typical old car from the North

This is for the repro 1969 Dynacom Camaro body -
"MSRP is $13,500 for Part # CA 69CP with doors and deck lid.
Plus a Crating and Handling Charge of $495.00. All Bodies are shipped FOB Camarillo, California freight prepaid, or you could make your own freight arrangements."
http://www.dynacornclassicbodies.com/gm_models2.html
 
To avoid these ads, REGISTER NOW!
OP
E

e-tek

Well-known member
Joined
Dec 19, 2007
Messages
10,690
Location
Saskatoon, SK
If you can get all these after market parts... Couldn't you buy an entire car in pieces and save yourself a whole lotta trouble by going from scratch? Just saying.:headscrat

A lot of people think that when they see this kind of work - but there's a LOT more to a car than the outer skin panes. The cowl, floor and inner structures are the lions share of the car and the pieces I'm replacing are fairly straightforward - when you've done it a few times. ;)

Looks like Ed is having fun as is with the Camaro ..
Looks like a typical old car from the North

This is for the repro 1969 Dynacom Camaro body -
"MSRP is $13,500 for Part # CA 69CP with doors and deck lid.
Plus a Crating and Handling Charge of $495.00. All Bodies are shipped FOB Camarillo, California freight prepaid, or you could make your own freight arrangements."
http://www.dynacornclassicbodies.com/gm_models2.html

Exactly - so there's $15,000 (plus 10% exchange), plus shipping to SK, taxes and imports, then the body has to have everything transferred over - which alone is MUCH more than doing what I'm doing. Of course the new bodies come with their own VIN's, so it would be like buying a different car.

I've priced out this route and it'd end up about $80K -$100K (depending on a lot of things) to trim one out and get it drivable, vs about $25K for what I'm doing. Right now I'm at about $3K in labour.
 
Last edited:
OP
E

e-tek

Well-known member
Joined
Dec 19, 2007
Messages
10,690
Location
Saskatoon, SK
Had to buy a new gallon of MetalPrep (Phosphoric Acid soln) yesterday for the Camaro sub structure and MAN has the price ever gone up! Used to be under $40/gal, now it's $65! Oh well, certainly worth the extra step to truly neutralize any old/hidden or surface rust:

106_6704.JPG


The white phosphate coating already on there was from the first application. I did 3 in total:

106_6705.JPG


106_6703.JPG


Quarter panel sits patiently while I await the new roof panel and hinges for the drivers door.

106_6706.JPG


While I'm waiting on that stuff, I'll be able to get a move on the 240!

106_6708.JPG


106_6701.JPG


Check out the difference between the old and new Urethane bushings:

106_6700.JPG
 

signcrafter

Well-known member
Joined
May 9, 2012
Messages
12,317
Amazing work Etek!

Can you get some photos of how you fit up the new roof to the car and where you decided to cut the old roof out. Then welding it in. I'm sure you will but thought I would ask. Curious how you decide where to cut the old out and how you weld the new in. Thanks.
 

Chateau Slate 66

Well-known member
Joined
Nov 4, 2008
Messages
408
Location
Twin Cites, MN
It's sad that I even feel like I need to say this, but it's refreshing to see someone that takes the time and has the talent to do things the RIGHT way.

Very well done. :beer:
 
OP
E

e-tek

Well-known member
Joined
Dec 19, 2007
Messages
10,690
Location
Saskatoon, SK
Amazing work Etek!

Can you get some photos of how you fit up the new roof to the car and where you decided to cut the old roof out. Then welding it in. I'm sure you will but thought I would ask. Curious how you decide where to cut the old out and how you weld the new in. Thanks.

Will do!
As for cutting the major panel out, I first cut around from the joints I needed to separate, taking care not to slice into any bits below. Once the major panel is off, it's easier to separate where the the panels were joined by locating and drilling out all the spot welds, then separating the bits from either side with the air chisel. A factory assembly manual - and some of the better parts catalogues - help as well.
 
OP
E

e-tek

Well-known member
Joined
Dec 19, 2007
Messages
10,690
Location
Saskatoon, SK
Daily driver Dodge blew a PS hose today:

106_6709.JPG


And while I was under there, I thought I'd update y'all on the Ultimate Winter RustBullet vs POR15 Rust Paint test I started nearly 6 months ago:

106_6711.JPG


At this point, both paints look to be holding up to the extreme conditions very well. Even after a wipe, you can see the road salt residue:

106_6712.JPG


After that, I did some fitment on the Camaro's left quarter:

106_6720.JPG


106_6721.JPG


Then bolted on the deck lid for an initial gap check -

106_6719.JPG


106_6716.JPG


They're fairly even - and are within a hair of what is called for in the FSM - but compared to modern cars, they look wide enough to throw a cat through!!

Also got some more bits readied to put the 240Z front end together. Trying to get as much as I can done while waiting on the Camaro parts and before the 40Ford returns for some finalizing!

106_6723.JPG
 

pb57

Well-known member
Joined
Jul 8, 2012
Messages
154
Location
Sioux City Iowa
Ed, very nice work you do. I have a question on a vehicle I am restoring. There is rust in the seams of my floor pans where the two layers overlap and are spot welded. the floors are good and the rust is light but I am sure there is some in between the sandwiched seams. I can sandblast them and they look great but short of taking apart each seam (overkill I believe) is there anything I can do to stop this. thanks Paul
 
OP
E

e-tek

Well-known member
Joined
Dec 19, 2007
Messages
10,690
Location
Saskatoon, SK
Ed, very nice work you do. I have a question on a vehicle I am restoring. There is rust in the seams of my floor pans where the two layers overlap and are spot welded. the floors are good and the rust is light but I am sure there is some in between the sandwiched seams. I can sandblast them and they look great but short of taking apart each seam (overkill I believe) is there anything I can do to stop this. thanks Paul

Paul, I think the best you can do there is soak them down in a Phosphoric Acid solution. It'll get into all those nooks and crannies and convert any rust that's started, plus treat anything else. I use MetalPrep from POR15, but it comes as Ospho, Naval Jelly, Rust Mort and more. For that application I'd use a liquid as opposed to a jelly though. Once you've put on several applications, you can wipe it down with thinner or acetone, then paint it with a rust paint like POR15 or RustBullet. Hope that helps!
 
Last edited:
OP
E

e-tek

Well-known member
Joined
Dec 19, 2007
Messages
10,690
Location
Saskatoon, SK
After taking care of my sick kids the first few days of the week, I caught up over the last couple days!

Mrs E's Mini Cooper blew it's thermostat seal....hard as HELL to get at - like everything on these cars...

106_6747.JPG


Then I got the struts hooked up on the 240Z:

106_6740.JPG


106_6741.JPG


And the 40Ford is back for some sorting out before upholstery:

106_6734.JPG


The hood will get new hinges and some alignment work:

106_6742.JPG


Something is binding in the trans and it needs to come out, but this plate is preventing that. It'll have to cut it out and then change it up a bit. Also the TV cable needs some tweaking...

106_6739.JPG


And - most unfortunately :( the heavy filler used by the shop that did the original metalwork is coming back to haunt us.....Its hard to see in the photo, but check out what happened when the door got slammed and the window motor hit it from the inside. I'll have to secure the motors somehow and add some protective padding....before repairing - and repainting - it.

106_6737.JPG


We'll get this thing ready fo-sho by summer!
 
Last edited:

raskal

Well-known member
Joined
Aug 16, 2005
Messages
290
Location
British Columbia
Mrs E's Mini Cooper blew it's thermostat seal....hard as HELL to get at - like everything on these cars...

106_6747.JPG

I'm doing the same fix on a '03 Beetle. Did you buy the Mini gasket or use a RTV product? The Beetle uses a simple rubber ring that doesn't look perished in any way, but still leaks
 
OP
E

e-tek

Well-known member
Joined
Dec 19, 2007
Messages
10,690
Location
Saskatoon, SK
I'm doing the same fix on a '03 Beetle. Did you buy the Mini gasket or use a RTV product? The Beetle uses a simple rubber ring that doesn't look perished in any way, but still leaks

Same - looks ok, but leaks! I'll buy the seal and t-stat, which come as one. I read that these housings crack quite often, but this one looks ok. Not an app where RTV would suffice.
 
OP
E

e-tek

Well-known member
Joined
Dec 19, 2007
Messages
10,690
Location
Saskatoon, SK
Today's post is brought to you by RUST BULLET ;)

First up was the Camaro's roof sub-structure:

106_6765.JPG


After the phosphoric Acid did it's work, the Rust Bullet will seal it permanently.

106_6764.JPG


Then I re-did the 240Z wheel wells, which also covered up the blue overspray:

106_6767.JPG


106_6760.JPG


After that work, I continued detailing all the small parts for the eventual suspension re-installation:

106_6759.JPG


Lastly, I dragged all the rear suspension parts out of the storage shed and brought them into the shop. Having been in an unheated shed all winter the metal was minus 30C - which went through my shop gloves like shards of ice piercing the skin. Ouch! :eyecrazy:
 

Jehannum

Well-known member
Joined
May 3, 2012
Messages
1,348
Location
Albuquerque, NM
Check out the difference between the old and new Urethane bushings:

106_6700.JPG

Just a quick note, when I did the suspension on my 240Z, I used a new rubber bushing on one side of the junction (IIRC, the I used the rubber bush on the engine compartment side). Going full urethane on the tension rods is a surefire way to break the tension rod at an "inconvenient" moment. :)
 
OP
E

e-tek

Well-known member
Joined
Dec 19, 2007
Messages
10,690
Location
Saskatoon, SK
Just a quick note, when I did the suspension on my 240Z, I used a new rubber bushing on one side of the junction (IIRC, the I used the rubber bush on the engine compartment side). Going full urethane on the tension rods is a surefire way to break the tension rod at an "inconvenient" moment. :)

That sounds like a smart plan. Thanks!
 
OP
E

e-tek

Well-known member
Joined
Dec 19, 2007
Messages
10,690
Location
Saskatoon, SK
Made the pieces needed to repair the worst part of the Camaro's roof substructure:

106_6769.JPG


106_6770.JPG


Drill and chisel, drill and chisel ;)

106_6772.JPG


106_6774.JPG


Bottom piece:

106_6775.JPG


Top piece:

106_6776.JPG


Nearly ready to weld:

106_6778.JPG


I was going to buy a transmission jack to pull the trans from the 40Ford, but I kept thinking how it would get used once, then be in the way forever! As well, I have this ram that was given to me by a friend and I wanted to use it in another application, so I thought out a way to make up my own trans jack, I cut the pieces for it today and I'll show the welding and assembly of it tomorrow:

106_6780.JPG


106_6781.JPG


I'm off these next few weeks for my bi-annual OLYMPIC so-journe. So while I'll be in the shop most of the time, my attention will be somewhat split between the two!

106_6782.JPG
 
To avoid these ads, REGISTER NOW!
Top Bottom