To avoid these ads, REGISTER NOW!

Empty but Full of Potential

jparks

Member
Joined
Apr 26, 2016
Messages
17
Location
Michigan
We purchased this garage in April, 2016. It had been labeled "an unusual property" by the county and the township for its dubious past and questionable prior owners. But, the price and location were just too good to pass up. We went into the project with eyes wide open. It had been on the market for three years for a reason - actually several reasons. No other buyers had wanted to become contortionists that would bend over backward and jump through hoops to bring the property into compliance to pass the point of sale inspection. After four long months, we had met every ordinance, health code, and request that could be thrown our way and the sale went through. "The clubhouse", as we call it, may be empty now, but it's full of potential.
Garage.jpg

Inside, there were four (and a half) rooms. The garage with the overhead door, two small rooms in the back, one large room to the side, and a poorly framed beginning of a bathroom.
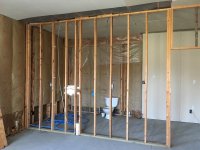
two walls.jpg
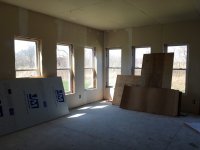
windows.jpg
toilet.jpg

These rooms did not comport with our plans for the clubhouse. They had to go. And thank goodness that was the plan all along because once we got into them, the surprises just kept coming. Step one was to take down the existing drywall. And surprise! There's insulation in the interior walls.
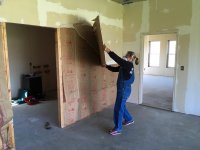
wall part 1.jpg

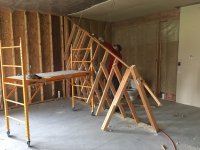
Oh, and surprise again, in the exterior walls, there's drywall screwed to OSB, OSB nailed (plentifully) to studs, and insulation stuffed around wires with ends that are simply twisted together and held in place with a prayer.
wall part 3.jpg

Those windows you see? Why frame them in when spray foam will do? Stay tuned. It's going to be a long journey.
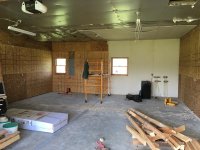
wall part 2.jpg
 
To avoid these ads, REGISTER NOW!

Marcm157

Well-known member
Joined
Jan 12, 2014
Messages
525
Location
Newburgh, NY
Good Luck - Looks like you got your hands full but you are right - LOTS of potential. What size is the building? How much property?
 
Last edited:

KRB52

Well-known member
Joined
Sep 25, 2013
Messages
2,650
"...for its dubious past and questionable prior owners." This sounds interesting. Care to elaborate? What was the original intent of The Clubhouse? Your picture of the outside look like it is in someone's backyard.
 

Bib Overalls

Well-known member
Joined
Dec 4, 2006
Messages
3,318
Location
Jonesboro, Arkansas
"It had been on the market for three years for a reason - actually several reasons."

Interesting project. Looking forward to seeing how you overcome the deficiencies and turn it into a garage, shop, and play pen.
 
OP
J

jparks

Member
Joined
Apr 26, 2016
Messages
17
Location
Michigan
"...for its dubious past and questionable prior owners." This sounds interesting. Care to elaborate? What was the original intent of The Clubhouse? Your picture of the outside look like it is in someone's backyard.

The original owner planned to live in it while building a house on the property. Local folklore is that he DID live in it... without plumbing and with very sketchy electrical work. It seems that he may have walled off a small room and heated and cooled only that area.

The pictures look like a backyard because it's a 2 acre lot with houses on either side. So for the neighbors, it is their backyards.
 

-Brent-

Well-known member
Joined
Dec 23, 2009
Messages
4,709
Location
Utah
I was expecting it to be worse. The last building with a questionable past I heard about, recently, had a bedroom that was insulated with a few garbage bags of weed hidden behind some loosely hung drywall.
 
OP
J

jparks

Member
Joined
Apr 26, 2016
Messages
17
Location
Michigan
Well, garage fans, we last left off with some of the walls down in the "Empty but Full of Potential" (EFP) project. The next weekend, we solicited help. The goal was to get the last dividing walls down and all drywall and insulation down. It was little gems like this that reminded us that it ALL had to go.
IMG_0690.jpg

Some walls were easier than others. For example, this wall was anchored to the ceiling only by the electrical wires running through it...
IMG_0696.jpg

Others were multi-step demolitions. Here, for example, we took off the drywall and removed the insulation. Then, we busted out a sawsall and cut through the studs and OSB.
IMG_0691.jpg

With half of the wall down, we came at it from the other side and killed it.
IMG_0699.jpg

But, notice in the background that we have piles of the fallen gathering on the floor.
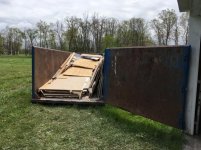
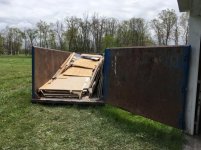
It's time for a dumpster.
 

Attachments

  • IMG_1184.jpg
    IMG_1184.jpg
    121.4 KB · Views: 148
  • IMG_0726.jpg
    IMG_0726.jpg
    84.4 KB · Views: 160
OP
J

jparks

Member
Joined
Apr 26, 2016
Messages
17
Location
Michigan
Dumpster day had arrived. A 30-yarder in all her glory had been delivered the previous day and we had help for a second weekend. So, the rest of the OSB, insulation, and ceiling were slated for demolition.
6 hours later, we declared the demolition done.
IMG_0726.jpg

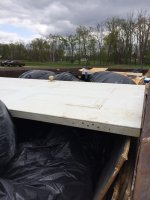
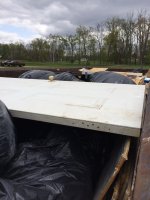
To keep the bags of insulation from poking above the top of the dumpster, we shut the door, climbed in, and jumped on to top of them like a very scratchy bounce house. Once compacted, doors kept them weighed down.
IMG_1184.jpg
 
OP
J

jparks

Member
Joined
Apr 26, 2016
Messages
17
Location
Michigan
Now that the building was down to its shell, we were able to focus on sealing it up. Don't get me wrong, the building is professionally built and the builder did a great job, but there was room for improvement.

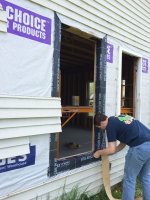
For example, the windows could have been flashed.

So, the siding needed to come off.
IMG_1188.jpg

But, I'm a novice EFP project worker so I didn't want to have a puzzle at the end of the day when the siding needed to go back on the building. To save my bacon, I replicated the pattern in the grass as we took off the pieces.
IMG_1191.jpg

Once the glass was removed and the window frames were unscrewed, we popped them out of the openings and marveled at the amount of daylight that had been coming in around them.
IMG_1193.jpg

Did I mention that we're novices? Occasionally, we had to take a break and look up with the hell we were doing.
IMG_1196.jpg

But, we succeeded and the windows fit back in their holes in the end, all snug like little water repellent bugs in rugs.
IMG_1197.jpg
 

Attachments

  • IMG_1192.jpg
    IMG_1192.jpg
    69.9 KB · Views: 85
OP
J

jparks

Member
Joined
Apr 26, 2016
Messages
17
Location
Michigan
Would it not be cheaper to tear it down and redo it properly from the start?

I don't think so. The building was built by a reputable company and is very well done. It's all of the work that the owner(s) did themselves that needed to come out. The exterior walls, floor, and roof are actually pretty remarkable.
 
To avoid these ads, REGISTER NOW!
OP
J

jparks

Member
Joined
Apr 26, 2016
Messages
17
Location
Michigan
I'm happy to report that we've been busy and making good progress. Unfortunately, there hasn't been much visual impact with the tasks at hand so I don't have anything amazing to show in pictures.

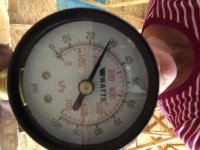
We've caulked and spray foamed all exterior cracks and openings. We also pressure tested the hydronic system to ensure that it will be usable - as finding out that it would not be will greatly change what we are preparing to submit on our electrical and mechanical permits. The great news is, it holds pressure!

Because the previous owner really REALLY enjoyed his fasteners, there are staples, nails, and screws galore to pull. The building will be significantly lighter when that project is done.
IMG_1211.jpg
IMG_1213.jpg

The only big visual impact item I can share lately is that we framed in and installed the first of five windows we plan to add. Here's a test fit of the window from the inside of the building.
IMG_1220.jpg

Here's the final install.
IMG_1222.jpg

This window is one of two small 2x2 windows we're adding to what will become the full bath. In addition to adding five windows, we need to remove two. The previous owner did not frame them in and they are too close to the gas - plus they would really jam us up trying to put a workbench on that wall due to their height and placement.

Thanks for following along! Much much more to come!
 

Attachments

  • IMG_1210.jpg
    IMG_1210.jpg
    134 KB · Views: 59
OP
J

jparks

Member
Joined
Apr 26, 2016
Messages
17
Location
Michigan
Been busy again.
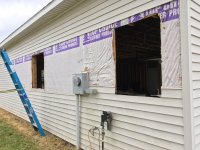
The garage had two windows that had to go for multiple reasons. Most importantly, they weren't properly framed in. The previous owner had simply cut holes in the wall and spray foamed the windows into place. We pulled down the siding (again) and popped out the windows.
IMG_1337.jpg
IMG_1339.jpg

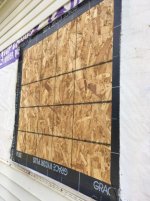
Then we cut back the existing OSB to the nearest studs and cut new OSB to fit the openings.
IMG_1340.jpg

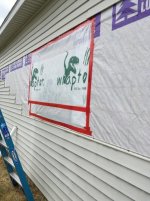
Once that was nailed in place, we flashed around the seams.
IMG_1341.jpg

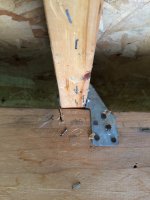
Inside, we replaced the missing 2X6s and added new ones.
IMG_1342.jpg

After putting up new house wrap, we put up new siding (since the old had holes for the windows in it). Thank goodness that the siding color matched even though it's had a decade to weather in the sun!
IMG_1343.jpg
IMG_1350.jpg
 
OP
J

jparks

Member
Joined
Apr 26, 2016
Messages
17
Location
Michigan
Like all other aspects of this garage, the previous owner's efforts were lackluster when it came to pouring a concrete pad at the door. We contemplated renting a jackhammer to break it up, but when I stuck a shovel under one edge, the entire pad lifted up easily. Under it... baseball size rocks. It seems he may have simple poured a bag of concrete and splashed some water on it and then prayed to the gods that it would form into some sort of solid surface.
Unfortunately, I don't have a before picture, but imagine **** cement broken into three pieces with grass growing in it and you'll come close.
So, we were able to break it up easily with a hammer and carted it off to the dump.
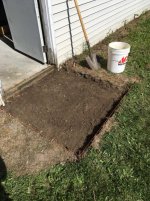
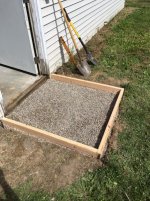
Then we busted out our shovels and dug down about 6 inches.
IMG_1355.jpg

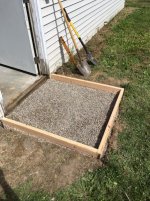
Once we built the wood form and squared and leveled it in the hole, we poured in 2 inches of gravel.
IMG_1356.jpg

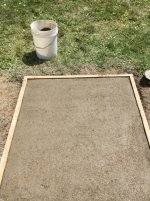
Thanks to the rented concrete mixer, it was easy to mix up the concrete and pour it on top of the gravel. And... ta da... a pad that doesn't ****!
IMG_1358.jpg
 

C_F

ALLIANCE MEMBER
Joined
Jan 21, 2005
Messages
9,675
Location
Utah...SNOW BLOWS!
Nice work on closing up the back windows, it looks like they were never there!:thumbup:
I'm sure your neighbors are enjoying having someone there who is doing improvements on the building, versus how it sounds like it was before.
 

Bib Overalls

Well-known member
Joined
Dec 4, 2006
Messages
3,318
Location
Jonesboro, Arkansas
It will have a ......... small snack bar/kitchenette, and a full bath.

Think about some sort of sleeping facility even if it just a fold out couch in the resting/snacking area. You never know when one of your buddies (or even you) will need to get out of the house for a day or two.
 
OP
J

jparks

Member
Joined
Apr 26, 2016
Messages
17
Location
Michigan
Couple of productive weekends to report:
You may have noticed when I posted pictures of our concrete pad project that the door's wood was rotted and the door itself kind of sucked. Take a look at the before in this pic.
IMG_1356.jpg

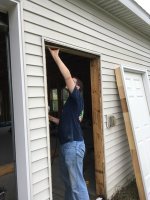
So, all of that was switched out. The door is now fiberglass with vinyl coated wood so hopefully it will hold up for a while.
IMG_1360.jpg
IMG_1362.jpg

With that and a new seal on the overhead garage door, we declared the building finally up to snuff.

But, we have grand plans. A well sealed and no longer rotting building was not our end goal. So, it was time to frame some walls. We plan to have a "work room" and a garage side. The work room side will have plenty of open space for laying out projects, "playing radio", drawing, etc. The clean hobbies. The work room will also have the kitchenette and the bathroom. The dusty and dirty hobbies will go in the garage side. To accomplish that, we needed to build a dividing wall, in addition to a hallway and a bathroom.

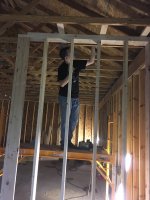
Here's our start on framing the dividing wall. First we laid the 2X6s out on the floor and nailed them together.
IMG_1367.jpg

Then we stood up the section and secured it.
IMG_1369.jpg
IMG_1370.jpg

Rinse and repeat.
And now we've got two of the dividing wall sections in place. Other weekend plans (I know... can you believe it? We do stuff beside this side project!) took precedence and we had to stop there for a while, but we've got the hang of framing now so look out world!
IMG_1372.jpg
 
OP
J

jparks

Member
Joined
Apr 26, 2016
Messages
17
Location
Michigan
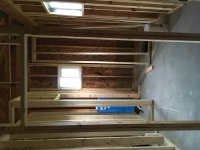
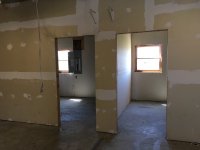
In October, we finished framing the walls. Previously, we raised the main partition wall. After that, we had to focus on building the bathroom. This is a picture of the bathroom as viewed from the work room.
IMG_1398.JPG
And... the bathroom as viewed coming in through the doorway.
IMG_1399.JPG
It is complete with a closet and, as of this weekend, a wall to create the shower.
IMG_1400.JPG

In the garage side of the garage, we built a closet to house the in floor heating system and to keep it from getting banged into by various projects.
IMG_1401.JPG
The BEST thing we accomplished recently was getting the framing inspected and PASSING!
IMG_1397.JPG
 
OP
J

jparks

Member
Joined
Apr 26, 2016
Messages
17
Location
Michigan
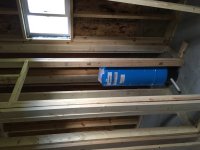
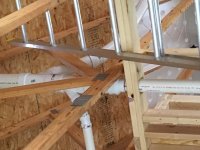
After obtaining our plumbing permit, we began with the venting installation. Here's the venting for the bathroom coming together to exit through the roof.
IMG_1406.JPG

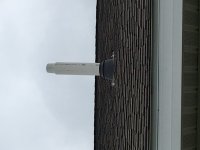
The vent from outside.
IMG_1408.JPG

And some attic baffles for blown insulation in the future.
IMG_1403.jpg

I have no idea why these pictures are suddenly uploading sideways...
 
To avoid these ads, REGISTER NOW!
Top Bottom