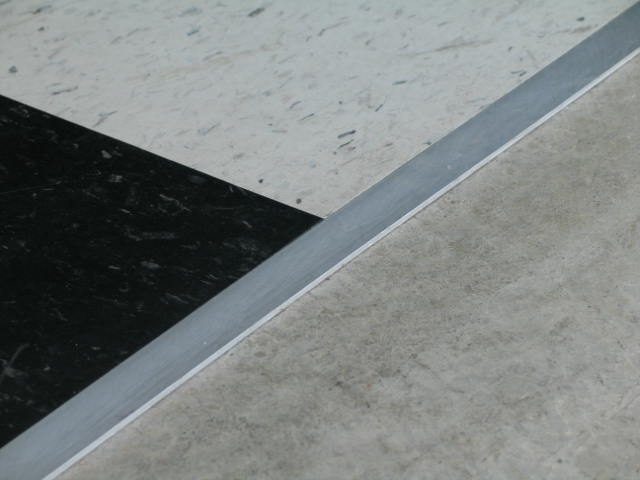
1) you can't see anything when the garage doors are closed. That's transition is an aluminum strip from Home depot, and is 1"x96" long, and 1/8" thick, the same thickness as the tile. It makes a nice transition. When the door is down, from the inside it just barely touches that aluminum, from the inside, from the outside you see nothing.
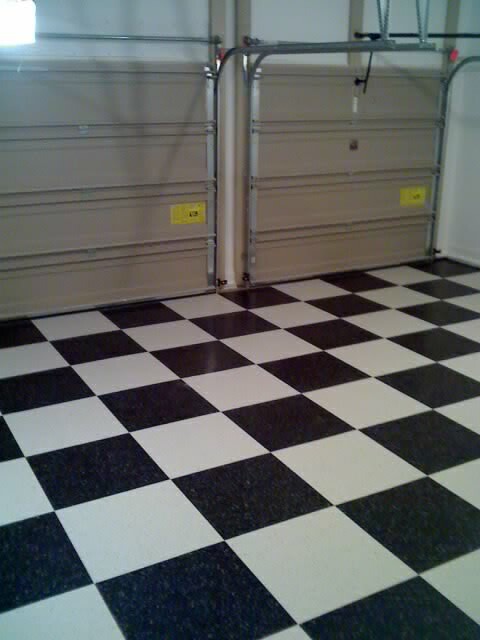
2) Yes, with Quickrete in the squeezable bottle. I also wanted the tile to be centered on the bigger 2 car garage door on the left, and I wanted to have a full tile when the garage door was opened in that area.
I used the Armstrong S-750 glue. See this below, from a while ago.
It is time to leave the car outside and focus on a product for the garage. More specifically, we are going to take
your drab and boring concrete floor and not only improve the looks, but make keeping it clean much easier. I
don’t need to remind you that a tile floor will make you the envy of all the neighbors too…
Recently, I put finishing touches on covering my garage floor with vinyl composition tile, or VCT. This
commercial-grade flooring is very common and very durable. Most likely, your favorite grocery store, drug
store or even indoor mall uses it. VCT is available in nearly every color and is sold as 12-inch-by-12-inch
squares.
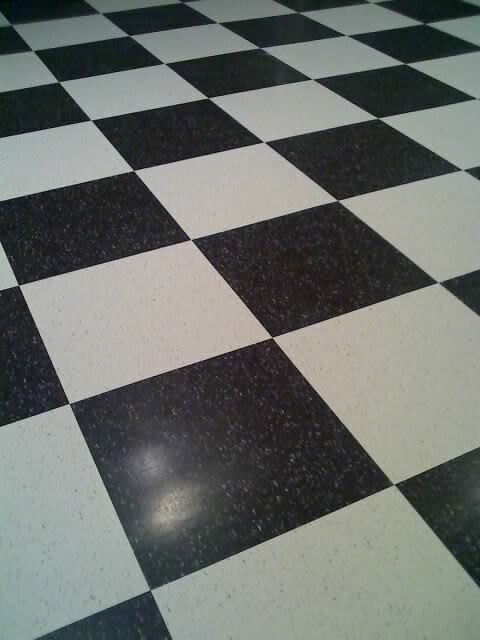
I used Armstrong Imperial Texture VCT for my garage floor. Since I wanted a black-and-white checked look, I
used two alternating colors. I chose Armstrong #51910 (black) and #51911 (white) because they are not solid
colors, but speckled with chips of the complimenting color. The 1/8–inch-thick tiles are resistant to most
chemicals and oils. The colors are solid throughout, so you can sand down any stains, and then wax the tile
back to perfection. Home Depot sells VCT for 59 cents a square foot.
Floor preparation is relatively simple. Sweep and vacuum up the dirt, gravel and cobwebs, then ensure the
floor is smooth. I used a chisel to knock off debris (paint and concrete drips), and filled holes with a concrete
mix (ready-made). The floor must be clean and even. You will be amazed that even the smallest bit of gravel
will show through the tile after it has settled.
The tiles are glued directly to the concrete with an adhesive specifically designed for the job. Keeping it all in
the family, I used Armstrong Glue S-750 ($13 per gallon). Each gallon covers about 10 feet by 20 feet, so I used
three gallons on my three-car garage. For a more permanent application, tiles can be applied with epoxy to
the concrete. This will prevent tile “creep” from wheel camber pressure when dropping cars off floor jacks.
The most difficult part (and most critical) is putting down the first tile. All tiles build off that one, so make
sure it is completely straight. Houses in California are not built perfectly square, so don’t expect your garage
to be either. I decided to snap a perpendicular line off the middle of the garage door. I used that as my
“straight line” for reference and to place my first tile. Visually, it worked out perfectly.
The tile goes down very easily. Spread the glue in sections with a very shallow trowel (1/32 of an inch), and
then let it dry to the touch. The color change of the dried glue is quite obvious, so it is easy to tell when it is
ready for tile.
Place your first tile and then build off that one. The tiles are sized exactly the same, with perfectly square
and straight sides. Push them together firmly (no gaps), then go to the next one. You can cut the tile with a
utility knife, or a special tool (like a paper cutter), as you near corners or obstacles. Upon completion, roll the
floor with a 100-pound-tile-roller (Home Depot/$15 day) to press out any air.
For the best protection against stains, I suggest waxing and polishing the tile to a shine (like grocery store
floors). The floor will resist most chemicals and oils, but I still suggest wiping up spills. Unlike concrete,
sweeping the tile floor with a “dust broom” takes mere minutes to complete.
My home has a three-car garage, with about 610 square feet of floor. I did the entire garage for about $450
(that figure includes tile, glue, equipment rental and tools). If you are interested in contracting the job out, I
was quoted $1 a tile (labor) to have someone else install it. However, they would not allow me to supply the
tile at that price (I would have to buy it from them for $1.24 each). Doing the math, it would have cost me
about $1,400 to pay a contractor to have the floor finished in VCT tile.
Instead, I used my minimal contractor skills, an open weekend, and an investment in materials of less than
$500. The result is a beautiful tile floor that garners continuous comments from nearly everyone who walks by.


")


 Cheers, Bill