mustangmatt
Active member
Mustangmatt's Epoxy Floor Project
Hello all,
I have been a long time lurker here but really have been reading the board ALOT lately as I am closing on my first Single Family Home ever. I am going from a tiny 2 car to a 25x39 "4 car" "dream" garage. I close this Friday and have been busy doing research on this site as I want to do my floor RIGHT and go from there. All of the vendors on here have been very helpful from what I can see and really go above and beyond, there are a couple in mind that I think I may have narrowed it down to but definitely open to option.
All that being said I want to get educated on the different Pro's and Con's about Epoxy vs Tile setups. Here is the backround of my garage...
-COLD Minnesota winters. Harsh climate, very wide temperature spread (I live in the twin cities but seriously it gets as cold as -20 and hot as 100+... Salt is also prevalent but will only be in the "daily driver" part of the garage.
-There is a wall between one side of the garage and the other
-I plan on installing a lift
-I work on cars as my hobby and will more then likely do a small amount of side jobs on cars to supplement income
-The garage does not currently have a heat source although I will be installing something before winter hits (wish I would have been there to put radiant heating in ).
).
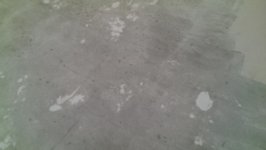
-There are some light oil stains
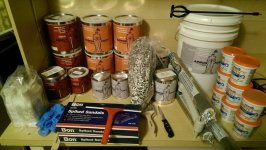
-I am prepared to do any job DIY to cut costs but I have a fairly large budget for this.
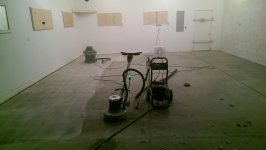
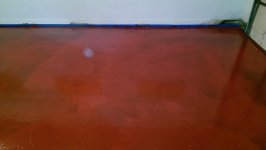
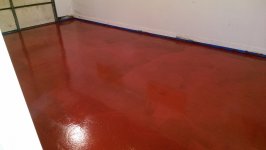
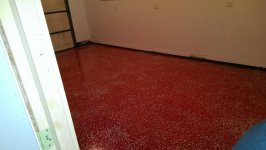
-I have attached pics to give a better look at the garage...
Things I desire:
-Ease of cleaning (heard you can just wipe stuff up with epoxy, not sure on tiles) I have no hose out in the garage.
-Grip. Several I have spoken with said epoxy gets slippery, I would rather hear it from the pros though.
-Durability, I wont be working out there every day but when I do I am sure I will be beating the hell out of it.
I think that covers all the bases for me, I really appreciate any input or responses ahead of time and really enjoy this forum! Thank you!
-Mustangmatt
Hello all,
I have been a long time lurker here but really have been reading the board ALOT lately as I am closing on my first Single Family Home ever. I am going from a tiny 2 car to a 25x39 "4 car" "dream" garage. I close this Friday and have been busy doing research on this site as I want to do my floor RIGHT and go from there. All of the vendors on here have been very helpful from what I can see and really go above and beyond, there are a couple in mind that I think I may have narrowed it down to but definitely open to option.
All that being said I want to get educated on the different Pro's and Con's about Epoxy vs Tile setups. Here is the backround of my garage...
-COLD Minnesota winters. Harsh climate, very wide temperature spread (I live in the twin cities but seriously it gets as cold as -20 and hot as 100+... Salt is also prevalent but will only be in the "daily driver" part of the garage.
-There is a wall between one side of the garage and the other
-I plan on installing a lift
-I work on cars as my hobby and will more then likely do a small amount of side jobs on cars to supplement income
-The garage does not currently have a heat source although I will be installing something before winter hits (wish I would have been there to put radiant heating in
).-There are some light oil stains
-I am prepared to do any job DIY to cut costs but I have a fairly large budget for this.
-I have attached pics to give a better look at the garage...
Things I desire:
-Ease of cleaning (heard you can just wipe stuff up with epoxy, not sure on tiles) I have no hose out in the garage.
-Grip. Several I have spoken with said epoxy gets slippery, I would rather hear it from the pros though.
-Durability, I wont be working out there every day but when I do I am sure I will be beating the hell out of it.
I think that covers all the bases for me, I really appreciate any input or responses ahead of time and really enjoy this forum! Thank you!
-Mustangmatt
Attachments
![IMAG1201[1].jpg](/forum/data/attachments/385/385294-05a19c83e0e3b9dcb1fdccf0f02445a8.jpg)
![IMAG1202[1].jpg](/forum/data/attachments/385/385340-736fc43d7b2c47e4f49728b9791e75a4.jpg)
![IMAG1203[1].jpg](/forum/data/attachments/385/385377-59b40ef6feba05de02a8d15ee214802b.jpg)
![IMAG1204[1].jpg](/forum/data/attachments/385/385427-8fab1a86753c8718cab9a9c2b7664113.jpg)
![IMAG1175[1].jpg](/forum/data/attachments/385/385184-44a4c2c3f8fb7b535787dbe68338e667.jpg)
![IMAG1176[1].jpg](/forum/data/attachments/385/385216-9a6b40e7405b954d0650c8a108161de7.jpg)
![IMAG1200[1].jpg](/forum/data/attachments/385/385252-e7e8b4824bed891d9524ad388fc74458.jpg)
Last edited: