Bigblue&Goldie
Well-known member
I actually dislike yellow, but I think it's a cool combo with what you're doing

")


I think he does. To sell it to mom the jeep could only be his while he's in school. After that, it becomes mine in exchange for something more college ready, like a Honda Accord. I'm probably going a little overboard on the build but I figure it's a once a lifetime thing that may prove to be a deep and meaningful memory for my son. We're hoping anyway.


I read through the entire thread tonight... such an awesome build. I appreciate that you never half-a$$ anything. That is a lesson that your son may may not fully realize or appreciate until he is a little older, but he that will sink in with him too.
I'm planning to do a similar project with my son except our project is a 1972 CB350. My son turns 14 the first week of October and I'm trying to get my garage cleared out more so I can start the process of prepping the CB350 frame for upgrades.
Like you, I'm also going in a little overboard... but mostly with upgrades that will make the bike safer and more reliable for him as well as more enjoyable to ride.
Lots of high quality, detailed work. Keep it up.
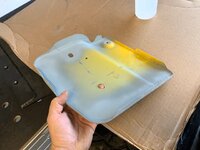
The different shades of yellow would drive me nuts though.
This thing would have gotten me in big trouble when i was 16. Awesome build!
I actually dislike yellow, but I think it's a cool combo with what you're doing
That'll be awesome. Hopefully you plan to document it so we can follow along. I'm a little jealous, you wisely chose a project of that only needs a fraction of the garage. I, not so much.
Ah, but I also have a fraction of the space you do and a fraction of the tools.
What drive shafts you and Andrew ordering. Jeep looks fantastic...
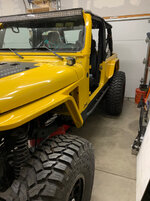
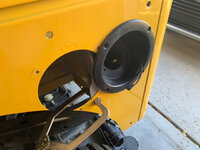
Adam's is a great shaft. I use them on my rig, no problems yet. What gears and lockers to turn those 40's did ya decide on? Also is it stick or auto? That black does pop on the yellow.


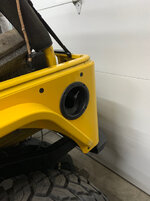
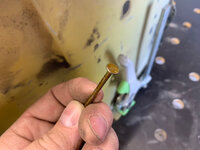
Are those the cheap "Aluminum" Inserts. Or are these a more desirable material (Steel)? And if steel, can these be easily "Crimped"More yellow
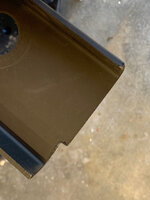
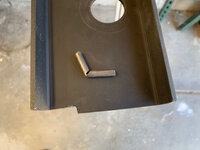
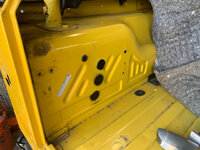
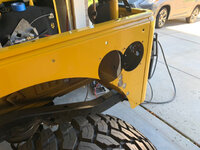
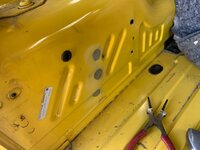
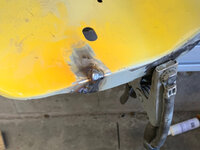
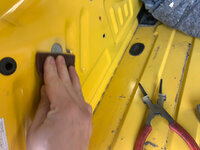
There’s couple blind holes on the tub where the corners attach. Each of those are drilled to the appropriate size and then rib-nuts are installed to eliminate the need for a nut on the back-side.
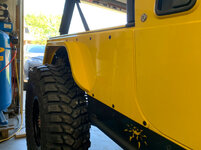
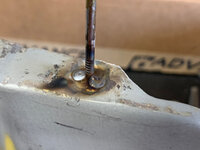
All of the body armor came with stainless steel fasteners. Neither Andrew nor myself felt that the shiny metallic look of stainless goes that well with yellow so I did a little looking for black fasteners. Initially I was looking for fasteners that had been powder coated which was an absolutely failure. At some point I tripped across 18-8 (stainless) which comes in a black-oxided (chemically rusted essentially) finish. Black oxide isn’t a protective finish however it also does not alter stainless's corrosion resistance which means that they should not rust (more) and stay black the way we intend on using them.
Are those the cheap "Aluminum" Inserts. Or are these a more desirable material (Steel)? And if steel, can these be easily "Crimped"
Matt you are going to share where you were travelling to "Trip Over" Those little gem's Right?
Thank You In advance Harry
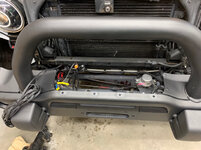
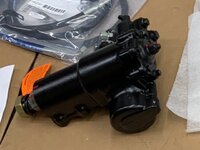
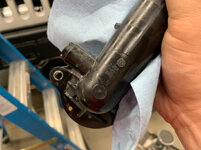
I purchased the box with a hydro assist but haven't added the ram yet (they lines were too short) and I need to relocate the mounting bracket. The one that came on the Dynatrac is too low and too far off to the passenger's side.You'll like the PSC Big Bore XD gearbox. I ran one for about 9-10 months before swapping over to hydro-assist and it worked well with my 35" tires.
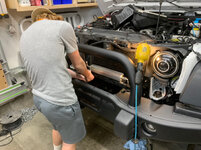
As for the cooler, I mounted mine behind the crash bar under the front bumper up and out of the way. It isn't in direct airflow but those heat sink style coolers don't need to be in direct airflow to function properly which is one of the reasons I like them. I was going to mount it where you did but I have a stacked plate auxiliary transmission cooler in front of my cooling package that wouldn't allow any more components to be mounted and I didn't want any more heat going through the cooling package that I already have.
I purchased the box with a hydro assist but haven't added the ram yet (they lines were too short) and I need to relocate the mounting bracket. The one that came on the Dynatrac is too low and too far off to the passenger's side.
Did you swap the box out when you went to hydro assist?
I think I'm going to move mine to the crash bar as well. Though it doesn't seem to be that big of a deal where it is, I have noticed that the engine temps are higher than they used to be and the fan runs more. Given it's now cooler in Denver (70's - mid 80's), that's probably not a good thing. I agree it doesn't need to be in direct air flow. Having a heat sink to dissipate heat is far better than not having one and not many rigs have had them historically. Besides, the under draft of the vehicle at speed should pull heat away from the sink just fine. Only time that it might be an issue is in extremely low speed wheeling where engine temps start to climb anyway.
Matt, I removed my PSC HDII gearbox just prior to my LS swap and I am running the OEM box that is ported for hydro-assist... the HDII (second version) of the gearbox which was much larger than its predecessor and was NOT compatible with the LS engine due to the size and interfering with the A/C compressor.
I think you're on the right track to relocate the cooling heat sink. When talking to the guys at PSC as well as Red Neck Ram both mentioned that with a hydro-assist ram a cooler really isn't necessary like it is when just running a gearbox because of the added volume and the ram itself acting as a heat sink but I had already installed my steering cooler so I just opted to keep it with the hydro-assist as a little extra insurance to ward off overheating my steering when crawling around at low speeds. So far it has performed flawlessly with absolutely zero steering fade when hot.
Any updates? I loved following the build. It's always nice to see a non bolt on build.
Sent from my Moto G (5) Plus using Tapatalk


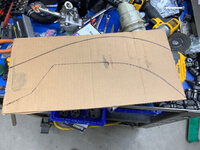
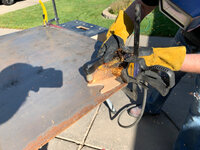

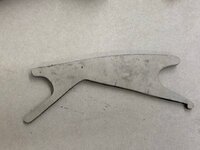
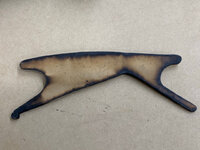


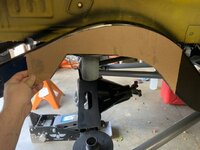

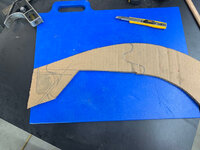
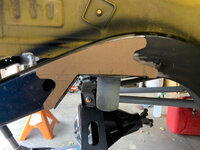


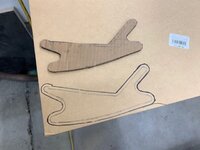


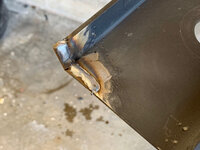
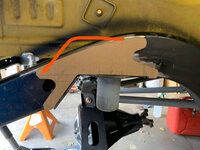
Brace looks very nice. Well done on avoiding stress concentrations where possible. From a moment-of-inertia perspective, it may have been more effective to make a bulge on the top, but that may not have been practical. But I'm sure it will hold fine.

Your attention to detail and write-ups are exceptional. Carry on!