To avoid these ads, REGISTER NOW!

#FabSpace

csp

Well-known member
Joined
Mar 23, 2010
Messages
5,719
Location
Franktown, CO
x2 on those NOCO chargers. I'm very happy with the Genius 10 and have brought back two batteries that were headed to the scrap place.
 
To avoid these ads, REGISTER NOW!
OP
L

lilscorpion

Well-known member
Joined
Mar 15, 2010
Messages
3,599
Location
Colorado
Diagnosing a problem is fun, stressful, confusing, and always a learning moment. A recap on my situation - after starting the Jeep for the first time after the Magnuson supercharger install, i was getting 5 different codes. Three were injectors 2, 4, and 6 weren’t getting voltage, the cooking fan wasn’t getting voltage, and a throttle position sensor error. Oh, and the serpentine belt was too long just a bit.

Reseating the throttle body plug cleared the throttle position sensor error. Almost felt like a freebie. Next the cooling fan. Chases the relay and found I missed hooking it up to power. Another freebie. Next the injector errors. I was able to get (what I thought was) #2 and #4 disconnected and snuck in the ohm tester to make sure the injectors themselves were good. They were. I was struggling to get to (what I thought was) #6 so I removed the batteries, fuse box, battery tray, and intercooler reservoir.

1A35F36F-6F23-4493-AE00-7EBE53F63835.jpeg

As I tried to get access to (what I thought was) #6, it occurred to me that it’s really unusual for all 3 to be affected by a plug or injector issue. It needs to be something up stream. My first thought was that there’s a ground I missed somewhere. Seemed reasonable and after rooting around, I stumbled across a ground I’d missed which connects directly to the wiring harness.

34421BD5-B40E-4DA6-A5FB-814C81466357.jpeg

Well hell, that has to be it right? I put everything back together and the entire time I was mentally preparing to do a victory dance. So happy…until I cleared the codes, fired it again, and the codes returned. Frustrated, I called it a night.

First thing in the morning, wanting a quick win to start the day, I went chasing a smaller serpentine belt. This time I bought the next three smaller belts as to avoid needing to take a bunch of trips. The 103 7/8” belt ended up the winner. Next, back to the injector issue. I was told that with key on the injectors should have voltage…but they didn’t. Back to the internet. I tried a bunch of things to no avail. Super frustrated, I somehow ended up on a JL thread where the topic was about the wiring harness and within was a picture of the JK’s cylinder numbering. Up until now, I’d used this pic as my frame of reference for cylinder mapping -

E89CC0F6-0D22-4182-90C4-72572E9CA12C.jpeg

2, 4, 6 are in the passengers side right? This is what I saw in the JL/3.6L thread -

2DFCD6E9-291F-43F4-915A-916A90D2D426.png

I felt SO dumb. The entire time I’ve been diagnosing the wrong side of the motor. I actually had a moment of happiness tho - I now had a lead…until I realized I can not access
Any of the injectors, they’re completely hidden by the supercharger. So it’s gotta come out and sonic does.

8BC87AE8-9FE3-4CB4-9E21-8A7023340C77.jpeg

With it off, I have complete access to all three injectors so I quickly test them. All three test good.

78ACB725-ECF0-4B23-9352-C3558FF9971A.jpeg

Now to the injector pigtails. According to the internet, they frequently go bad. The question is, how do I test them?

19594521-8C3F-40F8-9F5F-AC83F597227C.jpeg

The plan was to test the injector wires for continuity back to the plug upstream.

8C9C8E59-18AC-4D6E-92FE-33A8C87F278B.jpeg

As I went to test the first one, I noticed this…a single pin in the connector had been pushed back into the plug. There’s NO WAY that isn’t a problem. That said, it’s a single pin and my issues were with all 3 injectors.

BE0252EA-3E67-41B2-AA5B-16CC37C9FA82.jpeg

Since it’s a non-trivial task to put everything back together I figured I’d proceed with continuity testing all the injector plugs. The first one tested good. The second one tested good EXCEPT…the #4 pig tail also relied on the retracted pin!!! Excited now, I tested #6 and it also shared the retracted pin. I freakin found the issue. Back together the supercharger went.

ADE1E41F-682E-4520-89D2-08A17AC44D22.jpeg

The keys quickly found the ignition and vroom!! Fired right up and idled very smoothly. Tapped the throttle and it whined beautifully. Took it for a spin just as the sun was going down. Needed to hurry, the headlights aren’t hooked up at the moment. It runs good. 🍺🍺
 
Last edited:

zmotorsports

ALLIANCE MEMBER
Joined
Oct 20, 2009
Messages
21,312
Location
Northern Utah
Glad to see you got it figured out Matt. Sorry I didn't respond sooner as I just saw your message this morning. I should have read this to see that you already have it sorted out.
 
OP
L

lilscorpion

Well-known member
Joined
Mar 15, 2010
Messages
3,599
Location
Colorado
Glad to see you got it figured out Matt. Sorry I didn't respond sooner as I just saw your message this morning. I should have read this to see that you already have it sorted out.
No problem at all. I sometimes doubt myself when faced with a situation where there's so much electronics involved (ECM). What hurt me the first day is I was doing everything I could to not remove the supercharger as though it was saving me time...I could have found it without removing it maybe. Turns out that it was good practice for just plain ol' trouble shooting. Never a dull moment.
Matt, that's some Mike level troubleshooting. Nice work!
Mike would have found it in an hour or less. It took me 2 days. I am left with a sense of accomplishment but only now that I've found it and I'm up and running.
Nice work on resolving the wiring issues. It can be difficult to be able to step back and consider the 'other side' sometimes.
:)
The internet is truly a magical place. I didn't find the answer there, but I was given a bunch of ideas some of which ultimately helped me narrow in on the actual problem Had I not decided to test continuity of the injector pig tails I'm not sure I would have noticed the retracted pin in the connector. Either way, I'll take it!!
 
OP
L

lilscorpion

Well-known member
Joined
Mar 15, 2010
Messages
3,599
Location
Colorado
Today I tried to get the intercooler coolant punt to work and dug In on the stereo to see why it won’t connect to the Jeep and pull back info.

The coolant pump will only run for 5 seconds and according to the internet, it’s a safety to protect the pump when there’s air in it…so there’s air in it. I tried more than a few times to message the hoses in hopes of freeing the trapped air. I also elevated the tank…neither worked.

I moved on to the stereo. Took it the controller (Maestro) and re-flashed it based on my Jeeps configuration. Re-installed it and realized that the “data” connector was previously plugged into the wrong spot. Amazes me they couldn’t make them all different so the install was dummy proof. I I can use the ecm to monitor interesting things like boost. 🤓

12891D74-EC00-41A8-9C2C-448FB916F757.jpeg

This was near WOOT. 6.1lbs of boost. Had to let out of it because I was having some challenges driving and taking pictures of the stereo screen at the same time. The kit is rated at 5-6 lbs of boost so I’m getting all of it. I do have the ability to increase the boost a bit. According to Magnuson I’ll get about a pound more of boost for every 5mm the pulley gets smaller. I need to do a little more research but I’m fairly certain I can go 1-2 psi more without issues.

With the Jeep out of the garage finally, Andrew and I were able to get some much needed maintenance done on the other vehicles. Sway bar was loose on the Camry. Andrew had an exhaust leak on the LJ so we had to move a bunch of stuff to get to it.

04185840-A97D-4E1F-AA38-CCB2C4C8A1CA.jpeg

In the end, there were a few bolts we couldn’t get to without removing the drivers side inner fender. For a simple straight 6, there’s not a lot of room in there. I’m about an hour or so we were putting it back together.

3FB42C0F-95C8-4080-BDA6-38FE499BCABD.jpeg

From there it was mostly about planning for how we’re going to address the electrical mess. Look forward to getting that project out of way
 
OP
L

lilscorpion

Well-known member
Joined
Mar 15, 2010
Messages
3,599
Location
Colorado
While awaiting the smaller supercharger pulleys I have a list of things I have to get after before I can go wheeling. Little fiddly stuff. One of them is to make a secondary switch pod for trans and water temp gauges for above of the rear view mirrior. Kinda like this switch panel I found online -

DE2F2755-89B7-411F-A2D0-8AFF77D4B2C8.jpeg

A smart man buys this switch panel and just makes a new face for it. But I am not a smart man. 😆

I purchased a used one off of eBay so I wouldn’t need to wreck the only one I have.

C471FFA7-18BA-4A73-B7A1-6D82BCA88629.jpeg

To get the shape around the windshield molding, I used this form tool my parents got me for Christmas 2 years ago.

AFC77D10-00BA-4C8B-A9C8-52576E33A82F.jpeg

Then I did a little guessing to get the profile shape.

B815D15F-8AFE-4483-97EA-EE63AD624504.jpeg

Not like it surprised me or anything but it for perfectly.

1494C4A4-8745-42EB-AEBA-13BEC5E915AC.jpeg

Then cut to size the top and back.

45B3AEE0-EFF4-4A52-9B5D-146E55ECB756.jpeg

Welds turned out ok. I’m going to metal finish the edges anyway.

4A94757E-A6B0-4D6F-871F-96740639C5CC.jpeg

Something like this.

4C0B9599-B7D0-48A5-A8EA-C2CCA329DA16.jpeg

Need a way to attach a removable face so I machines these little brackets out of aluminum angle. They’re drilled and have recesses so the head of a rivnut will sit flush

F9F3CDB3-9A88-4BA8-90C1-042ABBFABA83.jpeg

There will be one on either side.

BBCD1E6E-B198-48FA-9A91-23A886D72099.jpeg
 
OP
L

lilscorpion

Well-known member
Joined
Mar 15, 2010
Messages
3,599
Location
Colorado
Mocked up.

E9E507F0-2604-4BD2-820A-AA90CBBAC801.jpeg

To attach the gauge pod I need to make an inner lip. Decided to use some 3/4” wide aluminum strap.

6E544D19-1A37-4467-87E5-B43766BAA4F5.jpeg

I’ll put a single bend in it and machine it for rivnuts in all four corners. I used this little metal brake that I can put in my vise. I can get really close just eyeballing the angle with this angle finder.

E29E231C-6FF2-4720-83C6-68E636D36473.jpeg

Needed a little tweak to get the right angle.

75C262C0-106D-464B-B3FF-3C78A5B289C8.jpeg

Fits well.

4F5AC181-251A-435B-8ABD-1DF1447E22E6.jpeg

Double it.

28D5ECD7-30AD-493D-ADA0-05B2BB7AC90D.jpeg

Since I’m hand making everything I just machined the holes for the rib it’s after the bending.

542BE977-D69F-4C08-923D-F24FF39D83C4.jpeg

Rivnut fits perfectly.

90168471-5080-4BB3-92E4-BCDFBD51B15A.jpeg

Double it.

E8C7A6EC-F3BC-4BF3-B427-B4DCD7D34174.jpeg

Little Tig and it’s one piece.

B2C7A471-EA6B-4F31-A196-CB32E0A1ED76.jpeg
 

zmotorsports

ALLIANCE MEMBER
Joined
Oct 20, 2009
Messages
21,312
Location
Northern Utah
E29E231C-6FF2-4720-83C6-68E636D36473.jpeg

Needed a little tweak to get the right angle.

Amazing work as usual Matt. Are you going to paint it matte black so it blends in or keep it raw aluminum after metal finishing?

Can I ask what brand of gauge this is? I have a small one that's similar but it is made of plastic and I really like yours that I am assuming is made of aluminum with nicely knurled thumbscrew.
 
OP
L

lilscorpion

Well-known member
Joined
Mar 15, 2010
Messages
3,599
Location
Colorado
Amazing work as usual Matt. Are you going to paint it matte black so it blends in or keep it raw aluminum after metal finishing?

Can I ask what brand of gauge this is? I have a small one that's similar but it is made of plastic and I really like yours that I am assuming is made of aluminum with nicely knurled thumbscrew.
Thanks Mike! The plastic interior parts have a slight textured finish on them.

image.jpg

I’ve been using Cardinals semi-gloss fine texture powder coat which is what I’ll use on this box and happens to be what I have all of my sliders and bumpers coated with. The light texture isn’t exactly like the interior parts but it’s very close a foot away.

image.jpg

The angle finder is made by CCKL Creator and is stainless steel. I’ve had it since before I started the business. Probably 20-ish years now I’m guessing.

image.jpg

years later I bought a longer one in aluminum. Each have their place but the short one gets used 4x more I’d guess.

image.jpg

Looks like you can still get both of them today.

 
Last edited:

WoodsTruck

Well-known member
Joined
Jan 12, 2013
Messages
1,019
That switch box is going to look nice up there.

I don't have your capabilities so I had to print one for a Yota build. The bottom cover plate has a recessed LED rock light for a center dome light. Paired with an LED rock light under the dash at each end the cab gets pretty well lit. I was able to source some dual position switches (off-on-on) to match the (off-on) switches so they are all "off" in the down position. The double switches can be activated by the high beams (front lights) or reverse (back up lights), or simply turned "on". Makes it nice if you are on legal roads so you don't forget to turn off the lights with oncoming traffic.
 

Attachments

  • IMG_6566.JPG
    IMG_6566.JPG
    258.4 KB · Views: 61
OP
L

lilscorpion

Well-known member
Joined
Mar 15, 2010
Messages
3,599
Location
Colorado
That switch box is going to look nice up there.

I don't have your capabilities so I had to print one for a Yota build. The bottom cover plate has a recessed LED rock light for a center dome light. Paired with an LED rock light under the dash at each end the cab gets pretty well lit. I was able to source some dual position switches (off-on-on) to match the (off-on) switches so they are all "off" in the down position. The double switches can be activated by the high beams (front lights) or reverse (back up lights), or simply turned "on". Makes it nice if you are on legal roads so you don't forget to turn off the lights with oncoming traffic.
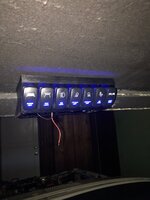
Love it! Really like the 3D printed game, just struggling to get into something else to learn. I had planned on 3D printing mine as well even bought a printer kit to print it but the assembly was a son project that went south and then became quickly forgotten. Anywho…

Yours looks fantastic and I like how it fades up into the roof instead of mine that has to slant down and away from the freedom top latch.
 

zmotorsports

ALLIANCE MEMBER
Joined
Oct 20, 2009
Messages
21,312
Location
Northern Utah
Thanks Matt. I have the larger black aluminum angle gauge already, works great on my JD2 tube bender. I like the stainless steel smaller one though.

I have the cheap plastic General one but it is flimsy as hell.
general.jpeg
 
OP
L

lilscorpion

Well-known member
Joined
Mar 15, 2010
Messages
3,599
Location
Colorado
Thanks Matt. I have the larger black aluminum angle gauge already, works great on my JD2 tube bender. I like the stainless steel smaller one though.

I have the cheap plastic General one but it is flimsy as hell.
general.jpeg
Ah, I’ve seen this one in the store.
 
OP
L

lilscorpion

Well-known member
Joined
Mar 15, 2010
Messages
3,599
Location
Colorado
Hit back after the gauge pod. Since I no longer need access to the attachment holes, I welded on the face plate flanges.

EF91BD76-366E-4750-9D21-965ABEB99C2B.jpeg

Weird on the back and metal finished the edges.

DC1C9B2C-975F-4891-99DF-7E4E36A4F2D0.jpeg

Prepped the box for powder by sand blasting. Interesting, there’s a bunch of mini pin-holes in the welds.

DAAF65CD-47DF-4721-9A9F-FD29F9154A77.jpeg

Clearly my Tig technique needs some refinement. At least I now know why practice boxes sometimes leak. Instead of re-welding the affected edges I decided to use some primer specifically designed for filling out gas holes in parts that will be powder coated.

CFFA8C90-35D1-4B9A-A033-6E95F3D4E812.jpeg

The stuff worked great. You coat the part that needs the attention and let it flow out then pull it from the oven and let it cool to room temp before sanding. Then sand. Repeat the process until the holes are filled. I was so eager to get to the coating part I didn’t even bother to snap a pic. My bad. That said tho, I had no choice but to hot flock the part (that’s when you heat the part to about 250 degrees to make adjustments.it’s doable but it’s hard to get an even coat and not run.

Next, powder and reassembly. I’m certain that it’s not at the same angle it’ll be sitting in the vehicle but it helps visualize what it will look like.

BE4EEF84-B0B9-4B10-8068-16D4CD3ABDB6.jpeg

Right after I was about to start in on the face plate a friend of Andrew’s showed up needing help. I guess I’ve spoiled myself a bit. I could eat off my engine and his…not so much.

13F9F50D-57FE-4A19-A78D-E33E62005AA3.jpeg

After messing with it trying to figure out why the belt was screaming we finally figured it out the wheel/bearing had her axed it self.

55490482-F04F-44E8-B389-E89947506677.jpeg

Fairly easy fix considering. We wrapped it up and he was back on the road.
 
Last edited:

zanyad

ALLIANCE MEMBER
Joined
Apr 26, 2018
Messages
2,755
Location
NE Ohio
The angle finder is made by CCKL Creator and is stainless steel. I’ve had it since before I started the business. Probably 20-ish years now I’m guessing.
image.jpg
<snip>
Looks like you can still get both of them today.

Thanks Matt. I have the larger black aluminum angle gauge already, works great on my JD2 tube bender. I like the stainless steel smaller one though.

I have the cheap plastic General one but it is flimsy as hell.
general.jpeg

Found General Tools makes a stainless version of the above as well:
51RTf1XDgKL._AC_SX679_.jpg
(Amazon link)
 
To avoid these ads, REGISTER NOW!
OP
L

lilscorpion

Well-known member
Joined
Mar 15, 2010
Messages
3,599
Location
Colorado
Slight aside from the console fabrication - been having some serious drivability issues with the JK after getting it back together (before the supercharger) that I’ve put off dealing with. Check engine lights tend to be a pain historically but since diagnostics using my friends Autel scanner made identifying the issue so much easier, I decided to get my own. I’ve been researching for almost 2 years and I’m glad I waited. The current buzz is over this new ThinkTool Mini ($350 on ThinkToolus.com right now) - has lifetime software updates and optional add ons as I need them (instead of having to pick up front).

006E687C-5502-49D9-8D32-91DCC4F5CB98.jpeg

The Autel units are very nice, don’t get me wrong. For me though, I struggle to find what I’m looking for because I’m not familiar with the headspace of the programmers who built it (a common problem in Software). Meaning - to them it makes TOTAL sense. 🙃

I’m having what I have self diagnosed as a wheel sensor issue. Why do I think it’s a wheel sensor? The freakin hill descent feature randomly triggers below 25 mph and the trans goes into limp mode. On the Autel I had to look at the actual live data to see what’s happening and when I did, I noticed random crazy readings from the front left.

In this ThinkTool though, it’s kinda dummy proof and thus far it just works. The first time Using it I was able to punch down to the problem and see the full detail - code, description, and when you click on it, it routes you to an explanation on the internet. Again, dummy proof. Yeah, “erratic readings…”

5088F598-59E5-4B21-B48F-CE2CACCA75FB.jpeg

Ok, so let’s take a look. Pulled the front wheel and the sensor and…

79DAEB5C-7388-4CAE-B229-CED213F64DB6.jpeg

Covered in metal dust and shavings. Most likely from when I cleaned up the diff before painting. Yeah, self-induced. Cleaned it up with brake clean, clears the codes, took it for a test drive and presto-fixed-o.

Now I have about half a dozen other codes to chase I didn’t know about. At lest I’m not looking blindly now. 🍺
 
Last edited:

86turbodsl

Well-known member
Joined
Jul 1, 2005
Messages
6,554
Location
Michigan
Diagnosing a problem is fun, stressful, confusing, and always a learning moment. A recap on my situation - after starting the Jeep for the first time after the Magnuson supercharger install, i was getting 5 different codes. Three were injectors 2, 4, and 6 weren’t getting voltage, the cooking fan wasn’t getting voltage, and a throttle position sensor error. Oh, and the serpentine belt was too long just a bit.

Reseating the throttle body plug cleared the throttle position sensor error. Almost felt like a freebie. Next the cooling fan. Chases the relay and found I missed hooking it up to power. Another freebie. Next the injector errors. I was able to get (what I thought was) #2 and #4 disconnected and snuck in the ohm tester to make sure the injectors themselves were good. They were. I was struggling to get to (what I thought was) #6 so I removed the batteries, fuse box, battery tray, and intercooler reservoir.

1A35F36F-6F23-4493-AE00-7EBE53F63835.jpeg

As I tried to get access to (what I thought was) #6, it occurred to me that it’s really unusual for all 3 to be affected by a plug or injector issue. It needs to be something up stream. My first thought was that there’s a ground I missed somewhere. Seemed reasonable and after rooting around, I stumbled across a ground I’d missed which connects directly to the wiring harness.

34421BD5-B40E-4DA6-A5FB-814C81466357.jpeg

Well hell, that has to be it right? I put everything back together and the entire time I was mentally preparing to do a victory dance. So happy…until I cleared the codes, fired it again, and the codes returned. Frustrated, I called it a night.

First thing in the morning, wanting a quick win to start the day, I went chasing a smaller serpentine belt. This time I bought the next three smaller belts as to avoid needing to take a bunch of trips. The 103 7/8” belt ended up the winner. Next, back to the injector issue. I was told that with key on the injectors should have voltage…but they didn’t. Back to the internet. I tried a bunch of things to no avail. Super frustrated, I somehow ended up on a JL thread where the topic was about the wiring harness and within was a picture of the JK’s cylinder numbering. Up until now, I’d used this pic as my frame of reference for cylinder mapping -

E89CC0F6-0D22-4182-90C4-72572E9CA12C.jpeg

2, 4, 6 are in the passengers side right? This is what I saw in the JL/3.6L thread -

2DFCD6E9-291F-43F4-915A-916A90D2D426.png

I felt SO dumb. The entire time I’ve been diagnosing the wrong side of the motor. I actually had a moment of happiness tho - I now had a lead…until I realized I can not access
Any of the injectors, they’re completely hidden by the supercharger. So it’s gotta come out and sonic does.

8BC87AE8-9FE3-4CB4-9E21-8A7023340C77.jpeg

With it off, I have complete access to all three injectors so I quickly test them. All three test good.

78ACB725-ECF0-4B23-9352-C3558FF9971A.jpeg

Now to the injector pigtails. According to the internet, they frequently go bad. The question is, how do I test them?

19594521-8C3F-40F8-9F5F-AC83F597227C.jpeg

The plan was to test the injector wires for continuity back to the plug upstream.

8C9C8E59-18AC-4D6E-92FE-33A8C87F278B.jpeg

As I went to test the first one, I noticed this…a single pin in the connector had been pushed back into the plug. There’s NO WAY that isn’t a problem. That said, it’s a single pin and my issues were with all 3 injectors.

BE0252EA-3E67-41B2-AA5B-16CC37C9FA82.jpeg

Since it’s a non-trivial task to put everything back together I figured I’d proceed with continuity testing all the injector plugs. The first one tested good. The second one tested good EXCEPT…the #4 pig tail also relied on the retracted pin!!! Excited now, I tested #6 and it also shared the retracted pin. I freakin found the issue. Back together the supercharger went.

ADE1E41F-682E-4520-89D2-08A17AC44D22.jpeg

The keys quickly found the ignition and vroom!! Fired right up and idled very smoothly. Tapped the throttle and it whined beautifully. Took it for a spin just as the sun was going down. Needed to hurry, the headlights aren’t hooked up at the moment. It runs good. 🍺🍺
that's sweet. I'm friends with the president of Magnuson. Nice looking rig.
 
OP
L

lilscorpion

Well-known member
Joined
Mar 15, 2010
Messages
3,599
Location
Colorado
Some of my gauge pieces and parts came today. Got this Autometer temp heater hose adapter so I can tap into my intercooler system. Not sure why it needed to be brass. The color is all wrong.

1DAF74D7-F3C3-4EE5-80FA-C1E0BD93236F.jpeg

Some plugs…

BAB78394-B0E0-4701-A28E-105AACC7F507.jpeg

Sandblast and powder coat

6D11AB38-0F58-43DF-96D5-0130A192B702.jpeg

There, fixed it for ‘em. #LikeThisAutometer

5810EBE3-F2C8-4EAA-8F04-F59278A2CD5E.jpeg
 
OP
L

lilscorpion

Well-known member
Joined
Mar 15, 2010
Messages
3,599
Location
Colorado
that's sweet. I'm friends with the president of Magnuson. Nice looking rig.
Thanks. Like the SC a lot. Install wasn’t bad otherwise other than it was the first time so I went SLOOOOOW. If I did another one I could probably do it in half the time. That’s not his fault though. 😁
 
OP
L

lilscorpion

Well-known member
Joined
Mar 15, 2010
Messages
3,599
Location
Colorado
Reality has come calling. 40’s on the Jk with it sitting as low as it is has created travel and steering issues. AT RIDE HEIGHT I can’t get lock to lock without rubbing the front bumper

B6632A6E-79E7-47C2-A2AA-EA64431CA9FD.jpeg

And the front of the slider and the pinch seam

70AA3206-6F93-4F86-80CB-9146A733EE44.jpeg

Now why MotoBilt didn’t align the slider to the fender is beyond me (I know actually, just don’t like it). If they’d designed their slider to intersect with the fender I’d just do a quick whack if the punch seam and be golden…but Noooooo.

1DA5FEC5-CAB8-47EC-BACB-456C34006337.jpeg

So I’m faced with somewhat of a dilemma - to make 40’s work (such that my suspension will cycle) I can lift my Jeep a bit and at the bumps accordingly (hate the idea) or I modify the bumper and sliders. Normally I’d go the modify route obviously and it would take me less than a weekend however, in this case, there’s a fairly significant consequence that I can’t overcome easily - they’re powder coated and I had them o
Primed for extra coating durability. Since I don’t have a 50 gal drum if stripper, and I don’t have a big enough sand blast cabinet, I’d have to take them to someone who does to strip them and re-coat. Maybe cost me $750 or more…nope. I’ll wait until I have the space to do it all myself. Until then, plan B.

Plan B is to run smaller tires - go back down to 37’s. Now before I go and get all stupid ordering stuff I figured I’d make sure 38’s wouldn’t solve my problem. Since I don’t have 38’s, I thought I’d try Andrews nearly bald 40’s whic measure in at just under 39”.

C0C4EB9F-6D9B-418F-A02F-665B0D2D779E.jpeg

Really like these wheels. Kinda mellows out the jeep a bit and makes it look a little less like a crawler/buggy.

4B729D8D-1490-408D-93D6-90B3B1F74602.jpeg

Man, the new software on this website either hates me or isn’t very compatible with iPhones. Uploading pics is a pain in the a$$. “Too big” or “security error” or “something went wrong…”. 🥹

This setup now has plenty of clearance at the slider but the reduced offset didn’t completely solve the bumper issue. Now it will go lock to lock flat on the ground but with only 1/2” of clearance. Based on what I’m seeing, I do need to go back to 37’s until I’m setup to fix the sliders and bumper and re-powder coat them.

Everything seems to be on national back order still but I was able to piece together a set of 4.

8B0F3AFE-E183-41AE-8038-99FC05F9F36B.jpeg

Same tread as the 40’s, just smaller.

29DF5E9C-BA0C-44D7-ABE1-C60B6C9AA6AA.jpeg

Sometimes I just have to accept that timing is a big deal. Back to 40’s someday, just not today.

On the up side, Andrew did need tires. The 40’s look bad *** on his Jeep. Little bit wider stance. Aluminum ring looks pimp.

23FD2427-DDB1-44EA-8CEE-8C8344FE4D44.jpeg
 
Last edited:
OP
L

lilscorpion

Well-known member
Joined
Mar 15, 2010
Messages
3,599
Location
Colorado
The LJ needs some attention. About the only thing we didn’t replace on the LJ when we built it was the paddle latches. Water sits in the sills, sun beats on em, and slowly the coating erodes until it looks like this or worse.

2CB42D52-2381-4314-8E76-FC4D01DEE604.jpeg

The most common fix is to buy new latches for $20 - $35 each. Replacements are typically made in China and of lesser materials (and finish) to the factory units. Pulled the inner door panel and peeled back the seal skin so I could gain access to the latch.

6889B942-0E5C-46F4-B8B1-4F0249EE83EC.jpeg

Could it figure out how to get my pics in there and take pictures at the same time…LOL. Took only a few to get it out. Got it disassembled. Dang there’s a lot more pieces to it than I thought there would be.

5837B532-6131-4032-BE1F-C2D9FD8AC335.jpeg

The rust ended up being surface finish only with no pitting. Simple sand blast was all that was needed.

E1ACE3F0-9BEA-4C44-B63B-C76B87521FBF.jpeg

And the lever cleaned up as well.

BB59F5D5-C0D8-432D-824D-963AFA640473.jpeg

They’ll be powder coated with “Stone Black” from Prismatic Powders which has great UV stability.

BA6C661B-38FC-41E6-9620-EE914BC82C0D.jpeg

All put back together. Maybe an hour of time, .50 in powder, and better than new.

3BCBABC6-C0CF-4689-8DFB-A28744671B2E.jpeg

Maybe we’ll get another dozen years out of them.

A4B7FAE5-B2B1-4168-87FE-5B0D8D228116.jpeg
 
OP
L

lilscorpion

Well-known member
Joined
Mar 15, 2010
Messages
3,599
Location
Colorado
You being able to do your own powder coating is a game changer!
It really has been. I wish I could quantify how much it’s cost and how much I’ve saved. Just in bolts/hardware alone - meaning when I used to do a build I’d always buy all new hardware because it looked nicer. Now I’ll only replace it if the threads are damaged. Otherwise everything but the threads get sand blasted and coated.
 

rattle_snake

Well-known member
Joined
Jun 25, 2015
Messages
5,144
Location
Chandler, AZ
It takes a big man to be able to step down to 37". Sounds like it does solve many issues and has some other upsides (lower Cog, lower effective gear ratio, less weight...).
 
OP
L

lilscorpion

Well-known member
Joined
Mar 15, 2010
Messages
3,599
Location
Colorado
The attention to detail is fantastic Matt.

Sorry to hear you had to step back down to 37's. Oh the humanity....... :ROFLMAO:

Haha! I’m the Jeep community going down in tire size is usually a precursor to selling the rig.

It takes a big man to be able to step down to 37". Sounds like it does solve many issues and has some other upsides (lower Cog, lower effective gear ratio, less weight...).

I’ll get ‘er on 40’s as the 8-speed goes in. Though it kinda seems like it’s a failure, I really only did it because it gives me the opportunity to figure a few things out -

I really like the idea of finding the ideal setup so I can run two different sized tires in the same rig. In the winter I’d actually prefer to run 37 x 12.50’s and 40 x 13.50’s in the summer. Having 2 sets of wheels and tires would allow me to run balanced wheels and a more road worthy tire in the winter and a more aggressive tire in beadlocks when I wheel. Narrower tires in the winter with 1-inch less offset means I might be able to semi-reduce the slop from being all over the jeep…a little. And when I go to the 8-speed, I’m going to guess that running the 37’s will be a hoot!
 
Last edited:

slodat

ALLIANCE MEMBER
Joined
Feb 6, 2010
Messages
3,679
Location
Central-ish, WA
Son-of-a…

6061 sway bar links can’t handle a burnout I guess…notice they failed where I cut flats for a wrench which also happens to intersect with where the link end thread shank stops. Hm, didn’t think about that. The weakest link, bye bye.

So.. it's a fuse of sorts?

image.jpg

years later I bought a longer one in aluminum. Each have their place but the short one gets used 4x more I’d guess.

image.jpg
Looks like you can still get both of them today.


Ordered the combo deal for both of these from Trick Tools. Layout tools are invaluable, and not straight forward to find. I appreciate you continuing to share your methods!
 
OP
L

lilscorpion

Well-known member
Joined
Mar 15, 2010
Messages
3,599
Location
Colorado
Feels like a wasted Saturday. Both links failed where the flats were machined in them for wrenches.

2C951981-2212-4D96-838E-40E3604320C9.jpeg

2215F4B0-92C4-4D69-9AE6-F70EFB2CFD44.jpeg

Made some new ones, a little beefier, out of some chromoly.

C0E411E5-7DE8-40AE-97B0-A0EA70AA1BD1.jpeg

To avoid the same weakness, I only cut two opposing flats for a

66A21CED-A398-4FF7-856B-B67110FB94E4.jpeg

but this time on the end as to be reinforced by the link end itself.

712E1C6B-B34C-4A49-8BFE-6E11D9094B1A.jpeg

Installed

AF1FF736-A0EA-4578-B7BC-96525FC5151C.jpeg

And back in business

D7C7F013-9431-4116-83DE-936408F6AF0F.jpeg
 

Attachments

  • 16401449-54B2-49FF-A4EB-E408605594BA.jpeg
    16401449-54B2-49FF-A4EB-E408605594BA.jpeg
    159.5 KB · Views: 60

Bigblue&Goldie

Well-known member
Joined
Mar 12, 2009
Messages
10,662
Location
AZ
For anyone needing sway bar links you can get swaged chromoly links for like $12/ea from Speedway or any of the other racing suppliers. Won't be nearly as cool as lilscorpion's, but of you don't have the tools to make your own, they're cheap. Get some low profile jam nuts and you're solid.
20190421_180325.jpg
 
OP
L

lilscorpion

Well-known member
Joined
Mar 15, 2010
Messages
3,599
Location
Colorado
Nice job on the new links Matt. You shouldn't have any issues with those. :thumbup:
Oh I wouldn’t be so sure. LOL…found out that my sway arms are just barely running downhill too much. When my shocks are fully extended, the links can invert. The links are just barely too short. Guess I’m making another set. Have some tube ordered.
For anyone needing sway bar links you can get swaged chromoly links for like $12/ea from Speedway or any of the other racing suppliers. Won't be nearly as cool as lilscorpion's, but of you don't have the tools to make your own, they're cheap. Get some low profile jam nuts and you're solid.
20190421_180325.jpg
I’d buy a set but their shortest link is 7”.
 
OP
L

lilscorpion

Well-known member
Joined
Mar 15, 2010
Messages
3,599
Location
Colorado
Got a little more time in on the gauge pod. Did a little math to figure out the angle for the thru-holes and the spacing.

FB70727F-3356-4CE6-A2D7-1C650BD08269.jpeg

With what seems like a plan, a little machining.

0881A11F-36C4-4158-AC22-4DF203BB4AD3.jpeg

With the holes roughed out, I machine a taper into one side. This relief is necessary so the gauges can sit in the face plate at an angle.

635CF897-133E-41D5-AB0A-9147837D64F5.jpeg

Super high-tech.

D357D290-239C-407D-9303-8D4CB8057C2B.jpeg

Next a relief for the volt gauge/dual battery switch which is super cool. This one switch serves as a gauge and allows me to control the dual battery setup. Toggle between, run independently, etc.

7F74FB22-27BE-468C-8D6B-874B94C0A30D.jpeg

This is the back side of the panel face.

FF591248-9665-4F0C-A6B2-B43B5DB2A2C3.jpeg

And the front side which really doesn’t highlight any of the machine work.

1B53E375-83A9-4328-A592-4378E8798B0A.jpeg

Here’s the gauges installed.l at the correct angle.

C319FE7B-F0F4-4A92-8A48-632DD826F2AD.jpeg

Slick.

D292A58B-26AA-4467-9154-866741B59783.jpeg

That’ll do. 🍺🍺

5B51BA1D-9D2B-4886-8811-A6909327F706.jpeg
 
To avoid these ads, REGISTER NOW!
Top Bottom