OOBER
Well-known member
Cool table.

Nice!
Cool table.
I want a desk very much like that for my office. Nice work.

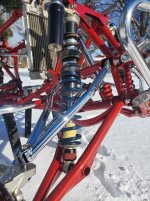
Finished up this small project yesterday. I didn't feel confident in a single, long 5/16" bolt for the pivot, so I tied into two of the water pump fasteners.

I like it - nice, simple and elegant design.
Very nice job on the bracketry. Clean and tidy looking.
Yes, that bracket came out great. Love the design, nicely done.

Tidy! Can you share the pn's you used as well as crimper?
I was in your hood last week on a motorcycle trip, and it didn't occur to me to give you a shout until I was almost through the fox valley. I was mad at myself for not giving you a heads up!
I didn't really realize where we were until I saw a bunch of signs for the fox valley, and it was bugging me because I KNEW there was someone I knew with something to do with the Fox Valley. And it hit me way too late that it was your shop! Duh.
I'll probably be in the area again next year, maybe we can get together for a beer.
Is it me or does anyone else think that wiring that looks that good should be left exposed? That is almost like a work of art. I hope I can make mine look half that good.
Mike
I am wondering, though...couldn't you have just connected the vehicle wiring harness directly to the terminals on the fuse block assembly? It would still be serviceable, but would eliminate a potential loose connection point.Somebody down the road will really appreciate the quality wiring!
Amazing work on the circuit board wiring
The wiring job is very neat and tidy.
yaidunno lovely work as usual..
My favorite brand are TE Solistrand. They crimp well even with cheap crimpers. They do not have the extra secondary trip for the insulator but if you are using marine/dual wall heat shrink I don't think it is necessary.I procured an assortment of ring terminals in various sizes from DigiKey, along with some proper cable ties and heat shrink.

 . I've been sort of keeping an eye out for one that doesn't require a tetanus shot but haven't found anything yet. Neat truck!
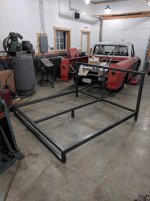
I've got a friend that is in need of a new bed frame for his mattress. The head board will be finished off with rustic sawn boards and the frame will be coated in semi gloss black. A simple project, but still enjoyable.


yaidunno lovely work as usual..
I Second this...!!!
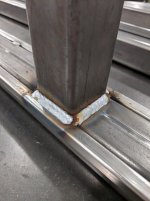
Great bed frame!!! And those welds are awesome
My favorite brand are TE Solistrand. They crimp well even with cheap crimpers. They do not have the extra secondary trip for the insulator but if you are using marine/dual wall heat shrink I don't think it is necessary.
I find Mouser to be about the same price as Digikey and more cost effective on shipping.
Yaidunno,
Do you have any details (or a build thread?) on the pro-street/drag truck in the fourth photo of this post? I think it's a Dodge Sweptline but I haven't figured out how to tell the years apart yet
Steve


Very nice work as usual.
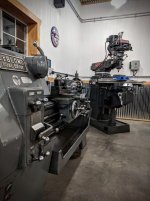
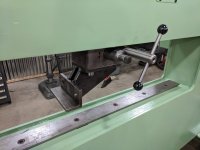
Linear slides....nice!
Neat projects here. I'll be following along. Thanks.
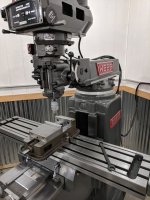
makes me want to get one.Looking great! Taking the time to make and use top of the line fixturing will pay off every time you use it in the future.
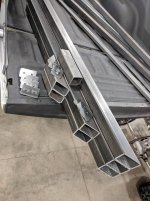
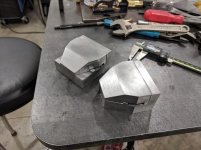
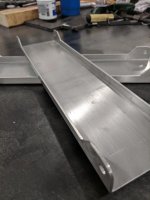
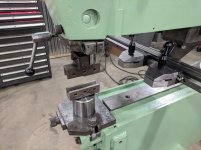
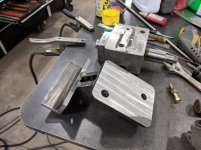
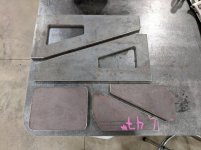
I got a chance to make the first project using the new nibbler last night. These are a pair of radiator mounts that will be welded on the side tanks. They are made from .090 3003 aluminum. The nibbler did a flawless job making the inside cuts.
I've been slowly making some other odds and ends for the nibbler between projects. Here are a set of universal die holders before welding. I'm out of TIG gas, but that will change this afternoon.
The front harness is fully loomed, and I've terminated all but the fans and coolant temp sensor. I will be working on getting the radiator mounted next, and then finishing up the wiring. It's a bit hard to capture the detail put into the harness, given that its all black.
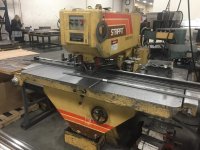
Very cool. The Nibbler looks like a great tool for Fabrication. Reminds me of our Strippit Super 30/30.
Nice work!!!
Only those who do wiring can understand the detail in a Harness.
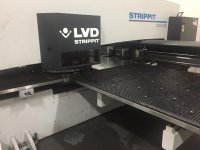
Thanks Pat! Yea, the nibbler is very similar, in theory at least, to your Strippit. I've always been very impressed watching the CNC punches flying through sheets cutting parts out.
I get to listen to 7 Turret Press banging away everyday all day!!! I love it...
The Super 30/30 is a Manual Punch using Micrometer Stops on the X and Y Axis.