To avoid these ads, REGISTER NOW!

G1K's Triumph TR-6 project - in progress

G1K

Well-known member
Joined
Feb 10, 2005
Messages
1,074
Location
Buffalo, NY
A few years ago I posted about replacing the cross member on my father’s Triumph TR-6. We discussed the job a little, but he passed before I was able to get to it. As a result of his passing I’ve purchased the car from the estate to help my mom settle some debts. I purchased the car as an investment and I wanted to sell it however my brother wanted to keep it for the sentimental value. He and my brother worked on it quite a bit and have a bit of history with it.
Here’s a link to the cross member build:
http://www.garagejournal.com/forum/showthread.php?t=58039

After much back and forth I’ve decided to keep it in the family keeping but not in its current form. Sure, the factory inline 6 with ~100 hp is dandy for a Sunday drive, until you need to pass someone – then not so much.

So more back and forth about what to do, add a supercharger or perhaps a turbo to the factory engine, fuel injection, or swap over to a newer GM 6 cylinder, or a turbo 4. I’ll admit I struggled with this for a while. Keep it stock or modify it and potentially ruin the collector value. The car has a factory overdrive, low miles and no rust. It came down to this, I don’t drive it and since I’m not going to sell it, might as well make it into something that I’d use. Sure the purists will be upset … can’t please everyone.

Enter the V8 conversion. There have been several people to complete this conversion so I get the benefit of some guidance in the form of blogs, photos and sites dedicated to their builds. I’ve decided on a ford 302 with a T5 gearbox. The following thread will detail the progress, trials and tribulations of the build which will hopefully conclude with a stock appearing car with a little American muscle under the hood.

So I bit the bullet and picked up a 302 advertised on CL. It came with all the accessories, bell housing, FI set up etc. The block went to the local machine shop for cleaning, boring to 4.030, main hone etc., along with the crank for a -.010 grind. I found a set of GT40 heads in the local junk yard for the whopping price of $60, they went to the shop for a cleaning and valve job. While it was apart, I upgraded the valve springs to handle a little more lift. Very slowly I learned how to check bearing clearances, gap rings and learned assembly techniques to put all the parts back together into something that should work. SBFbuilding.com was a great resource for the assembly portion of the engine build (not affiliated, just a satisfied customer). I learned quite a bit from Woody’s videos.

Like most of my projects I work an hour here or there maybe a few hours on the weekend. The engine build took most of the summer, which was okay because I was still able to drive the TR-6 on nice days. Quite a bit of that time was spent on researching different components and how everything in the system works together. This is my first large engine build, my previous work was all on motorcycle engines with the occasional lawn mower thrown in for good measure. Too much time was spent on cross referencing the crazy ford components, like the timing cover. Which pumps work with which covers, what was a standard rotation vs. regular and which one will work with a serpentine system vs. v-belt. Who knew something as simple as a water pump would take so much time to figure out? I don’t think the Chevy guys have these kinds of problems, but the grass is always greener. The Ford 302 has dimensions more suited to fitting the TR-6 engine bay.
I didn’t capture many photos of the assembly process, but here’s a few. There’re still a few more pieces to go on like the fuel pump, sensors, remote oil filter kit etc.


The build engine build took me into September. Somewhere in there I also rebuild a T5 with some new gears and all new bearings and syncros etc. The original gears had been beat on a little bit.


There’s still a good month of driving the 6 left before it gets too cold and the snow starts to fly, however I wasn’t driving it much during the summer. I decided to start the transformation by pulling stock the engine and transmission out. It went much easier than I anticipate. In an afternoon I went from this:


To this:


After a putting the 302 in and out a few times and some trimming of the sheet metal,


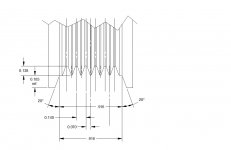
I don’t want to have to put a bulge in the hood to clear the air cleaner nor do I want to relocate the steering rack, so the engine has to be as low and as reward as possible. The front cross member will need to be notched and a reinforcement beam welded to the front. That is today’s project.

Hopefully I’ll have some updates tonight or tomorrow.
 
Last edited:
To avoid these ads, REGISTER NOW!

kbs2244

Well-known member
Joined
Nov 11, 2006
Messages
14,065
Do you have plans for the real axel?
I doubt the factory one will take the new power.
Maybe an IRS from one of the Jap mini SUVs?
 

zkling

Well-known member
Joined
Jan 23, 2007
Messages
16,939
I can't wait to see this finished. :drool:

Sure, the factory inline 6 with ~100 hp is dandy for a Sunday drive, until you need to pass someone – then not so much.

You could say that again, a buddy in high school had one. Neat looking little car, but so dang slow. :lol_hitti I can't imagine 250+hp in that car. Do you plan on stiffening up the chassis?

BTW, your lathe (10EE?) is beautiful. :beer:
 
OP
G

G1K

Well-known member
Joined
Feb 10, 2005
Messages
1,074
Location
Buffalo, NY
Subscribed. Though I think an LS engine would have smaller, lighter and more powerful.

I think you're right, but the cost of the LS was a little over my budget.

Do you have plans for the real axel?
I doubt the factory one will take the new power.
Maybe an IRS from one of the Jap mini SUVs?

I am unsing some Goodparts CV axles with a Nissan R200 limited slip diff from a 300ZX. Here are the axles in all their glory (and the mounting flanges to get the diff in the TR-6 frame)


Looking forward to the rest of this. One of my favorite cars.

jhn9840
John

Thanks, I'm looking forward to the first drive.

I can't wait to see this finished. :drool:


You could say that again, a buddy in high school had one. Neat looking little car, but so dang slow. :lol_hitti I can't imagine 250+hp in that car. Do you plan on stiffening up the chassis?

BTW, your lathe (10EE?) is beautiful. :beer:

I'm not sure what I'll do to the frame yet. After all the bugs are worked out I'm going to pull everything back apart, pull the tub from the chassis and do a repaint. That's probably when I'll address the frame if needed.

Thanks, the 10EE was a labor of love. I had a thread on here about it a few years ago as well. It turned out to be a diamond in the rough when I got it.

http://www.garagejournal.com/forum/showthread.php?t=28009

Ryan
 

CNGsaves

Well-known member
Joined
Sep 26, 2012
Messages
13,233
Location
KS and OK
Beautiful job you're doing on the restore / improvement of the TR6.

Had chance back in early 80's to get one just like it . . . convertible TR6 for $2500 that had maroon paint. Too bad my dad talked me out of TR6. :sad:

Keep pics and info coming. It's terrific !! :thumbup:
 
OP
G

G1K

Well-known member
Joined
Feb 10, 2005
Messages
1,074
Location
Buffalo, NY
To get the engine to the rear and as low as possible, the stock cross member needed to be notched. I was kind of surprised at how thin the stock frame is. I think I uesd 11ga for the three patch panels to box in the notch, and a 3"*1.5" C channel to reinforce the front of the cross member. The stock part was 3" wide, the notch needs to be ~2.5" leaving only 1/2" of the original piece.

Here's the cut (I had a little whoopsie with the saw on the passenger side.


and the patches


and the notch boxed in:


c-channel welded in


and the welds smoothed out


The next step will be to position the engine and tack the engine side mounts together, and the frame side to the frame. I'm using a set of biscut mounts between the frame side and engine side.
These will become the engine side mounts (dubbed the Dan Masters style)


One side of each of the square tubing was milled shorter to tilt the engine back 2.5 degrees. This is what it should look like when complete.


I just need the engine in the car to see where to cut everything. Hopefully that'll be Monday night.


Ryan
 

Tinner

Well-known member
Joined
Aug 31, 2013
Messages
1,101
Location
N.E. Wisconsin
Very cool. I had a TR-6, a TR-250 and a Spitfire in my younger days. This should be an interesting build. I'll stay tuned.
 

dwright406

Well-known member
Joined
Nov 2, 2010
Messages
172
Location
77566
Subscribed.
I've dabbled in Triumphs a few years back.
I had a couple TR7's with 350 chevys, and a Spitfire with a 4.3 v6.

I always liked the looks of the TR6's.
 
OP
G

G1K

Well-known member
Joined
Feb 10, 2005
Messages
1,074
Location
Buffalo, NY
I've made a little progress since the last post. Unfortunately the daily driver required some attention resulting in lost time for the fun work. To get to the rad fan on the mini cooper the car needs to be put in to service mode.. it looks worse than it is;


Back to the TR-6, The engine and transmission got bolted together to see where everything would line up.

Here's the assembly ready to go in:


The clearance between the rear of the engine and the battery tray. Not much room to mess around, but necessary to keep the steering rack in the stock location.


Here's how things line up on the inside. I'll need to cut the e-brake handle and move it back about 3". As it sits now there's only 1/2" between the tip of the handle and the shifter.


With the air cleaner on I test fit the hood to check clearance. There's very little room between the leading edge of the air cleaner and the underside of the hood, but it fits.


With the engine and trans centered and at the correct angles, I could concentrate on the mounts. The trans mount is fabbed from stainless. It's entirely too heavy and I'll have to redo it from aluminum when the tub gets removed from the frame, but this will work for now to keep everything in place.

Trans mount:


and the engine mounts


I'll need to take a better photo, the flash washed this out. This weekend I hope to get started on the new trans tunnel.

Ryan
 

bluebolt

Well-known member
Joined
Dec 28, 2008
Messages
5,441
Location
Benton LA
Quote:
Originally Posted by BoostAddiction
Subscribed. Though I think an LS engine would have smaller, lighter and more powerful.
I think you're right, but the cost of the LS was a little over my budget.

I will disagree with an LS engine being smaller, a 5.0 is one of the most compact v8's out there with it's short 8.2" deck height compared to a LS engines 9.240.

An all aluminum LS is MAYBE a little lighter than a 5.0. Hard to compare without having identically dressed motors. The 5.0's compactness keeps the weight pretty low. Both engines with just an alternator, an aluminum carb intake and a carburetor are probably right at 400 pounds.

As for power I will give that to the LS. They are great motors but not necessarily the best choice for every application. The 5.0's tend to work better for long narrow engine compartments.

G1K, nice project. I know all the in's and out's of the Ford front covers and pumps and pulleys, wish I had known earlier and I could have helped. What water pump and pulleys and brackets are you going to run?
 

driver

Well-known member
Joined
Mar 16, 2010
Messages
126
I used to autocross against a guy may years ago that had a Ford 289 swapped into a Triumph GT6 which is Spitfire based. This one should be a piece of cake.:D

Can't wait t o see it finished.
 

1953mercury

Well-known member
Joined
Nov 25, 2012
Messages
701
Location
Steamboat Springs CO
I have pretty much the same deal in progress. Actually have two of them, but I'm thinking one will get built back to enhanced stock 6 cyl. with a t-5. The other one will get a 347 stroker and a tko 600. The 302 short block is done and should put out 450 hp or slightly more. 185 cc AFR heads, fairly big solid roller, etc.. First have two trucks to finish, and a drive-line change for the T-Bird. I will follow your build with interest. Cheers, Mike


MoBoost

Active member
Joined
Aug 20, 2007
Messages
27
I see that you're in Buffalo. I knew someone in Jamestown who had a TR6 of the same color. Any chance your car is the same one?
 
To avoid these ads, REGISTER NOW!

kbs2244

Well-known member
Joined
Nov 11, 2006
Messages
14,065
The sprit of Shelby lives.
Big American V8’s in small English cars.
What could be better?
 
OP
G

G1K

Well-known member
Joined
Feb 10, 2005
Messages
1,074
Location
Buffalo, NY
G1K, nice project. I know all the in's and out's of the Ford front covers and pumps and pulleys, wish I had known earlier and I could have helped. What water pump and pulleys and brackets are you going to run?

I'm using a timing cover that will work with a standard rotation pump. The cover has a provision for a mechanical fuel pump and a dip stick hole. I'm going to use with a modified pump from a '87 Crown Vic LTD which has a serpentine belt and standard rotation pump, or the ford short pump. I'll likely fab all the brackets, and perhaps the pulleys as well. I have a 3G alternator also.

I have pretty much the same deal in progress. Actually have two of them, but I'm thinking one will get built back to enhanced stock 6 cyl. with a t-5. The other one will get a 347 stroker and a tko 600. The 302 short block is done and should put out 450 hp or slightly more. 185 cc AFR heads, fairly big solid roller, etc.. First have two trucks to finish, and a drive-line change for the T-Bird. I will follow your build with interest. Cheers, Mike

Mike,
Nice looking 6. I look forward to hearing about your progress as well.

I see that you're in Buffalo. I knew someone in Jamestown who had a TR6 of the same color. Any chance your car is the same one?

Perhaps, this one has been in my family since the late 90's, and was owned by someone in CT prior to that. The CT owner was no the original purchaser of the car.

Ryan
 
OP
G

G1K

Well-known member
Joined
Feb 10, 2005
Messages
1,074
Location
Buffalo, NY
I got a little more done on the build. The clutch fork and T/O bearing are in, and the trans has been bolted to the bell housing for hopefully the last time. Still left to do it fab a bracket to hold a clutch "push" slave cylinder. I will not be using the cable mechanism that Ford uses for the Mustang.


And the motor mount perches are welded to the frame. Passenger:


Driver


On the schedule this week is finish trimming the firewall and a small notch in the frame for exhaust clearance. Then start measuring for the new trans tunnel.

Ryan
 
OP
G

G1K

Well-known member
Joined
Feb 10, 2005
Messages
1,074
Location
Buffalo, NY
After welding the mounts to the frame, the engine and trans combo was again reinstalled. The new transmission mount worked, but as I was laying under the car thinking of the next 600 things still needed, I realized I failed to consider how the exhaust would route. With the mount above, the exhaust would need to be 1" diameter to pass between the mount and the trans and follow the stock routing. Since 1" isn't going to work, I had to redesign the mount - the way I should have done it the first time.

The new mount milled, cut and bent to fit the contours of the frame.


The C channel in the next photo are the pieces that will be welded to the frame. The crossmember will be bolted on each side to the channels. The channel was tacked to the L-shaped bracket, the the bolt holes drilled - that ensured the holes would be aligned. Next, nuts were welded on the inside of the channel and finall the tacks were cut. Here's the shot before the tacks were cut. Everything is welded to gether at this point, but there still some clean up required.


And finally installed on the car


Next up is moving the e-brake back a little to clear the longer transmission. I haven't determined the final position yet


The aftermarket tunnel that was on the car will work with the T5 with a little trimming in the shifter location:


but I need to add a little sheet metal to the firewall to get everything to seal up. Here's the passenger side:


With some luck by the end of this weekend I'll have the firewall done and get ready to move on to the drive shaft, exhaust and wiring.

Ryan
 

IONH

Well-known member
Joined
Feb 12, 2010
Messages
2,043
Location
Central Massachusetts
Good read, definitely subscribed for more info.

I have a 1980 MGB which I just finished test fitting a Mazda 2.2L Turbo engine in a donor chassis to do that project this winter once my garage is better organized. I hadn't thought about posting a thread here on GJ, but there will probably be a ton of advice and everyone loves pictures. I'm a novice, being a software developer by trade and home/auto DIYer for years now.
 

FastKat

Well-known member
Joined
Jan 4, 2010
Messages
553
Great project!

That foil stuff - what exactly is it and where did you get it? I'm assuming it's for heat insulation - does it absorb any sound? Is it self adhesive? How well does it work?

I did an LS1 V8 engine swap on a Jaguar and the transmission tunnel gets hot. I need something (hopefully economical) to keep the heat down.


ZRX61

Well-known member
Joined
Aug 15, 2006
Messages
28,716
Location
Solar Blight Valley, SoCal
Great project!

That foil stuff - what exactly is it and where did you get it? I'm assuming it's for heat insulation - does it absorb any sound? Is it self adhesive? How well does it work?

I did an LS1 V8 engine swap on a Jaguar and the transmission tunnel gets hot. I need something (hopefully economical) to keep the heat down.


Couple of coats of Lizard Skin paint on both the inside & outside of the tunnel, hit the firewall etc with it too.
 
OP
G

G1K

Well-known member
Joined
Feb 10, 2005
Messages
1,074
Location
Buffalo, NY
Great project!

That foil stuff - what exactly is it and where did you get it? I'm assuming it's for heat insulation - does it absorb any sound? Is it self adhesive? How well does it work?

I did an LS1 V8 engine swap on a Jaguar and the transmission tunnel gets hot. I need something (hopefully economical) to keep the heat down.

The foil was on the tunnel, I presume my dad put it on but I can't be sure. I think it's similar to this:

http://www.ebay.com/itm/Insulated-D...666?pt=LH_DefaultDomain_0&hash=item258331c002

It looks like he sprayed some adhesive to the tunnel as opposed to the radiant barrier having an adhesive backing. Since I've never run the car in any other config, I don't know if it cuts the noise either.

Sorry I can not be more help.

Ryan
 

JohnMcD348

Well-known member
Joined
Apr 27, 2009
Messages
614
Location
Lakeland, FL
Very Nice.

Not a big fan of the "Butchered Beasts" as I've seen them referred to before, but I do admire the work to make it happen. My first car and true love was a 1970 MkIII Spit that was 1 month older than I was. I helped a friend rebuild a TR6 back then also. My Dream Car is a large mouth TR3.

My Uncle did a quick conversion with a TR250 many years ago by putting the body onto an AMC Eagle. It was a great little 4x4 car. It even looked nearly factory other than the ride height and didn't corner quite well but could take the trails like a champ.
 
OP
G

G1K

Well-known member
Joined
Feb 10, 2005
Messages
1,074
Location
Buffalo, NY
I'm try not to butcher this one- having said that my specialty is not sheet metal. I'm kind of learning as I go.

Last week I got the e-brake moved back a few inches. This was necessary to clear the shifter and tunnel, the ford T5 is a few inches longer than the stock TR-6 trans, and the engine is sitting toward the rear more as well.

debrake_zpsf30405fc.jpg

With that done the next step is to build a new firewall. Again, I'm not good at sheet metal work. The only way to get good is to practice..

The passenger foot well piece and the main firewall cut out of 16ga sheet. (Ignore the ugly looking notches at the top of the firewall, they were corrected after a bunch of test fits and trimming)

dfirewall4_zps53833acb.jpg

A 1" lip welded to the tunnel opening. I think a good fabricator would have rolled or somehow bent this edge out instead of welding it on. I've watched a bunch of videos on youtube by Lazze and picked up a few tips from some of the metal shaping sites, but this is still way beyond my capability.

dfirewall3_zpsbb3e08e4.jpg

It took what seemed forever to do a series of tacks and short beads with tig, but it cleaned up nice.

dfirewall2_zps73993619.jpg

and installed in the car. The drive side still needs more work, but that another days work.

dfirewall_zpsd8981050.jpg

To get to this point, the engine and trans had to go in and out 4 times to check clearances. Once the firewall is fully welded in I think the hard parts are complete and the tedious parts start - sanding, priming, painting the engine bay. The list to complete also includes a new dash, drive shaft, exhaust, radiator, and a complete rewire. I'm not as nervous about those as I was the sheet metal work.

I'm hoping to have the firewall finished by this time next week.
 
Last edited:
OP
G

G1K

Well-known member
Joined
Feb 10, 2005
Messages
1,074
Location
Buffalo, NY
Time for another update.

The firewall and both foot wells are in, primed and painted.


I'm not entirely happy with the way the drivers foot well turned out. The tub will be coming off in the next several years for a complete repaint, I think it'll be easier to redo the foot well when the tub is on a rotisserie and I don't have to be a contortionist to weld it together. It's solid the way it is, but there's a funny looking way in one of the panels.

Next up is how to drive the water pump. There's very little clearance between the steering rack and the harmonic balancer. Fords late 80's LTD had a serpentine belt system with a standard rotation pump. The crank had a double pulley with the outer pulley driving the pump. Unfortunately I do not have room for the outer pulley. If I cut it off, the inner will fit and have just enough space to allow for a belt change.

The problem is then how to drive the WP. one solution is to move the pulley back the to mater up to the inner crank pulley. After some measuring and head scratching, it looks like there will be enough clearance around the snout of the pump. Here a photo of the pulleys, stock on the left, and the cut pieces on the right.


And the spacer to move the pulley back from the flange 1.16". I got lucky on this one and the pulley has very little run-out - no more than the unmodified pulley.


I also removed the stock wiring harness in preparation for the advance autowire harness to get installed.

Until next time...

Ryan
 
OP
G

G1K

Well-known member
Joined
Feb 10, 2005
Messages
1,074
Location
Buffalo, NY
N0tt0N,
The transmission is painted, not powder coated.

A quick update for tonight, I bolted up the converted water pump pulley and was not satisfied with the fit up. I made a calculation error along the line and the two pulleys were mismatched by ~1/4 of a belt groove.


I have another stock pulley I can cut and try again, but I thought it may be easier in the long run to fab one from a piece of aluminum.

I had a chunk left over from a project documented in this thread (making a brake rotor carrier for a magnesium motorcycle wheel):
http://www.garagejournal.com/forum/showthread.php?t=187446

A few shot of the work in progress - first is the back side roughed out blank:


and with the grooves machined in. I used a custom ground hss bit with a carbide tip. The included angle for a j-type poly vee belt is 40 degreees, and .140 peak to peak. I think the depth of each groove is ~.210.


Hopefully this weekend I can get it completed and to the anodizer on Monday.

Ryan
 

T100C

Well-known member
Joined
Jan 3, 2010
Messages
85
Location
Southeast Michigan
Following with interest! Have had a TR6 or 4 V8 conversion on my wish list for a while. Need to finish the (stock) Healey resto first though.
 

Kevin54

MEMBER EMERITUS
Joined
Jan 12, 2005
Messages
29,341
Location
Urbana, Ohio
I used a custom ground hss bit with a carbide tip. The included angle for a j-type poly vee belt is 40 degreees, and .140 peak to peak. I think the depth of each groove is ~.210.

A while back I made a pulley for a Supercharger and in looking up specs for the belt, this is the dimensions that I made the pulley to. This is just the detail for the "vees" that fit the belt. I agree with you on the 40 degrees, but your depth sounds too deep, unless you are doubling things because of the lathe. Different lathes will take .002 per mark and others only take .001 per mark.

attachment.php
 

Attachments

  • pulley.jpg
    pulley.jpg
    58.7 KB · Views: 865
OP
G

G1K

Well-known member
Joined
Feb 10, 2005
Messages
1,074
Location
Buffalo, NY
A while back I made a pulley for a Supercharger and in looking up specs for the belt, this is the dimensions that I made the pulley to. This is just the detail for the "vees" that fit the belt. I agree with you on the 40 degrees, but your depth sounds too deep, unless you are doubling things because of the lathe. Different lathes will take .002 per mark and others only take .001 per mark.

Kevin,
Good catch, the .210 was on the diameter, so ~.105 on the radius. Maybe it was .220, for a depth of .110, I really can't remember exactly. I fed in the first two vees unit the roots and crests looked right. The 10EE has a diameter dial on the cross feed and that was the number that was sticking in my head when I typed the post above :)

I measured the depth on the stock pulley for my reference. Either way, we've created a very similar geometry.

Ryan
 
Last edited:
To avoid these ads, REGISTER NOW!
Top Bottom