To avoid these ads, REGISTER NOW!

Garage Lighting Layout Confirmation

houtan

Well-known member
Joined
Aug 23, 2011
Messages
85
First post in the lighting section.

I initially received awesome input piggybacking on another thread located here: https://www.garagejournal.com/forum/showthread.php?t=439197

However, now that I am going to finally purchase my lights, I thought it would be better to start my own thread to get final inputs and stop hijacking the other thread created by shubox56 (thanks for letting me post in your thread and inspiring me to create my own layout in excel!).

Per recommendations from @Platonic Solid, I am going with this light: https://www.ledlightingwholesaleinc.com/E5SLB35D4-840-p/e5slb35d4-840.htm?CartID=2

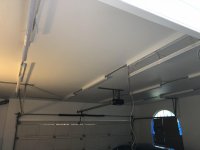
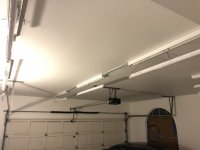
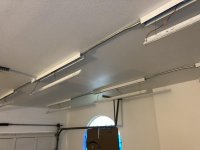
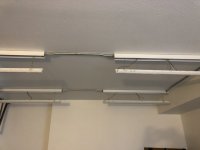
The current planned layout is attached. Ceiling is 9ft. My intent is for each full size square to represent 1 sq ft. Any squares split are intended to be split in half. It's not perfect but I think it's sufficient for planning and material ordering purposes. Since I literally have no idea what I am doing with respect to lighting, I would greatly appreciate any recommendations or input.

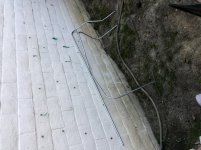
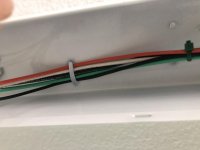
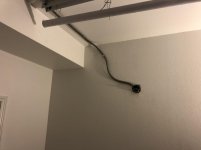
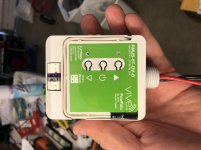
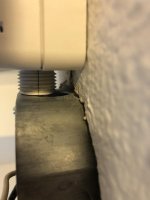
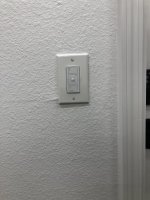
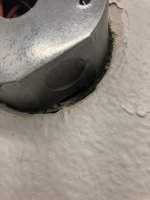
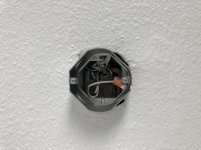
I have also never wired a 0-10v dimmer and just realized I need to run a separate purple and grey wire for the dimmer. Can you please tell me what gauge wire the grey and purple wire should be? I plan on running 14 gauge THHN black, white, and ground, along with the purple and grey wire, in 1/2" EMT. Is 1/2" EMT sufficient? Finally, does the purple and grey wire need to go to every fixture? I am assuming yes, but want to double check.

Thanks,
houtan
 

Attachments

  • houtan garage 22MAR2020.jpg
    houtan garage 22MAR2020.jpg
    137.6 KB · Views: 252
Last edited:
To avoid these ads, REGISTER NOW!
OP
H

houtan

Well-known member
Joined
Aug 23, 2011
Messages
85
I hope everyone is doing well during this challenging time.

Anyone have inputs on my layout? I guess my main concern is how close my lights are to the walls. Especially on the side with the 24” storage cabinets. The lights are about 30” from the wall. Is that a major mistake? Or would I be better off doing three rows of three lights, and then doing a set of lights perpendicular to those lights?

I am probably overthinking this as I do everything else, but would love to hear from someone with more experience than myself.
 

Platonic Solid

Well-known member
Joined
Nov 29, 2014
Messages
3,587
Location
CT-USA
houtan - Your layout is fine. 18 Ga. stranded is typical for for dimming wires. They can be run in the conduit or anywhere since they are very low voltage. Daisy-chain the dimming wires from fixture to fixture ending at the dimmer.

Note: Though it is not recommended to run dimming wires in the AC conduit due to potential noise interference from the AC line, others here have done it with no issues. No idea if there are code implications = I'm a lighting designer, not a sparky.
 
Last edited:

Bert_

Well-known member
Joined
Dec 24, 2016
Messages
9,699
Location
NW Iowa
I've run 18 TFFN for dimming in the same conduit as power. It is acceptable since TFFN is rated 600V
 
OP
H

houtan

Well-known member
Joined
Aug 23, 2011
Messages
85
@Platonic Solid: Thank you!

@Bert: Awesome, I will plan to do the same.

@Terry D: Thank you, that looks very cool. It doesn't seem readily available though so I may just go with standard EMT and try to bend it myself. Will be my first time using a conduit bender so it will probably take me much longer than it should, but I am going to try!
 

pbon

Well-known member
Joined
May 14, 2017
Messages
3,498
You can also go gray plastic pvc electric conduit and not do any bending. Maybe you need or prefer metal, maybe not.
 
OP
H

houtan

Well-known member
Joined
Aug 23, 2011
Messages
85
You can also go gray plastic pvc electric conduit and not do any bending. Maybe you need or prefer metal, maybe not.

Thanks. I was thinking about doing gray plastic PVC but I thought doing the EMT would be more fun and challenging to try. Chances are I will completely fail and end up doing PVC, I am going to give it a try and see what happens.

Lights are ordered! looking forward to seeing them and getting them installed.
 

rquackenbush

Well-known member
Joined
Sep 18, 2010
Messages
161
Location
Raleigh, NC
I'm looking forward to seeing your results. I need to upgrade the lighting in my garage (similar size) and might do something similar.
 
OP
H

houtan

Well-known member
Joined
Aug 23, 2011
Messages
85
Started chipping away at the light install. The location of the lights are slightly different than my original plan due to stud location. The lights come with drywall anchors as well but I decided to go into studs which shifted their location a little. Pics are below.

The lights themselves are really nice. Overall they are easy to install. The only annoying thing so far is the mounting screw head is the same size as the mounting hole so it is awkward to mount the light. You sort of have to angle the light one way to get one side of the screw through then pop on the other side. Sometimes that doesn't work and you have to remove the screw, hold the light up with one arm, then thread the screw through the hole. This becomes a major challenge when running the conduit, since the length of conduit is longer the length of the conduit mounting sleeves on the lights. So after I mount the light and take a measurement for conduit, I go back to the light, remove one screw, put the conduit in the mounted light, then push it into the unmounted light, then thread the screw back into the hole. Makes for a long process when by myself!

Hoping to get some input on a few items.

1. Round light junction box plate and conduit attachment (Pics below): This is where my old garage light was attached. The box measures 3.5" and the distance between the mounting holes is about 2.75". I am currently using the pictured plate and have two options to attach to the plate for the conduit run. The plate doesn't perfectly align on the junction box for some reason so I may have to drill my own holes. Do you know of a different plate that would work or should I be doing something completely different at this junction box? Also, any preference between the two conduit fittings I have purchased that will attached to the junction box plate?

2. I am running the 18/2 doorbell wire for the dimming capability. What I failed to realize is, while i have access to power at the round junction box, I do not have access to the wiring between the junction box and the switch. doh!!! not my proudest moment. Any recommendations on how to get the dimming wire to the switch or maybe some sort of wireless option that I am not aware of?

Thanks again for any help and hopefully I will have more updates soon!
 
OP
H

houtan

Well-known member
Joined
Aug 23, 2011
Messages
85
Pictures
 

Attachments

  • B604D603-E533-4FDB-A152-56E9AB455AA7.jpeg
    B604D603-E533-4FDB-A152-56E9AB455AA7.jpeg
    99.7 KB · Views: 97
  • 706BBAE1-A7CE-4588-AE37-ECB70425B6D4.jpeg
    706BBAE1-A7CE-4588-AE37-ECB70425B6D4.jpeg
    39.6 KB · Views: 91
  • D9AEFE06-2090-42C1-AACB-CE115DFC55BB.jpeg
    D9AEFE06-2090-42C1-AACB-CE115DFC55BB.jpeg
    91.5 KB · Views: 85
  • 5FA3199F-ECFE-4FB3-AE94-53078F81167A.jpeg
    5FA3199F-ECFE-4FB3-AE94-53078F81167A.jpeg
    41.7 KB · Views: 89
  • 0A01FD55-3ACB-44C1-82DB-6767A058FD13.jpeg
    0A01FD55-3ACB-44C1-82DB-6767A058FD13.jpeg
    65.2 KB · Views: 94
  • 01A606A9-A705-45F3-93D5-4A018577F510.jpeg
    01A606A9-A705-45F3-93D5-4A018577F510.jpeg
    61.5 KB · Views: 113

cybrdyke

Well-known member
Joined
Sep 9, 2014
Messages
3,442
Location
USA
Speculation on a couple of things. Others might chime in...
It looks like you're trying to use a cover for an octagon box on an old 3.5" plastic box. I'm not sure if they'll line up...I guess you're saying they dont.
The 90 degree fitting in the bag would be the better of the two, because the LB fitting looks like it has female ends on both connection points. How will you mount that to the box cover? A ****** might work.
Do you have access to the wiring above the ceiling? If so, this would be where you can install a wireless receiver so that you dont need to run the low voltage wires down the wall.
CD
 
OP
H

houtan

Well-known member
Joined
Aug 23, 2011
Messages
85
Thanks cyberdyke.

Yeah it would have to be ******* for the L body which will be clunky now that you mention it.

(Never mind this comment, Bert has clarified what I need to get.) So it sounds like I need to get a plastic cover for the light box. Is there any issue going to the emt 90 exiting from the plastic cover?

I don’t have access to the wiring at the moment but I would consider it. What does the hw look like that you are referring to?
 
Last edited:

Bert_

Well-known member
Joined
Dec 24, 2016
Messages
9,699
Location
NW Iowa
You can't use that cover with hard pipe coming out. There would be no way to access the box.

Use an extension ring. I'm guessing it's a 4" round box but it looks like there is still a metal bracket that needs to come off.
 
OP
H

houtan

Well-known member
Joined
Aug 23, 2011
Messages
85
You can't use that cover with hard pipe coming out. There would be no way to access the box.

Use an extension ring. I'm guessing it's a 4" round box but it looks like there is still a metal bracket that needs to come off.

Thank you. That makes much more sense! I was trying to come up with creative ways to wire that side up and it would have been a struggle lol.

When I measured the outer diameter it was about 3.5”. The distance between the two screw holes is 2.75”. Do you know where I could get an extension ring that would fit?

I think my round junction box is similar to this but I am having a hard time finding the extension ring: https://cedcarlsbad.portalced.com/apex/Product?id=09491000000041

Would this extension ring work? It is 4" and my box is 3.5", but it seems like it has two sets of holes. Maybe the inner set of holes will work with my box?

https://www.lowes.com/pd/Sigma-Elec...-Box-Extender-Exterior-Electrical-Box/3136565
 
Last edited:
OP
H

houtan

Well-known member
Joined
Aug 23, 2011
Messages
85
Speculation on a couple of things. Others might chime in...
It looks like you're trying to use a cover for an octagon box on an old 3.5" plastic box. I'm not sure if they'll line up...I guess you're saying they dont.
The 90 degree fitting in the bag would be the better of the two, because the LB fitting looks like it has female ends on both connection points. How will you mount that to the box cover? A ****** might work.
Do you have access to the wiring above the ceiling? If so, this would be where you can install a wireless receiver so that you dont need to run the low voltage wires down the wall.
CD

Are you talking about something like this?

https://illumra.com/products/receivers/wireless-0-10v-dimming-20a-area-controller/
 

Bert_

Well-known member
Joined
Dec 24, 2016
Messages
9,699
Location
NW Iowa
Thank you. That makes much more sense! I was trying to come up with creative ways to wire that side up and it would have been a struggle lol.

When I measured the outer diameter it was about 3.5”. The distance between the two screw holes is 2.75”. Do you know where I could get an extension ring that would fit?

I think my round junction box is similar to this but I am having a hard time finding the extension ring: https://cedcarlsbad.portalced.com/apex/Product?id=09491000000041

Would this extension ring work? It is 4" and my box is 3.5", but it seems like it has two sets of holes. Maybe the inner set of holes will work with my box?

https://www.lowes.com/pd/Sigma-Elec...-Box-Extender-Exterior-Electrical-Box/3136565

Here's one https://www.homedepot.com/p/3-1-2-in-Octagon-Extension-Ring-1-1-2-in-Deep-with-1-2-in-KO-s-111/100124595
 
OP
H

houtan

Well-known member
Joined
Aug 23, 2011
Messages
85
I made some more progress tonight and ran a few more conduit runs.

@cyberdyke, thanks. I ended up going with this wireless dimmer and switch. Not cheap but better than cutting into drywall. It will also fit nicely in the extension ring @Bert linked.

Dimmer: https://www.amazon.com/gp/product/B07D95RRQS/?tag=atomicindus08-20

Switch: https://www.lowes.com/pd/Lutron-Pico-White-Smart-Remote-Control-Kit/50289571

@Bert, thank you! I searched for a long time and didn't even come close lol. That is exactly what I need. I have a silly question. The extension box should sit flush on top of the existing box right? I am asking because I will probably have to shave off some drywall to get it to sit flush so just want to double check.

Lastly, I decided to return the 18/2 doorbell wire and purchase 18 gauge THHN 600v rated wire for the dimmer. Can I run this wire in the same conduit as my 120v wire?

New dimmer wire - Red: https://www.amazon.com/gp/product/B07S8H384T/?tag=atomicindus08-20

New dimmer wire - Black: https://www.amazon.com/gp/product/B07SCLKL7C/?tag=atomicindus08-20
 

Attachments

  • 81172C5E-EBAD-43C3-8091-A848DAC93DC6.jpeg
    81172C5E-EBAD-43C3-8091-A848DAC93DC6.jpeg
    66.8 KB · Views: 50
  • 3FF63434-0118-431D-A429-CFD0F3CBCE14.jpeg
    3FF63434-0118-431D-A429-CFD0F3CBCE14.jpeg
    48.7 KB · Views: 51
Last edited:
To avoid these ads, REGISTER NOW!
OP
H

houtan

Well-known member
Joined
Aug 23, 2011
Messages
85
@cybrdyke, thank you!

I am currently on a massive search on what I need to strap vs not strap.

In post 11, the second and third pictures, the conduit runs are about 58". From what I have read, there should be a strap within 3 feet of a junction box, then every 5 feet thereafter.

So, do I need at least one ******** each of those 58" runs?

The majority of my conduit runs are 30" or less that go between the lights, so I am assuming I do not need straps in those locations. Is that accurate?

All of the light fixtures are mounted in studs if that makes a difference.

Lastly, is there a preferred screw type to mount the one hole strap into studs? I bought some deck screws that basically look like drywall screws, but it seems some sort of button head screw would be better. I just couldn't find any button head wood screws so I got deck screws.
 
Last edited:
OP
H

houtan

Well-known member
Joined
Aug 23, 2011
Messages
85
Allllllmost done with conduit. Need to potentially strap a few runs once I get input from one of the experts on here and also need to do the run from the junction box to the first light. Left the hardest one for last. Hopefully going to start routing wire on Friday.

Overall it’s looking good and I can’t wait to turn them on!

Also, there is a small prong inside the lights. Is this for holding the wires inside out of the way?

Thanks again for the help.

Houtan
 

Attachments

  • EF6F0227-B56A-41DD-AE94-12D8388E4889.jpg
    EF6F0227-B56A-41DD-AE94-12D8388E4889.jpg
    101.2 KB · Views: 33
  • A0B6763B-D374-4A94-A0F5-84CD2A7CC07D.jpeg
    A0B6763B-D374-4A94-A0F5-84CD2A7CC07D.jpeg
    56.3 KB · Views: 40
  • A774C0EE-F24A-475A-A4CC-B22A131E76DD.jpeg
    A774C0EE-F24A-475A-A4CC-B22A131E76DD.jpeg
    70.3 KB · Views: 33
  • 60B0C037-9305-48E8-AB53-4117CFDE5983.jpeg
    60B0C037-9305-48E8-AB53-4117CFDE5983.jpeg
    74.6 KB · Views: 34
Last edited:

Platonic Solid

Well-known member
Joined
Nov 29, 2014
Messages
3,587
Location
CT-USA
Also, there is a small prong inside the lights. Is this for holding the wires inside out of the way?
Most likely, but holding wires with a sharp metal edge sounds like a bad plan. Using it as a ty-wrap retainer for the same purpose would be much better.
 

Notgrownup

Well-known member
Joined
May 5, 2014
Messages
5,859
Location
Snow Hill NC
I did the same layout in my 24x24 with T12 4’ double bulb fixtures all on 1 switch and 1 20amp breaker. Lights up the shop really nice. I opted with T12 instead of LED at the time due to $. I am not in my shop a lot so it really doesn’t cost much to operate.
 
OP
H

houtan

Well-known member
Joined
Aug 23, 2011
Messages
85
@platonic solid. Great idea. Thanks.

@Notgrownup. I cannot wait to see how bright my garage is!

So I picked up the extension box @Bert linked. They apparently tweaked the design a little bit and the back side of the box no longer has the ring in the picture. I actually went back in to Home Depot to confirm they gave me the right part and it is the same part number. Even the picture on the box for the item had the round ring on the backside but the item itself is slightly updated I guess.

It seems to fit over the round white box OK but it brought in a new dilemma. When I line up the holes on the extension box to the existing light box the extension box knockouts are at 45° angles. My initial plan if I ran into this issue was to drill new holes on the round lip so I can make the knockout on top point straight up, but the lip is no longer there.

This made the last conduit run I need to do even more intimidating! So I bought extra conduit just in case I mess up ha ha. I am attaching some pictures as well. Can someone please confirm general fitment is acceptable? I will shave away some of the drywall so the extension box is centered on the light box.

Sorry, not sure why the pictures are rotating. Please let me know if you know how to fix them.
 

Attachments

  • 48B24AEE-15AF-4EFD-ADCD-3A1F27505C28.jpg
    48B24AEE-15AF-4EFD-ADCD-3A1F27505C28.jpg
    108.4 KB · Views: 30
  • FE181486-6AD2-4916-A2C4-AF25B596AAFA.jpg
    FE181486-6AD2-4916-A2C4-AF25B596AAFA.jpg
    102.7 KB · Views: 29
  • AAE54364-E754-4E6C-BCA8-47BCD80438A4.jpg
    AAE54364-E754-4E6C-BCA8-47BCD80438A4.jpg
    58.1 KB · Views: 32
Last edited:

kroc0005

Active member
Joined
Apr 27, 2020
Messages
27
Location
Plymouth, mn
Houtan have you temporarily energized this layout yet? Just wondering what you end up thinking about the 3 in line perpendicularly to entrance w/ 4 rows for total of 12 lights.

I'm thinking of using the same LED Lights platonic suggested to you but only doing 9 individual lights myself (3 rows) in my sized space.

You ask a lot of the same questions I enjoy watching and reading your updates, thank you!
 
Last edited:
OP
H

houtan

Well-known member
Joined
Aug 23, 2011
Messages
85
@kroc0005, glad you are enjoying the thread. Hopefully it helps you out. Unfortunately I have not turned them on yet. Hopefully tomorrow.

Made good progress today, got two banks of lights wired up. I was hoping to get it all done but it was a lot of wires to deal with and my shoulders are shot haha.

I ended up using the tabs in the lights and zip ties to help hold the wires out of the way. The tabs didn’t seem sharp so hopefully they don’t cause issues and I noticed the light manufacturer was using the tabs the same way. Wiring at the end of a run was much easier than where three sets of wires are required (pictures below).

Before I called it a day I tried to finish the last conduit run to the junction box. I failed, twice, and basically spent about 2.5 hours learning I have a long way to go before I should ever attempt a run like this again. Sooo, I’m planning on using flexible conduit there.

Pictures of progress, my custom spool holder 😉
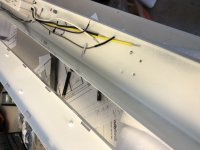
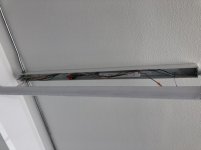
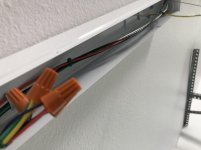
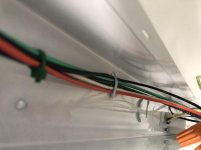
, wiring inside the lights, and failure lol
 

Attachments

  • 053EB8BA-AFE9-40D6-9DEF-C15CBAB91CF8.jpg
    053EB8BA-AFE9-40D6-9DEF-C15CBAB91CF8.jpg
    145.5 KB · Views: 35
  • D93D6C71-5530-47E5-9E82-8178F6384D1A.jpg
    D93D6C71-5530-47E5-9E82-8178F6384D1A.jpg
    113.3 KB · Views: 31
  • F54FE340-D699-456F-A505-CD29EE79A80B.jpg
    F54FE340-D699-456F-A505-CD29EE79A80B.jpg
    77.4 KB · Views: 31
  • 8D5C8312-10FB-4B48-9EB0-25B100AD7693.jpg
    8D5C8312-10FB-4B48-9EB0-25B100AD7693.jpg
    66.4 KB · Views: 33
  • 9C21F86E-4A0E-423F-9D7C-FDD5BDBCDA01.jpg
    9C21F86E-4A0E-423F-9D7C-FDD5BDBCDA01.jpg
    66.7 KB · Views: 166
  • 1818E829-E99B-4049-9762-70161B2F4E95.jpg
    1818E829-E99B-4049-9762-70161B2F4E95.jpg
    66.3 KB · Views: 32
  • 3D9AC2EA-627C-4B8D-8DCD-7EA3899C5CD5.jpg
    3D9AC2EA-627C-4B8D-8DCD-7EA3899C5CD5.jpg
    131.2 KB · Views: 34

Platonic Solid

Well-known member
Joined
Nov 29, 2014
Messages
3,587
Location
CT-USA
Actually, I was suggesting you could ty-wrap the wires to the exterior of the metal tang so you wouldn't have a sharp metal edge against the wire (like you have now)

attachment.php


But, hey, I'm not a sparky either. No idea what SOP is.
 
Last edited:
OP
H

houtan

Well-known member
Joined
Aug 23, 2011
Messages
85
@Notgrownup, lol. I was actually shocked the wires didn’t tie themselves in a knot after the first foot haha. Hopefully keeps working for the rest of the lights.

@Platonic Solid, thanks for the clarification. I see you wrote that the first time as well. Not sure why it didn’t register in my brain. Making a hoop to hang from the tang would work great. I’ll try it on the next set of lights.

Couldn’t get over my conduit failure so I tried bit again last night with flex conduit. Took me ten minutes. There’s a little slack on the wall side but I think that’s ok.

Another thing I forgot to mention is the wire nuts that come with the lights are really small. They can do one 14 gauge with one wire from the light, anything more and you will have to use your own.

Lastly, realized something really annoying with the wireless Lutron dimmer. The power wires come out the bottom, which is the side that can attach to the junction box. The 0-10v wires attach to the top of the box, so somehow I have to make those wires exit the junction box, and it looks ugly lol. Or, I can add a two gang box to the current box and hide all of it, but then I can’t access the buttons on the lutron dimmer. Maybe that’s not a big deal after setting it up.
 

Attachments

  • 28EED73F-667F-4EAE-BEC8-FA8E3F6C4C36.jpg
    28EED73F-667F-4EAE-BEC8-FA8E3F6C4C36.jpg
    89.2 KB · Views: 33
  • 914BC37E-06F2-4113-8EE5-2EB0AAA81935.jpg
    914BC37E-06F2-4113-8EE5-2EB0AAA81935.jpg
    77.3 KB · Views: 28
OP
H

houtan

Well-known member
Joined
Aug 23, 2011
Messages
85
Here is the lutron WiFi dimmer. I‘m guessing the low voltage is separate because the low voltage wires are typically run separately?

Also, the instructions say to use solid core wire only for the low voltage wires. Not sure why but my wire is stranded. I called Lutron and they couldn’t see why it mattered as well, but could not tell me to use stranded since the instructions say otherwise. Any concerns there?
 

Attachments

  • A9518E1B-CF91-49B0-8857-D45557D2ED2B.jpg
    A9518E1B-CF91-49B0-8857-D45557D2ED2B.jpg
    90.9 KB · Views: 24
Last edited:
OP
H

houtan

Well-known member
Joined
Aug 23, 2011
Messages
85
A little more progress yesterday and completed three more lights. Only three left! Super sore lol.

I tried to hoop a zip tie around the tang and wires but it kept slipping off. If I can make the tang into a hook it would work but I had a small window of time so I went with the old way for these three.

Been using a new wire stripper that has been awesome and really sped up my the time it takes to strip all of the wires. If you need one this will not disappoint and the best thing is the blade is replaceable! 7 in. Long 10-22 AWG Stripmaster Wire Stripper
https://www.homedepot.com/p/300497605

Still not sure what to do with the Lutron dimmer. The other issue I’m having is the knockouts on the extension box sit flush with the drywall while the dimmer knockout is offset from the back. I have to loosen the Box quite a bit to allow enough spacing to use one of the perimeter knockouts or I can use the knockout on the faceplate. Neither seemed ideal which is why I was considering adding the additional two gang box and throwing the whole thing in there which would take care if the low voltage wire issue as well.

I received an email with a post from cybrdyke but it’s not showing up in the thread whicih is weird.
 

Attachments

  • 1321AA51-99B4-4123-855D-E618648DC822.jpg
    1321AA51-99B4-4123-855D-E618648DC822.jpg
    78.6 KB · Views: 23
  • C8AA952B-9FF0-41B5-97F0-7888F6B51DD6.jpg
    C8AA952B-9FF0-41B5-97F0-7888F6B51DD6.jpg
    77.2 KB · Views: 25
  • EEA38177-EFC6-423C-8ED6-8C1351ECA022.jpg
    EEA38177-EFC6-423C-8ED6-8C1351ECA022.jpg
    69.3 KB · Views: 23
  • 92188FA2-9C0E-4EF2-A754-69724C68FC67.jpg
    92188FA2-9C0E-4EF2-A754-69724C68FC67.jpg
    64 KB · Views: 20
  • DC597222-1F4F-4408-81D7-55218A1CD06F.jpg
    DC597222-1F4F-4408-81D7-55218A1CD06F.jpg
    40.7 KB · Views: 19
Last edited:
OP
H

houtan

Well-known member
Joined
Aug 23, 2011
Messages
85
So tonight was the night. The lights are on!! And yes, they are bright!!! Lol. I think they are perfect though, especially for doing any sort of work at night. I’m sure I will need to add some task lighting once I get a work bench and cabinets, but this phase of lighting is done.

I went back and forth on trying to get the Lutron dimmer to work. In the end, I decided to try it because I didn’t need full brightness all the time, such as letting the dog out or going to the refrigerator. So it made sense to add it to save energy.

What I ended up with I am sure is not normal nor up to code, but it works so I’m going to try it for now. I ended up sneaking the wires through one of the slots in the wall box cover. I mounted the wifi dimmer using this 90 degree elbow I came across at Home Depot. It has a female threaded side that the WiFi dimmer screwed into. Again, I am no electrician so don’t do what I did lol. Setting up the wireless switch was extremely easy and everything works great.

One thing I forgot to mention is about the flexible conduit and the one home straps. Is a 1/2 EMT strap supposed to work with flexible conduit? I couldn’t get it to work as the flex conduit was much bigger. I didn’t see anything specific at the hw store so I purchased 3/4 one home straps which worked out great.

Also, I am attaching a picture of the extension box fitment over the round light box. Overall it seems acceptable but there is a tiny gap at some edges. Is this ok?

Need to touch up some paint and wipe down a couple walls, but for the most part I’m done!


I just realized I never mentioned where I ended up purchasing the lights from. They are sold a few places, I ended up purchasing from shineretrofits and worked with a gentleman named Dave Thompson. Excellent customer service and experience.

Appreciate everyone’s help and advice to get me to this point. I will update if anything changes.
 

Attachments

  • 9BED7C9B-12CC-4199-8EE0-49E39EF1DDB9.jpg
    9BED7C9B-12CC-4199-8EE0-49E39EF1DDB9.jpg
    99.1 KB · Views: 29
  • 9393309F-15A8-4D25-82C2-B71724DBD965.jpg
    9393309F-15A8-4D25-82C2-B71724DBD965.jpg
    94.4 KB · Views: 27
  • F6E3C1E4-48D2-499B-95D9-E6E3611D4515.jpg
    F6E3C1E4-48D2-499B-95D9-E6E3611D4515.jpg
    71 KB · Views: 31
  • BA1C7B78-A753-4473-A63A-2A31084D938A.jpg
    BA1C7B78-A753-4473-A63A-2A31084D938A.jpg
    59 KB · Views: 29
  • B8A19DBF-07C3-4A27-A872-EA4FBE701753.jpg
    B8A19DBF-07C3-4A27-A872-EA4FBE701753.jpg
    57.6 KB · Views: 26
  • BFAE1AAE-D2BD-4E97-A426-C65221488EB9.jpg
    BFAE1AAE-D2BD-4E97-A426-C65221488EB9.jpg
    93.9 KB · Views: 24
  • 01C382D3-228C-4D4A-951E-309DFDC539E7.jpg
    01C382D3-228C-4D4A-951E-309DFDC539E7.jpg
    57.1 KB · Views: 24
Last edited:
OP
H

houtan

Well-known member
Joined
Aug 23, 2011
Messages
85
Oh one other thing. I got extremely lucky with my wiring. I had about one foot left of black wire. What was odd was I had a lot of green wire left over. Everything was cut the same length when I wired the lights. Not sure if black was cut short but jest a heads up to give yourself a generous amount of extra wiring when estimating how much you need.
 

Attachments

  • 65E23899-7C31-42B5-929A-AF99542B6E5D.jpg
    65E23899-7C31-42B5-929A-AF99542B6E5D.jpg
    59.5 KB · Views: 20

Platonic Solid

Well-known member
Joined
Nov 29, 2014
Messages
3,587
Location
CT-USA
Here is the lutron WiFi dimmer. I‘m guessing the low voltage is separate because the low voltage wires are typically run separately?

Also, the instructions say to use solid core wire only for the low voltage wires. Not sure why but my wire is stranded. I called Lutron and they couldn’t see why it mattered as well, but could not tell me to use stranded since the instructions say otherwise. Any concerns there?
The Wire Trap/Plug-in Connectors are only UL rated for solid core wire. I wouldn't worry about it.

Congrats on finishing the install. I assume you have minimal shadowing.
 

jpcjguy

Well-known member
Joined
Jan 6, 2014
Messages
1,473
Location
Richmond, VA
So tonight was the night. The lights are on!! And yes, they are bright!!! Lol. I think they are perfect though, especially for doing any sort of work at night. I’m sure I will need to add some task lighting once I get a work bench and cabinets, but this phase of lighting is done.

I went back and forth on trying to get the Lutron dimmer to work. In the end, I decided to try it because I didn’t need full brightness all the time, such as letting the dog out or going to the refrigerator. So it made sense to add it to save energy.

What I ended up with I am sure is not normal nor up to code, but it works so I’m going to try it for now. I ended up sneaking the wires through one of the slots in the wall box cover. I mounted the wifi dimmer using this 90 degree elbow I came across at Home Depot. It has a female threaded side that the WiFi dimmer screwed into. Again, I am no electrician so don’t do what I did lol. Setting up the wireless switch was extremely easy and everything works great.

One thing I forgot to mention is about the flexible conduit and the one home straps. Is a 1/2 EMT strap supposed to work with flexible conduit? I couldn’t get it to work as the flex conduit was much bigger. I didn’t see anything specific at the hw store so I purchased 3/4 one home straps which worked out great.

Also, I am attaching a picture of the extension box fitment over the round light box. Overall it seems acceptable but there is a tiny gap at some edges. Is this ok?

Need to touch up some paint and wipe down a couple walls, but for the most part I’m done!


I just realized I never mentioned where I ended up purchasing the lights from. They are sold a few places, I ended up purchasing from shineretrofits and worked with a gentleman named Dave Thompson. Excellent customer service and experience.

Appreciate everyone’s help and advice to get me to this point. I will update if anything changes.

got a link to the actual lights you bought?
 
OP
H

houtan

Well-known member
Joined
Aug 23, 2011
Messages
85
@Platonic Solid. I don't think its possible to have shadows they are so bright haha. I didn't notice any but i will take some pictures trying to show the entire room today.

@Cybrdyke. Yeah, not sure. I don't think you hit the wrong button because I received an email notification of your post, but it's not in the thread. Your post was regarding the wifi module and how it is designed to mount in a knockout.

@jpcjguy, here you go. Make sure you select 35 watt, then there are two options on color. I went with 4000K. I would also call them for best pricing. Lastly, the lumens and spec sheet may be out of date, but calling them will get you the most current information, or may be from energetics website.

https://www.shineretrofits.com/ener...and-surface-mount-light-fixture-120-277v.html
 

Platonic Solid

Well-known member
Joined
Nov 29, 2014
Messages
3,587
Location
CT-USA
@Platonic Solid. I don't think its possible to have shadows they are so bright haha. I didn't notice any but i will take some pictures trying to show the entire room today.
Having several well placed fixtures is what reduces shadows, not lumen output.
 
To avoid these ads, REGISTER NOW!
Top Bottom