bowditchsmith
Active member
I came across this forum years ago shortly after purchasing our first home in 2014 and immediately came to the realization that I wasn’t going to have the garage that I wanted. It was a tight unfinished two car garage with one of the bays being almost inaccessible due to a narrow driveway, and it being tucked behind our house. It became a full time storage /work bay for our play car and motorcycle and a part time workshop / shed. Fast forward six years and a global pandemic later and we finally moved to a home that has more of what we have wanted and one that we can see ourselves living in for a significant period of time.
Our Old Garage:


The nightmare single wide driveway (couldn't open a car door without hitting the chimney or fence)

Moving during the pandemic was interesting, our offer was accepted two days before the US came to a standstill, and my wife and I both found out that we would be working from home. While we purged and prepped our old home for listing on the market we were migrating our way through the home setting up temporary work spaces.
In April we closed on our new home, and got a handful of projects underway that were better suited for addressing prior to moving in. (Refinished all the hardwood floors, added matching hardwood to our second floor, and lots of painting) in hindsight this would have been an awesome time to tackle the garage, but it quickly became the temporary storage area as we transitioned homes.
Our New home: 2.5 acre plot buried in the middle of nowhere (with plenty of room for expansion down the road)


Knowing that I wouldn’t have a bay for the project car for a bit, and not wanting to leave it outside for a few months, I made the decision to find it a new home, and figured would begin my search for its replacement once I had a proper place for it to stay.
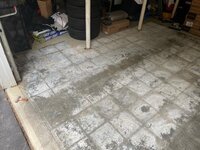
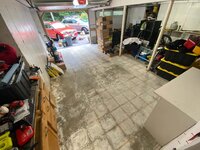
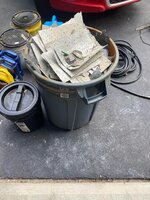
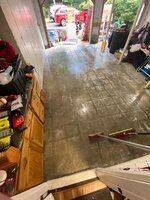
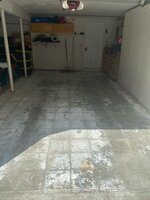
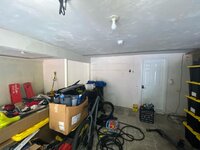
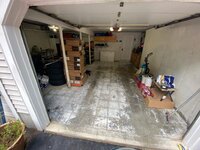
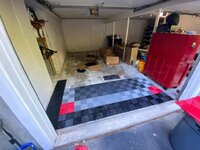
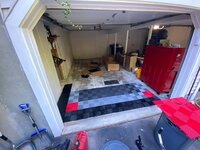
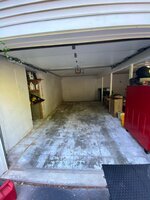
Which brings us to the mess of a space that I am left to start with:


Immediate Plan:
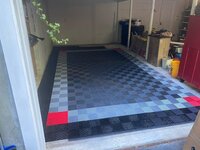
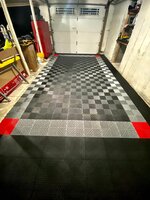
Mock up of wall paint and floor pattern:

Long term plans:
My cabinets are ready for pick up, the flooring has arrived, and I need to officially get this project underway.
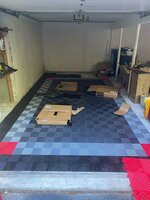
Boxes and Boxes of Flooring:


Ill be using the small textured coin against the back wall under the cabinets and along the high foot traffic areas to provide grip. and the free flow under the cars.

Floor Colors:
Small Coin HDXT - Black
Freeflow - Black
Freeflow - Alloy
Freeflow - Graphite
Freeflow - Red
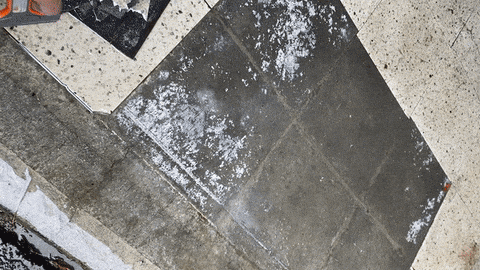
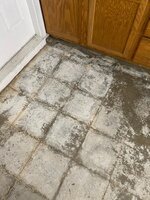
Tonight I lifted a tile to see what kind of an undertaking I have ahead of me in term of removing the adhesive from the floor. It’s going to take a bit, but I want to do it right. Goof-off rubbed in seemed to work really well on the test spot, but we’ll see how this process goes 500+square feet into the project.

Goals for this current garage will be primarily just for the cars and the toys. I have a shed in the back lot that will house the mower, blower, and all the yard stuff.
Looking forward to sharing my journey with you all, this forum has been incredibly inspirational, and the builds you have all contributed have been amazing.
Our Old Garage:
The nightmare single wide driveway (couldn't open a car door without hitting the chimney or fence)
Moving during the pandemic was interesting, our offer was accepted two days before the US came to a standstill, and my wife and I both found out that we would be working from home. While we purged and prepped our old home for listing on the market we were migrating our way through the home setting up temporary work spaces.
In April we closed on our new home, and got a handful of projects underway that were better suited for addressing prior to moving in. (Refinished all the hardwood floors, added matching hardwood to our second floor, and lots of painting) in hindsight this would have been an awesome time to tackle the garage, but it quickly became the temporary storage area as we transitioned homes.
Our New home: 2.5 acre plot buried in the middle of nowhere (with plenty of room for expansion down the road)
Knowing that I wouldn’t have a bay for the project car for a bit, and not wanting to leave it outside for a few months, I made the decision to find it a new home, and figured would begin my search for its replacement once I had a proper place for it to stay.
Which brings us to the mess of a space that I am left to start with:
- The garage is a partially finished 22x21 separated bay garage.
- 2 8ft wide doors (not my preference, but what I’m stuck with now)
- It features a 6ft and 4 ft alcove (one on each side wall)
- Bays are separated by lally collums (gross)
- Side walls are cement
- Rear wall is drywall
- Lighting is trash
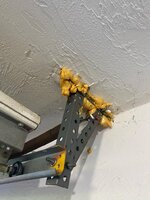
- Chain driven garage door openers are outdated,
- Shelving is absolutely left over from a previous kitchen.
- Peel and stick tile floor (going to be a nightmare to clean up)
Immediate Plan:
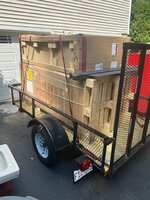
- Dumpster Rental
- All the Cabinets will go
- All the tile will be lifted
- Floors cleaned, degreased, etched and sealed
- Epoxy coating on floor
- Painting Walls
- Race Deck Flooring
- New Lighting
- All new steel cabinets, wheel rack, and work tops
- Some sort of modular wall paneling
- Tool Organization
- TV and dedicated garage computer
Mock up of wall paint and floor pattern:
Long term plans:
- Lally collum removal
- Air Compressor and water hook ups Inside of the garage.
- Build a bigger detached garage behind the house

My cabinets are ready for pick up, the flooring has arrived, and I need to officially get this project underway.
Boxes and Boxes of Flooring:
Ill be using the small textured coin against the back wall under the cabinets and along the high foot traffic areas to provide grip. and the free flow under the cars.
Floor Colors:
Small Coin HDXT - Black
Freeflow - Black
Freeflow - Alloy
Freeflow - Graphite
Freeflow - Red
Tonight I lifted a tile to see what kind of an undertaking I have ahead of me in term of removing the adhesive from the floor. It’s going to take a bit, but I want to do it right. Goof-off rubbed in seemed to work really well on the test spot, but we’ll see how this process goes 500+square feet into the project.
Goals for this current garage will be primarily just for the cars and the toys. I have a shed in the back lot that will house the mower, blower, and all the yard stuff.
Looking forward to sharing my journey with you all, this forum has been incredibly inspirational, and the builds you have all contributed have been amazing.
Last edited: