OP
Re: garage refurb
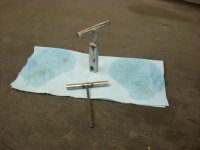
I made a few more tools for working on the SCBA bottles, nothing fancy but I'll show them.
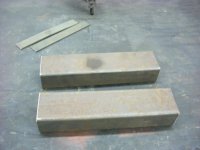
I started with some pieces of misc parts.

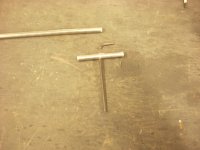
Cut off a piece of the round stock and the angle off the allen wrench. Drilled a hole and ground the allen. AKA home made t-handle, which I already have but this will be going to the FD and I'm not leaving my tools there.

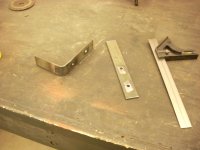
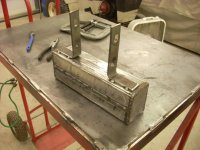
Next up, a Cman 1/2" deepwell socket, some 3/8" keystock and another pice of the round stock. I notched the deepwell ( I used SYWR points so it didn't cost anything) to fit around the needle guage on the bottle valve. It's not a high torque item, so it won't be "cranked" on.

I ground a "V" on one end off the keystock for the round stock to fit it. The other end of the 3/8" keystock, goes into the drive end of the socket. A little welding and some paint after the picture was taken.

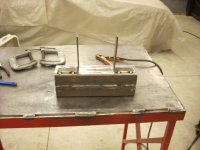
So what I ended up with was a 5/32" t-handle and a 1/2" deepwell t-handle.
I made a few more tools for working on the SCBA bottles, nothing fancy but I'll show them.
I started with some pieces of misc parts.
Cut off a piece of the round stock and the angle off the allen wrench. Drilled a hole and ground the allen. AKA home made t-handle, which I already have but this will be going to the FD and I'm not leaving my tools there.
Next up, a Cman 1/2" deepwell socket, some 3/8" keystock and another pice of the round stock. I notched the deepwell ( I used SYWR points so it didn't cost anything) to fit around the needle guage on the bottle valve. It's not a high torque item, so it won't be "cranked" on.
I ground a "V" on one end off the keystock for the round stock to fit it. The other end of the 3/8" keystock, goes into the drive end of the socket. A little welding and some paint after the picture was taken.
So what I ended up with was a 5/32" t-handle and a 1/2" deepwell t-handle.
Attachments


Last edited:


")