To avoid these ads, REGISTER NOW!

Above 1200 Sq/FT Garage Refurb®

Wokspaces above 1200 squarefeet.
OP
N

NUTTSGT

Super Moderator
Staff member
Joined
Sep 14, 2009
Messages
50,890
Location
Northern Central Ohio
Eric, congratulations on the milestone post. Bones' new perch is perfect but I'm wondering what he keeps in his chest (or is that yours and he's stuck with the mid-box). I hope he shares his pretzels.

Bob, the boxes are mine as are the pretzels. I'd share the latter but I prefer to keep him away from people food. He prefers cheese curls and Doritos to pretzels when he gets hungry and is home alone if you catch my drift. The pretzels were merely opened and dumped on the floor, the others got eaten . ... much like the BBQ chips last week.
 
To avoid these ads, REGISTER NOW!

drivesitfar

Well-known member
Joined
Oct 23, 2013
Messages
36,004
Location
Pacific Northwest
ERIC: Merry Christmas to you and your family and your great garage dog. also here's to a great 2017 and i hope you win all the races you compete in this year with that new trailer helping you rest in style.

also wanted to thank you for moderating GJ and making it my favorite and only forum i belong to and participate in.

cheers (Ice tea for this old guy mostly)
 

slimpickins

Well-known member
Joined
Mar 27, 2011
Messages
2,404
Location
Canada
Merry Christmas Eric!
Thanks for all your work here on GJ as a moderator! It must be a thankless job!
Some of us notice how much work it must take!
 
OP
N

NUTTSGT

Super Moderator
Staff member
Joined
Sep 14, 2009
Messages
50,890
Location
Northern Central Ohio
ERIC: Merry Christmas to you and your family and your great garage dog. also here's to a great 2017 and i hope you win all the races you compete in this year with that new trailer helping you rest in style.

also wanted to thank you for moderating GJ and making it my favorite and only forum i belong to and participate in.

cheers (Ice tea for this old guy mostly)

Merry Christmas Eric!
Thanks for all your work here on GJ as a moderator! It must be a thankless job!
Some of us notice how much work it must take!


Merry Christmas to my fellow members, enjoy the day with family and friends.

The simple thank you for the work is appreciated, it does make it worth the effort which can be trying at times.


Be safe and enjoy the holidays.

:beer:
 

Yammie

Member
Joined
Aug 28, 2016
Messages
17
Location
Sarasota, FL
Eric, I found Garage Journal when looking for a new toolbox (ended up with a great Tool Vault from Strictly Toolboxes thanks to info here), and I just stumbled across you garage thread.

Wow.

This has been an education in efficiency. Too often I don't start a project because I haven't broken it into chunks in my mind first. You've demonstrated how tackling a specific task, or even part of it when work, weather, and women conspire against us, will keep a project moving relentlessly forward.

We bought a real project here in north Florida a little over a year ago. It's a beautiful two story timber framed home built in 1995, but neglect by the second owner led to Fannie Mae foreclosure and the home sitting empty for several years. The massive, 400+ year old live oak in the side yard of the five acre lot sold me before I set foot inside.

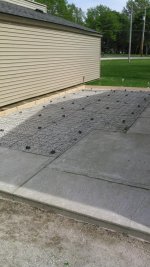
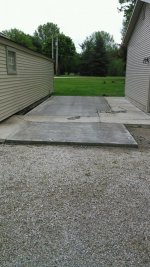
I'm in the process of converting the two story three car garage into a mother in law apartment from raw blocks and I'm learning with every step. (In my defense, the conversion had begun illegally by the second owners and the apartment was really important - but it broke my heart to lose such a massive garage with built in man cave loft.) One of the best lessons has been to see what you got done working full time (and such a noble, exhausting profession, too!) and HOW you got it done, doggedly and methodically, is really tremendously helpful. And I need to take more pictures!

So though I'm late to the party, thank you. My mother-in-law's failing health unfortunately means we're going to finish all we can and list this place in the spring so we can return to New England for more family support, which means I'll have another massive project by summer time. I'd better put away my phone and get to work...

Best regards,
Bill
About ten years west of Gainesville, FL
 
Last edited:
OP
N

NUTTSGT

Super Moderator
Staff member
Joined
Sep 14, 2009
Messages
50,890
Location
Northern Central Ohio
Bill,

Welcome to GJ, thank you for the compliments and it's an honor to have you make your first post in my thread.

I have learned more information from this site than that which I can pay back to our fellow members. I might also add that GJ has some of the greatest members on the 'net. They range from simple folks with a great sense of humor to serious DIYers to professionals that are more than willing to share their vast amount of knowledge if you're willing to listen.

Taking pictures and sharing your experience help others and in turn helps you stay motivated on a project.
 

Growlertdi

Well-known member
Joined
May 17, 2016
Messages
410
Location
Millersport, Ohio
I made it to the end. Happy 2017 Eric. Its been great reading your thread these last few weeks.

I am glad to hear that your Dog Bones is helping you through some trying times.

I am hoping to get my new pooch out to the garage more this spring once her leg heals. 5 mo old lab/boxer mixes are all legs and feet.

The garage is looking great and I can tell you like spending time out there, even if its just for a small project like adding an outlet on the outside, or a big one like redoing the whole chimney. keep up the great work.
 
OP
N

NUTTSGT

Super Moderator
Staff member
Joined
Sep 14, 2009
Messages
50,890
Location
Northern Central Ohio
I made it to the end. Happy 2017 Eric. Its been great reading your thread these last few weeks.

I am glad to hear that your Dog Bones is helping you through some trying times.

I am hoping to get my new pooch out to the garage more this spring once her leg heals. 5 mo old lab/boxer mixes are all legs and feet.

The garage is looking great and I can tell you like spending time out there, even if its just for a small project like adding an outlet on the outside, or a big one like redoing the whole chimney. keep up the great work.

Yes, I like spending time out here, it helps with my sanity. :evil:
 
OP
N

NUTTSGT

Super Moderator
Staff member
Joined
Sep 14, 2009
Messages
50,890
Location
Northern Central Ohio
I bought some LED conversions for the can lights out front under the over hang. I had them painted for about two weeks but was waiting for nicer and warmer weather.


I had some 13W CFL out here but didn't put them back when I removed the green and red colored bulbs I put in for Christmas. You can tell I painted the old trim rings to macth too.
 

Attachments

  • GR1200.jpg
    GR1200.jpg
    128.5 KB · Views: 5
  • GR1201.jpg
    GR1201.jpg
    108.2 KB · Views: 3
Last edited:
OP
N

NUTTSGT

Super Moderator
Staff member
Joined
Sep 14, 2009
Messages
50,890
Location
Northern Central Ohio
I removed the old trim rings but pulling the springs out. Once they were out, I loosed the bulb holder and moved it all the way up.


Then I screwed in the small adapter and plugged in the new light. The new LED fixture was slid in place. The color is off but I won't loose any sleep over it.


Once I did all three of them, I flipped the switch. Easy as pie and shouldn't be a need for them to warm up like the CFLs. That was the main reason to swap them out. The energy saving will be small 10W vs 13W and considering how much I use them, I doubt I ever see a ROI.


One step closer to having the house and garage changed over entirely to LEDs.
 

Attachments

  • GR1202.jpg
    GR1202.jpg
    92.9 KB · Views: 3
  • GR1203.jpg
    GR1203.jpg
    93.9 KB · Views: 4
  • GR1204.jpg
    GR1204.jpg
    143.2 KB · Views: 4
Last edited:
OP
N

NUTTSGT

Super Moderator
Staff member
Joined
Sep 14, 2009
Messages
50,890
Location
Northern Central Ohio
Well, I'm trying to motivate myself to add this to the attic space over the garage area.


Last year I added some rolls of fiberglass (unfaced R11) in the attic of the house. There is an area with a floor down the center, half of which is used for storage. I also replaced the can lights in the bathroom with LEDS and was able to pile some of the blown-in cellulose back around the fixtures. I rolled a layer across the width of the attic and once I was done, I decided to add more. The second layer is perpendicular to the first layer and blanket the attic.

About two weeks ago when we had some single digit/low teens temps, I mentioned to the wife that the furnace was not running as much as it had in the past. She had noticed as well and I believe what I added last year to the attic will finish paying for itself this year with savings on fuel oil.

After see what the extra fiberglass did for the house, I decided to try it with the garage. I figure it'll help once the fire goes out to help hold the heat in and in turn keep the concrete warm. That should make the temp come up faster on those mornings when I come home from work and get the heat fired up.
 

Attachments

  • GR1205.jpg
    GR1205.jpg
    131.9 KB · Views: 5
Last edited:
OP
N

NUTTSGT

Super Moderator
Staff member
Joined
Sep 14, 2009
Messages
50,890
Location
Northern Central Ohio
I'll also mention the cost. 15 rolls at $6.79/roll plus tax. So it's about $110 with tax plus Menard's had 11% sale so my rebate receipt had $14 with a few other things I had bought.
 
OP
N

NUTTSGT

Super Moderator
Staff member
Joined
Sep 14, 2009
Messages
50,890
Location
Northern Central Ohio
Well part of that project is done, above the garage area complete. I have to do the attic area above the workbenches next.

This is the access hole I was working through. It's barely big enough to get a roll through.


As you can tell, there wasn't much room to work in the attic. I used an extendable broom handle to stuff it back as far as I could.


Attachments

  • GR1208.jpg
    GR1208.jpg
    130 KB · Views: 7
  • GR1207.jpg
    GR1207.jpg
    119.8 KB · Views: 6
  • GR1206.jpg
    GR1206.jpg
    101.8 KB · Views: 4
Last edited:
OP
N

NUTTSGT

Super Moderator
Staff member
Joined
Sep 14, 2009
Messages
50,890
Location
Northern Central Ohio
One sight I was happy to see, empty insulation packaging.


When I came home from work this morning, the garage was about 4-5 degrees warmer than what it normally is. However, it's not a true test as we had an exceptionally warm day in there. Looks like we're going to have a few days of warmer weather so I won't be able check out the difference for a week or so.
 

Attachments

  • GR1209.jpg
    GR1209.jpg
    126.9 KB · Views: 7
Last edited:

FRSMech

Member
Joined
Nov 8, 2014
Messages
6
Location
Québec QC
Eric,

For the past couple days I've been sitting here reading your story (don't worry I'm not at work - I'm on parental leave taking care of my newborn son) and it has really been a great read.

It's a special treat to be able to follow someones journey in restoring and renovating their home and workspace. Thank you for sharing so much and motivating so many here on GJ. You're obviously an autodidact and a very motivated individual! Thank you for serving the public in your career choice.

My wife and I bought a 130 year old house here in downtown Québec City with a garage built in the '60s. Your story has made me reflect on the importance of sharing our experiences through communities like GJ, I have always been a lurker on all of the forums that I visit and I have often felt guilty for the one way benefit! I will start working on my story.

Thank you for sharing.
 

sean Buick 76

Well-known member
Joined
May 7, 2013
Messages
3,221
Location
Edmonton Alberta
Nice Job on all the projects Eric! I spent an hour or so going through your posts from first page and you certainly know how to put in "sweat equity!" Keep up the great work and SLOW DOWN so I can get to the last page of your thread LOL!
 
To avoid these ads, REGISTER NOW!

rixtrix1

Well-known member
Joined
Aug 25, 2013
Messages
3,010
Location
Chandler, AZ (from west NE)
I'm sure you'll notice the difference with the extra insulation, even from the mental aspect of not looking at all those packages every day. Always enjoy dropping by to see what's going on!
 

Johanfpa

Well-known member
Joined
Dec 27, 2016
Messages
241
Location
Aberdeen Scotland
Eric,

While searching the internet I came across this thread and just spend the last weeks reading it and writing down the bits I want to use in my garage so thanks for sharing your great handiwork. You have done a fantastic job with a limited budget and loads of hard graft, well done! :bowdown:
I bet Bones is enjoying his little spot in your garage. :thumbup:

Johan
(Aberdeen Scotland)
 

racer-john

Well-known member
Joined
Apr 1, 2008
Messages
1,461
Location
Newmarket, ON Canada
Please disreguard the above post.
I went back thru your posts and noted some criticism of a comment I made about the position of the ground lug on receptacles.
Our Electrical states that the ground plug is always oriented to the bottom, reason being if the plug is dislodged the plug is still grounded by the pin.
Sorry for any confusion.
 

drivesitfar

Well-known member
Joined
Oct 23, 2013
Messages
36,004
Location
Pacific Northwest
Eric: i bet you've been busy getting ready for race season. do you have any trailer information on this thread or just on your trailer thread?

hope everything is still pushing forward nicely so you can have a fun and successful race year.

good luck
 
OP
N

NUTTSGT

Super Moderator
Staff member
Joined
Sep 14, 2009
Messages
50,890
Location
Northern Central Ohio
Eric: i bet you've been busy getting ready for race season. do you have any trailer information on this thread or just on your trailer thread?

hope everything is still pushing forward nicely so you can have a fun and successful race year.

good luck

Actually I haven't got anything done on the trailer, things like typical life here have tossed a wrench in everything.
 
OP
N

NUTTSGT

Super Moderator
Staff member
Joined
Sep 14, 2009
Messages
50,890
Location
Northern Central Ohio
Across the page of the back of the garage, I tied into an old down spout drop. I used some PVC pipe and field tile concreting it all together.


From there, a trench was dug, some stone base and I wrapped the field tile with landscape fabric to to the roots from making their way into the tile. I'm not sure if it'll work but it's cheap to try.


I then covered the tile with some river rock.


Attachments

  • GR1210.jpg
    GR1210.jpg
    113.8 KB · Views: 12
  • GR1211.jpg
    GR1211.jpg
    130.6 KB · Views: 12
  • GR1212.jpg
    GR1212.jpg
    139.3 KB · Views: 11
Last edited:
OP
N

NUTTSGT

Super Moderator
Staff member
Joined
Sep 14, 2009
Messages
50,890
Location
Northern Central Ohio
Next up, the current project, a parking spot for the enclosed trailer. I pulled out a bush, root ball and filled it with stone. Then proceeded to fill that spot with some stone and dug out the rest of area.


All dug out and started to fill it with stone.


I went to the quarry and got another 1.5 ton of stone, which is sitting on my open trailer. I need to rent a tamper/compactor before I put down more stone. Unfortunately since my FIL retired, I don't have access to some of the construction that he was able to borrow from his employer.
 

Attachments

  • GR1214.jpg
    GR1214.jpg
    135.2 KB · Views: 10
  • GR1213.jpg
    GR1213.jpg
    113 KB · Views: 10
Last edited:
OP
N

NUTTSGT

Super Moderator
Staff member
Joined
Sep 14, 2009
Messages
50,890
Location
Northern Central Ohio
Somewhere around 6 ton of stone in and tamped down. The forms are set up.


Since I'm adding a tile covered stone area between the pad and garage, I may not need anything for the expansion joint but figured either way, it would be cheap insurance.


You might notice my choice to hold the expansion joint in place, modified masonry nails and plastic cap nails.
 

Attachments

  • GR1215.jpg
    GR1215.jpg
    114.5 KB · Views: 10
  • GR1216.jpg
    GR1216.jpg
    99.4 KB · Views: 11
Last edited:
OP
N

NUTTSGT

Super Moderator
Staff member
Joined
Sep 14, 2009
Messages
50,890
Location
Northern Central Ohio
I added some wire and put them on chairs, which I happened to find at Menard's on clearance. We'll still pull the wire up as we go.


I'm ordering 5 yards and the pad will take 4 1/4, the remainder will fill in an apron area in front of the sidewalk and pad. It'll get formed up after we pour the pad.


Attachments

  • GR1217.jpg
    GR1217.jpg
    109.1 KB · Views: 10
  • GR1218.jpg
    GR1218.jpg
    131.1 KB · Views: 7
Last edited:

drivesitfar

Well-known member
Joined
Oct 23, 2013
Messages
36,004
Location
Pacific Northwest
Nutts: I've never heard of the rebar or steel holders as chairs. i usually use rocks, but i know there are stuff made for the job.

best of luck on the pour and are you finishing it yourself?


when you order concrete do you ask for a specific PSI or type or just say i want 5 or 10 yards?

best of luck and welcome back to GJ cause i did notice you were taking a break.

cheers
 
OP
N

NUTTSGT

Super Moderator
Staff member
Joined
Sep 14, 2009
Messages
50,890
Location
Northern Central Ohio
Nutts: I've never heard of the rebar or steel holders as chairs. i usually use rocks, but i know there are stuff made for the job.

best of luck on the pour and are you finishing it yourself?


when you order concrete do you ask for a specific PSI or type or just say i want 5 or 10 yards?

best of luck and welcome back to GJ cause i did notice you were taking a break.

cheers

A freind of mine and a few guys from the fire dept are showing up to help get it poured. Probably more help than needed for a small job but it should keep any one person from having to bust their ***.

The pad will get a broom finish so it should make finishing easier not having to keep working with a trowel. The concrete company recommended a 4500 psi mix.


Thanks and thanks again.
 

krcoomer

Well-known member
Joined
Jul 22, 2016
Messages
379
Location
Bluegrass region
Nutts: I've never heard of the rebar or steel holders as chairs. i usually use rocks, but i know there are stuff made for the job.


cheers

Drives: The chairs allow concrete to better encapsulate the rebar or mesh and gives a more consistent pressure and stronger set than a rock or brick, although I have been known to do that. I really don't miss working in concrete.
 

drivesitfar

Well-known member
Joined
Oct 23, 2013
Messages
36,004
Location
Pacific Northwest
Nutts: did you get it poured and finished before the rain cause I think i see cement leftovers on your extra spot you framed in.

over here in the PNW we just look outside.

one member wrote something pretty good about weathermen and weatherwomen.

goes something like this. 10 of them sitting around a table in a room eating donuts and drinking coffee. the oldest one in the room asks how many think it will rain today. 7 of them raise their hands so 70%.

he asks again for the next day's thoughts and a couple were busy grabbing donuts so only 2 raised their hands hence the 20% chance of rain tomorrow.

and so on.

take care and i hope it turns out.

BTW is your trailer finished and ready for racing season or are you delaying a year and maybe planning on racing in 2018 now?
 
OP
N

NUTTSGT

Super Moderator
Staff member
Joined
Sep 14, 2009
Messages
50,890
Location
Northern Central Ohio
It was finished and we had just got doing a broom finish on it about 20-30 minutes prior. It'll be fine and if it's not, it is what it is.

The trailer isn't done, I put it away for Winter and haven't touched it since getting it out. Now that the pad is done, I can get the trailer in place once it's cured and start back on it.
 
OP
N

NUTTSGT

Super Moderator
Staff member
Joined
Sep 14, 2009
Messages
50,890
Location
Northern Central Ohio
The foam expansion product I used has a tear away top edge. This allows a person to caulk the gap. I pulled it out the day after pouring the concrete, but haven't caulked it yet.


You can see were some of the cream washed back onto the broomed surface from the rain. I was able to rebroom part of it on the other end. At the end of the day, it's cosmetic and won't affect the trailer while it's sitting there.


Attachments

  • GR1221.jpg
    GR1221.jpg
    77.6 KB · Views: 15
  • GR1220.jpg
    GR1220.jpg
    95.5 KB · Views: 14
Last edited:
OP
N

NUTTSGT

Super Moderator
Staff member
Joined
Sep 14, 2009
Messages
50,890
Location
Northern Central Ohio
Here's a shot that shows the pad and part of the new apron. I'm actually missing the fence that I took down.


I extended the trench along the garage and stoned the bottom of it. I strecthed the tile out, getting it ready to place in the trench.


Attachments

  • GR1222.jpg
    GR1222.jpg
    128.3 KB · Views: 13
  • GR1223.jpg
    GR1223.jpg
    120.6 KB · Views: 15
Last edited:
OP
N

NUTTSGT

Super Moderator
Staff member
Joined
Sep 14, 2009
Messages
50,890
Location
Northern Central Ohio
The trench follows around the back of the shed entrance, I didn't want to pull the bricks up so I dug around them.


Then it comes around to tie into the previous tile that I had installed.


After the tile was put in place along the side of the garage, I covered it with some river rock. What I installed on the back of the garage does a nice job of taking the water away. I hope this works just as good. What you don't see is the wrapping of the tile with some landscape fabric. It's my attempt to keep the roots and silt out of the tile.


Attachments

  • GR1224.jpg
    GR1224.jpg
    118.8 KB · Views: 8
  • GR1225.jpg
    GR1225.jpg
    140.1 KB · Views: 8
  • GR1226.jpg
    GR1226.jpg
    105.7 KB · Views: 8
  • GR1227.jpg
    GR1227.jpg
    105.7 KB · Views: 8
Last edited:
To avoid these ads, REGISTER NOW!
Top Bottom