To avoid these ads, REGISTER NOW!

Above 1200 Sq/FT Garage Refurb®

Wokspaces above 1200 squarefeet.
OP
N

NUTTSGT

Super Moderator
Staff member
Joined
Sep 14, 2009
Messages
50,901
Location
Northern Central Ohio
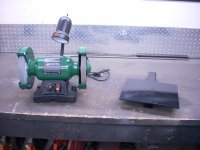
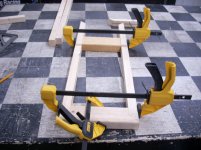
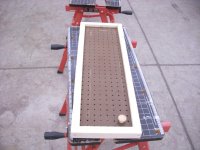
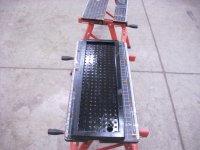
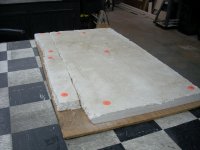
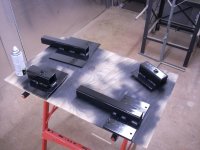
One last picture for the day. . . waiting on paint to dry.

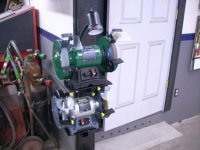
Two wall mounts and two bases for the grinders.

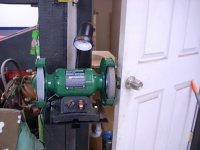
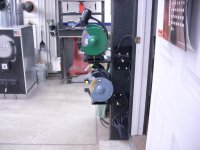
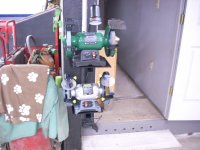
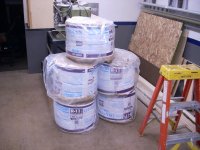
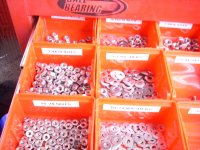
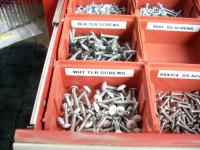
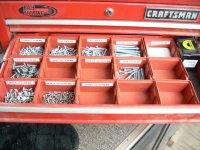
Heck, I'll toss in these pictures as well.

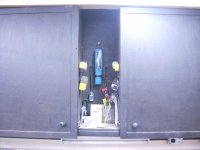
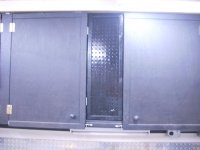
I have my long steel above in a shelf welded to the steel beam in my shop. The shorts go in a tote screwed to a movers dolley. It slides in/out nicely under the workbench and is out of the way.
 

Attachments

  • 01062019 grinder 006.jpg
    01062019 grinder 006.jpg
    99.4 KB · Views: 130
  • 01062019 grinder 007.jpg
    01062019 grinder 007.jpg
    138.8 KB · Views: 126
  • 01062019 grinders2 001.jpg
    01062019 grinders2 001.jpg
    126.4 KB · Views: 132
To avoid these ads, REGISTER NOW!

xtremek

Well-known member
Joined
Apr 13, 2012
Messages
11,603
Location
St. Johns, Mi
Good to have you back. I hope you've been well. I like the idea of the receiver mount for the grinders. Do they move much when you're using them?
 
OP
N

NUTTSGT

Super Moderator
Staff member
Joined
Sep 14, 2009
Messages
50,901
Location
Northern Central Ohio
Headlines: Man goes up 3 inches in size with his grinder. Well done.


LOL, thanks.

Good to have you back. I hope you've been well. I like the idea of the receiver mount for the grinders. Do they move much when you're using them?

I've been around, just not doing much to the garage. It's pretty much done, just small stuff nowadays.


I hope they don't move much, I've never used them like this. I hope it turns out well.
 
OP
N

NUTTSGT

Super Moderator
Staff member
Joined
Sep 14, 2009
Messages
50,901
Location
Northern Central Ohio
Nice to see things are moving along. Utility room looks great( I didn't show my wife;)).

Thanks, the wife still says it's her favorite room in the house.

Back on the bench grinder project to finish it up.

I mounted the upper wall mount where I had planned then moved on to the grinder. I bolted it to it's base plate. I used Rustoleum Gloss Black 2X primer/paint.
 

Attachments

  • 01062018 grinder 001.jpg
    01062018 grinder 001.jpg
    95.4 KB · Views: 106
  • 01062018 grinder 002.jpg
    01062018 grinder 002.jpg
    127.7 KB · Views: 107
OP
N

NUTTSGT

Super Moderator
Staff member
Joined
Sep 14, 2009
Messages
50,901
Location
Northern Central Ohio
Having the upper grinder in place, I could figure out how high to mount the lower brush grinder. However, I ran into a small issue.. . .


oops, bathroom door won't close. Oh well, generally it's just me out here so no biggie.

If it becomes and issue, I should be able to flip them over to the other side of the wall.
 

Attachments

  • 01062018 grinder 003.jpg
    01062018 grinder 003.jpg
    122.5 KB · Views: 182
  • 01062018 grinder 004.jpg
    01062018 grinder 004.jpg
    100.6 KB · Views: 188
OP
N

NUTTSGT

Super Moderator
Staff member
Joined
Sep 14, 2009
Messages
50,901
Location
Northern Central Ohio
I had to make up some shims so I could the the wire wheels tight. I sacrificed the washers from the Skil grinder and drilled them out to fit the larger shaft.

Done, both grinders in place. I think I might grab a ratcheting 3/4" wrench to mount above the grinders. so I don't have to walk over to the tool box (eight feet away) to grab one out of the drawer.

:beer:
 

Attachments

  • 01062018 grinder 006.jpg
    01062018 grinder 006.jpg
    116.4 KB · Views: 187
  • 01062018 grinder 005.jpg
    01062018 grinder 005.jpg
    115.9 KB · Views: 182

Joe-R

Well-known member
Joined
Apr 6, 2012
Messages
164
Location
St. Louis
Eric,

Great job on the multi grinder project!!! Please let us know how smooth they run.

Thanks!
Joe
 
OP
N

NUTTSGT

Super Moderator
Staff member
Joined
Sep 14, 2009
Messages
50,901
Location
Northern Central Ohio
I was seriously considering swapping the grinders to the other side till this morning. I walked in without thinking the door hit the grinder......:headshake


Problem solved, you can quit the meds now.
 

Attachments

  • 01152019 grinder 001.jpg
    01152019 grinder 001.jpg
    109.5 KB · Views: 182
OP
N

NUTTSGT

Super Moderator
Staff member
Joined
Sep 14, 2009
Messages
50,901
Location
Northern Central Ohio
I started to do a little update between my cabinets after ordering a pegboard Sharpie holder from AndyL.

This a space that was created when I started the Garage Refurb. It has worked well for keeping a few things handy. I decided to update it now.

I started to make a small door and got it painted. I was using some pegboard and after it was painted, I knew it was ****. The pegboard I used was 1/8" and I had cut some stuff on it so it had cut marks.

I broke it in half and made use of it one last time. It became heat for the garage.
 

Attachments

  • 01212019 temp 001.jpg
    01212019 temp 001.jpg
    97.1 KB · Views: 143
To avoid these ads, REGISTER NOW!
OP
N

NUTTSGT

Super Moderator
Staff member
Joined
Sep 14, 2009
Messages
50,901
Location
Northern Central Ohio
Today, I made a run to Menard's and grabbed a few things. One of them being a 2'x4' piece of 1/4" pegboard. Once I came home, I set about to create a new door. I started with new measurements and ripped a 2x6 down for door sides.

I started to glue and screw it together and took a measurement for the pegboard. Once it was cut to size, it was put in the dadoes and the top of the door was glued/screwed in place. I added a knob and some quick sanding to knock the edges off. I also recessed the hinges with a little bit of chisel work.
 

Attachments

  • 01232019 garage pics 001.jpg
    01232019 garage pics 001.jpg
    148.5 KB · Views: 92
  • 01232019 garage pics 002.jpg
    01232019 garage pics 002.jpg
    123 KB · Views: 93
OP
N

NUTTSGT

Super Moderator
Staff member
Joined
Sep 14, 2009
Messages
50,901
Location
Northern Central Ohio
After some black paint, it resting comfortably until tomorrow when I hang it up. I bought some more pegboard hooks and will be arranging things back on the pegboard from either the previous nails or screws.

This will also create a small "hidden" area behind the door. As to what will live back there, I don't know.


You'll also so a little project for tomorrow, an itchy one. I'll be adding some more insulation in one of the attic areas.
 

Attachments

  • 01232019 garage 2 001.jpg
    01232019 garage 2 001.jpg
    129.7 KB · Views: 84
  • 01232019 garage pics 003.jpg
    01232019 garage pics 003.jpg
    147.3 KB · Views: 84
OP
N

NUTTSGT

Super Moderator
Staff member
Joined
Sep 14, 2009
Messages
50,901
Location
Northern Central Ohio
I mounted some hinges and a magnetic catch on the door today. It's hung but some of you with OCD won't get past the gloss black paint I used instead of the flat black like the other cabinet doors.

I added a HF magnetic strip to hold a few things and a few hooks. Just a stuff that I want within quick reach.

Once the door is open, you can see a few things that I'll keep out of sight.
 

Attachments

  • 01242019 garage 003.jpg
    01242019 garage 003.jpg
    94.1 KB · Views: 152
  • 01242019 garage 002.jpg
    01242019 garage 002.jpg
    114.2 KB · Views: 143
  • 01242019 garage 001.jpg
    01242019 garage 001.jpg
    88.4 KB · Views: 142
OP
N

NUTTSGT

Super Moderator
Staff member
Joined
Sep 14, 2009
Messages
50,901
Location
Northern Central Ohio
I did a little reorganization last night. Took some bins out of the attic and put them in a drawer of a 26" Cman mid box. Still got some work to do.


Wow those pictures came out like ****, must not be enough light for that camera.
 

Attachments

  • 01272019 garage 001.jpg
    01272019 garage 001.jpg
    151.9 KB · Views: 107
  • 01272019 garage 002.jpg
    01272019 garage 002.jpg
    129.5 KB · Views: 112
  • 01272019 garage 003.jpg
    01272019 garage 003.jpg
    141.2 KB · Views: 106
  • 01272019 garage 004.jpg
    01272019 garage 004.jpg
    148.3 KB · Views: 119
OP
N

NUTTSGT

Super Moderator
Staff member
Joined
Sep 14, 2009
Messages
50,901
Location
Northern Central Ohio
Made a quick adjustment to the camera. . . .looks better.


Yeah, I know washers aren't sized to fine/coarse thread but I would have had to edit it from the label maker and had more labels with 10-24 to print out..
 

Attachments

  • 01272019 garage 005.jpg
    01272019 garage 005.jpg
    148.7 KB · Views: 103

OccupantRJ

Well-known member
Joined
May 15, 2009
Messages
11,011
Location
Eastern North Carolina
I think you will like the horizontal view of pieces as you open a drawer. I am converting all my hardware to this method to make it easier to find. Before I spent more time and effort opening bolt bin drawers than finding hardware.
 

Attachments

  • 13784800-5C9E-4672-A348-6F7F6C5F7E9C.jpeg
    13784800-5C9E-4672-A348-6F7F6C5F7E9C.jpeg
    125.8 KB · Views: 102
OP
N

NUTTSGT

Super Moderator
Staff member
Joined
Sep 14, 2009
Messages
50,901
Location
Northern Central Ohio
This 5 rolls are now in use after climbing around in the side attic. I covered over one of the attic access coves. I also realized that the other one needs some more rigid insulation on top of it. That'll be a project for Tuesday, go grab a 4x8 sheet of polyiso.
 

Attachments

  • 01232019 garage pics 003.jpg
    01232019 garage pics 003.jpg
    134.7 KB · Views: 46

OccupantRJ

Well-known member
Joined
May 15, 2009
Messages
11,011
Location
Eastern North Carolina
That should help with the heating, for sure. I need to insulate my shop attic with some blown in, but it does not get below 45 in there even when it drops to 20* around here for a couple of days. The job is still on the to do list though.
 
OP
N

NUTTSGT

Super Moderator
Staff member
Joined
Sep 14, 2009
Messages
50,901
Location
Northern Central Ohio
That should help with the heating, for sure. I need to insulate my shop attic with some blown in, but it does not get below 45 in there even when it drops to 20* around here for a couple of days. The job is still on the to do list though.

I generally don't have issues with heating except when it gets to low teens and below. When it stays there and the wind kicks in, it makes it harder to warm the place up. It also draws the heat out so it doesn't retain it as well. Hopefully, this added insulation will help.
 
OP
N

NUTTSGT

Super Moderator
Staff member
Joined
Sep 14, 2009
Messages
50,901
Location
Northern Central Ohio
Nice job on the bins. How thick is the insulation in your ceiling?

I think what I put in originally was R13. I added a second layer perpendicular of R11. So in theory, R24.

In the back corner, there are a few pieces of varying sizes/types of foam. Whenever I finished a project and had a piece left over, I'd stick it up there rather than to throw it away. That second layer I put in, R11, was rolled on top of that.
 
OP
N

NUTTSGT

Super Moderator
Staff member
Joined
Sep 14, 2009
Messages
50,901
Location
Northern Central Ohio
I added some more bins to the lower drawers and started to fill them. These fasteners are more of the stuff I was using on my enclosed trailer.
 

Attachments

  • 01292019 garage 002.jpg
    01292019 garage 002.jpg
    150.9 KB · Views: 86
  • 01292019 garage 001.jpg
    01292019 garage 001.jpg
    153.9 KB · Views: 89
OP
N

NUTTSGT

Super Moderator
Staff member
Joined
Sep 14, 2009
Messages
50,901
Location
Northern Central Ohio
I went to Menard's this morning as the wood stove was heating up the garage....also got side tracked at Best Buy too.

I grabbed sheet of 1" polyiso R6 rigid foam. I took the attic access cover down, grabbed a measurement and got to work. First I had to pull off the old piece of polystyrene insulation.

My plan was to add four pieces on top of the polystyrene but after cutting out what I needed, I found I could piece another layer together.

I ripped some plywood, drilled some holes and bolted it all together. In theory, it'll give me an R30 cover. However, there will be small gaps along the edges of the cover.
 

Attachments

  • 01292019 garage 004.jpg
    01292019 garage 004.jpg
    141.8 KB · Views: 87
  • 01292019 garage 006.jpg
    01292019 garage 006.jpg
    147.7 KB · Views: 88
  • 01292019 garage 007.jpg
    01292019 garage 007.jpg
    120.2 KB · Views: 102
OP
N

NUTTSGT

Super Moderator
Staff member
Joined
Sep 14, 2009
Messages
50,901
Location
Northern Central Ohio
Once it was a solid cover, I slid it in place. I need to add a little black paint to the heads of the carriage bolts.

For a different location, I literally have 4 different attic spaces, You can see the cover in place. I pulled a sheet of Reflectix over the cover and the end of one of the rolls of insulation too.

The last picture, you can see insulation that I added the other day. The silver in the background is the heat duct that I added a few years back along with the newer wood stove.

Now this is done, I have no real reason to get up in this attic space, other than for some utility/maintenance work.
 

Attachments

  • 01292019 garage 008.jpg
    01292019 garage 008.jpg
    82.4 KB · Views: 109
  • 01292019 garage 009.jpg
    01292019 garage 009.jpg
    143.8 KB · Views: 112
  • 01292019 garage 005.jpg
    01292019 garage 005.jpg
    99.9 KB · Views: 114
To avoid these ads, REGISTER NOW!
Top Bottom