OP
Nicely done as always.
Thanks, time for an update been a little busy.

Nicely done as always.
Good use of space.
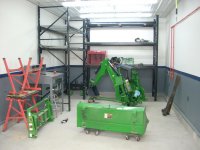
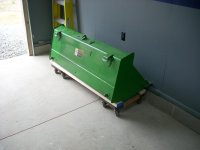
You built the dolly for the back hoe? When I first saw it in middle of your garage, I was that seems like weird place to take off. Then I saw the dolly.

Do you use the backhoe attachment enough to justify the cost? I borrow the neighbor's Kubota enough to warrant the cost (for the bucket, and I wish I had that kind of money), but I don't see the frequent need for a back bucket. Not trying to be a snot, just very nosey.

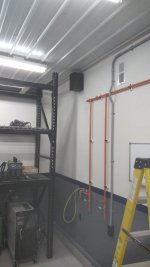
A place for every thing, and every thing in its place.

LOL, I've been called a slight bit OCD. I correct people and just tell them I'm organized. I don't want to hunt for something longer than what the job takes. I want to be able to see my stuff and know if something is missing.
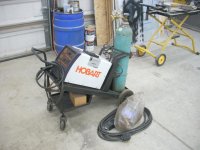
Nice. Can’t beat a Hobart welder in my opinion anyway.
Sent from my iPhone using Garage Journal
Yep, good welders for the money... I now have nine $50 bills in my pocket and down to one welder.
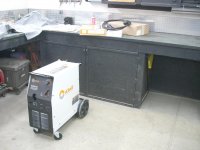
That’s great. Best of both worlds I guess lol. Even though a backup welder would be handy in case yours breaks.
Sent from my iPhone using Garage Journal
The white board will work well for planning projects and drawing schematics out before you get the material.
Maybe get another one for “needs for the shop” ie. more wire nuts, 16D nails etc.
That is looking amazing! You saved a TON of money doing all this by yourself!
Nice [emoji106]. It’s not a garage if you don’t have some good music playing.
Sent from my iPhone using Garage Journal
Thanks Blake. Some good music helps saves my sanity. . . . especially, at work.
Looks like you are making some good progress.
Sent from my iPhone using Garage Journal
Pool noodles are a good thought. Fortunately, the JD sits close and makes it a "no walk zone."Eric, the garage is looking very good. Tool box looks like a fun project. I just tool my first trip with rustoleum bedliner on the backside of a couple rusty bumpers. Was impressed with how well it worked.
Would suggest pipe insulation or pool noodle on the edge of the bucket to save walls, shins, etc.
Yep, I helped to drop the weiny.
Let me get on the PC at home so I can link something