LX-Markham
Well-known member
#3 is correct.
I would recommend shimming, bolting, and grouting those baseplates so the posts remain plumb.
I would recommend shimming, bolting, and grouting those baseplates so the posts remain plumb.


#3 is correct.
I would recommend shimming, bolting, and grouting those baseplates so the posts remain plumb.
My last attempt.... The beginning of the instructions tell you that you need a flat surface for the feet to sit on; the instructions also tell/show you how to use a transit to calculate the distance each corner needs to be adjusted.
Sand, grind or whatever so that you have a flat surface to place the columns on, once the surfaces are flat, adjust the height of the columns with plates, etc. that are the total footprint of the column feet. It's truly simple to get a good foundation to build on and I'll bet your problems disappear. Mine and several friends of mine have similar lifts and all of them have a lot more threads exposed on top of the ladder post....
Wow, I thought my lift was tight. You win.
I can see now why you are concerned about lateral movement.
By plumb I mean perfectly vertical in both directions. To achieve that, you will likely have different thickness of shims under each of the corners of the baseplate. No, the baseplate will not be in full contact with the concrete. It will be resting on the corner shims. Once you bolt it down, you then use a high flowing grout to fill the gap between the baseplate and the concrete floor. This way the baseplate has full bearing, as designed.
We plumbed my posts with a 4' level. By we, I mean me and the Bendpak Installer. He was drilling the anchors, and I was following right behind plumbing the posts. Then the following week, I packed the grout under the baseplates.
")
Borrow/rent a transit, the process will not take you 30 minutes and that's with setup and take down. Lowes, etc carry some real inexpensive devices for home use and that's all you need. A small electric hand grinder and a straight edge will get you four spots flat for your posts.
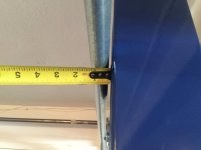
Actually scratch the idea about the grinder. It would have worked before installing it. Now there is no way to move this thing, simply no room (see my picture with the garage track and the I beam).
I will look into the grout idea, although I dont know how strong it will be and how to properly compress it.
). The garage I have is way too tight. Not only ceiling is too low (90") but those columns that connect to I beam are in the way making maneuverability of an hoist literally impossible. We have struggled a great deal with my friend during installation. We had to install the non power side runway manually with hand which wasnt a pleasant experience.As previously mentioned, you could plumb the post with nessacary shims in the corners then seal the gap all around the base plate and the floor and pour grout into holes of the base plate to fill the void under the base plate. After the grout drys you will have a solid full contact footing under the base plate. At this point I personally would bolt it down but again that's up to you. Use a 4 ft level and insure the post are all plumb left to right and forward to back.
i didn't have a transit but I used a laser that I set in the center of the floor and rotate 360* to each post. A water level would have worked also.
With the issue you were describing about the ladder bowing out on you almost sounds like the bolt on top could be welded on crooked but I guess you resolved that.
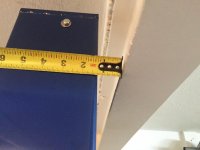
What is the largest amount of shim under any post?
You would be able to move it if you wanted. I would bolt it down though. I know, I need to let you alone about bolting it down. LOL
but i m guessing it will stick to the concrete which I dont care really. No I will definitely bolt it down eventually but if I cannot move the lift at all with the grout in place, thats a big no no. Are you sure the grout wont bind to the metal and keep it stuck permanently?
Ok before I do this hopefully one last time, plumbing a column means that each column will be vertically level on all 4 sides. So I will take a 4 feet level and vertically put it on each 4 sides (well 2 really) and make sure the bubble is right on the center, correct.
 you got it
And as far as grout use something like this from HD
Hold on everyone we are missing a very important measurement.
The OP needs to make a mark on each leg of the hoist at the same level point. Then using a laser level move any legs that are not on the same level (using the low.est one as the set point). Now shim up any that are not level. Measure the gap below the plates, wedge up till level, then grout. After the grout has cured he will be able to bolt the pads to the floor. Since the pads now make full contact with the floor no tipping will occur. you got it
), can someone help answer the following?Go back and reread post 23.
I will give it a try today.