To avoid these ads, REGISTER NOW!

Hein Werner OS

Uncle Buck

Banned
Joined
Mar 7, 2005
Messages
9,120
Location
Kansas
I have his catalog still but its the biggest piece of ****, No prices till you get to the back page and every item till you get there is numbered with letters and numbers ie: kves1234 and so on. It used to give me a headache trying to figure out how much stuff costs.

I actually considered getting his material briefly, but the whole thing just seemed a bit sketchy to me so I passed.
 
To avoid these ads, REGISTER NOW!

Hiball

Well-known member
Joined
Apr 30, 2009
Messages
14,027
Location
Missery
I actually considered getting his material briefly, but the whole thing just seemed a bit sketchy to me so I passed.

Yeah he used to sell "hydraulic jack rebuild startup kits" and they were extremely pricey and i remember looking at the kits and thinking to myself.. Hell ive never even worked on that model before and then the next one was the same. It was like he was trying to get rid of some of his obsolete stuff. Unless you have a huge clientel you cant keep that much stuff on hand, 1st off everything except the leather and balls, springs has a shelf life and when it gets age on it it gets hard and brittle. Ive learned to keep the common stuff on hand and keep the odd ball stuff distributors within 2 days of me via the mail. Yes.. Its more expensive not to be able to order 50 lincoln 2 ton ram cups at a time but its also cost prohibitive to have to junk them after they get hard.
 
OP
E

Elroy

Banned
Joined
Oct 15, 2005
Messages
3,467
Location
kentucky
Elroy knows from first hand experience how difficult it can be to obtain repair parts. The biggest problem Elroy saw was in the area of hard parts. Especially something that starts out as a casting. Simple hard parts can be machined. You're basically screwed if you need a replacement casting. If you need a lift arm, caster joke or handle assembly you need a jack to cannibalize or start reverse engineering a solution.

Elroy never did worry per se about the "soft" parts as they are used in lots of different applications. Especially on these simple machines were all the bores and journals were "standard sizes".

Surely it's nice to get a complete package of seals that have all the parts and pieces at ones finger tips. Thanks again Hiball.

It was the hard parts that gave Elroy the most trouble. We were also well aware of the fact that replaces were NOT AVAILABLE and exercised caution not to break or damage parts.
 
Last edited:

evintho

Well-known member
Joined
Apr 6, 2006
Messages
1,358
Location
Santa Rosa, CA.
And Elroys answer is yes we should. Yes we did
*****************************
To clarify these photos:

The floor jack on the Left is a circa 1979 Hein Werner Model WS rated at 1-1/2 ton

The jack on the right is a circa 1948 Hein Werner O'Boy Model OS rated at 1-1/4 ton.

Picture054.jpg

Elroy, how were you able to arrive at a specific year of manufacture on the jacks. I've been told my O'Boy is 60's-ish. If I can narrow it down to a specific year, that'd be great!
 
OP
E

Elroy

Banned
Joined
Oct 15, 2005
Messages
3,467
Location
kentucky
Elroy, how were you able to arrive at a specific year of manufacture on the jacks. I've been told my O'Boy is 60's-ish. If I can narrow it down to a specific year, that'd be great!


Because the original owners cited the date:

Elroy spoke with "Jimmy" last night and informed him that his jack was functionally complete. Elroy made arrangements to deliver it this afternoon.

Was surprised to discover that Jim's mother was going to be in attendance as she wanted to see it.

Jan couldn't believe it was the same jack. You see that Hein-Werner OS belonged to her father. Discovered that Jan is a 1940 model, and that her father and Uncle opened their used car lot in Harrodsburg, Kentucky in the late 30's, just before she was born. She vividly remembered her father taking her and her older sister for "rides" on that jack when she was 8 or 9 years old.

Discussions by family members came to the conclusion that Hein-Werner was probably purchased no later than 1948.

Yep 61 years old !

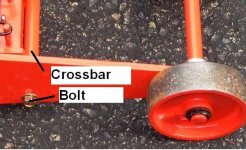
That might just explain the excessive wheel wear and the funky "round plug" in the plunger bore.

1948 and it still worked. 100% fresh in 2009. :thumbup:

Shame on you for not reading the entire thread.

Elroy is the original owner on the WS. We still have the Bill of Sale from 1979
 

heffneil

Well-known member
Joined
Apr 12, 2009
Messages
722
Location
Naples FL
I appreciated the recap :) I read the entire thread just when it was new. Glad it wasn't back in 1948 when I read it :)

Neil
 

heffneil

Well-known member
Joined
Apr 12, 2009
Messages
722
Location
Naples FL
Oh brother. Did he really just ask that? I know two: Elroy and Bob Dole. I don't think Bob Dole is on this board so that just leaves good ole Elroy.

Neil
 

Hiball

Well-known member
Joined
Apr 30, 2009
Messages
14,027
Location
Missery
Elroy, how were you able to arrive at a specific year of manufacture on the jacks. I've been told my O'Boy is 60's-ish. If I can narrow it down to a specific year, that'd be great!

Without a serial number breakdown or cracking of the code it is nearly impossible to determine when your jack was produced. There are small tidbits changes in Production methods, styles that can narrow it down but in the end its very difficult to actually pinpoint the exact timeline.
 

evintho

Well-known member
Joined
Apr 6, 2006
Messages
1,358
Location
Santa Rosa, CA.
Thanks! I just thought there might be a date code stamped on it somewhere. The Wilton vise I just refurbished had the date stamped on the drift key.
 

sjdon67

Well-known member
Joined
Feb 9, 2010
Messages
76
Elroy I was wondering if the support bar was already threaded for a bolt? Mine was rivited but broke off while taking it appart.
 

Attachments

  • 1.JPG
    1.JPG
    140.9 KB · Views: 73
OP
E

Elroy

Banned
Joined
Oct 15, 2005
Messages
3,467
Location
kentucky
Elroy I was wondering if the support bar was already threaded for a bolt? Mine was rivited but broke off while taking it appart.

Well Elroy's was broken off as well as seen here. Notice the "rivet" heads are still in the side plates.


Elroy made a new spreader bar from some cold roll round bar and simply drilled and tapped each end. The real ***** about it all is that riveted in spreader bar prevents the frame from being split.

We contemplated duplicating the rivet feature but decided it was not worth the trouble. Same thing with the axle clips. Elroy took the easy way out and bolted them in as well.

Here in another view of the missing cross bar and its bolt in replacement:

And a few more before and after shots

Picture001.jpg


Picture005.jpg

And the bolt in axle clips with aftermarket set screw collars to augment axle retention

 
Last edited:

sjdon67

Well-known member
Joined
Feb 9, 2010
Messages
76
Where did you get the axle clips? Also what type of rivet do you think they originally used to hold the bar in place? Im not sure if I can do they hold tap and die thing.
 

Hiball

Well-known member
Joined
Apr 30, 2009
Messages
14,027
Location
Missery
Where did you get the axle clips? Also what type of rivet do you think they originally used to hold the bar in place? Im not sure if I can do they hold tap and die thing.

Trust me the Tap and die route is gonna be easier than riveting a new bar as they are 1 piece from the factory, which is no longer in bizzness. I believe elroy fabricated the axle clips as they where factory riveted also.
 
OP
E

Elroy

Banned
Joined
Oct 15, 2005
Messages
3,467
Location
kentucky
Trust me the Tap and die route is gonna be easier than riveting a new bar as they are 1 piece from the factory, which is no longer in bizzness. I believe elroy fabricated the axle clips as they where factory riveted also.

Allow Elroy to clarify (3) issues here

1) The OEM spreader bar was indeed a single piece where the "rivet" body was incorporated in each end of the bar. If Elroy recalls correctly, the OEM bar was 1/2" diameter with 5/16" diameter journals turned on each end to form the integral rivet body. The side plate has a 5/16 hole to accept the turned down journal. Elroy did NOT incorporate the turned down ends on his spreader bar but simply drilled and tapped each end of the bar for a 5/16" bolt. The part is so damn simple that any machine shop should be able to whip one up for you in 15 or 20 minutes.

2) the front axle retainer clips are independently riveted to each side plate and engage notches in the axle as shown here:


Elroy drilled out the OEM rivets and simply replaced them with some 1/4"-20 nuts and bolts. The OEM axle clips were reused, bolted in not riveted

3) Elroy augmented the side to side location of the front axle by installing some off the shelf set screw collars. These collars are very common and readily available. They were installed directly over the front axle and register next to the bolted in OEM clips.

It's all very simple work but it adds up eating time.

Please advise if you have any other issues.
 
Last edited:

cegreen

Well-known member
Joined
Feb 27, 2010
Messages
63
Location
New Jersey
Hello Everyone,

I just found and joined the forum yesterday, and first and foremost, I want to say thank you to Elroy for a truly wonderful thread! Thanks, too, go to Hiball for his very helpful comments along the way.

A few days ago, I bought my first floor jack -- an old Hein-Werner O'Boy OS, as luck would have it. It needs a lot of TLC, so I started researching it on the Web, and to my great good fortune, I stumbled across Elroy's two great H-W rebuild threads. What a gold mine of information!

Hiball, you will be hearing from me soon regarding a rebuild kit.

Elroy, your pictures are great, and they add tremendous value to the discussion, so another big thank you for taking the time to take them and post them. One question: would you mind revealing what camera you used?

FWIW, I'm in the midst of doing this same kind of detailed tear-down and rebuild on an old 13" South Bend metal lathe, and I love working on and giving new life these wonderful old tools and machines.

Regards,

-Chris
 

cegreen

Well-known member
Joined
Feb 27, 2010
Messages
63
Location
New Jersey
AntsGarage -- any chance you might be persuaded to post another close-up picture of the ID tag you uploaded in post #185?

My aforementioned and recently-acquired O'Boy OS has a tag of precisely the same design as yours, but mine is pretty mucked-up, and I'd like to get a replacement made. I need a good image of a good tag to start with, however.

If you are willing to do it, a bit more in-focus and somewhat more straight-on would be very helpful indeed. Many thanks.
 

cegreen

Well-known member
Joined
Feb 27, 2010
Messages
63
Location
New Jersey
Just in case anyone needs bearing balls in the future, here are two more sources.
FYI, McMaster-Carr's shipping is considerably cheaper than MSC's.

Supplier: McMaster-Carr
http://www.mcmaster.com

McMaster Part Number: 9528K15
$4.24 per 100

Material: Bearing-Quality Aircraft-Grade E52100 Alloy Steel
Alloy: E52100
Shape: Balls
Diameter: 1/4"
Diameter Tolerance: ±.0001"
Tolerance: Standard
Temper/Condition: Hardened, Quenched, Tempered
Hardness: Rockwell C60-C67
Yield Strength: 295,000 psi
Grade: 25
Specifications Met: American Society for Testing and Materials (ASTM)
ASTM Specification: ASTM A295


Supplier: MSC
http://www.mscdirect.com

MSC Part Number: 00072702
$4.75 per 100

Description: Chrome Steel Balls
Diameter: 1/4"
Material: Chrome
Hardness: 62-66 C
Sphericity: 0.000025
Diameter Deviation: ±0.00005
Big Book Page #: 1768
 
OP
E

Elroy

Banned
Joined
Oct 15, 2005
Messages
3,467
Location
kentucky
I just found and joined the forum yesterday............

A few days ago, I bought my first floor jack -- an old Hein-Werner O'Boy OS, as luck would have it. It needs a lot of TLC, so I started researching it on the Web, and to my great good fortune, I stumbled across two great H-W rebuild threads. What a gold mine of information!

Elroy tells me he's glad you found us over here and that his Hein Werner builds have been useful.

Post up.
 
To avoid these ads, REGISTER NOW!

sjdon67

Well-known member
Joined
Feb 9, 2010
Messages
76
How did you get this off? No matter how I try it wont budge. I tried using a pipe wrench on it and nothing. What way did it turn? Im guessing counter clock wise like most things. I made a tool for the top brass nut and it worked great but I am stuck here.
 

Attachments

  • Picture017.jpg
    Picture017.jpg
    30 KB · Views: 103

Hiball

Well-known member
Joined
Apr 30, 2009
Messages
14,027
Location
Missery
How did you get this off? No matter how I try it wont budge. I tried using a pipe wrench on it and nothing. What way did it turn? Im guessing counter clock wise like most things. I made a tool for the top brass nut and it worked great but I am stuck here.

There is nothing else to come off, Once you remove the brass nut on the outside that gives access to the Packing and under the packing you will find that buckling ring. Just to clarify is that actual picture of your tank nut? Or is yours still on the jack? LOL

Ok i now see that is Elroys picture, So yours must still be on the jack. It is standard thread and Counter Clockwise will remove it. It may require a cheater to remove the Tank nut, Try sitting the jack on its base, Using a Hammer give it a few whacks as this will swell the threads and might ease the removal process.
 
Last edited:
OP
E

Elroy

Banned
Joined
Oct 15, 2005
Messages
3,467
Location
kentucky
Elroy used a pipe wrench. Make sure you grip the body of the nut (it's actually round) and not the reservoir tube.

It's on there tight. So is the cylinder tube on the inside. The threads are standard right hand configuration.
 

cegreen

Well-known member
Joined
Feb 27, 2010
Messages
63
Location
New Jersey
Elroy - what did you do about the heavily worn rear caster axle pin you showed at the top of post #53?

Picture028.jpg
 
OP
E

Elroy

Banned
Joined
Oct 15, 2005
Messages
3,467
Location
kentucky
Elroy - what did you do about the heavily worn rear caster axle pin you showed at the top of post #53?

Elroy simply reinstalled the same pin with the flat on the top. What would you have done??

You sure couldn't buy a new one. I could have made a fresh pair of pins but that would have required procurement of straight knurl tooling. Then I would have had to bored the wheels and bushed them.

From a functional standpoint, flipping the pin 180 worked fine.

Good observation. :thumbup:
 

cegreen

Well-known member
Joined
Feb 27, 2010
Messages
63
Location
New Jersey
Makes sense to me.

Since the knurling will presumably prevent the pin from rotating, then Elroy's solution clearly seems like the best option.

In another 50 years, when this side of the pin is worn out, too, then someone else can figure out what to do. :bounce:
 
OP
E

Elroy

Banned
Joined
Oct 15, 2005
Messages
3,467
Location
kentucky
Most likely, Elroys next few posts in this thread are going to complete this Hein-Werner service jack restoration. We hope you have enjoyed this little project as much as Elroy. Make no mistake about it, it takes a lot of work to pull off something like this. The work isn't really that hard but it does eat up a bunch of time. The biggest headache is rounding up all the parts.

In that regard, Elroy would like to take just a minute and publicly thank Steve "Hiball" Coil for his extensive help and professional advice over this last year. Steve has proven to be fully versed and capable to address any issue that could arise. If you're in the market for jack repair services, you can do no better than employing this gentleman's services.

http://www.hydraulicjackrebuild.com/

This has been a year long project and was functionally complete last summer. Complete except for one little detail. The name Hein-Werner Serial number / Name tag. Well that issue has now been addresses as well by CEGreen. Chris has been gracious enough to supply Elroy with one of two prototype reproduction tags that he had manufactured using art work that required extensive digital restoration. You can see what he had to start with here:

CEGHein-WernerOBoyOSPlate.jpg


And this is the reproduction tag:

Picture.jpg


So on with the tag preparation and mounting:

The first step was punching the mounting holes. Elroy took the old tag and laid it over the reproduction to check the accuracy of the "dot" locations. Not bad, You can see the repo dots underneath

Picture002.jpg


Both tags measure 2-3/4" wide but they're only 2-1/2" tall. The tag is NOT square

Picture004.jpg


Elroy debated working with the film in place but decided to remove it

Picture008.jpg


Using the corner "dots" as a guide, Elroy proceeded to punch 5/32" clearance holes in the repo tag

Picture015.jpg


Sorry but Elroy lost one of the slugs. Dam things are small

Picture017.jpg


Picture021.jpg
 
OP
E

Elroy

Banned
Joined
Oct 15, 2005
Messages
3,467
Location
kentucky
Second step was laying out the serial number. The stamps are 1/4" square with 1/8" figures. 1/4" pitch was going to be too big for the field

Picture023.jpg


So Elroy taped off the tag and marked a 3/16" pitch

Picture007.jpg


Then Elroy got a piece of extruded aluminum angle and clamped it up as a guide

Picture009.jpg


Picture026.jpg


Picture033.jpg
 
OP
E

Elroy

Banned
Joined
Oct 15, 2005
Messages
3,467
Location
kentucky
Elroy tells me he thinks it turned out just fine:

Picture035.jpg


Picture037.jpg


And with a little highlight paint it stands out just fine:

Picture041.jpg
 

_CY_

Well-known member
Joined
Oct 12, 2010
Messages
61
beautiful work!
thanks for sharing ...
 
Last edited:

scott37300

Well-known member
Joined
May 5, 2010
Messages
3,450
Location
Wisconsin
I just read this whole thread and just wanted to say great job and THANK YOU ELROY for taking the time to write this up with pictures.

I always meant to read Hiballs write up he had linked to in his signature but never got around to it and has since been removed. Learned a lot this morning thanks to Elroy and Hiball's input in this thread.

I have a 10 year old craftsman 3 ton that works pretty good, needs a good cleaning. The only complaint I have is the release is hard to turn and then when it does start to release it goes fast, but that might have a lot to do with it being so dirty from my lack of taking care of it.

Just out of curiosity does anyone know a ball park of what a pump rebuild kit goes for? I know Elroy said he had 200 bucks into his rebuild but that included other parts besides the pump rebuild. I know they would be different for every jack but was just wondering a ballpark price. I don't think I need one yet so not going to order one right now, I would pm Hiball but don't want to waste his time since I'm not ready to buy anything.
 

Hiball

Well-known member
Joined
Apr 30, 2009
Messages
14,027
Location
Missery
1st off the thread is still there, secondly I don't have a issue pricing parts to members. I do have a problem spending hours, sending countless detailed pictures to members only to be lied to and used for my knowledge and then the member purchases the kit from another supplier to save $1.97
 

scott37300

Well-known member
Joined
May 5, 2010
Messages
3,450
Location
Wisconsin
1st off the thread is still there, secondly I don't have a issue pricing parts to members. I do have a problem spending hours, sending countless detailed pictures to members only to be lied to and used for my knowledge and then the member purchases the kit from another supplier to save $1.97

I didn't mean anything bad by my post, hope it didn't sound like that. :beer:
I read the other post about why you were upset and understand 100 percent. That is why I didn't want to send a PM asking about price and waste your time when I know I"m not going to buy anything right now. I didn't see the link in your signature anymore so after reading the other post about the subject I thought it was gone. I didn't mean any disrespect to you, sorry if I offended you anyway with my post.
 

Jack90210

Well-known member
Joined
Nov 2, 2009
Messages
304
Location
VA, USA
This thread was a joy to read. What a great resource and inspiration. Thanks, Elroy.

I have two YA700 (USA) jacks that need some care, so I was doing some poking around and found this thread.

Awesome.
 

jcgrahovac

New member
Joined
Feb 25, 2011
Messages
2
I know this is an old thread, I inherited the same jack from my Grandfather and looking for some initial help in the restoration.

First of all how tough is it to trake this thing apart with a novice tool box?

After it is apart I think I can follow the awesome description in the thread.

Thanks for any help along the way.

Jeff
 
OP
E

Elroy

Banned
Joined
Oct 15, 2005
Messages
3,467
Location
kentucky
.......I inherited the same jack from my Grandfather and looking for some initial help in the restoration.

First of all how tough is it to trake this thing apart with a novice tool box?

Sorry to hear how the jack came into your possession.

These vintage Hein-Werner "curb jacks" are good machines and deserve to be repaired. These smaller OS jacks don't weight that much which makes them much easier to tote around than the bigger WS series jacks

You'll find it takes more time than tools. Probably the toughest thing to accomplish is spreading the clip to remove the spring cap over the plunger. If you want to split frame you need to grind off a few "rivets" which causes some minor problems.

Elroy would encourage you to have at it. If you have any problems or question don't hesitate to ask. Just don't break anything as hard parts are near impossible to find

PS: Buy your kit from member "Hiball". You'll be glad you did.
 
To avoid these ads, REGISTER NOW!
Top Bottom