To avoid these ads, REGISTER NOW!

Help Breaking down 1/2hp motor

Rix65

Member
Joined
Dec 5, 2014
Messages
21
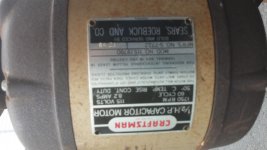
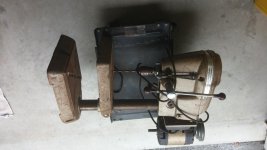
Guy's before I do something really stupid...can someone enlighten me on how to take apart my motor. It is the one that come on the 100 dp. Specifically, how does the spindle come off? Do I just drive that little metal key down? And, how are guys rehabbing the badge?

Thanks
 
To avoid these ads, REGISTER NOW!

jakemac

Well-known member
Joined
May 21, 2013
Messages
9,035
Location
New England
:needpics:

"It is the one that come on the 100 dp" is a fairly vague description. Early on, different motors could be purchased as an option. So there could be a wide variety of motors on your DP, including a competitor's brand if the original owner had one laying around.

Give more details (HP, Model number, single or double arbor), and post up some pictures so we know what we're dealing with.
 
OP
R

Rix65

Member
Joined
Dec 5, 2014
Messages
21
:needpics:

[

Give more details (HP, Model number, single or double arbor), and post up some pictures so we know what we're dealing with.

Craftsman model 115 19780. 1/2 HP 1750 rpm, double arbor.
 

Attachments

  • 0802151545.jpg
    0802151545.jpg
    127.9 KB · Views: 77
  • 0802151541a.jpg
    0802151541a.jpg
    143 KB · Views: 80

sailah

Well-known member
Joined
Sep 17, 2013
Messages
165
Location
Hingham, MA
Take apart the bolts on the end bells, they should be long thin bolts that go all the way through. Make sure there aren't any snap rings etc and gently rap the end of the shaft with a dead blow mallet. The end bells should split along the paint line. To remove bearings I usually apply a little heat to the end bell and it comes right out of the bore if it didn't come out with the shaft. If it's on the shaft use a gear puller to remove.
 
OP
R

Rix65

Member
Joined
Dec 5, 2014
Messages
21
That motor actually looks pretty clean. What issues are you having with it?

Opening up these old motors can be like opening a can of worms. If you must disassemble, check post #18 in jtbinvalrico's thread 1952 Craftsman "100" DP resto . This shows a re-assembly.

I'm working on a similar Dunlap motor. See post #140 in the link in my signature.

You will likely need a puller to remove the bearing and end cap on the "electrical" end of the rotor assembly. The fan-side end cap should slide off easily. The bearings are pressed onto the rotor shaft and kinda free-float in the end caps.


No real issues. The bearing seam ok, maybe a tad noisy. I am going to paint the unit most likely a different color, and would like to freshen the badge.

Thanks for the input.
 

jakemac

Well-known member
Joined
May 21, 2013
Messages
9,035
Location
New England
If you're just wanting to paint it, then check out the first post in my projects link in my signature. It has a picture of how I masked off the motor without taking the case apart. I only removed the base.
 
OP
R

Rix65

Member
Joined
Dec 5, 2014
Messages
21
Awesome Jakemac,

Are there also post regarding removing the chuck? And, is removing the spindle on the motor side as simple as removing the set screw and knocking out the retaining shaft that's in the groove?
 
OP
R

Rix65

Member
Joined
Dec 5, 2014
Messages
21
Frank! You are my new idol!! I went to your post...amazing. Now with all your knowledge, is there a way, or is there a company that refurbishes badges? The paint on my model number badge had solvent get to it, and paint flaked right off. Is there a print method or some way to restore these? Oh, and how do I remove the pulley on the motor side?

Thanks
 
To avoid these ads, REGISTER NOW!

jakemac

Well-known member
Joined
May 21, 2013
Messages
9,035
Location
New England
One more note to add to removing the pulleys -

They're very fragile. With age, they can become very intolerant of stress, so be careful with tapping or pulling on the edges or they may crack or break off.
 
OP
R

Rix65

Member
Joined
Dec 5, 2014
Messages
21
You guys are truly awesome. I will post results of my efforts once I finish.

R~
 
OP
R

Rix65

Member
Joined
Dec 5, 2014
Messages
21
Take apart the bolts on the end bells, they should be long thin bolts that go all the way through. Make sure there aren't any snap rings etc and gently rap the end of the shaft with a dead blow mallet. The end bells should split along the paint line. To remove bearings I usually apply a little heat to the end bell and it comes right out of the bore if it didn't come out with the shaft. If it's on the shaft use a gear puller to remove.

How do I remove the motor left side pulley? Gear puller?
 

dw1

Well-known member
Joined
Jan 26, 2015
Messages
1,335
Location
Ky
I just did what you are wanting to do, mine had two set screws on the pulley, I loosened both and gave a little tap on the shaft, the pulley pulled right off. I took mine apart and painted, just re-assembled today, I did put a new cord on and found a newer vintage power switch on ebay, it should be here next week.
Take pics with your phone and print out the above parts list pic, it will be helpful on re assemble. I am sanding mine down and painting a piece at a time.
Good Luck!!
 
OP
R

Rix65

Member
Joined
Dec 5, 2014
Messages
21
DW1

Did you take yours completely apart? I'm a little squeamish about doing so. The wires seem brittle, especially the side with the reset button. And...how does the band around the center of the motor separate from the base?
 

dw1

Well-known member
Joined
Jan 26, 2015
Messages
1,335
Location
Ky
DW1

Did you take yours completely apart? I'm a little squeamish about doing so. The wires seem brittle, especially the side with the reset button. And...how does the band around the center of the motor separate from the base?
The bands on mine have two bolts under the motor, I took the one end cap off and just separated the other end 1/2" or so, I will post some pics of it tomorrow, I would like to clean and shine my tags up though, next thing on my list!!
 

dw1

Well-known member
Joined
Jan 26, 2015
Messages
1,335
Location
Ky
here are a few pics after I re-assembeld, I did replace the cord. This is the first vintage anything that I have ever redone. I am cleaning/ dressing up the pipe that everything mounts to, I am using a small air side grinder with a scotch brite pad on it, afterwards I am taking a scotchbrite sheet and rubbing, it seems to look better. I am all ears if anyone has a better way to clean this upmotor4.jpg

motor3.jpg

motor2.jpg

motor1.jpg
 
OP
R

Rix65

Member
Joined
Dec 5, 2014
Messages
21
Nice Work DW1,
Yeah I just pulled off the one end and called it good. Dis-assembly just appears to risky.
continue to post. I will post some pictures later. Picked a Dunlop over the weekend which will require way more work than I probably should take on...but what fun.
 
To avoid these ads, REGISTER NOW!
Top Bottom