To avoid these ads, REGISTER NOW!

Help Me Build My First Work Benches

OP
J

Just F Me

Well-known member
Joined
Aug 3, 2012
Messages
52
Good idea…I was thinking "i'll just put these things in here now". But in the future, when those things break or get replaced, I'll want adjustable shelves. I'll make sure i put holes in it.

I don't have a very level garage. I want it on castors, but I'm afraid it will still be wobbly?
 
To avoid these ads, REGISTER NOW!
OP
J

Just F Me

Well-known member
Joined
Aug 3, 2012
Messages
52
In my opinion you need to consider skinning the front and adding much more substantial framing. If you built it exactly this way, just plywood **** joints everywhere, it would probably be ok-ish just after assembly, but would not be very rigid once loaded down with tools, moved around, and with weight sitting on and being manipulated on the work surface.

Tips on skinning the front and adding framing? How would that look? Sample photos?
 

bczygan

Well-known member
Joined
Nov 4, 2009
Messages
22,002
Location
DETROIT! Arsenal of Scrappers
A little more talk about structure.

I've demolished a fair number of old dressers and other furniture, in order to fit the pieces in the curbside dumpsters.

Typically, once you kick the back panel out, the structure folds like a parallelogram and the joints between the top and sides and bottom just separate and you are left with just panels in a stack. This informed me that in a structure without a face frame (Like the one you are designing), the back panel is a critical component. How it is attached and the way the joints are done makes a big difference in how the cabinet resists movement or forces acting vertically and horizontally.

If you simply nail the panel onto the back, then only the fasteners resist the racking force. A better solution is to cut a rabbit, and install the panel in it with glue and screws.

A face frame on the front does the same thing. It helps resist racking.

Besides a full 2x4 frame for a cabinet, a smaller dimension frame will also add strength. A 2x2 or even smaller dimension framework will still add strength to the joints.

Even corner blocks will help

Another method for joining panels that gives a lot of strength is using dovetails or finger joints:
200px-Boxjoint.png


Even a spline joint will add surface area for glue, and thus strength.
joining_contrasting_splines.jpg


In designing, choices must be made concerning strength needed and difficulty of construction.
 

Terranova

Well-known member
Joined
May 12, 2008
Messages
854
Location
Grove City, OH
JFme...
At forty-two and having worked with cabinetry style woodwork and projects for most of my life, the two major lessons I've learned and would like to pass on are these:
1. Everything needs to be square. Square results from using a quality square, AND accurate measurements.
2. Measurement errors compund quickly. They are a result of being in a hurry, being "lazy", wide pencil tips, using different reference surfaces (measuring from different places), and poor quality measuring tools.

I'd also like to go on record saying that bczygen's post above is informative too. Rabbets increase gluing surface. Rabbet and glue joints are usually stronger than the wood surrounding them.

Also his point about face frames is accurate.
Think of it this way. When you pick up a 2x4 to look for warp curve and cup, which way does it bend easier? When it's on its widest side or it's narrowest edge? Plywood is the same. If you add some wood(the face frame) that's on its edge perpendicular to the bowing wood it adds rigidity.

I just built a box for some cabinet storage for my garage here. http://www.garagejournal.com/forum/showthread.php?t=256086
Check out post #18. I have yet to make the face frames because I have more boxes to make.

T
 

zcar751

Well-known member
Joined
Apr 15, 2013
Messages
831
Location
Knoxville, TN
I have built many "boxes" over the years and the Rabbet joint is critical to strength and rigidity. The back panel and facing also increase the strength and prevent racking. With 3/4 inch plywood you shouldn't have any problem with strength.
I have a bench built out of old kitchen cabinets that are built with 1/2 at best and they will easily support my fat **** and I have even had a Miata engine sitting on it.
I say build away, your drawings look good with an eye towards detail.
 
OP
J

Just F Me

Well-known member
Joined
Aug 3, 2012
Messages
52
So I think I'm pretty much set on the design of this 1st work bench. Am i going to mess up on it? Hopefully not too much. Will I probably build another bench, redesign the bench, make add ons, etc? Sure...I hope so.

So I wanted now to get everyone's opinion on what tools I should get or if I'm missing anything.

L9xcv7Y.jpg

I picked up tool this past weekend and it was an easy one IMO. I've had the Ryobi drill for years now and the 18V nicad batteries are on their last legs as they only run for about 20 mins of heavy usage and it's done and it also weighs a ton (5 something pounds). The new Makita has been awesome, much lighter, charges fast, and I got the two driver kit so I also have the impact driver and drill driver.


Building:
7K2itMI.png

I was also looking to get these squares so hold everything together...what do you think?


udSkW1D.png

I also talked to some people at the local hardware stores and I'm going to pick up the Kreg Pocket Screws Jig. Some people in this thread have said it wouldn't be their choice, they don't like it, or they feel it's too cumbersome. I also was very concerned about how "strong" this work bench would be because of my design of just butting the wood together because I don't have the tools to do dados and rabbits in a large capacity.


I'm going to be purchasing the Makita Track Saw to cut down all my wood for this project as I don't have room for a true table saw setup. Maybe in the future I would by a small one, but I'm not sure....?

Measuring:
t5K4Xqr.png

I was wondering about picking up this WoodPeckers T-Square. It's damn pricey, but I don't have any truly accurate measuring tool and like other members have said, it's best to make sure measurements are dead on or else the mistakes start adding up really quick.

Is this square worth it? Woodpeckers makes some really nice stuff it seems...I don't own anything made by them but I've seen it used in some threads on GJ.

I hope to get going on this next weekend or the weekend after.
 

Terranova

Well-known member
Joined
May 12, 2008
Messages
854
Location
Grove City, OH
If you have a router you can make your dadoes with a bit like this.View media item 42336


I used an aluminum strait edge clamp like this.View media item 42341


They turned out well for me.View media item 42342

I have a kreg jig and it has it's uses, but if you're building it to be structural and you're wanting to learn the skills as you mentioned, why not take a swing at the dadoes?
 
Last edited:
OP
J

Just F Me

Well-known member
Joined
Aug 3, 2012
Messages
52
I have a Ryobi router table but i'm just afraid that it might be too difficult to get a nice route since they're going to be large sheets, and the table of the router is so small.

Curious, to how deep of a rout did you do?

I was contemplating on buying a Makita router, ditching the router table for whatever I can get for it, and using the Makita router with my track saw guide that I will be getting to get clean dados...
 

aka Larry

Well-known member
Joined
May 2, 2012
Messages
8,030
Location
Eastern, NC
I have a Ryobi router table but i'm just afraid that it might be too difficult to get a nice route since they're going to be large sheets, and the table of the router is so small.

Curious, to how deep of a rout did you do?

I was contemplating on buying a Makita router, ditching the router table for whatever I can get for it, and using the Makita router with my track saw guide that I will be getting to get clean dados...

Take a look at page 7 of my thread (in my signature). I'm building a new bench as well and I started with a set of drawers. I used 1/2" plywood and routed a 1/4" dado for the bottom of the drawers. I simply attached a 1x2 to the plywood so I could make a dado the entire 8'-0" length. I cut the the sides of the drawers to length AFTER making the dado for simplicity of the routing.
 

ebarker9

Well-known member
Joined
Oct 1, 2010
Messages
85
I have a Ryobi router table but i'm just afraid that it might be too difficult to get a nice route since they're going to be large sheets, and the table of the router is so small.

Curious, to how deep of a rout did you do?

I was contemplating on buying a Makita router, ditching the router table for whatever I can get for it, and using the Makita router with my track saw guide that I will be getting to get clean dados...

I have the Makita track saw/router setup (RP2301FC router) and it's good for doing what you're describing, although there's not a ton of information about what parts are compatible and how to set them up. Overall though it's a great package. Happy to help if you have any questions.
 

Terranova

Well-known member
Joined
May 12, 2008
Messages
854
Location
Grove City, OH
I made a 3/8" deep by 3/4" width dado in 3/4 plywood.

There's no way I would try the dadoes on a table.
It's a plunge router. And the bearing at the top of the bit ran along the aluminum strait edge insured strait lines.
 
OP
J

Just F Me

Well-known member
Joined
Aug 3, 2012
Messages
52
83EZXJt.png


Q6TqFm4.png


Alright guys...the day is getting closer. I made some more revisions to my original design. Instead of just butting pieces of ply together, I took the suggestions of some to make some dados.

Turns out, I was able to remove my router from the table it was mounted on (it came that way, and I never even looked at it closely) so now I can work on making dados on the top and bottom pieces of the work bench. The I wasn't sure if I should go too deep or not, so I made the dado grooves 1/4" deep by 3/4 wide. Sorry, I hate the standard system we use so this whole 3/8, 5/8, whatever it is, it just drives me crazy, so I kept it simple and went with 1/4".

I'm also still up in the air if i want to do the 3/4" holes in the table so i can clamp things on it, etc...maybe I'll do that on the other bench? I need two of these anyway.

I added the two uh...frame rails? I don't know what to call them, but the two red pieces in the drawing to hopefully add some more rigidity.

The total bench has gotten a bit bigger. It's now 45.75" wide and 24" deep. I figured it was silly to have one side bigger than the other so I made them both the same size, which made the table bigger. I added a shelf on one side so that possibly I can learn to make a drawer. My plans are to keep my shop vac on the right side, and my small air pancake air compressor on the left side. When I need to use either, I can pull it out easily.


I picked up some things today...

Kreg R3 Pocket screw jig.
6sycWEe.jpg


Festool 55" guide rail with 32mm drilling guide
W4xC165.jpg


I was really really really close to buying a Festool TS 55 REQ at $615 (no tax no shipping). The setup I decided to go with was to buy a Makita SP6000J track saw (tool only, $336 + tax) and buy the Festool 55" guide rail because i wanted the drilling guide ($125 + tax). I felt even if I bought the Festool TS 55 REQ, that only comes with a regular guide so I would still have to buy some kind of guide for drilling. The blades are 2x as much on the Festool, it's almost entirely made of plastic (not like I would have thrown it around anyway). Hopefully this works....I read about 3 Amazon reviews that the rails are identical minus stickers so I can use the Makita saw on a Festool rail.

Hopefully I get a really nice setup with this. The Makita saw comes on Thursday, along with some other clamps and stuff. This weekend will be way too packed to do anything but next weekend I'll get busy!
 
Last edited:

aka Larry

Well-known member
Joined
May 2, 2012
Messages
8,030
Location
Eastern, NC
Just a personal preference, but I don't like the 'look' of the dados on the ends. I'd rabbet those so your ends are flush and don't have those edges sticking out.

Edit: It was also be easier if you make the middle vertical panel 3/4" shorter so the back (show in white) can be one solid piece.
 
Last edited:
OP
J

Just F Me

Well-known member
Joined
Aug 3, 2012
Messages
52
So what wood should I use to make this?

$34.98 ea 4x8 sheet 3/4 Red Oak Plywood (Home Depot)
$44.98 ea 4x8 sheet 3/4 Sande Plywood (Home Depot)
$56.45 ea 4x8 sheet 3/4 C/2 White Birch UV2S (idk what that means)

Part of me wants to stay away from the really expensive stuff since it's just my first project...maybe for the second work bench?

Also...more tools came today.
2pXnvox.jpg
 

aka Larry

Well-known member
Joined
May 2, 2012
Messages
8,030
Location
Eastern, NC
So what wood should I use to make this?

I'd go with the Birch myself. As far as worrying about this being your first workbench, I think you might be selling yourself short. My guess is your build quality will be better than a lot of them out there, but you'll want to tweak the design on your next one. I'm still using my first one (getting ready to build another) and I'll be changing a few things like adding doors to keep the inside clean and making it a little wider to handle more stuff.
 

creativecars

Well-known member
Joined
Nov 15, 2010
Messages
4,300
Location
Indiana- where horse and buggies still roam
I know I am late to the party here but is your shop vac a bigger one on wheels? Are you planning on installing a vise? I usually think of a work bench as something HD. I know 3/4" can be pretty strong, but when you remove part of the thickness with the dados it decreases strength around the edges where a vise may go??
This design works well for kitchen cabinets but they have the luxury of being fastened to the wall and not rolling around in the garage.
 

Flying Fool

New member
Joined
Aug 2, 2014
Messages
4
Well, in that case, you're rolling! :D

Let me rephrase: You know nothing about designing or building in wood--don't even know how to fasten it together. Yet you want to start out with a complicated workbench, of your own design, that you think will be just ideal. Look at what professionals use for workbenches, and rethink your project.

Hi Just F Me, When I first started reading this thread I got pissed off how some of the members were treating your quest for help. I'm similar to you as I never built a workbench before, but I'm quite mechanically inclined. And I also reached out to another forum years ago for help building a wardrobe cabinet. The negativity I received because I was a beginner deterred me form building it.

A couple of months ago I too wanted to build a workbench and still had zero woodworking or joint experience. This is what I came up with. The pictures show what a person with no experience but alot of determination can do. My bench works for what I do and what I need it to do. Don't give up, build it. If you get stumped, research it, ask questions, or do what I did. Drink beer and stare at it till the solution becomes clear.
 

Attachments

  • IMAG0074[1].jpg
    IMAG0074[1].jpg
    141.5 KB · Views: 70
  • IMAG0073[1].jpg
    IMAG0073[1].jpg
    143.3 KB · Views: 65
To avoid these ads, REGISTER NOW!

Gizmosity

Well-known member
Joined
Jun 17, 2014
Messages
376
Location
SW Wisconsin
So what wood should I use to make this?
$34.98 ea 4x8 sheet 3/4 Red Oak Plywood (Home Depot)
$44.98 ea 4x8 sheet 3/4 Sande Plywood (Home Depot)
$56.45 ea 4x8 sheet 3/4 C/2 White Birch UV2S (idk what that means)

Part of me wants to stay away from the really expensive stuff since it's just my first project...maybe for the second work bench?
IMG]

UV2S means it's prefinished on two sides. One species of plywood isn't really any better than the other in terms of strength. Buy what you like and can afford. Watch the backs. Some cheaper plywood will have a much lesser quality and darker (ie..fugly) back. I'd check the stacks again and see if you can find a 2 sided Birch that isn't prefinished or maybe a 2 sided maple.
 
OP
J

Just F Me

Well-known member
Joined
Aug 3, 2012
Messages
52
As far as worrying about this being your first workbench, I think you might be selling yourself short. My guess is your build quality will be better than a lot of them out there, but you'll want to tweak the design on your next one.

Thanks for the positive words Larry! This IS going to be my work bench, however, it's not like I'm going to be tearing apart a transmission on it! Think of this, right now, I have no place to even put together a lego set in my garage, so this "bench", "cabinet", "storage unit" or whatever you want to call it will be great because I'll have a flat space to put more junk on.

I know I am late to the party here but is your shop vac a bigger one on wheels? Are you planning on installing a vise? I usually think of a work bench as something HD. I know 3/4" can be pretty strong, but when you remove part of the thickness with the dados it decreases strength around the edges where a vise may go??
This design works well for kitchen cabinets but they have the luxury of being fastened to the wall and not rolling around in the garage.

My shop vac is a bigger one on wheels. It's a 12 gallon rigid vac. Right now, it's just a pain in the *** to get out, so if i can have it in one place where it's got it's own place, that will be super helpful. I don't plan on putting a vise on this one but the next one I build will have a vise!

Hi Just F Me, When I first started reading this thread I got pissed off how some of the members were treating your quest for help. I'm similar to you as I never built a workbench before, but I'm quite mechanically inclined. And I also reached out to another forum years ago for help building a wardrobe cabinet. The negativity I received because I was a beginner deterred me form building it.

A couple of months ago I too wanted to build a workbench and still had zero woodworking or joint experience. This is what I came up with. The pictures show what a person with no experience but alot of determination can do. My bench works for what I do and what I need it to do. Don't give up, build it. If you get stumped, research it, ask questions, or do what I did. Drink beer and stare at it till the solution becomes clear.

Flying Fool...man that looks great! I hope I don't get stumped and I can have a beer to celebrate! Or maybe a glass of scotch :drool:

You can doo it. Your drawings look great. I don't see any reason you shouldn't start cutting.

Speaking of cutting! This showed up today!
I5mZSkO.jpg


So earlier I mentioned I don't even have a place to build a lego set...do you notice how most of my pictures are taken with whatever I want to photograph, sitting on the hood of my car? :lol_hitti

My Makita plunge saw showed up today...I had some OSB laying around and this is what I cut during my first 3 cuts right out of the box...

peIa9q7.jpg


1st cut - 0.48"
2nd cut - 0.27"
3rd cut - 0.07"

I wasn't trying to cut a specific thickness or anything, I just wanted to get used to how the saw works, how thin can it cut, etc...just playing with my new toy! :willy_nil

XPsTjYQ.jpg


Smooth and clean cuts right out of the box! I bought a Makita SP6000J plunge/track saw and I'm using it with a Festool 55" LR32 track and it works PERFECT. People say they're the identical track, just different color scheme and stickers. I was skeptical about the things people put online for reviews but I'm happy it turned out exactly what people say.

I don't have a truck, so I can't get the wood home to start cutting and building so on Monday, my friend and I will go pick up some 4x8 sheets and let the party begin! :rocker:
 

legenddc

Well-known member
Joined
Aug 19, 2012
Messages
1,069
I would make it so you could swap out the miter saw and router table. That way you have a bigger work surface on the one side and more storage. You could probably make it so the miter saw or router table could be stored underneath the other one in the center part.

Also, if you plan on making lots of cuts or routing a lot, you may want to extend the fence on the workbench.

The worst that happens is it's not strong enough and you have to add some 2x4s in the back for added strength. It's a workbench and you'll be the only one who will know where the flaws are (unless you post it up here).

You'll like the Kreg jig. I bought a K5 and made a kitchen table with it. It's not the highest quality award winning type of kitchen table, but it looks damn good and was done for $150 ($300 including the jig). I have loads more projects to build with it too.
 

aka Larry

Well-known member
Joined
May 2, 2012
Messages
8,030
Location
Eastern, NC
I don't have a truck, so I can't get the wood home to start cutting and building so on Monday, my friend and I will go pick up some 4x8 sheets and let the party begin! :rocker:

I'm in the same boat so two years ago I built my own utility trailer. You should see the look on the guy's face at Lowes when I showed up pulling it with my Miata.

I'm looking forward to seeing your progress so please post lots of pics!
 
OP
J

Just F Me

Well-known member
Joined
Aug 3, 2012
Messages
52
OK FRIENDS! This is what I came up with this past week.

Man...I have to tell you guys...making mistakes ****! But it does feel great to learn from them! I'm going to admit this up front. This is my first EVER woodworking project. I've never built anything myself so I KNEW and EXPECTED I was going to make mistakes. Some of you may read though this and be like "well that's stupid, why did he do that? Then you may continue reading on and then see how I started picking up on my mistakes. HOWEVER, there are problems I still have and any input anyone has would be cool and I welcome your input.

So my friend's old little Toyota Tacoma pickup managed to bring home five 4x8 sheets of 3/4 red oak plywood and also a 4x8 of styrofoam so I can do all my cutting. *****, I did all my cutting on the ground of my garage. Sure...I could have bought a pair of saw horses, but I was being cheap and didn't want to spend anymore money. This project for 2 light duty storage cabinets/work space bench things has cost me almost $1000. $200 in plywood, $100 in various tools / accessories, $340 for Makita track saw, $125 for Festool guide rail, $200 Makita 18v Li drill set, $40 KREG Jig. Anyway, trying not to think about that.

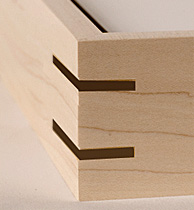
Just as a reminder, I went through so many designs and I ended up just building it like this. Sorry, no fancy rabbets or lap joints or whatevers. Just edge to face and pocket screws.
jv9jfqa.png


So here's where it all started...

yEbuVsJ.jpg


Making my cuts...do you see the problem?

q2w5lTK.jpg


One of the members earlier mentioned how fast mistakes compound and boy did they compound exponentially! I should have been cutting TWO sheets at a time because for most of the project, I needed almost two of everything! But I was cutting the top piece in one cut, then the bottom piece in the next, and then making separate cuts for all my vertical panels...wha? Man that was dumb.

I looked at all the wood and was like...hmmm...I'm not sure if this thing is square?!?!??!

Sorry for the shallow depth of field but...
ovrK7yj.jpg

Wait! The T-Square must be off!!!!! (This T-Square has probably been in our family for 20 years, who knows!). OK LETS GO OUT AND BUY A NEW ONE!

GdUwqQ1.jpg


Oh ****...I guess it is off?!?!?!
LtYnZAx.jpg


OK. Let's just cut it off then?
vCXj2p2.jpg


Much of the project kept going on like this. I kept finding mistake after mistake. As I corrected it, it made them worst. Oh man, this sucked. :(

Moving along, I learned that I made way too many pocket screw holes...It wasn't really necessary to make it any stronger.
lhgi6Ix.jpg


In the end...this is what I came up with and this is how it's being used.
zQxsG87.jpg


Behind the air compressor and shop vac are problems like this...and they're ALL OVER!
8gHGBwh.jpg


Many of you will say....wha? $1000 and that's all he got? Well...yeah. It was a pretty expensive cabinet bench or whatever thing, but you know, it fits what I wanted to put in there perfectly and I'm glad I built it because I learned so much. I now have some what of a flat surface to do SOMETHING on. Or maybe just put more stuff on top of it. That seems to be the cool thing GJ members do to their work space. I also built that miter saw floating box next to the left.

After using the Makita track saw, I realized how bad *** it is to cut wood and not have a gazillion pieces of dust flying all over so that Ryobi Miter saw will probably be gone by the end of the year. I'm just gonna drop the cash and buy the Festool Kapex Miter saw. All the videos I've seen, it ***** up so much of the dust it's amazing.

I still have to add the shelf to the first cabinet/bench. Also, I'm going to paint it, I just don't know what color yet...

Well...on to the next project! I gotta get rid of all this wood so I can move my daily driver back into the garage. Hopefully I'll use something I learned this time around...
qoqLfkm.png


So this time around, I took two 4x8 sheets and stacked them so that I can cut out two pieces at a time.
nF7wcrV.jpg


This time around, instead of using a small 6" speed square, I went out and bought a 12" square...looks like this one will come together nicer?
tp27m7s.jpg


I still have some more pieces to add and also the separators for the drawers I plan on making a total of 8 pull out drawers for the two smaller 10" wide spaces. I'll probably either put this on leveling feet or caster wheels. I don't know yet...
0fkhB6f.jpg


NkoO0pQ.jpg


This 2nd cabinet seems to have gone together much nicer, but I still have some problems. I managed to hide some of it on the back but not all of it. I seem to be off 1mm to 2mm and it ***** :(

t0HR3wl.jpg


YwmX8kd.jpg


dOA3zQH.jpg


Some corners come together a lot better!
r8SvvZz.jpg


So...the obviously things I learned. Measure twice, cut once. Always cut from the same side (either on the line, or to right/left of the line, etc, but always staying consistent. So with these things being off by 1mm to 2mm, what do I do?

Part of me thinks / wants to think, that since I need to do repetitive cuts, I should buy the Festool Parallel Guides?
j5BPWCF.png


Or maybe I should get the Festool MFT/3?
3o36Rbk.png


Before all this, I read through Sakurama's thread on his whole home renovation (all the Festool **** he has), also just watching videos all over the interweb and obviously people aren't having these problems! Also went through lilscorpion's entire thread on tool organization as well. So I'm trying to learn how to get more accurate cuts... I believe Sakurama used only a track saw, parallel guides, and a MFT/3 table. I don't think he had a table saw....but obviously he's got 1000000000x more mad skills than I do, but I'm just trying to learn. :(

I don't have a table saw and I just don't have the room to have one so that's sorta out of the question at this time. I know in the future it will be nice to have to do dado and lap joints, etc but right now, I can't.

UGH...I'm not sure more tools is going to fix the problem, though it might make things much easier?!
 
Last edited:

Terranova

Well-known member
Joined
May 12, 2008
Messages
854
Location
Grove City, OH
For your first and second project, jumping in feet first, you did great. The thing you have to realize about wood is that it's imperfect. It flexes and bends. It's organic. It expands and contracts. Being off a little bit to be expected. Part of learning wood working is learning to anticipate where the errors could occur and planning or designing them out of the process.

You're in good shape in that plywood is more stable, or probably the most stable type of wood to work with. Normal, non ply wood, expands along the grain, it also warps and twists. Ply wood has layers where the grains are laid at angles to help eliminate it. It never completely[ eliminates it.
So what I'm saying is plywood can warp and twist a little.

You could cut everything perfectly square using an armada of expensive Festool equipment (lord I wish!!) and still have things not fall together square.

That's why I like having dadoes and rabbets. They're a tool you can use to help pull things into square. The slots can help you bend a slightly warped piece of ply into a strait piece.

Another thing to realize is about being a few mm off in the corners etc it this...
IOAFW
In the immortal words of my dad... "It's Only A F-ing Workbench" In the grand scheme of things, this thing holds tools in your garage and you're not using it for your daily living. If it's your "beer drinking garage buddies" you're worried about noticing the errors, why are they that close to your gear!? Right?! Lol and anyways how many of your buddies would really notice anyway?

If you're vexed because "YOU know they're not square" and it keeps you up at night, well, keep building and learning like you are till you can build a better one.

It's not like we're building "high class furniture" for your house like Sakurama and his mad skills.

You rocked it out. We'll done.
 

ez-duzit

Well-known member
Joined
Jun 24, 2013
Messages
5,096
Location
Marina del Rey
OK FRIENDS! This is what I came up with this past week...
This project for 2 light duty storage cabinets/work space bench things has cost me almost $1000...

Part of me thinks / wants to think, that since I need to do repetitive cuts, I should buy the Festool Parallel Guides?
Or maybe I should get the Festool MFT/3?...
I'm not sure more tools is going to fix the problem, though it might make things much easier?!

Unsubscribed.
 
OP
J

Just F Me

Well-known member
Joined
Aug 3, 2012
Messages
52
For your first and second project, jumping in feet first, you did great. The thing you have to realize about wood is that it's imperfect. It flexes and bends. It's organic. It expands and contracts. Being off a little bit to be expected. Part of learning wood working is learning to anticipate where the errors could occur and planning or designing them out of the process.

You're in good shape in that plywood is more stable, or probably the most stable type of wood to work with. Normal, non ply wood, expands along the grain, it also warps and twists. Ply wood has layers where the grains are laid at angles to help eliminate it. It never completely[ eliminates it.
So what I'm saying is plywood can warp and twist a little.

You could cut everything perfectly square using an armada of expensive Festool equipment (lord I wish!!) and still have things not fall together square.

That's why I like having dadoes and rabbets. They're a tool you can use to help pull things into square. The slots can help you bend a slightly warped piece of ply into a strait piece.

Another thing to realize is about being a few mm off in the corners etc it this...
IOAFW
In the immortal words of my dad... "It's Only A F-ing Workbench" In the grand scheme of things, this thing holds tools in your garage and you're not using it for your daily living. If it's your "beer drinking garage buddies" you're worried about noticing the errors, why are they that close to your gear!? Right?! Lol and anyways how many of your buddies would really notice anyway?

If you're vexed because "YOU know they're not square" and it keeps you up at night, well, keep building and learning like you are till you can build a better one.

It's not like we're building "high class furniture" for your house like Sakurama and his mad skills.

You rocked it out. We'll done.

Terranova, thanks for your input. Good info and thanks for your support!

I hope to build a few more things with the tools I have (maybe pick up some more). Gotta look at my garage and see what else it needs.
 
OP
J

Just F Me

Well-known member
Joined
Aug 3, 2012
Messages
52
With no design or woodworking or cabinetmaking experience, you are trying to create a complicated workbench that you may later find to be of little use. You don't need a CAD program to play with. Just place a hollow core door on top of a pair of sawhorses or rollaway base cabinets. Bingo! Workbench.

Well, in that case, you're rolling! :D

Let me rephrase: You know nothing about designing or building in wood--don't even know how to fasten it together. Yet you want to start out with a complicated workbench, of your own design, that you think will be just ideal. Look at what professionals use for workbenches, and rethink your project.

The holes and clamping are completely unnecessary with the Festool track saw; the track stays put with very little pressure. I found mine on c/l for $350.

The workbenches I showed are only incidentally related to table saws. One actually attaches; the other does not. My point was that real, working workbenches are generally not fancy affairs that require computers and committees to design.

When you've never done it, before, it may seem like you need a custom made workbench to help get you through the daunting tasks of running a router and cutting wood to length, especially at an angle! :scared: ;) But then, if you actually do some work, you discover that what you really need is unobstructed space.

Unsubscribed.

LOL...what an *******.

Not sure why you even subscribed in the first place...
 

Gizmosity

Well-known member
Joined
Jun 17, 2014
Messages
376
Location
SW Wisconsin
Dude.......it's called a 'drywall square' for a reason. They work fine for +/- 1/8". Not so well for dead on. 20 years old or new....it's not the right tool. A drafting square that's out of square typically won't matter because of how it's used in drafting.....but will prove to be a nightmare in general layout.

You don't need/want a line all the way across a 4' sheet of material. Even a pencil line has a measurable width. That width is enough to throw your angle off 90 degrees if it's not lined up right. You just need a 'tick' on the ends of the cut. You need to check your diagonals before cutting. Resolve the issue before it becomes a real issue.

Also.....plywood isn't always (practically never) square to start with.

I've seen a lot worse first boxes. A LOT worse. I partially heat my home with other peoples mistakes.

I still don't see the attraction of the Kreg jig. Forces applied at non 90 degrees cause headaches. It's similar to a 'toenail' in framing. Not as strong and members creep during applying the fastener. If it works for you, run with it.

Keep at it. Lots more mistakes to make. Everything will get progressively easier, progressively better and you'll spend a small fortune along the way.

I'm ready to retire some of my stuff and go heavy into Festool. The Kapex is pretty high on my list as well.
 
Last edited:

Alexbn921

Well-known member
Joined
Aug 22, 2013
Messages
579
Location
East Bay Nor Cal
Good job tackling a new project. The miter saw floating table will start to sag if you don't reinforce it somehow. The more you build the better you will get. Good tools help a skilled craftsman, but they do not make you skilled. There is always some fudge factor when working with wood. Start with simple projects and learn on cheap materials. it will be easier to complete the hard stuff with a good foundation. It doesn't look like there is a solid connection to the floor or a way to level your bench.
 

over40pirate

Well-known member
Joined
Aug 31, 2012
Messages
160
I built almost every cabinet in my shop using a Kreg jig for the joinery. If you don't want to put out the money for a track saw, then use a standard circular saw with a good blade and build something like this.
.

I agree on using a shop made guide. Saves a lot of money for essential tools.
 
OP
J

Just F Me

Well-known member
Joined
Aug 3, 2012
Messages
52
Dude.......it's called a 'drywall square' for a reason. They work fine for +/- 1/8". Not so well for dead on. 20 years old or new....it's not the right tool. A drafting square that's out of square typically won't matter because of how it's used in drafting.....but will prove to be a nightmare in general layout.

I just bought that dry wall square because I figured it would be more square than what I had. I had that T-square, but like i said, it's probably 20 years old and I remember using it as an axe when I was a kid :bounce:

However, because it didn't really help me with what I was doing, and based on what you said, I'll just go return it :)
 

Gizmosity

Well-known member
Joined
Jun 17, 2014
Messages
376
Location
SW Wisconsin
I remember using it as an axe when I was a kid :bounce:

Hahahaha. Many, many years ago, I went on my first installation with my new boss. He grabbed a bunch of stuff and filled a 5 gallon bucket, tucked a level under his arm and grabbed some other stuff. On the way out of the step-van he asked me to grab a framing square as my hands were empty.

Halfway up the stairs to the house, I dropped the only thing I was carrying.

He made me sign my name on it with a felt tipped marker and screw it to the wall of the shop.
 

Kimarieck

Member
Joined
Jul 24, 2014
Messages
14
Location
Las Vegas
Hi Just F Me, When I first started reading this thread I got pissed off how some of the members were treating your quest for help. I'm similar to you as I never built a workbench before, but I'm quite mechanically inclined. And I also reached out to another forum years ago for help building a wardrobe cabinet. The negativity I received because I was a beginner deterred me form building it.

A couple of months ago I too wanted to build a workbench and still had zero woodworking or joint experience. This is what I came up with. The pictures show what a person with no experience but alot of determination can do. My bench works for what I do and what I need it to do. Don't give up, build it. If you get stumped, research it, ask questions, or do what I did. Drink beer and stare at it till the solution becomes clear.

Damn, man! For a first build, that is fantastic!
 

Terranova

Well-known member
Joined
May 12, 2008
Messages
854
Location
Grove City, OH
Good tools help a skilled craftsman, but they do not make you skilled.

Amen
I was just about to say the same thing before I more thoroughly read the responses.

Tools don't make the craftsman, skills do.

Remember this point when you're in the local big box or perusing the tool sites on the internet. It will save you money.
 

aka Larry

Well-known member
Joined
May 2, 2012
Messages
8,030
Location
Eastern, NC
I think for your first woodworking project ever it turned out better than expected. Learn from your mistakes and you'll do better the next time. A few tips to help as you move forward:

- As others have said, your skill is what makes a better final product, not the tools. I have a friend who can cut an almost perfect straight line with a just a hand saw, but not on his first attempt.

- Don't cut all the pieces before you check for errors. They will compound as you discovered.

- The Kreg jig has two holes that close together to make it easier to do a 1x2 face frame on a cabinet, not like you used it. You should have spaced single pocket holes at approx. 6" intervals along your pieces.

-Measure twice, three, four, five or how many times it takes before you cut. As you found out, that plywood isn't cheap and it's hard to fix a mistake once the saw comes out.

Don't get discouraged. You will get better each time you build something. Just keep at it, ask questions, live and learn.
 

joeysh03

Well-known member
Joined
Sep 8, 2013
Messages
113
Location
Columbus, OH
Try putting a framing square on the 90deg of a new sheet of plywood. I almost bet its out of square. Try squaring your ends first, don't rely on the mills to do it for you. Not bad though. Probably better than I could do.
 
To avoid these ads, REGISTER NOW!
Top Bottom