To avoid these ads, REGISTER NOW!

Hit ByThunder's 24 X 24 Palace (to me)

OP
H

Hit-By-Thunder

Well-known member
Joined
May 11, 2008
Messages
181
Location
Fort Saskatchewan
thanks Scott, checked out your build too, Love the arch. Let me know how the pressure test goes.

Well out to the garage tonight and checked on the moisture, now at 91%, holy **** already. seems to be holding at 91% now. I picked up the rest of the drywall and managed to install 2 pieces on the bottom of the storage floor which is the ceiling (if that makes sense.) Also got my first of 9 overhead doors up, It's going to be sweet for sure. More pictures later.

Rob/HBT
 
To avoid these ads, REGISTER NOW!
OP
H

Hit-By-Thunder

Well-known member
Joined
May 11, 2008
Messages
181
Location
Fort Saskatchewan
hey Scott, that is sweet what did you pressure test it to,...PSI I mean pictures buddy, pictures :lol

ya I didn't know about the moisture til too late, I was wondering What the heck was going on. Came here and did a search,.....tada now I work in the cold.

humidity is at 92%......holy snappin arseholes, its going to rain in there soon.


Rob/HBT
 

Steve in Mi

Well-known member
Joined
Mar 13, 2007
Messages
1,042
Location
Mid Michigan
Fantastic build! Just covered all 17 pages - couldn't put it down, lol.

Question, with all the detail and expense for vapor barrier and insulation above the sill of your stem wall (and 10 years of planning) WHY did you not include them on the exposed stem wall and under your concrete floor. Is this typical construction where you are? I also wonder if the lack of vapor barrier in these areas doesn't contribute to the high humidity. I'm aware that the LP unvented heater will make alot of water but is that the only source?

FWIW, I tested my copper air line system to 120 psi IIRC (I installed it a long time ago) before I barried it in the walls and upstairs floor but when I more recently upgraded to a 2 stage compressor at 175 the system shows a slight but bothersome leak. Before you enclose your lines I suggest you test at the highest pressure you ever expect to subject your air system to.
 
OP
H

Hit-By-Thunder

Well-known member
Joined
May 11, 2008
Messages
181
Location
Fort Saskatchewan
ya Steve, looking back I was going to and maybe should have. the years of planning did not include the concrete work, it was the planning of the inside and placement of items collected over the years. This "WAS" suppose to be a 24X36 but all that was changing too quick and the build (concrete work) was starting before I got the permit approved to beat the winter freeze up

As for the airlines being enclosed in the floor of the upper storage, the floor will be able to be lifted out of the way to allow easy access if need be. Yes, you are correct, it will be fully pressured to 150 psi and will sit as a closed system for a few days to see if the line pressure drops. If ok, proceed if not hunt it out with soapy water, then proceed.


update,....

3 walls are all drywalled, not taped or mudded, too cold in the garage. Wore out a set of gloves (well one finger anyhow :lol ) from Santa handling all the drywall screws.

we had a few days over freezing and the moisture climbed to 96% but all the ice on the overhead door is off and the sides of each panel too. pictures soon.....

Rob/HBT
 

4StarCstms

Well-known member
Joined
Mar 14, 2008
Messages
938
Location
Kentucky
Rob - look forward to the pictures. I've been moving pretty slow on my drywall, but..hey any progress is progress! haha
 

SiGmA_X

Well-known member
Joined
Aug 13, 2005
Messages
1,111
Location
Portland, OR
Nice work thus far Rob! I was wondering about the threaded rod used for the storage shelves/cabinets. Are they really at angles, or are they perpendicular to the ceiling? My uninformed guess would be that they need to be perpendicular to not have funky side loading and added stresses, but I could be way off, or the pictures could be making them look funky.

Keep up the good work and I hope your back heals up so you can get it wrapped up pain free!
 
OP
H

Hit-By-Thunder

Well-known member
Joined
May 11, 2008
Messages
181
Location
Fort Saskatchewan
Thank you SiGmA X, and yes they are at an angle, The height is 28" the lower part is 24" wide and the upper 2X4 on the ceiling is 27" so they are at an angle. It is no added stress that I can see. Yes if they were on too much an angle i could see the added stress of pulling the shelves sideways. The top 2X4 and the bottom 2X4 were drilled at the correct angle and the nuts with washers were countersunk about 3/8" so there is no side pull on the threaded rod.

as for the back, it is still out, I have a hard time putting on my socks, pinches in the lower left side down low. A little concerned cause I have never had it last that long before.

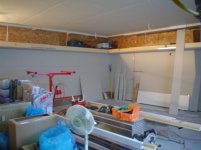
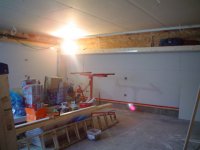
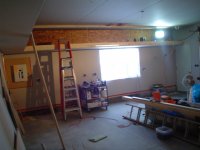
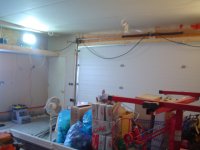
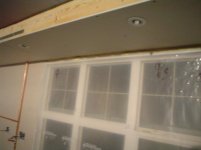
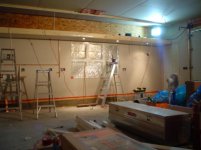
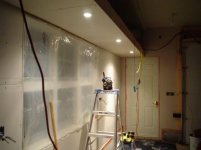
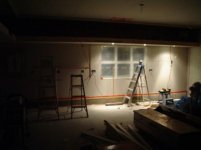
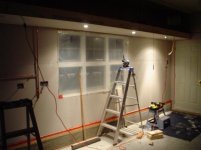
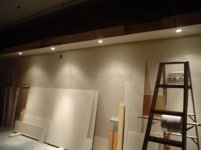
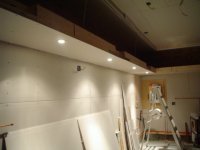
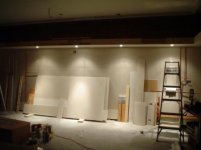
ok now for the updates, got all the drywall up other than 2 small pieces above the overhead door. Have to move too much stuff so I will get those later. I have all the recessed lights drilled (3 1/4" hole saw) and have the lights set it for now. What a pain to get them all lined up and even looking. had to sneak an inch or two on some. anyhow, pictures............
 

Attachments

  • DSC07522.jpg
    DSC07522.jpg
    32.8 KB · Views: 567
  • DSC07523.JPG
    DSC07523.JPG
    141.4 KB · Views: 481
  • DSC07524.JPG
    DSC07524.JPG
    142.7 KB · Views: 509
  • DSC07525.jpg
    DSC07525.jpg
    26.2 KB · Views: 468
  • DSC07528.JPG
    DSC07528.JPG
    138.1 KB · Views: 476
  • DSC07547.jpg
    DSC07547.jpg
    20.3 KB · Views: 492
  • DSC07549.jpg
    DSC07549.jpg
    18.6 KB · Views: 531
OP
H

Hit-By-Thunder

Well-known member
Joined
May 11, 2008
Messages
181
Location
Fort Saskatchewan
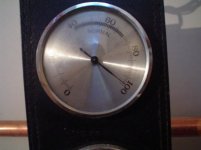
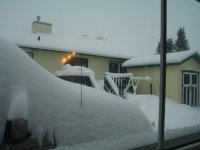
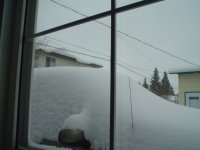
oh and we are getting more snow,...AGAIN!!!!!!! and the moisture is at,......


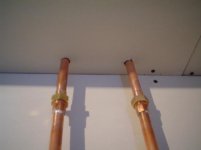
started to run the copper as well, marking and drilling holes in the drywall. Can't fully install cause the tape and mud has to be done and then paint. Once that is done, the lines can fully be installed.

oh I love my "Rotozip"

Rob/HBT
 

Attachments

  • DSC07530.JPG
    DSC07530.JPG
    135.8 KB · Views: 473
  • DSC07538.jpg
    DSC07538.jpg
    20.3 KB · Views: 371
  • DSC07533.jpg
    DSC07533.jpg
    14.6 KB · Views: 306
  • DSC07534.jpg
    DSC07534.jpg
    25.5 KB · Views: 307
  • DSC07536.JPG
    DSC07536.JPG
    143.5 KB · Views: 258
  • DSC07535.JPG
    DSC07535.JPG
    141.2 KB · Views: 247

Motown 454

Well-known member
Joined
Sep 25, 2008
Messages
1,359
Nice work. Its looking great, the lights look good in there. How did that sheetrock lift work?
 
OP
H

Hit-By-Thunder

Well-known member
Joined
May 11, 2008
Messages
181
Location
Fort Saskatchewan
Thank you Wayne, that drywall lift is amazing. I used it to put up the framing for the floor in the staorage area, used it for the drywall on the bottom of the same framing and even used it o put up all the tracks for the sliding doors in the storage area. Yes the best $149 bones I've spent on a tool.

I got 3 of the recessed lights hooked up today, ran temporary power to them, looks AWESOME!!!!!!!!!!! Thanks Scott for the ideas

have a few more tricks/ideas up the sleeve but those will be posted later

Rob/HBT
 

4StarCstms

Well-known member
Joined
Mar 14, 2008
Messages
938
Location
Kentucky
Rob, glad ya were able to use one of my ideas. Gonna give us a night shot?? The lights look good, so does all the drywall.. Thumbs up!
 
OP
H

Hit-By-Thunder

Well-known member
Joined
May 11, 2008
Messages
181
Location
Fort Saskatchewan
Thanks again Scott, and yes, I will be posting it later tonight, i want to get the other 2 hooked up before taking the picture. The TV wall has 5 lights, the window wall the same, 5 lights and the bare wall will have 6 lights. this is where I plan to have my "Ford" art work.

Rob/HBT
 
OP
H

Hit-By-Thunder

Well-known member
Joined
May 11, 2008
Messages
181
Location
Fort Saskatchewan
well dang, it's cold out there. -20 working in bare hands and my toes are froze being on a ladder, but it is worth it. I am loving the look so far. Looks even better in person:drool:

lights are casting on the wall nice and even. The 3 by the window, there are 2 more but way too cold out there tonight

Also, the last light on the TV wall can't be hooked up because the wiring goes to the panel and out the mast but stops there. I have to wait til spring thaw to hook to the house and finialize the electrical permit. the lights are powered by an extention cord for testing only

Rob/HBT
 

Attachments

  • DSC07560.jpg
    DSC07560.jpg
    34.9 KB · Views: 400
  • DSC07559.jpg
    DSC07559.jpg
    28.2 KB · Views: 381
  • DSC07558.jpg
    DSC07558.jpg
    23.7 KB · Views: 373
  • DSC07557.jpg
    DSC07557.jpg
    30.5 KB · Views: 386
  • DSC07556.jpg
    DSC07556.jpg
    23.8 KB · Views: 401
  • DSC07555.JPG
    DSC07555.JPG
    144.7 KB · Views: 445
  • DSC07553.jpg
    DSC07553.jpg
    25.4 KB · Views: 468
Last edited:
To avoid these ads, REGISTER NOW!

woody2136

Well-known member
Joined
Oct 1, 2010
Messages
96
Location
Walton, NY
adding missing pictures

rather than use 2x4's for support, I decided to use 3/8 ready rod (all thread rod) in 2 places. They are spaced about 78" apart. I tested the weight support by jumping up from the floor and grabbing on. No creaking or bounce at all,...... perfect

Rob/HBT oh and changed my avitar and added my thread link

How did you fasten the threaded rod to the ceiling? I will be doing similar overhead storage soon and have already dry walled the ceiling.
 

aka

New member
Joined
Jan 2, 2011
Messages
1
What kind of lights did you use? I am about to build a soffit like that but I am going to use 2x4s and not 2x6s as the base board and not sure I can get a can light in a space that small. I assume you used 2x6s so a standard 4" can light fits?

Thanks!
 
OP
H

Hit-By-Thunder

Well-known member
Joined
May 11, 2008
Messages
181
Location
Fort Saskatchewan
wow,... I did not know there was this many posts!!!!!!!

I have to check my settings cause I have instant e-mail notifications selected so all questions are answered quickly. Sorry everyone.

OK update first, not too much too report, the weather has been very cold and just last week it started to wrm up. I got the floor in place on the overhead storage, but not screwed down. I will be using only a few screws per piece cause I want to be able to lift the floor up if there is an air leak or wiring additions. I also have been cutting on my cabinet parts to size. The one cabinet it together (24WX30HX12D) dowelled and glued. I bought the Vertas 32 cabinet system from Lee Valley tools. great website for specialty cabinet building. Also bought all the oval knobs for the cabinets too, they look like Ford Ovals,..... sweet.

so that is the update thus far, mostly cabinet stuff while it is cold. The back is still out and giving me gears while climbing the ladder but onward progress is still happening.

now for question and answer time,....

thank you Scoutman, Onedge and z28dad, ya the garage is coming out great so far

Woody2136,...
How did you fasten the threaded rod to the ceiling? I will be doing similar overhead storage soon and have already dry walled the ceiling.

The threaded rod goes into a 2x6 laying flat between the trusses. My trusses are 16" on center and the threaded rod (3/8) is placed through the 2x6 through a 3/8 hole drilled on a slight angle. To prevent the nut from coming loose on the top side of the threaded rod, I hammered the threads on 4 sides and force the nut into the jammed threads. This way the nut stays tight to the rod. Hope this helps you out a bit.

aka,...
What kind of lights did you use? I am about to build a soffit like that but I am going to use 2x4s and not 2x6s as the base board and not sure I can get a can light in a space that small. I assume you used 2x6s so a standard 4" can light fits?

I went with 2x6's cause that is how Scotts grage was done. I am doing mine the same as his. This way the lights fit inside the frame The smallest or should I say the shortest I could find were 5" tall 3" non insulated ceiling recessed lights that use the 50 watt halogen gu10 base bulbs. The trim ring came with them as well as the bulb set of 6 was about 40 bucks cheap here in Canada. Hope this helps you out as well too. I like the 2x6 cause the extra load handling they will take if needed. an idea if you use the 2x4 framing,... try the low voltage puck lights maybe???? just an idea for you.


Sids04,... :lol: get r' done you know it is cold when the pen you use to write measurements down is frozen and the pencil was left in the house. too cold to go outside :lol:

ah yes, my friends Wayne and Scott, I do have a few pictures to post but nothing too exciting just a mock-up of the TV cabinet on the living room floor in the house but I am still out there. Today I put the garage door tracks back up I reoved them for drywalling the ceiling. Frig I wish the weather would warm up so I could do the mud and taping.

Thanks all

Rob/HBT
 
OP
H

Hit-By-Thunder

Well-known member
Joined
May 11, 2008
Messages
181
Location
Fort Saskatchewan
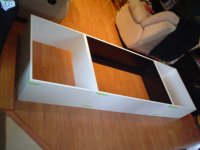
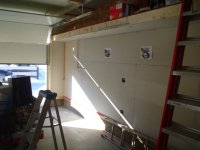
ok update pictures, only a couple. This is going to be the TV cabinet. The black cabinet is for the TV and if you notice, the edge banding is white like all the other cabinets. This way when the cabinet is cloesed, it will look like the other cabinets, completely hidding the TV from view,...... stealth and clean uncluttered look. the other picture is all the cabinet gables (sides) waiting for the shelving holes, hinge holes.

Rob/HBT
 

Attachments

  • DSC07562.jpg
    DSC07562.jpg
    28.3 KB · Views: 128
  • DSC07563.JPG
    DSC07563.JPG
    141 KB · Views: 124
  • DSC07561.jpg
    DSC07561.jpg
    32 KB · Views: 133
OP
H

Hit-By-Thunder

Well-known member
Joined
May 11, 2008
Messages
181
Location
Fort Saskatchewan
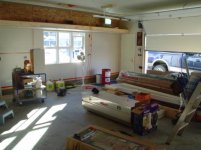
well today turned out to be a beautiful day, nice and warm, but not warm enough for drywall compound. I took the day off from work (my birthday) and pitter-putted around the garage.

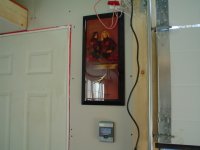
I got my 75th anniversary Snap-on clock out of the package. Brand new and now have a nice spot for it.:thumbup:

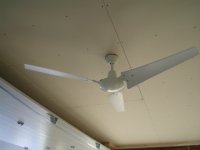
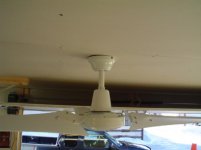
mounted my 60" industrial style fan. **note** the angle of the blades, man this thing moves serious air. the blades sound soooooo cool. The best way to discribe the sound ,... say "Sue" about 5 times as fast as you can, That is what it sounds like,....saweeeeeet Then added the switches in the 3 gang box ( Fan/Recess lights/outside eave recepticles.)

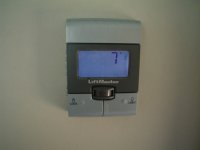
Also my remote light for the 3800 Liftmaster opener which also was remounted. I removed it and the tracks for drywall. and the remote door opener

went over all the screws in the drywall to be sure they were below surface.

Added a couple of computer pictures to the wall just to get something up :lol:

Rob/HBT
 

Attachments

  • DSC07585.JPG
    DSC07585.JPG
    135.6 KB · Views: 323
  • DSC07587.jpg
    DSC07587.jpg
    21.7 KB · Views: 339
  • DSC07576.jpg
    DSC07576.jpg
    34 KB · Views: 428
  • DSC07572.JPG
    DSC07572.JPG
    129.3 KB · Views: 383
  • DSC07567.JPG
    DSC07567.JPG
    140.9 KB · Views: 383
  • DSC07566.jpg
    DSC07566.jpg
    39.6 KB · Views: 436
  • DSC07565.JPG
    DSC07565.JPG
    143.4 KB · Views: 387

51rider

Well-known member
Joined
Dec 21, 2009
Messages
502
Location
London, England.
Sir,
Happy Birthday!

Great job on the garage:thumbup: I'd say go grab a cold one but given the weather, may be a medicinal short might be more appropriate:)
 
OP
H

Hit-By-Thunder

Well-known member
Joined
May 11, 2008
Messages
181
Location
Fort Saskatchewan
Thanks 51rider. Oh there has been some cold ones out there already. No liquid antifreeze yet,...... YET!!!!!

Your avitar has been one of my favorites, top notch limey <- :) :lol:

Rob/HBT
 

4StarCstms

Well-known member
Joined
Mar 14, 2008
Messages
938
Location
Kentucky
Very Nice update. Ive been looking at using a Big *** Fan setup for my shop (they are a local company to me and have some SWEET products)

Love the clock too
 
OP
H

Hit-By-Thunder

Well-known member
Joined
May 11, 2008
Messages
181
Location
Fort Saskatchewan
Thanks Scott:thumbup:

ya the clock is MINT just a slight dust coving that I will wait to clean off. Don't want to just dry wipe it.

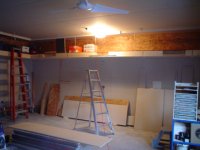
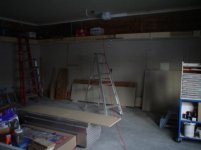
so here is the remote light from the 3800 lift master. This is with 2 60 watt regular bulbs. I love the motion sensor, just walk into the garage and it is on right away.:thumbup:

****, have to load the photos:wtf:

on a side note,...seeing the chiropractor now. He calls me "pretzel boy":shocking: doing adjustments and today shock therapy:shocking: ahhhhhhh soooooooooo good. Muscle will not stop spasming and causing pain. still can't put socks on without great difficulty.
 

4StarCstms

Well-known member
Joined
Mar 14, 2008
Messages
938
Location
Kentucky
You'll have to get one of those california Car dusters (for the dash, the small one) to clean stuff like the clock w/o scratching. You could use compressed air to blow it off too ..

Sorry to hear your back is still giving you fits. Just need to tie ya to your truck, and the wall and have the wife/GF Drive, stretching ya out straight again! Just don't do it when she's mad at ya!
 
OP
H

Hit-By-Thunder

Well-known member
Joined
May 11, 2008
Messages
181
Location
Fort Saskatchewan
ya Scott I feel like doing that at times.

as for the California Duster, got one, the dash duster, but it is in storage, some place :lol:

ok for the pictures.......

first is the remote light on and then with it off. This is to show how much light is shining

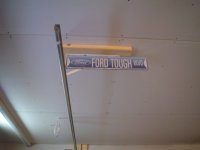
there is one with my "Ford Tough" sign on the shelving brackets that support the garage tracks. The bracket supports will be surrounded with crown molding and then painted. Sure beats the ugly universal brackets hey?

the last is the laser pointer so the car can be parked in perfect position for the Max Jax lift

Rob/HBT
 

Attachments

  • DSC07589.JPG
    DSC07589.JPG
    140.1 KB · Views: 317
  • DSC07590.jpg
    DSC07590.jpg
    26 KB · Views: 258
  • DSC07592.JPG
    DSC07592.JPG
    143.4 KB · Views: 323
  • DSC07613.jpg
    DSC07613.jpg
    16 KB · Views: 299
Last edited:

Motown 454

Well-known member
Joined
Sep 25, 2008
Messages
1,359
Happy belated Birthday. The garage is lookin good! Nice work.
 
Last edited:

go_n_low88

Well-known member
Joined
Mar 15, 2010
Messages
85
Enjoying the pics showing the build process at different stages. My 28x25 pad should be getting poured this week, and then things should start to progress. Looks like i'm just a few hours south of you in CowTown.
:beer:

Keep up the good work.

Parrish
 
To avoid these ads, REGISTER NOW!
Top Bottom