To avoid these ads, REGISTER NOW!

Hoffman Werkstatt

OP
H

hoffman912

Well-known member
Joined
Dec 21, 2011
Messages
418
Location
Columbus, Ohio
here is the finished pad! in a week the 912 comes back for its winter slumber, and next spring it's rust bullet time!

then after that we can start working on upgrading the electric.
 

Attachments

  • 12227713_10156178016485510_6475419094668368231_n[1].jpg
    12227713_10156178016485510_6475419094668368231_n[1].jpg
    59.7 KB · Views: 97
  • 12208757_10156178016475510_2356529082037174743_n[1].jpg
    12208757_10156178016475510_2356529082037174743_n[1].jpg
    45 KB · Views: 103
Last edited:
To avoid these ads, REGISTER NOW!
OP
H

hoffman912

Well-known member
Joined
Dec 21, 2011
Messages
418
Location
Columbus, Ohio
quick question - the concrete installer said i can pull the car in after 5 days. does that sound right? should i wait a bit longer to be safe? once i bring the 912 back, its very likely it will not move for another 4 or 5 months.
 

smschriefer

Well-known member
Joined
May 28, 2009
Messages
841
Location
Yorktown, VA
The new floor looks awesome! I'm not sure regarding putting the car back in. I thought it was 28 days before concrete was at its full design strength. Are you going to put a sealer down on the new concrete to protect it? I'd be worried about staining the floor moving a car in before it was sealed/protected.
 
OP
H

hoffman912

Well-known member
Joined
Dec 21, 2011
Messages
418
Location
Columbus, Ohio
they are going to put sealer down some time this week. i will likely park the car on tyvek or something to keep it from leaking and staining (all porsches, like dogs, mark their territory). i do have a big metal cookie sheet oil catch pan, but want to play it safe.

thoughts from anyone else?


PS, its supposed to be fiber reinforced, but i dont see little fibre hairs sticking out the top. are they hard to see?
 
OP
H

hoffman912

Well-known member
Joined
Dec 21, 2011
Messages
418
Location
Columbus, Ohio
Today got the lights reinstalled. I also purchased a few more lights, to light up the front of the garage with the garage door shut. much better.
 

Attachments

  • 10541807_10156194913050510_821799012044076390_n[1].jpg
    10541807_10156194913050510_821799012044076390_n[1].jpg
    46.9 KB · Views: 150
  • 12247166_10156194912955510_4979046555716794844_n[1].jpg
    12247166_10156194912955510_4979046555716794844_n[1].jpg
    42.8 KB · Views: 89
  • 12240043_10156194913060510_5441332098320978202_n[1].jpg
    12240043_10156194913060510_5441332098320978202_n[1].jpg
    79.1 KB · Views: 522
  • 12239872_10156194913165510_8033088649770148111_n[1].jpg
    12239872_10156194913165510_8033088649770148111_n[1].jpg
    66.7 KB · Views: 93
  • 12250152_10156194450035510_6140890407030544211_n[1].jpg
    12250152_10156194450035510_6140890407030544211_n[1].jpg
    57.9 KB · Views: 101
OP
H

hoffman912

Well-known member
Joined
Dec 21, 2011
Messages
418
Location
Columbus, Ohio
the ones above the garage door were a super tight fit.

just to give you an idea, here is the door just before it goes under the lights.
 

Attachments

  • 12241383_10156194754145510_3890005760547220637_n[1].jpg
    12241383_10156194754145510_3890005760547220637_n[1].jpg
    53.6 KB · Views: 59
  • 12227715_10156194754135510_1200089034989018227_n[1].jpg
    12227715_10156194754135510_1200089034989018227_n[1].jpg
    46.7 KB · Views: 62
OP
H

hoffman912

Well-known member
Joined
Dec 21, 2011
Messages
418
Location
Columbus, Ohio
before and after shots.

PS, i am thinking of adding one last run of lights. overkill?
 

Attachments

  • 1538677_10153627783175510_1127716268_n[1].jpg
    1538677_10153627783175510_1127716268_n[1].jpg
    85.8 KB · Views: 95
  • 12115449_10156194912980510_2497142238170001607_n[1].jpg
    12115449_10156194912980510_2497142238170001607_n[1].jpg
    68.6 KB · Views: 527
Last edited:

bj383ss

Well-known member
Joined
Sep 29, 2011
Messages
3,166
Location
TX
Just read through your whole thread. Great progress on the garage and super cool house. New floor came out great. Bet you are excited to get moved back in. I chuckled at your comment about being in the apt for 4 months. We are currently on day 72 staying with my parents waiting on our new house to get finished...

Bret
 
OP
H

hoffman912

Well-known member
Joined
Dec 21, 2011
Messages
418
Location
Columbus, Ohio
omg. when i was in my mid 20s my parents moved in with me when they were between houses. i was right in my prime and was out and bout all the time, going to bars, dates, hanging out with friends. i got hassled like i was 14 - 'omg did you have a beer!?' 'who's this girl you're going out with?' 'you came home at what time? you have to work tomorrow'

Hope your house is done soon!

I will continue to post pics as things progress. This is a slow project, and will take time due to funds.

phase 1: new roof and termite repair, and purchase 1/2 the lighting - done 2014

phase 2: new pad, brighten up interior, and purchase 2nd half of lighting - done 2015

phase 3: electric - 2016?

phase 4: dry wall and insulation - 2017?
 
Last edited:

smschriefer

Well-known member
Joined
May 28, 2009
Messages
841
Location
Yorktown, VA
Things are looking good! The white paint and extra lights really makes your place bright inside.

I used to have one of the galvanized drip pans and got rid of it. Mine rusted, due to condensation collecting on the bottom. I ended up using a plastic dog crate liner and have been happy with it for the last 4-5 years.

Have you started planning your electrical outlets for the walls? I know you have some power out there already, but will you be adding a subpanel?
 

jsherid1

Well-known member
Joined
May 28, 2009
Messages
1,272
Location
Lucas, TX
Looks great Harry--as for the additional lights, I'm not sure there is such a thing as overkill when it comes to garage lighting. If anything, I wish I'd added more in my garages.
 
OP
H

hoffman912

Well-known member
Joined
Dec 21, 2011
Messages
418
Location
Columbus, Ohio
Things are looking good! The white paint and extra lights really makes your place bright inside.

I used to have one of the galvanized drip pans and got rid of it. Mine rusted, due to condensation collecting on the bottom. I ended up using a plastic dog crate liner and have been happy with it for the last 4-5 years.

Have you started planning your electrical outlets for the walls? I know you have some power out there already, but will you be adding a subpanel?

Thanks for the tip on the dog crate tray! i like that idea a lot.

I have done some planning on the wiring. Currently i have 30 amps going to the garage, and a tiny sub panel. the house only has 100 right now. i am going to upgrade the house to 200, and run 100 to the garage.

here is my rough pipe dream of a mock up. I was originally planning 200 amp new service, but that may be harder to do.

View media item 39114
 

smschriefer

Well-known member
Joined
May 28, 2009
Messages
841
Location
Yorktown, VA
I'd think 100 amp service would do, but I'm not sure what you plan to do. I see one 220 outlet by the compressor, but the rest seem like normal 110 runs. The light plan seems to have deviated from the original plan, but honestly, I think you have plenty of light now (until you do something delicate and then if you are like me, no amount of light seems to be enough.
 
OP
H

hoffman912

Well-known member
Joined
Dec 21, 2011
Messages
418
Location
Columbus, Ohio
plan on having a big air compressor and a welder, for restoration of my porsche and general car work. There are actually two 220 outlets, one on each side of the same wall. one for the air compressor, and one for the welder.

The plan above was the 1st conceptualization of the garage, and while i have deviated from it some, the over all general goal will be the same, or very similar.
 
OP
H

hoffman912

Well-known member
Joined
Dec 21, 2011
Messages
418
Location
Columbus, Ohio
brought the car home last night. feels good to have it back in the garage
 

Attachments

  • 12274778_10156200396820510_1512296467920486098_n[1].jpg
    12274778_10156200396820510_1512296467920486098_n[1].jpg
    71.1 KB · Views: 55
  • 12227724_10156200396770510_4437029634590440583_n[1].jpg
    12227724_10156200396770510_4437029634590440583_n[1].jpg
    74.3 KB · Views: 59
  • 12219599_10156200396740510_5637629374632690406_n[1].jpg
    12219599_10156200396740510_5637629374632690406_n[1].jpg
    73.7 KB · Views: 61
  • 12241179_10156200396645510_6354792867745486781_n[1].jpg
    12241179_10156200396645510_6354792867745486781_n[1].jpg
    48.3 KB · Views: 58
  • 12278886_10156200396610510_5876070972631631479_n[1].jpg
    12278886_10156200396610510_5876070972631631479_n[1].jpg
    48.7 KB · Views: 56

jsherid1

Well-known member
Joined
May 28, 2009
Messages
1,272
Location
Lucas, TX
I hear you on the Porsches marking their territory, if I don't drive my 928 for a few weeks it pees a little ATF on the floor.
 
OP
H

hoffman912

Well-known member
Joined
Dec 21, 2011
Messages
418
Location
Columbus, Ohio
Fritz got a new rallye inspired flat four stablemate. Unmolested, unmodified, 1 owner, well cared for, religiously maintained and loved 2005 Subaru WRX, with 115K. :thumbup:

The BMW was getting to a point where it needed more attention than i could give it. it needed new suspension which i was planning on doing, but now the master totally crapped out. I have had no free time since August and the immediate future doesnt look great in terms of tinkering time (besides it will be too cold to work on cars soon).

she doesnt have a name yet, but I am thinking Toshi after Subaru Rally Driver Toshihiro 'Toshi' Arai. I will miss Dieter dearly, and look forward to owning another BMW in the future (this is the first time i will be Beemerless since i was 21), but I am looking forward to the WRX experience. :beer:
 

Attachments

  • 12301571_10156228655560510_6209296078793926034_n[1].jpg
    12301571_10156228655560510_6209296078793926034_n[1].jpg
    95 KB · Views: 34
  • 12316483_10156228656760510_5701928452439032698_n[1].jpg
    12316483_10156228656760510_5701928452439032698_n[1].jpg
    84.9 KB · Views: 43
OP
H

hoffman912

Well-known member
Joined
Dec 21, 2011
Messages
418
Location
Columbus, Ohio
Some updates!

This April we finished the floor in the garage, which is a huge milestone and improvement from where we started.

Due to budget, usefulness, ease of prep and installation as well as how well the product is proven to hold up, I went with Rust Bullet from Garage flooring LLC http://www.garageflooringllc.com/rust-bullet-concrete/


Justin and the team at garage flooring llc is fantastic, and their products were perfect for my needs. if you are considering doing a floor on a budget, this is absolutely the way to go. The rust bullet system is straight forward, no fiddling around. just paint and go.


here are some pics of the progress:

We had to diamagrind the floor before we did anything due to the sealer the concrete company put down. If it wasnt for the sealer we woudlnt have had to grind -just powerwash. Rust bullet does not require grinding if a floor does not have a sealer on it.

word to the wise, if you are having a new floor put down and want to finish it do not let them put a sealer down. period. it doesnt matter if they say its a mild sealer or shouldnt cause issues - it likely will. In our case, i put down a few test spots of rust bullet on the sealed floor and then after it cured put down gorilla tape on top. after letting the gorilla tape sit for a day, i pulled it up and found paint on the back - a clear sign the sealer affected the ability of the rustbullet to adhere.

After grinding and power washing a hand full of times we got to a good clean floor, that we could start working on.


the 1st step after our prep was to put down the garage flooring llc TL829 flexible joint sealer to go into the contraction/expansion joints. It is a straight forward two part epoxy and is pretty easy to use, and requires no grinding afterwards as it is self leveling. Just pour it in, and then after it firms up (but not fully cured), you can trim the excess with a razor blade.

TL829 is a flexible epoxy that is permanent, self leveling, and fills in the expansion joints - but it has elasticity so it allows for expansion, contraction and movement. its a perfect filler solution that wont leave your floor cracked or ruined when the floor moves or expands/contracts.

https://scontent-iad3-1.**.fbcdn.net/v/t1.0-9/12994526_10156759310760510_6103839029995349408_n.jpg?oh=16d6f4d56681286b578a5e5405d3ffd6&oe=57CE4D7F

https://scontent-iad3-1.**.fbcdn.net/v/t1.0-9/13043489_10156759310740510_4256762282951450499_n.jpg?oh=3b7ea1ed18377942551ba88b3b8548ad&oe=57CB2296

https://scontent-iad3-1.**.fbcdn.net/v/t1.0-9/13010799_10156759310810510_8113586620942110278_n.jpg?oh=43577b87d4c10f9755e0121e5291eede&oe=57E239D3


typically two coats of rust bullet are enough. we went with four because a)we ground the floor which would require us to use more of the product (ground concrete soaks up more), and b) because we wanted more of an industrial quality flooring to handle anything i throw at it. i say when you have a job to do, do it once and do it right.

first coat

https://scontent-iad3-1.**.fbcdn.net/v/t1.0-9/11219690_10156784574135510_983547837515532444_n.jpg?oh=f76db7a89865b52b0d60316edc4a68ed&oe=57CE46A7

second coat

https://scontent-iad3-1.**.fbcdn.net/v/t1.0-9/13083241_10156785338720510_2698340264396197481_n.jpg?oh=978ffe555efc0df310df0f1e969a5424&oe=57D9DCD0


skipping a head to the fourth coat

https://scontent-iad3-1.**.fbcdn.net/v/t1.0-9/12524148_10156787768000510_3745606908957896547_n.jpg?oh=28311166e54c121ea954a74f044cd115&oe=57C6F6E2

https://scontent-iad3-1.**.fbcdn.net/v/t1.0-9/13043255_10156789302915510_11302076119446138_n.jpg?oh=309e8891b632c348a2d2c0494fbaad45&oe=57DF14CD


pro tips

- use a tyvec suit when you paint this stuff on. also a respirator is a must. (plus the combo makes you look like walter white doing a cook)

-wear rubber gloves!! this stuff does not come off unless you use their solvent.

-if you buy the kit, it comes with solvent. if you piece mail it, do make sure to get the solvent

-if you have a separate entry door to the garage, get plastic sheeting big enough to cover the bottom half of the garage door, and staple in place. this allows you to a) keep the garage door open for venting b) by covering the bottom half, you are blocking enough to help keep dirt and leaves and stuff from blowing in the garage door.


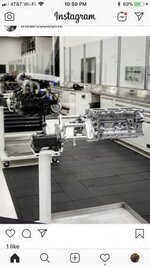
now its the slow process of moving things back in and reorganizing after everything was put in boxes and shoved in the side room of the garage (leanto) for the last 8 mos)

https://scontent-iad3-1.**.fbcdn.net/v/t1.0-9/13096262_10156809752145510_728436522886272616_n.jpg?oh=6d73c5f5f9a76e445d8967ecca80b57e&oe=57DC54B9
 
Last edited:
To avoid these ads, REGISTER NOW!
OP
H

hoffman912

Well-known member
Joined
Dec 21, 2011
Messages
418
Location
Columbus, Ohio
got some much needed garage therapy in this weekend (or what I call Garage Yoga).

I did a bit of organizing and arranging, and spent most of Sunday and part of Saturday detailing the WRX (something i usually do when i get a new car, but couldn't do since i picked it up in November and then had all the work done on the pad).

"Thousands of candles can be lit from a single candle, and the life of the candle will not be shortened. Happiness never decreases by playing with cars in your garage". -Buddah ‪#‎garageyoga‬

https://scontent-iad3-1.**.fbcdn.net/v/t1.0-9/13336034_10156922413840510_7766676845879711555_n.jpg?oh=0f984347944077570ed15a69c11712a7&oe=57DD7B52

https://scontent-iad3-1.**.fbcdn.net/v/t1.0-9/13325528_10156922413915510_8601982772092949201_n.jpg?oh=66464bbbc9284244b8222d290434122a&oe=580E2481

https://scontent-iad3-1.**.fbcdn.net/v/t1.0-0/p526x296/13336081_10156919091695510_6309703486199139763_n.jpg?oh=cee83b680f9ffefb5780448c1c08bba0&oe=580DC5E6

https://scontent-iad3-1.**.fbcdn.net/v/t1.0-9/13256387_10156918836750510_5384356523775035203_n.jpg?oh=442ecf95eb3a9911faae52a617f45241&oe=57CE39AA
 
Last edited:
OP
H

hoffman912

Well-known member
Joined
Dec 21, 2011
Messages
418
Location
Columbus, Ohio
Here is a bit of how it is looking today with some of the reorganization in process. Still trying to figure out the best place for everything, but it is getting there. Reorganizing the side room is next.

I am going to get some quotes soon on upgrading the power to the house so i can upgrade the power to the garage. if it's in the cards it will be a project we tackle this year. If not then that is next years phase 3 project. :)

https://scontent-iad3-1.**.fbcdn.net/v/t1.0-9/13321813_10156922535715510_2253381402473228034_n.jpg?oh=910f07a3118d65bdd1a405010258e0a4&oe=57C825A7

https://scontent-iad3-1.**.fbcdn.net/v/t1.0-9/13312657_10156922535130510_1890773220718011206_n.jpg?oh=08f3f560e096aaed6cc5bf6bc02a1656&oe=57E03F60

https://scontent-iad3-1.**.fbcdn.net/v/t1.0-9/13342895_10156922535560510_4524197996812569471_n.jpg?oh=57a1379236a9a90e45501136f6728052&oe=57CB6302

https://scontent-iad3-1.**.fbcdn.net/v/t1.0-9/13321615_10156922532780510_6909263509281613171_n.jpg?oh=19deabaf4afc1f5e5578cd1cf37ffd1e&oe=57CAF0B6
 

smschriefer

Well-known member
Joined
May 28, 2009
Messages
841
Location
Yorktown, VA
It's looking good! I'm guessing the lean-to is a mess from everything moved over from the garage space. With time it will all be straightened out. Do you still need to pain the lean-to side?
 
OP
H

hoffman912

Well-known member
Joined
Dec 21, 2011
Messages
418
Location
Columbus, Ohio
Yeah, the lean to is a disaster right now. I need to pretty much gut it like i did the main room. a lot of stuff was shoved in boxes and corners and thrown about so we could empty out the garage half for the floor project. needless to say, i need to go through all of that.

needs for the lean to:

-remove everything, toss what we dont want and do spring cleaning.
-tear out dry wall.
-clean out all dust and crud.
-install additional lighting
-floor (currently what i will assume to be old asbestos tile, will cover with linoleum or vinyl or something)
-put everything back in an organized manner

additional needs:

Electric, electric, electric.

Currently have only 30 AMP to the whole garage. when new electric goes in, the box will be in the leanto, where the current box is.

i will probably refrain from painting the barewood in the leanto like i did the garage, and will just eventually dry wall. I am not doing as much work in there so the brightness isnt as much of a factor. more lighting will be important though.

eventually both the lean to and main garage will be insulated with fire resistant insulation and finished with fire resistant dry wall. this is probably 2 to 3 years away (which is why i painted the garage white for the short term), depending on budget... have to install new electric first!!
 
Last edited:

Zeke

Well-known member
Joined
Aug 13, 2009
Messages
17,176
Location
Long Beach CA, the sewer by the sea.
Harry, you inspired me to go look at a 912 that has been sitting for a long time. You and I both know what that means. I don't know if I'm up to another front suspension pan or reat package tray (probably skip the package tray and cover it with Dynamat :D)

Anyway, your garage is looking GOOD, but my favorite room is the lean to. Get on it, man! :)
 
OP
H

hoffman912

Well-known member
Joined
Dec 21, 2011
Messages
418
Location
Columbus, Ohio
LOL, rust never sleeps :)

Yeah, i really need to get onto the leanto. I think its one of those situations that i need a weekend to just gut it.

This weekend wont work though - Stoddard has their swap meet up in Cleveland on Saturday :)
 
OP
H

hoffman912

Well-known member
Joined
Dec 21, 2011
Messages
418
Location
Columbus, Ohio
last night i finally figured out a spot for my porsche clock. It was a gift from several 912ers to me at a banquet for the inaugural east coast 912 rendezvous last year - which i hosted and organized.

It was a fun event, with wonderful people, and I was so honored to receive such a wonderful gift. It is really special for me and I am so glad to finally have a place to display it in my garage!!


https://scontent-iad3-1.**.fbcdn.net/v/t1.0-9/13344646_10156962280490510_5993296791312098432_n.jpg?oh=059f4b309efe37f823507e1b250ce285&oe=57C9EF69


https://scontent-iad3-1.**.fbcdn.net/v/t1.0-9/13428462_10156962281080510_8703438635194881679_n.jpg?oh=e0f0bd1ce969258bbdfba57c5d7c64e2&oe=58086A15
 
OP
H

hoffman912

Well-known member
Joined
Dec 21, 2011
Messages
418
Location
Columbus, Ohio
Thanks! I think i would rather have it where the power cord reel is, but then i dont know were a better place for the reel would be. the primary driver of this garage is to be a functional work shop, so usefulness of lay out for actual use, goes beyond aesthetics (but i do want it to look as good as it can in the process).
 
OP
H

hoffman912

Well-known member
Joined
Dec 21, 2011
Messages
418
Location
Columbus, Ohio
Update:

One of the things i love about Jack Olsen's garage are all the creative solutions he has for multiple work benches. That being said two folding workbenches (one for each side wall) has been in my plans for a long time.


The one thing i didn't like about Jacks were the extra legs and stuff that have to fold down and prop it up. I wanted something a bit different with less moving parts. Less things to bump or run into that could knock things over.

In my search i saw this one with folding brackets that locked in place. It looked good, it was minimalist and by locking in place gave me that safety aspect i felt more comfortable with.

http://www.benchsolution.com/

b44cd4a4-f7c7-43ca-a130-8ee92e99328a_400.jpg


The only problem is Bench Solution is about 300-350 bucks... too rich for my blood.

in my search for a budget solution, i found these foldable, locking brackets on Amazon. They are made by Amarine and are made to be folding bench seats for boats..

31NI6rsn8uL._SX425_.jpg


https://www.amazon.com/dp/B00F9O4YPY/?tag=atomicindus08-20


lockable.. foldable.. and made to carry a few hundred pounds. Check, Check and Check. Price at $17 per bracket so its relatively affordable. Hell yes. I purchased two pairs.


I also needed a table top. Being on a budget i went with some desk tops from Ikea. We were there shopping for something else and came across them.

For 15 bucks when you have the free family membership you can buy a linnmon table top. not ideal, but it will do for now until we get something more substantial. Besides, I have a behemoth 100 year old workbench for when i need to do anything heavy duty. My end goal is to eventually go with butcher block, but this is fine for now and i cant beat the price.

http://www.ikea.com/us/en/catalog/products/40240239/

linnmon-table-top-gray__0176240_PE329142_S4.JPG


This weekend I decided to put one of them together. one challenge was the wall studs being too far apart. I solved that issue by sistering another 2x4 to the joist to bring them just a bit closer in.

The other challenge was that the brackets have to be 100% square.. if not they will not shut right and will not fold parallel to the wall. I had to re do it and adjust to get it right.

Also to add extra strength i used joist hanger screws instead of normal construction screws.

Below are the final results.

226047eec3e75f8324ea1243c6ecc28a.jpg

9ce6fdaa151257ab8c20e8f1e60d6f6e.jpg

here you can see how much it sticks out when folded down all the way. it sticks out about an inch, but does not impede the ability to pull the 2nd car in or open doors.

dffe56e19a76b77ae9bda3ea697c1aef.jpg

over all its super solid. I woudl test sitting on it to see if it would hold me, but i suspect the ikea table top would not be happy.. when i upgrade table tops in the future i will test that out.


My one complaint is placement. I put it farther down so i would not have a window above it. I think i would rather have it below the window so it is centered to the garage. I will probably move it later this week or next weekend. For now it will do the job though!

Not bad for approximately $50 a bench, eh?
 
Last edited:

smschriefer

Well-known member
Joined
May 28, 2009
Messages
841
Location
Yorktown, VA
Very nice and creative solution. I think you'll like the bench under the window. More natural light is always a good thing, plus, it is hard to find things that fit nicely under a window and by placing the bench there you free up floor space for other items.
 
OP
H

hoffman912

Well-known member
Joined
Dec 21, 2011
Messages
418
Location
Columbus, Ohio
Very nice and creative solution. I think you'll like the bench under the window. More natural light is always a good thing, plus, it is hard to find things that fit nicely under a window and by placing the bench there you free up floor space for other items.


Thanks, I agree. It just has a natural fit in the center and the extra light is always good.
 
OP
H

hoffman912

Well-known member
Joined
Dec 21, 2011
Messages
418
Location
Columbus, Ohio
Performed some more garage yoga this weekend. I have a caliper sticking so its time to do the next major project on the 912 - brakes!


"Calm mind brings inner strength and self-confidence, so do good brakes." - Tenzin Gyatso, the 14th Dalai Lama. #garageyoga

https://scontent-ord1-1.**.fbcdn.net/v/t1.0-9/13606540_10157064400015510_4922956788350180165_n.jpg?oh=be317672349243d549697b003d4684d2&oe=57F6C59C


Upgrading my brakes from Dasani to San Pellegrino


https://scontent-ord1-1.**.fbcdn.net/v/t1.0-9/13606655_10157064412245510_5644285257388055424_n.jpg?oh=ff811db23f0bf5dfa5753eb2830f0088&oe=58310437
 
OP
H

hoffman912

Well-known member
Joined
Dec 21, 2011
Messages
418
Location
Columbus, Ohio
I will be sending the calipers out to PMB http://www.pmbperformance.com/catalog.html for a refresh. They will come back totally gone through and like new. new pistons, new bleeders, new seals, new everything, and the calipers themselves will be freshly cad plated as well. cannot wait!

https://scontent-ord1-1.**.fbcdn.net/v/t1.0-9/13567413_10157068247225510_3510265891834998143_n.jpg?oh=e4ac7a7bdfd599b2184124a77b1b7f66&oe=5801B99D

I have already done lines a few years ago so this time around will be just new calipers, pads and rotors.

here are the old calipers

https://scontent-ord1-1.**.fbcdn.net/v/t1.0-9/13620837_10157068247335510_8735042811250983095_n.jpg?oh=22307cc57095f0032fb65c1801a4a11d&oe=5802E2CA
 

tylerg1

Well-known member
Joined
Mar 28, 2014
Messages
173
Great posts, really enjoyed reading!
Wish the early pics were still up but whatever!
 
OP
H

hoffman912

Well-known member
Joined
Dec 21, 2011
Messages
418
Location
Columbus, Ohio
Re: Hoffman Werkstatt (17x24 with an 8x19 attached lean-to)

It’s been 4 years or so since I’ve made any updates. I will need to backfill and re-add pictures that have since disappeared.

This year we refinanced and took cash out to repaint the house and finally upgrade the electric to 200 amp; upgrading the garage in the process. That was put on hold quickly: my wife and I both work in business travel, and industry decimated by covid (and work for the same company). We both survived several rounds of furloughs and layoffs (being client paid helps), however a 90% drop in transactions never makes anyone feel safe, so we are sitting on those funds until the crisis is over. The upgrade will just have to wait for now.

I have gotten tons of use out of my space in the last 4 years. A lot of car projects, some odd jobs to help others and just general garage shenanigans.

Here are some pics on how things have been and how they sit today.


665250c0ffe0c43dab773608511ab21d.jpg514c40934a260582d0330f6ad0ae64fd.jpg88e09474212324d53eaeca37771ae38a.jpg

5bb258f99a0e49cf59b753d16362cd2a.jpgb586bae2f403f0fa1d6c7c6fbc6689d6.jpg

dbaa607229f8917eae21a3a98dad7cf0.jpg

49b55743468105e4ce8323ba1dd49b07.jpg

caed85d6b44ace6e563a56e8bfd9a5c0.jpg

a4ea01e33a62d74132dd4ee50ceadcce.jpg


Sent from my iPhone using The Garage Journal mobile app
 

Attachments

  • 49b55743468105e4ce8323ba1dd49b07.jpg
    49b55743468105e4ce8323ba1dd49b07.jpg
    321.3 KB · Views: 4
  • a4ea01e33a62d74132dd4ee50ceadcce.jpg
    a4ea01e33a62d74132dd4ee50ceadcce.jpg
    127.5 KB · Views: 3
  • caed85d6b44ace6e563a56e8bfd9a5c0.jpg
    caed85d6b44ace6e563a56e8bfd9a5c0.jpg
    181.3 KB · Views: 2
  • dbaa607229f8917eae21a3a98dad7cf0.jpg
    dbaa607229f8917eae21a3a98dad7cf0.jpg
    229.7 KB · Views: 2
  • b586bae2f403f0fa1d6c7c6fbc6689d6.jpg
    b586bae2f403f0fa1d6c7c6fbc6689d6.jpg
    181.4 KB · Views: 2
  • 5bb258f99a0e49cf59b753d16362cd2a.jpg
    5bb258f99a0e49cf59b753d16362cd2a.jpg
    180.7 KB · Views: 1
  • 88e09474212324d53eaeca37771ae38a.jpg
    88e09474212324d53eaeca37771ae38a.jpg
    179 KB · Views: 2
  • 514c40934a260582d0330f6ad0ae64fd.jpg
    514c40934a260582d0330f6ad0ae64fd.jpg
    148.9 KB · Views: 3
  • 665250c0ffe0c43dab773608511ab21d.jpg
    665250c0ffe0c43dab773608511ab21d.jpg
    174 KB · Views: 4
OP
H

hoffman912

Well-known member
Joined
Dec 21, 2011
Messages
418
Location
Columbus, Ohio
One thing I have been considering is selling my us general 44” box (it’s a gen 1), and the big monolithic work bench. I do t like that it’s harder to upgrade and add on to the box and I’m losing potential bench space. I also keep fighting with the location of the bench. With the orientation of the wood vice, it only irks where it’s at, but I don’t like that location in the corner and it’s just a beefy pain in the neck as it relates to work flow. The drawers aren’t great, it’s cool, but doesn’t really fit in with the look and feel I think I am going for, which is more like a race shop/paddock kind of look. I have become very big on organization and mise en place and I feel like this kind of set up with lots of drawers and cabinets will help.

Inspiration

b43e950b5367d5172c31006c92b7f3fa.jpg

1837213bfced28d895feb4c1ec3d4a50.jpg

f081b28b8c7d5d0e34773ee0dc4ce879.jpg

cbda88ed3e526b3201feb1d4973de9d0.jpg

47590210806373a21a41b9cd8af7c473.jpg

After I sell the us gen box and the bench, I think I’d like to buying 2-3 of husky white boxes and building built in cabinets like stevo, with wood top. Then buying the white us general tool cart or a smaller base cabinet size box that could fit under the built in (leaving a nook to park it in) that I could wheel out like a cart.

Oh well.. no funds for this now, just say dreaming and thinking out loud. Before any of that could happen, I need new electric and walls with insulation.


Sent from my iPhone using The Garage Journal mobile app
 

Attachments

  • 1837213bfced28d895feb4c1ec3d4a50.jpg
    1837213bfced28d895feb4c1ec3d4a50.jpg
    21.8 KB · Views: 2
  • f081b28b8c7d5d0e34773ee0dc4ce879.jpg
    f081b28b8c7d5d0e34773ee0dc4ce879.jpg
    57.9 KB · Views: 2
  • cbda88ed3e526b3201feb1d4973de9d0.jpg
    cbda88ed3e526b3201feb1d4973de9d0.jpg
    189.5 KB · Views: 2
  • b43e950b5367d5172c31006c92b7f3fa.jpg
    b43e950b5367d5172c31006c92b7f3fa.jpg
    238 KB · Views: 2
  • 47590210806373a21a41b9cd8af7c473.jpg
    47590210806373a21a41b9cd8af7c473.jpg
    208.4 KB · Views: 7
To avoid these ads, REGISTER NOW!
Top Bottom