Hi all,
I’ve decided to take a break from polishing tools and put them to use. This will be my first endeavor in shaping body panels from scratch, so please bear with me here. I happily accept any and all criticism and advice!
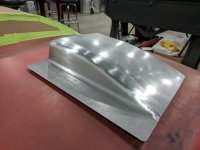
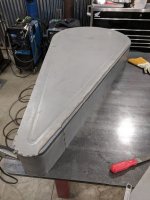
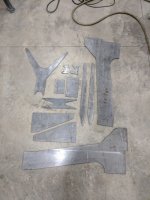
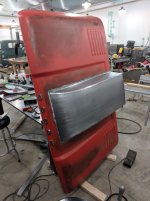
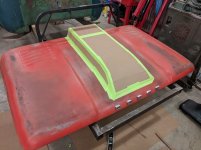
The project at hand is building and installing a hood cowl on a 61-65 Dodge D series truck. This hood presents some challenges in the body lines, but I believe I will be able to overcome them. The first step was to make a cardboard template of what I intended to build. My initial thoughts were confirmed: it was obvious that flat panels and square edges were not going to work on this large sweeping hood.

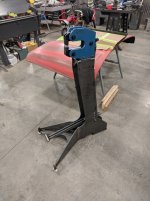
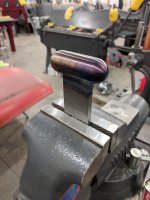
I determined that the cowl will be built from 3 main sections consisting of the two sides, and the top. My intent is to build this to the best of my abilities, so a practice run to test my theories and tooling is what will be covered in this first post. The sides will blend into the hood with a ½” radius, and the same radius will be used to transition into the new top. Step one was to build a tool from 1” bar stock to allow the brake to give me the desired bend radius. Flats were cut in the bar stock, and ½” tabs welded on.

A small T-dolly was made to roll over on the top edge. I will be getting a rawhide hammer to do this on the final pieces. The faces on my urethane hammers are pretty beat up. It should be noted that after the sides get the first bend in the brake, I will need to stretch the vertical side to match the existing hood profile. I currently only have access to the standard issue shrinker/stretcher set, and fear that I will not be able to reach far enough in with them. In any case, I got ahead of myself and forgot to grab a photo after the top edge was rolled.

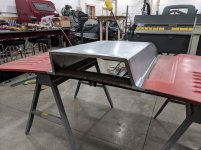
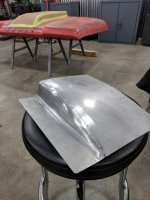
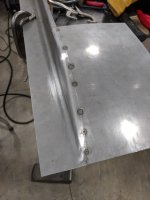
After I was satisfied with the side, I began to form and roll the top in the English Wheel. Once the shape closely matched the contour of the side, a line was scribed to cut along. It took a good deal of filing and belt sanding to get the gap just right, but it is necessary for a proper distortion free weld. Here the part has been tacked up.

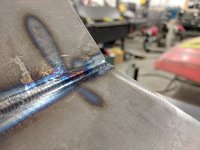
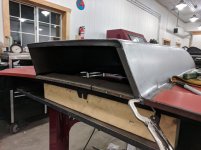
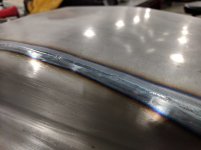
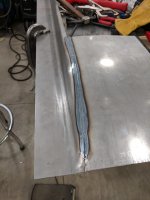
Happy with the tacked piece, it was time to run a pass. The machine was set at 60 amps and 3 PPS. As you can see, it’s been some time since I’ve run a bead on light material, but I was able to get it together. A wise person would run some test blanks, but I just went with it. I’m thinking that 55 amps will be better suited for 18 gauge material. The final pieces will be made from 19 gauge, and I will certainly be spending some torch time with samples before striking an arc on real deal.

I was able to adjust along the way with the pedal and get the heat under control. Ideally, the welder will be set at the correct amperage and floored which will allow me to concentrate on running the torch.

It was getting late at this point, so tonight I will work on bumping things around and metal finishing the weld.

Thanks for reading. More updates to follow.
I’ve decided to take a break from polishing tools and put them to use. This will be my first endeavor in shaping body panels from scratch, so please bear with me here. I happily accept any and all criticism and advice!
The project at hand is building and installing a hood cowl on a 61-65 Dodge D series truck. This hood presents some challenges in the body lines, but I believe I will be able to overcome them. The first step was to make a cardboard template of what I intended to build. My initial thoughts were confirmed: it was obvious that flat panels and square edges were not going to work on this large sweeping hood.
I determined that the cowl will be built from 3 main sections consisting of the two sides, and the top. My intent is to build this to the best of my abilities, so a practice run to test my theories and tooling is what will be covered in this first post. The sides will blend into the hood with a ½” radius, and the same radius will be used to transition into the new top. Step one was to build a tool from 1” bar stock to allow the brake to give me the desired bend radius. Flats were cut in the bar stock, and ½” tabs welded on.
A small T-dolly was made to roll over on the top edge. I will be getting a rawhide hammer to do this on the final pieces. The faces on my urethane hammers are pretty beat up. It should be noted that after the sides get the first bend in the brake, I will need to stretch the vertical side to match the existing hood profile. I currently only have access to the standard issue shrinker/stretcher set, and fear that I will not be able to reach far enough in with them. In any case, I got ahead of myself and forgot to grab a photo after the top edge was rolled.
After I was satisfied with the side, I began to form and roll the top in the English Wheel. Once the shape closely matched the contour of the side, a line was scribed to cut along. It took a good deal of filing and belt sanding to get the gap just right, but it is necessary for a proper distortion free weld. Here the part has been tacked up.
Happy with the tacked piece, it was time to run a pass. The machine was set at 60 amps and 3 PPS. As you can see, it’s been some time since I’ve run a bead on light material, but I was able to get it together. A wise person would run some test blanks, but I just went with it. I’m thinking that 55 amps will be better suited for 18 gauge material. The final pieces will be made from 19 gauge, and I will certainly be spending some torch time with samples before striking an arc on real deal.
I was able to adjust along the way with the pedal and get the heat under control. Ideally, the welder will be set at the correct amperage and floored which will allow me to concentrate on running the torch.
It was getting late at this point, so tonight I will work on bumping things around and metal finishing the weld.
Thanks for reading. More updates to follow.
Attachments
-
 IMG_20171116_194031.jpg110.7 KB · Views: 1,108
 -
 IMG_20171127_221059.jpg66.3 KB · Views: 1,109
 -
 IMG_20171127_215920.jpg84.2 KB · Views: 1,101
 -
 IMG_20171127_215904.jpg59.9 KB · Views: 1,097
 -
 IMG_20171127_215432.jpg50.9 KB · Views: 1,109
 -
 IMG_20171127_202806.jpg77.3 KB · Views: 1,126
 -
 IMG_20171127_202833.jpg124.3 KB · Views: 1,115