To avoid these ads, REGISTER NOW!

how do I create this wood finish style?

BTL-A4

Well-known member
Joined
Feb 28, 2018
Messages
1,255
Location
Santa Clarita
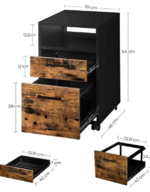
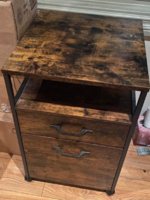
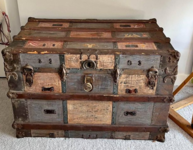
I have something I'd like to do an industrial-ish type finish to that will look something like this:
stain idea for table 2.PNGstain idea for table 3.PNGstain idea for table.PNG

Is it a matter of artfully brushing on some dark paint/stain, then going over that with a lighter color? What is this technique called; perhaps I can find more info if I knew what is was known as.

Thanks!
 
To avoid these ads, REGISTER NOW!

Rc_Guy

Well-known member
Joined
Apr 14, 2013
Messages
4,485
Location
Minnesota
IMG_2745.jpeg

This was stained dark and about 6 coats of polyurethane 6 years ago and was getting beat up and dirty so I used a stripper that was supposed to strip everything off but it didn’t do I used a belt sander with 80 grit and orbital with 120 & 220 grit, if I wanted to get it all off I could have kept sanding but we like this look, now it has about 9 coats of polyurethane on it.

These are just really good quality 2X4’s squared up on a table saw and glued and screwed together. It is bolted to the top of a Milwaukee rolling tool box with stools on the side without drawers.

Did a bar outside last summer with 2X4’s also and clear coated it with about ten coats but the sun ate the clear coat so we just painted it with $60 a gallon outdoor paint and still going to clear coat that.


2023-10-19-17-46-33-938.png
 
Last edited:
To avoid these ads, REGISTER NOW!
OP
B

BTL-A4

Well-known member
Joined
Feb 28, 2018
Messages
1,255
Location
Santa Clarita
IMG_2745.jpeg

This was stained dark and about 6 coats of polyurethane 6 years ago and was getting beat up and dirty so I used a stripper that was supposed to strip everything off but it didn’t do I used a belt sander with 80 grit and orbital with 120 & 220 grit, if I wanted to get it all off I could have kept sanding but we like this look, now it has about 9 coats of polyurethane on it.

These are just really good quality 2X4’s squared up on a table saw and glued and screwed together. It is bolted to the top of a Milwaukee rolling tool box with stools on the side without drawers.
This might be what I end up doing, since I have dark stain and sanders. And, I'm using 2x4's. Thanks!
 

tarbellb

Well-known member
Joined
Apr 17, 2011
Messages
5,776
Location
Oregon
blow torch top to desired darkness

if pine or soft wood you'll get that stripping effect quickly

then sand down high spots to reveal patchy like appearance

super simple and rather easy to control because you can also sand down again
 

gahrajmahal

Well-known member
Joined
Dec 12, 2008
Messages
2,538
Location
Cincinnati, Ohio
Before you mess with stains where it will be difficult to duplicate that splotchy effect, try the plumbers torch. It’s quick and easy and if you over darken an area it’s easy to sand it back lighter.
 

four.cycle

Well-known member
Joined
Oct 19, 2015
Messages
29,189
Location
Tacoma, Washington
"distressed finish"
was all the rage in the mid-1960s.
they sold kits: base color / glaze

paint object with "base coat" (some sort of polychrome tone)

with a wad of cheesecloth, wipe on a mix of polyurethane with some sort of pigment in it. (originally those "glazes" contained a sepia tone pigment.)
let stand a couple minutes. wipe with a piece of clean cheesecloth until it desired look is achieved.
can also be done mixing metallic pigments into the glaze. gold is popular. (Daniel Smith sells powdered gold pigment.)

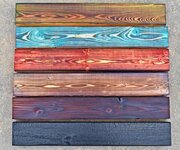
You can also bring up the grain by application of flame to wood.
Everything from "light scorch" to "full on charcoal" can be done.
I did a sculpture where this technique was used for the base platform: torching the wood and then brushing it agressively with a file card.
(It looks darker than it actually is because I had to wash it to take the photo - it was a bit dusty.)

You can experiment with lighter finishes over darker finishes, but my results have been mixed. Once you apply the first (darker) finish, you've somewhat "sealed" the surface, so subsequent applications (of a lighter tone) don't always do that (sometimes necessary) "penetration" thing. Again, I've played with that one on many pieces - with mixed results. (I think the walking sticks were one of the last experiments.)

Popular items used to add "age" marks to pieces for distressed finishes include (but are not limited to) bundles of keys, pieces of bicycle chain, pieces of broken saw blades.
 

Attachments

  • fish sculpture base.jpg
    fish sculpture base.jpg
    426.3 KB · Views: 18
  • walking stick 071823.JPG
    walking stick 071823.JPG
    927.3 KB · Views: 25
To avoid these ads, REGISTER NOW!
Top Bottom