To avoid these ads, REGISTER NOW!

How do I fix this vise ?

Outlawmws

Well-known member
Joined
Aug 9, 2011
Messages
39,208
Location
The Badlands
OK I didn't note the no drying directions; if re-shoot is 48, I'd go 2X + a day or so, again, if under heat, or out in the warm sun. too early and it's still soft...

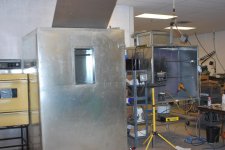
This is why I'd like to get setup for powder coating. it s a baking process, so more likely to be cured faster...
 
Last edited:
To avoid these ads, REGISTER NOW!

69supercj

Well-known member
Joined
Jan 26, 2010
Messages
555
A piece of brass or copper and a stamping set in 1/4 inch or so you could make your own custom tag to say whatever you wanted it to. Maybe gramps' name and your name and the date you finished restoring it. Just a suggestion.
 
OP
J

Jeanke

Well-known member
Joined
Aug 23, 2011
Messages
70
Thanks for all the tips guys. Indeed a piece of brass or copper was what I wanted initially, but when I add up all the costs to get to a finished vise, I could easily buy a new Heuer from Germany :) I think I'm happy with how it is now, can not believe that it was pretty much destined for the wastelands just a couple of days ago!

Really nice job on put Parker on both sides and not entirely sure how you did that. also since you did a couple coats of primer you might only need the one coat of blue if you like the finish.

Very simple, after primer, I placed letters stating 'parker' on top. Then I spray painted, painted over the letters and took them off :D
 

Kevin54

MEMBER EMERITUS
Joined
Jan 12, 2005
Messages
29,341
Location
Urbana, Ohio
To keep the vise from swiveling without damage.....Before you put it all back together, but a small pack of sanding disk at Lowes, or any box store in the tool department. Or you can use sheet sandpaper, but with sheet sandpaper you will need some good double sided tape. Use something like 100 grit or 80 grit. Put the paper together back to back so you have the grit side showing on both sides. Cut the paper to fit the diameter of the base and put a hole in the middle. Put the sandpaper between the two plates. Once everything is tightened up, the grit of the sandpaper will be enough to keep the vise from swiveling around.
 

Pumpman1968

Well-known member
Joined
Oct 21, 2012
Messages
1,520
Location
Upstate, NY
I have Reed No 31 vise that looks pretty similar to that if someone is interested. Not trying to hijack the thread, but I'll put it in the classified section with pictures if someone wants to do a similar restore. It also is missing the bolt/wingnut on the bottom.


Outlawmws

Well-known member
Joined
Aug 9, 2011
Messages
39,208
Location
The Badlands
To keep the vise from swiveling without damage.....Before you put it all back together, but a small pack of sanding disk at Lowes, or any box store in the tool department. Or you can use sheet sandpaper, but with sheet sandpaper you will need some good double sided tape. Use something like 100 grit or 80 grit. Put the paper together back to back so you have the grit side showing on both sides. Cut the paper to fit the diameter of the base and put a hole in the middle. Put the sandpaper between the two plates. Once everything is tightened up, the grit of the sandpaper will be enough to keep the vise from swiveling around.

Keven, that's a decent idea but why two? Why not just use the sticky back on the bottom of the vise to give it grip and done? :3gears:
 

Outlawmws

Well-known member
Joined
Aug 9, 2011
Messages
39,208
Location
The Badlands
Pumpman, that reed looks like a nice project. BTW, I believe you are missing the mating plate as well; See the nub? (probably another 180 deg from that one) that is a lock nub for the plate at whatever increments they made them at. (I have two similar, one at 15 deg intervals, and one at 9 deg.)
 

drivesitfar

Well-known member
Joined
Oct 23, 2013
Messages
36,009
Location
Pacific Northwest
Outlaw: another piece of wisdom about your homemade paint booth out of an old cardboard appliance box. also an even funnier story about you having one almost permanent in your parent's garage when you were younger. good luck on the powder coating and love to hear how that is done when you figure out a solution to do that in your garage/shop.

Back to the vise restore and you are doing a fantastic job on Gramps old vise and maybe you'll spend half of what a new one is, but you will enjoy using and looking at this one a heckuva lot more.

:thumbup::thumbup::thumbup:
 

Outlawmws

Well-known member
Joined
Aug 9, 2011
Messages
39,208
Location
The Badlands
DIF: on the powder coating; They make kits for it, but the key is having a large oven, hence my plan to put in an old built in electric remod cast off in the garage shop.
 

drivesitfar

Well-known member
Joined
Oct 23, 2013
Messages
36,009
Location
Pacific Northwest
I know kilns are fairly expensive and probably not big enough for most of the items we want to paint, but would one of those work as well or better than an oven? I've seen several of these cross my path with a hobby person that changed hobbies and I know they draw a lot of power to or do they?

are you talking a shop oven or a regular old range that you would use in your kitchen?
 
To avoid these ads, REGISTER NOW!

Outlawmws

Well-known member
Joined
Aug 9, 2011
Messages
39,208
Location
The Badlands
A Kiln would be way overkill. You are talking two thousand degrees give or take!

A std kitchen oven can go 450 on regular temps and 500 with Broil, more than enough for powder coat, the only real issue is cubic volume. large parts need a larger oven...

So I wait and watch for a big one...
 

KMScott

Well-known member
Joined
Feb 14, 2012
Messages
4,641
Location
Daufuskie Island, South Carolina
I know kilns are fairly expensive and probably not big enough for most of the items we want to paint, but would one of those work as well or better than an oven? I've seen several of these cross my path with a hobby person that changed hobbies and I know they draw a lot of power to or do they?

are you talking a shop oven or a regular old range that you would use in your kitchen?

Kilns are not needed for powder coating. 400 degrees is the Eastwood temperature for their powder coating, and only at final temperature for 10 minutes, any longer you burn the paint. I do painting for military and aircraft parts. We have a small electric oven like the one you use in your home for the smaller stuff and a custom built large one for the bigger items. I did paint a 4" Wilton in the smaller oven but the problem I ran across is the color selection, I could not find a good match for the Wilton vises, at least with Eastwood paint.
I added a picture of my set up for powder coating, note the small oven to the left.
 

Attachments

  • VAC Shop March 2010_4.jpg
    VAC Shop March 2010_4.jpg
    138.1 KB · Views: 10
  • Wilton 4 inch 5-1982 (2).jpg
    Wilton 4 inch 5-1982 (2).jpg
    135.3 KB · Views: 15

drivesitfar

Well-known member
Joined
Oct 23, 2013
Messages
36,009
Location
Pacific Northwest
Outlaw: never spend a quarter when you can spend a $1 and have a tool for life is my motto. I guess i'll look for the big oven that will fit in the shop and pass on those kilns unless I see a huge on for free and thanks for the heads up.

Jean: sorry to get off track, but we are waiting for your paint to dry. i'm sure you'll find a way to make a brass or copper badge someday for Gramps vise and in the meantime it is looking great.

Kevin 54: so the double back tape in between the 2 pieces of sandpaper under the vise or under the bench or both so 4 pieces of sandpaper? i'm guessing if you use it under the vise on the top of the bench that you would cut them the size of the base of the vise?

KM: thanks for the pictures and the heads up. I also like the metal box version you have for a paint booth which Outlaw sometimes makes a similar one out of a cardboard appliance box.
 
Last edited:

drivesitfar

Well-known member
Joined
Oct 23, 2013
Messages
36,009
Location
Pacific Northwest
I just had a great idea. I might have a fairly good size metal cabinet I can pull the shelves out of and make that a vise paint booth and just let it sit on one of my benches or rolling carts.
 
OP
J

Jeanke

Well-known member
Joined
Aug 23, 2011
Messages
70
Back to the vise restore and you are doing a fantastic job on Gramps old vise and maybe you'll spend half of what a new one is, but you will enjoy using and looking at this one a heckuva lot more.

:thumbup::thumbup::thumbup:

I spent about 1/3 rd of a heuer vise new. But thats ok, in fact i had to spend a bit more because i did not have a wire brush, flap wheel and grease. But now that i have them, i'm very happy to know of their existense, so much easier then doing everything manually!! Most expensive bit was the can of rustoleum, so thats ok :)

Will post pics this evening with finished product, will put it gently together andl et it cure like that
 
OP
J

Jeanke

Well-known member
Joined
Aug 23, 2011
Messages
70
Finished the vice, am curious if I find a good product somewhere to protect the slide from rusting... Any other suggestions anyone? Handle is really smooth in the hand, feels good. Also it rotates with one finger, so really smooth action! :)

r8gm1l.jpg


291e3up.jpg


Temporarily installed on the Workmate, waiting for the workbench to be made...

4sedes.jpg


Retro shot just for fun:
2vkbzg6.jpg


4j9r28.jpg
 
Last edited:

drivesitfar

Well-known member
Joined
Oct 23, 2013
Messages
36,009
Location
Pacific Northwest
Jeanke: Gramps would be proud that is for sure. very nice job and good luck on making the bench to install it on for many years of good use.

there's not enough thumbs up to put on my remarks so i'll just wish you the best in your upcoming projects. Maybe if you can find a nice bench grinder with a wire wheel then you can restore or just spiff up quite a few things with those 2 tools.
 

Kevin54

MEMBER EMERITUS
Joined
Jan 12, 2005
Messages
29,341
Location
Urbana, Ohio
Keven, that's a decent idea but why two? Why not just use the sticky back on the bottom of the vise to give it grip and done? :3gears:

I found out when running a lot of parts in a lathe that I couldn't have any holes in, I would put it on an aluminum faceplate. Sometimes a sticky side against metal can slide, especially if the glue is older. But two sticky surfaces put together are usually stuck for good. Then with that, you have two pieces of the grit side each facing a plate that will grip in a little.

Also if you dismantle things, there is no glue residue to clean off. I always kept aluminum faceplates at work, that had 1" bungs on them that I could put into a collet into the lathe. Anytime someone needed a ******* size disk, I would take a scrap piece of aluminum and put a centerdrill hole in it. I would put a doublesided grit of sandpaper between the faceplate, put the material in I was going to turn, then put another double sided disk of sandpaper between the piece to turn and the scrap piece with a center in it. Run the tailstock up and put a center in the tailstock, tighten things up, and turn down a perfectly round plug with no holes in it.
 
OP
J

Jeanke

Well-known member
Joined
Aug 23, 2011
Messages
70
Found this vice, only branded with Parker. It is almost exactly the same except for the molded branding and some very minor things

http://mishoptoolsinventions.blogspot.be/2013/08/vintage-parker-bench-vise-mod-no-2200.html

interesting, it seems indeed I'm missing the metal disk at the bottom. I will fix that with either a softwood base for good grip or thick hard rubber base for better grip as suggested above. Will see what is most easily available :) Thanks for all the info and tips throughout this thread, it was an interesting project! I learned new things on cleaning metal, and concluded small metal jobs that had to be done around the house thanks to this, so all in all, great week :D
 
To avoid these ads, REGISTER NOW!
Top Bottom